 |
VOOZH | about |
|
VOOZH | about |
TypeScript has classes, interfaces, and modules that can be useful to define types. It’s always a good practice to use TypeScript with JavaScript.
👁 Essential VS Code Extensions For TypeScriptIf you’re using VS Code for writing code, then it has rich extensions to help configure and use TypeScript easily. Here are some essentials VS Code extensions for TypeScript.
The Replay is a weekly newsletter for dev and engineering leaders.
Delivered once a week, it's your curated guide to the most important conversations around frontend dev, emerging AI tools, and the state of modern software.
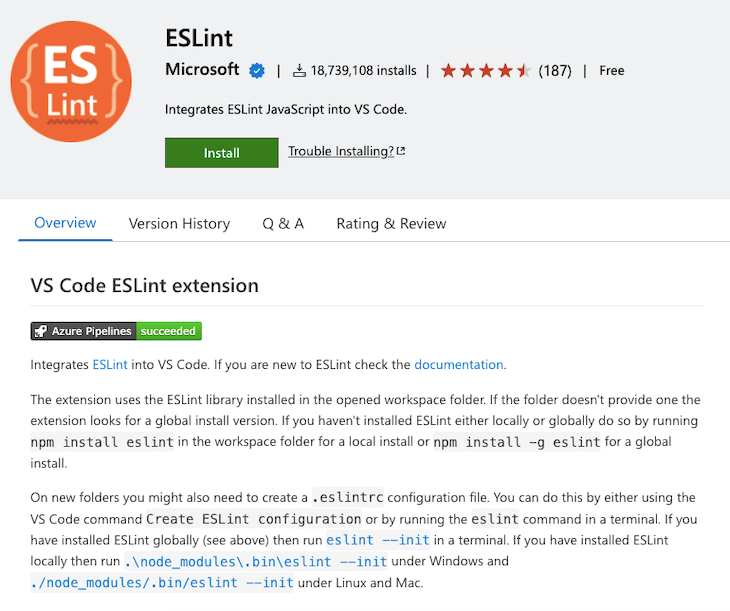
TS ESLint is a must-have VS Code extension when you’re working with TypeScript. TypeScript ESLint is used to lint your code and check basic code guidelines. By using it, you’re ensuring basic code quality and integrity.
You know that JS is an interpreter language, so each error is encountered at runtime only because there’s no compilation phase. You need to make sure that your code does not throw any errors in the execution phase.
ESLint does a very good job at catching errors. Apart from that, it’s necessary to maintain code conventions when your code is used by others or when your project has multiple contributors. Generally, linters are used to identify basic bugs such as scope errors and undeclared variable assignments.
As soon as you install ESLint, it’s available in VS Code. It works if your project has a local ESLint file. If not found, then it will check for a global config file in the system. In the coming step, you can find how to configure ESLint in your existing or new project.
After installation, you can change default ES Lint settings as well. Go to Code > Preferences > Settings and then directly type ESLint in the search bar or find ESLint under the Extensions menu and click on it. Make sure you’re in a User tab. Now you can see all settings provided by VS Code. There’s also a provision to modify VS Code’s default setting.json.
Install base dependency that you need throughout the project by running the given command:
> npm install --save-dev eslint typescript @typescript-eslint/parser @typescript-eslint/eslint-plugin
Now you need to configure your lint file. There are two options available for that: either configure it manually or create a lint file in the root directly. Let’s understand how to configure it manually. Run any one command from these two:
> eslint --init


> npm init @eslint/config
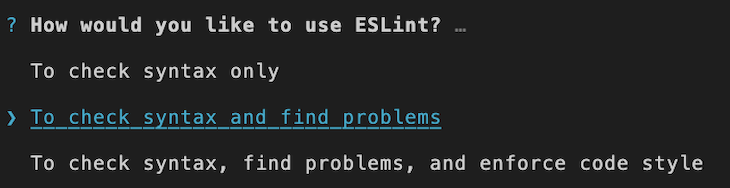
After that, you need to choose the appropriate option for the asked questions. Let’s start with the first step; choose according to your requirement:
The best practice is to go with the third one so you can analyze code syntax defects, and it will be better for a large scale.
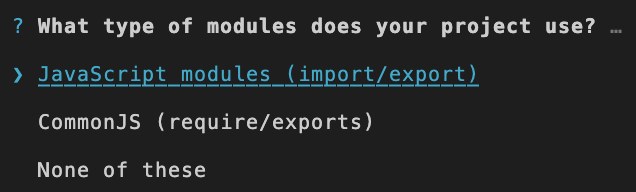
Moving to the second step, choose an option as per your project guidelines:
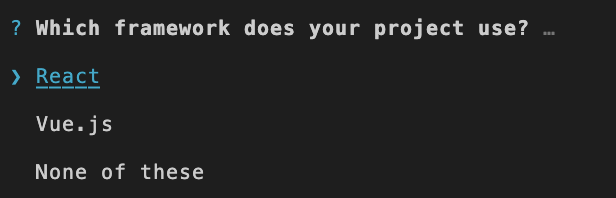
The next question is for your project framework:
After this, it will ask for usage of TypeScript:
Of course it’s a TypeScript project, so you need to click on Yes. Because TypeScript and ESLint are useful for both frontend and backend, the next step is identifying which your project is for:
Now choose a style guide:
It is purely based on your project requirements. You can go with any option. The next question is about config file format. Choose a format in which you’re comfortable:
Then it will ask you to install dependency based on your selection; you just need to select the Yes option.
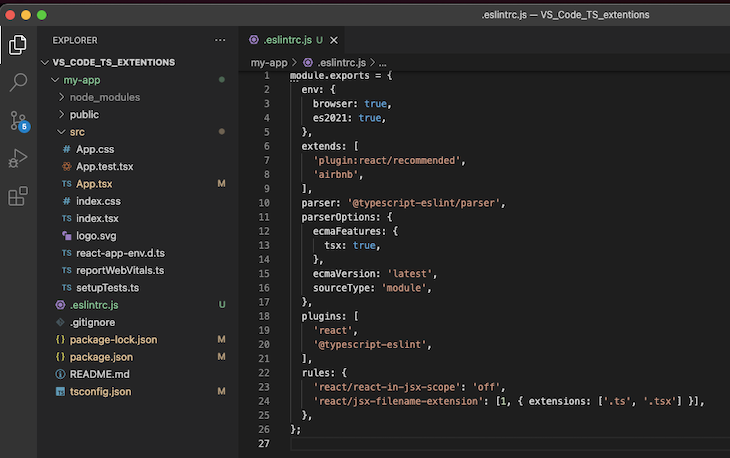
After successfully installing dependencies, you can see the .eslintrc.js (here, the extension is .js because I choose JavaScript in the config file format) file in your project root with your selected options. Initially, there’s an empty object for rules. For TypeScript support, you need to add a rule like react/jsx-filename-extension': [1, { extensions: ['.ts'] }].
In the extensions section, you can add file extensions. As an example, for React, .tsx is also required. Further, you can add whichever rules you want from the available rules.
The second way is to create JavaScript, JSON, or YAML file in your project root and write it from scratch. Here’s an example of a .js file:
//.eslintrc.js
module.exports = {
 rules: {
 // Write rules here
 }
};
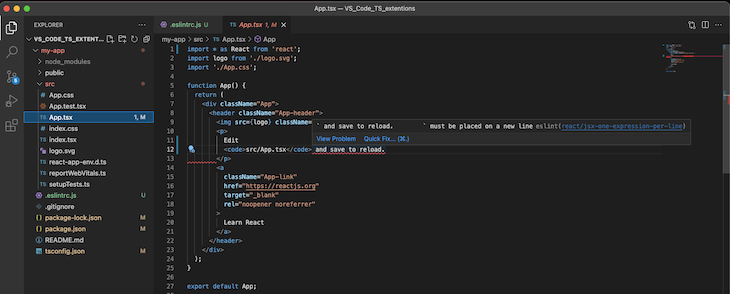
If you open any file, it will have a colorful underline if it failed to match the TypeScript rules. If you want to know more about an error or warning, hover on the underlined code and you can see a pop-up message. There are two buttons: one is to see more details about an issue and another is to quickly fix it. The Quick fix option is only available for some rules.
You can also disable ES Lint for some specific blocks of code by wrapping them in /* eslint-disable */ and /* eslint-enable */. If it’s a single line, just add // eslint-disable-line at the end of your line. This is useful when you want to disable linting.
Another good feature provided by VS Code is it gives an option to automatically fix an issue when you save a file. For that, you need to change settings. Go to Code > Preferences > Settings and type ES Lint in the search bar.
Once search results appear, click on the ESLint form extensions. After that, choose the Workspace tab that’s just below the search box. On the right side, you can see an option like Edit in settings.json. When you click on it, it will navigate you to your workspace’s ESLint settings file. There you need to copy a couple of lines written below:
{
 "editor.codeActionsOnSave": {
 "source.fixAll.eslint": true
 },
 "eslint.validate": ["typescript", "typescriptreact"]
}
With this setting, VS Code will correct basic errors on save.
There are three things that should be handled when you’re writing code: architecture, styling, and maintainability. Thinking about the long term, it’s better to follow ESLint best practices.
Your code needs to be refactored if it’s not efficient each time. So it’s better to take care of your code at the beginning. Code quality should be high and consistent. Some of the best ESLint configs are provided by leading IT firms:
If these aren’t for you, there are tons of config available. Or you can make your own config and use that in the project. TS also provides a facility to avoid certain rules or to add a custom rule.
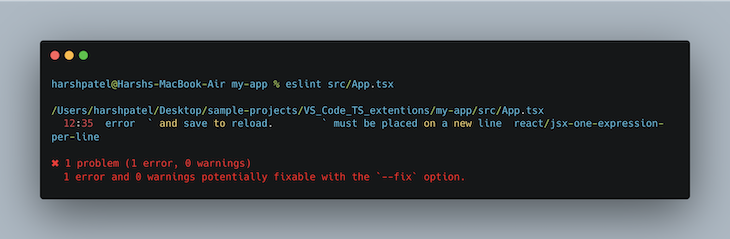
Suppose you disabled linting in a project but you want to check in on a specific file. You simply run:
eslint fileName.ts
If a file contains errors, then each error will be listed down sequentially.
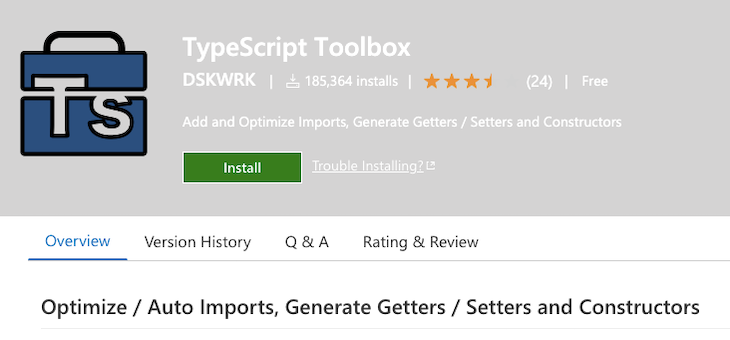
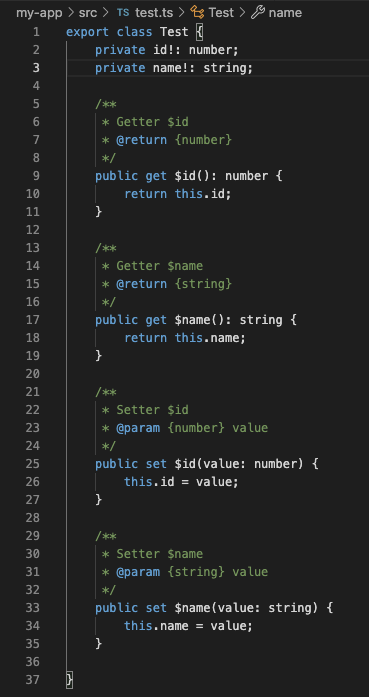
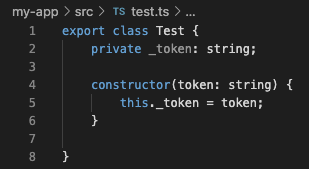
The TypeScript Toolbox is best when you want to improve already existing VS Code generation extensions. Mainly it is used for code generation as the overview suggests. Along with that, it is also used for cases like the following:
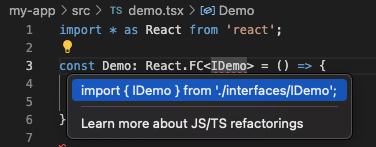
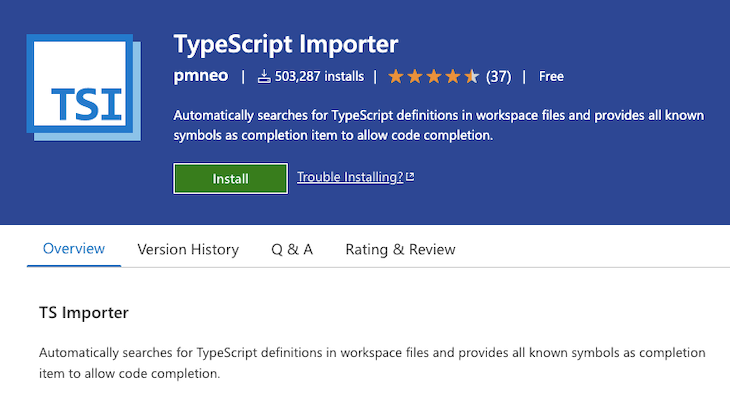
It’s necessary to save time when you want to import each and every external module used in a file. TS importer is the best extension when you want to add an appropriate import statement in your file without writing it.
You can see from the video how you can add the import. Behind the screen, it searches the definition in the existing workspace, and if it’s available then it is shown in the dropdown and just by selection of it will be imported.
It’s always a good practice to test individual units of a project. A unit test will provide useful insights about individual units of a project, and if you’re using TypeScript and VS Code, Ponicode is there to ease your unit testing task.
Ponicode identifies which functions need to be tested and generates unit test cases using AI, thus you can run test cases and check outputs. As a result, the code will be bug-free.
Ponicode provides a nice GUI to write test suits and a respective test file will be generated with properly written test cases. It also recommends best test cases.
Apart from that, Ponicode can generate an end-to-end test case in just one click so you can achieve high coverage.
You can see it quickly generated test cases for one simple function. You just need to select or add test data from GUI and the rest will be handled by Ponicode.
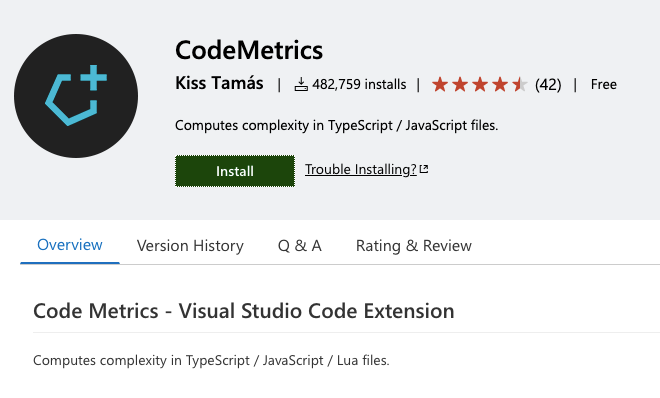
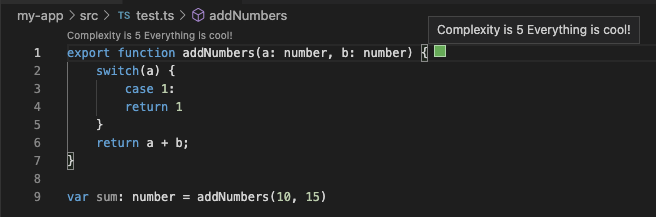
Code complexity does matter. Sometimes logic can be simple, but code is written with many unnecessary conditions or with complex logic, which results in reflecting. Reflecting impacts time and effort. Therefore, tools like CodeMetric are useful. CodeMagic identifies code complexity based on its predefined conditions.
At the start of a function, you can see the complexity number; it is the default provided by CodeMetric, but it can be customized. Just edit the settings of the codemetrics.basics file. It’s pretty useful when you want to write optimized code.
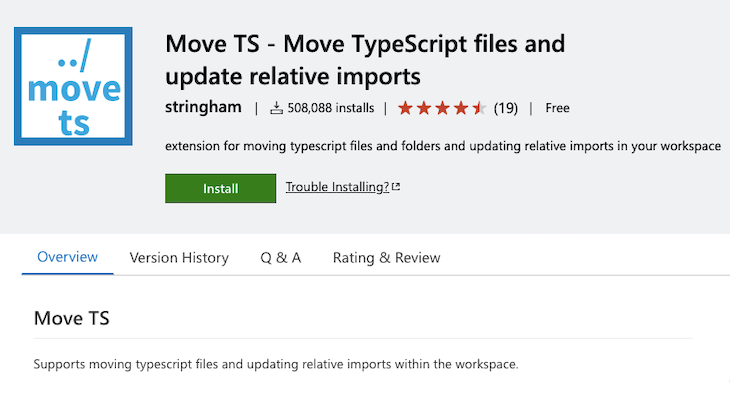
Files often need to be moved from one directory to another. It’s hard to keep track of where that file is used if a project contains many files. If you don’t use Move TS, then you need to search for it and then traverse into each file and manually change the import path. Move TS makes that work easy. If you change the file location, then it will change all relative used paths automatically. Pretty simple, right?
👁 DotEnv
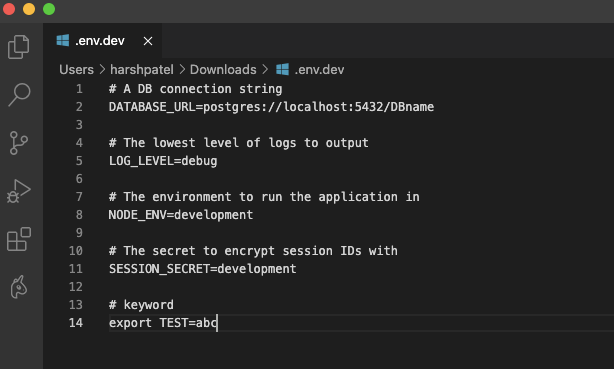
While working on multiple environments, we need to manage multiple .env files that contain our environment configurations. Currently, VS Code has no default syntax highlighter for .env files. Now imagine your file without syntax highlights. It will look like this:
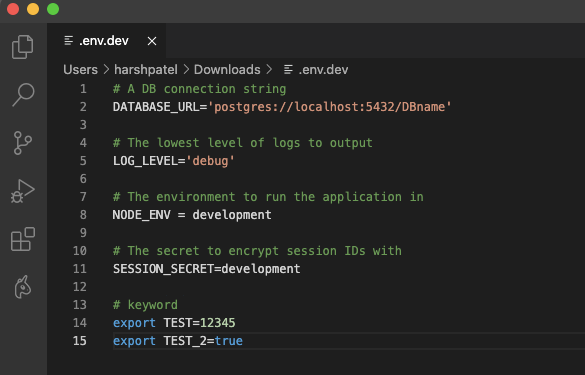
Using the DotEnv extension, your file looks good because you can identify the key and value for each variable. That will prevent big mistakes.
👁 Better Comments
While working with multiple team members, it’s always a good practice to put comments about the code, which saves lots of time for your colleagues. They can quickly understand the working flow and code just by reading the comments. On the other hand, a poorly-written comment will spoil the result.
For better comment management, VS Code has an extension called Better Comments. It will create readable comments. You can create colored annotations by category. For example, for an alert, use the red color.
Quokka.js provides a live playground in VS code for TypeScript and JavaScript. You can run sample code and see on-the-fly changes. We know that if we want to try something, we navigate to the browser’s console or try in a node terminal.
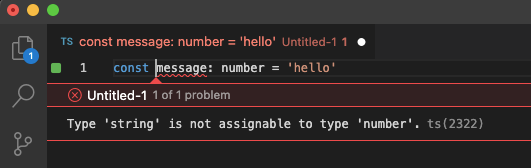
Apart from that, Quokka.js shows run-time errors that really save a lot of time.
👁 Quokka.js Shows Runtime Errors
If you really love it, you can purchase the Pro version. It has additional benefits like live comments, a CPU profiler, live performance testing, and more.
VS Code is a widely used IDE for programming. Having multiple TypeScript extensions would be the cherry on top.
Extensions will help you write elegant code and save time by automating some tasks. And VS Code provides good support to its users. If you’re a TS developer, then you should use these extensions to make your code beautiful and bug-free.
LogRocket lets you replay user sessions, eliminating guesswork by showing exactly what users experienced. It captures console logs, errors, network requests, and pixel-perfect DOM recordings — compatible with all frameworks, and with plugins to log additional context from Redux, Vuex, and @ngrx/store.
With Galileo AI, you can instantly identify and explain user struggles with automated monitoring of your entire product experience.
Modernize how you understand your web and mobile apps — start monitoring for free.
TSRX adds first-class control flow, conditional hooks, and scoped styles to React via a TypeScript compiler extension — no new framework required.
Learn how to build a full React Native auth system using Better Auth and Expo — with email/password login, Google OAuth, session persistence, and protected routes.
Compare the top AI development tools and models of June 2026. View updated rankings, feature breakdowns, and find the best fit for you.
Learn how Bloom filters reduce database lookups for username availability checks while preserving correctness at scale.
Would you be interested in joining LogRocket's developer community?
Join LogRocket’s Content Advisory Board. You’ll help inform the type of content we create and get access to exclusive meetups, social accreditation, and swag.
Sign up now