 |
VOOZH | about |
|
VOOZH | about |
Editor’s note: This post was updated 8 December 2021 to reflect updates to Redux and improve the tutorial’s overall clarity.
👁 ImageAdding a type-checking feature to your React application can help you catch lots of bugs at compile time. In this tutorial, we’ll demonstrate how to build a type-safe React Redux app by examining a real-world example.
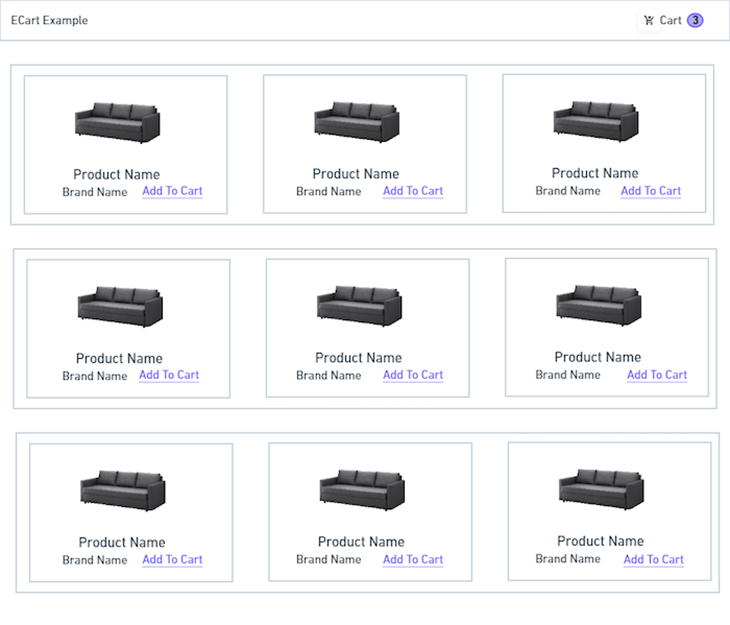
To illustrate these concepts, we’ll create a sample ecommerce app like the one shown below.
👁 The first view of our sample ecommerce app
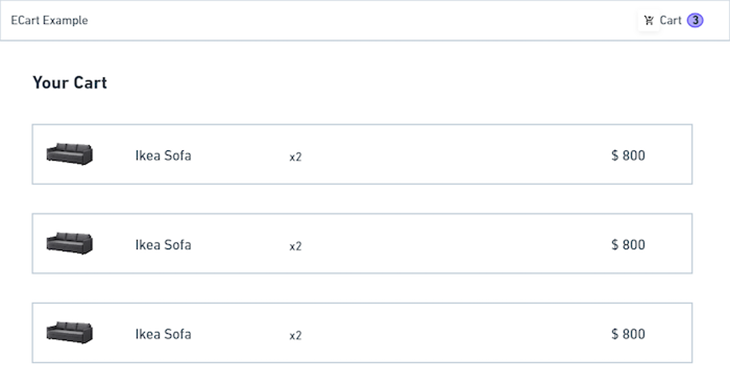
👁 The second view of our sample ecommerce app
👁 The third view of our sample ecommerce app
We’ll also cover the following points:
Without further ado, let’s get started!
The Replay is a weekly newsletter for dev and engineering leaders.
Delivered once a week, it's your curated guide to the most important conversations around frontend dev, emerging AI tools, and the state of modern software.
React is a component library that we use to build modern frontends for applications. As an application expands, it becomes increasingly difficult to manage data.
That’s where Redux comes in. Redux is a state management library that is popular in the React ecosystem. If you’re new to the concept of React Redux, I recommend reading the official docs before proceeding with this tutorial.
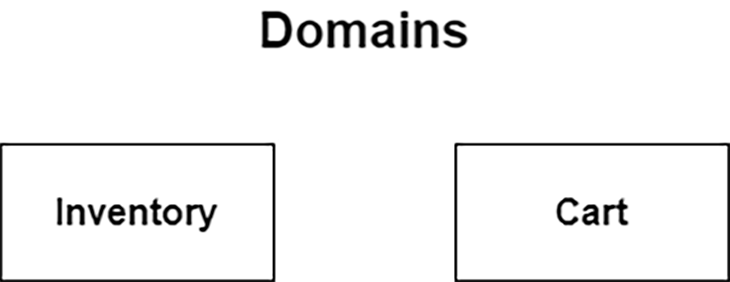
Let’s start by building an ecommerce application workflow. Here, we have two important domains in the wireframe: inventory and cart.
👁 A diagram of our inventory and cart domains
First, we’ll create the essential Redux building blocks — namely, action creator, reducer, and store. If you’re not familiar with these building blocks, Redux keeps your app’s state in a global JS object called a store. Throughout the app all changes that are made in store are generated via action and executed via reducers. You can read more about it in official docs.
Since we know the application domains, we’ll structure our app based on that. Create a React application using this command:
npx create-react-app react-redux-example --template typescript
This will create a React application boilerplate with TypeScript files. Next, install the dependencies for React Redux and its types.
npm i react-redux redux redux-thunk
npm i --save-dev @types/react-redux
The above command should install the redux and react-redux libraries, which handle the React and Redux connection. Next, install redux-thunk, which is a middleware used to handle the asynchronous data fetching in action creators.
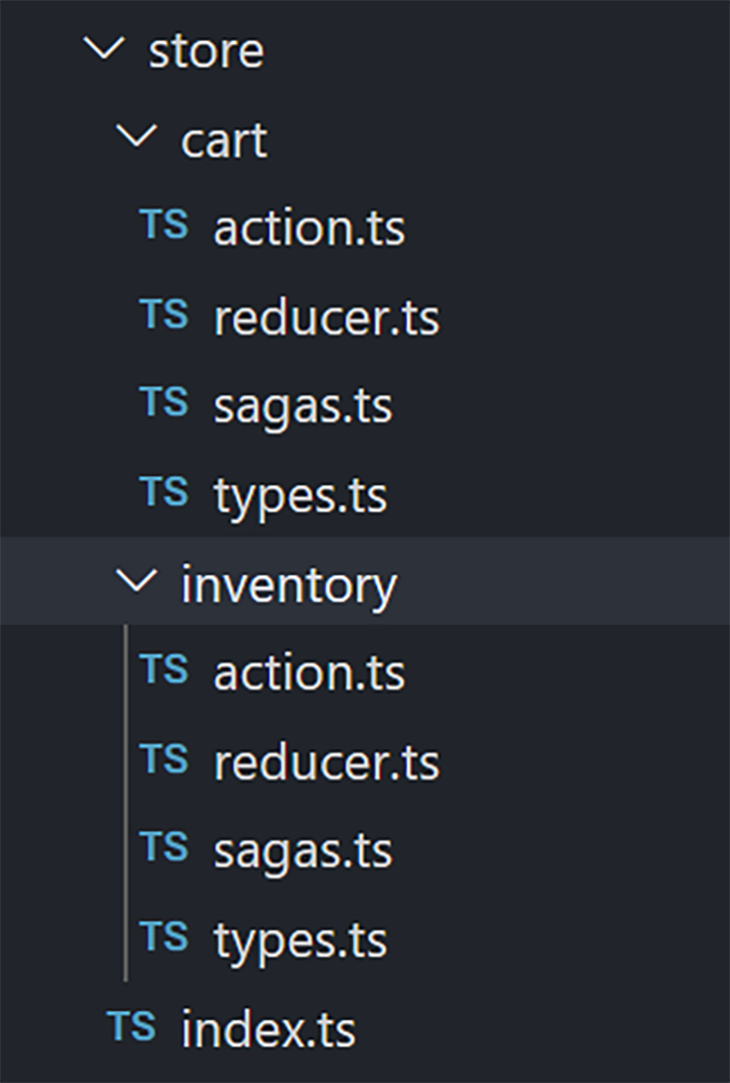
Now it’s time to create a file structure for our Redux store.
The application store is structured based on the domain. You can see that all the actions, reducers, and types of the inventory domain are maintained in one folder, whereas the actions, reducers, and types of the cart domain are maintained in an another folder.
This pattern is commonly known as “feature folder” — it makes apps more scalable as store updates related to each feature are kept closer to each other. With feature folder, it’s easier to keep unit and integration tests related to particular features in the same directory with Redux building blocks.
If this managing number of files feels overwhelming to you, Redux ToolKit introduced dux pattern that allows you to keep complete feature implementation in single file. Redux ToolKit has amazing TypeScript support that can bolster your development speed.
Let’s start with the inventory domain. We need to create actions, reducers and types for the inventory domains. I always start with domain type because that way, I can define the structure of the specified domain at an early stage.
The type will contain the Redux state, action types, and domain.
 export interface Inventory {
 id: string;
 name: string;
 price: string;
 image: string;
 description: string;
 brand?: string;
 currentInventory: number;
}
export enum InventoryActionTypes {
 FETCH_REQUEST = "@@inventory/FETCH_REQUEST",
 FETCH_SUCCESS = "@@inventory/FETCH_SUCCESS",
 FETCH_ERROR = "@@inventory/FETCH_ERROR"
}
export interface InventoryState {
 readonly loading: boolean;
 readonly data: Inventory[];
 readonly errors?: string;
}
A few notes about the code above:
Inventory interface determines the specified domain dataInventoryActionTypes enum determines the action typesInventory state handles the type of domain stateNow, it’s time to create an action for the inventory store.
We’ll use Redux Thunk as a middleware in the action to make API calls.
What is Redux Thunk, anyway? Basically, the action creator returns an object that has action type and payload. redux-thunk turns the action into a function that makes an API call in the intermediate and returns the data by dispatching an action.
import { InventoryActionTypes } from "./types";
import { ActionCreator, Action, Dispatch } from "redux";
import { ThunkAction } from "redux-thunk";
import { ApplicationState } from "../index";
import inventory from "../../mockdata";

export type AppThunk = ActionCreator<
 ThunkAction<void, ApplicationState, null, Action<string>>
>;

export const fetchRequest: AppThunk = () => {
 return (dispatch: Dispatch): Action => {
 try {
 return dispatch({
 type: InventoryActionTypes.FETCH_SUCCESS,
 payload: inventory
 });
 } catch (e) {
 return dispatch({
 type: InventoryActionTypes.FETCH_ERROR
 });
 }
 };
};
Here, we have an action, fetchRequest, which returns a function. That function makes an API call (here, we mocked the inventory data instead of an API call). After that, it dispatches an action.
We should also briefly mention type checking for actions. Every action should be of type ActionCreator. Since we used Redux Thunk, each ActionCreator returns a function that has type ThunkAction.
If you’re new to Redux Thunk, check out the excellent documentation for an in-depth look. Or, if you’re looking for more a powerful tool as a Redux middleware, check out Redux Saga, which uses generator functions and allows developers to easily manage sophisticated async operations of the app.
The final part of the inventory store is the reducer. Let’s create that file.
import { Reducer } from "redux";
import { InventoryActionTypes, InventoryState } from "./types";
export const initialState: InventoryState = {
 data: [],
 errors: undefined,
 loading: false
};
const reducer: Reducer<InventoryState> = (state = initialState, action) => {
 switch (action.type) {
 case InventoryActionTypes.FETCH_REQUEST: {
 return { ...state, loading: true };
 }
 case InventoryActionTypes.FETCH_SUCCESS: {
 console.log("action payload", action.payload);
 return { ...state, loading: false, data: action.payload };
 }
 case InventoryActionTypes.FETCH_ERROR: {
 return { ...state, loading: false, errors: action.payload };
 }
 default: {
 return state;
 }
 }
};
export { reducer as InventoryReducer };
First, define an initial state that has a type of InventoryState.
export const initialState: InventoryState = {
 data: [],
 errors: undefined,
 loading: false
};
After that, create a reducer with a state type of InventoryState. It’s very important to define the types for each reducer because you want to identify issues at compile time rather than run time.
const reducer: Reducer<InventoryState> = (state = initialState, action) => {
 switch (action.type) {
 case InventoryActionTypes.FETCH_REQUEST: {
 return { ...state, loading: true };
 }
 case InventoryActionTypes.FETCH_SUCCESS: {
 console.log("action payload", action.payload);
 return { ...state, loading: false, data: action.payload };
 }
 case InventoryActionTypes.FETCH_ERROR: {
 return { ...state, loading: false, errors: action.payload };
 }
 default: {
 return state;
 }
 }
};
Here, we handle all the actions of the inventory domain and update the state.
It’s time to implement the Redux functionalities for the cart. The functionalities of the cart domain are similar to those of the inventory domain.
First, create a file named types.ts and add the following code.
import { Inventory } from "../inventory/types";
export interface Cart {
 id: number;
 items: Inventory[];
}
export enum CartActionTypes {
 ADD_TO_CART = "@@cart/ADD_TO_CART",
 REMOVE_FROM_CART = "@@cart/REMOVE_FROM_CART",
 FETCH_CART_REQUEST = "@@cart/FETCH_CART_REQUEST",
 FETCH_CART_SUCCESS = "@@cart/FETCH_CART_SUCCESS",
 FETCH_CART_ERROR = "@@cart/FETCH_CART_ERROR"
}
export interface cartState {
 readonly loading: boolean;
 readonly data: Cart;
 readonly errors?: string;
}
This represents the cart domain attributes, cart action types, and cart state of Redux.
Next, create action.ts for the cart domain.
import { CartActionTypes, Cart, cartState } from "./types";
import { Inventory } from "../inventory/types";
import { ActionCreator, Action, Dispatch } from "redux";
import { ThunkAction } from "redux-thunk";
import { ApplicationState } from "../index";
export type AppThunk = ThunkAction<
 void,
 ApplicationState,
 null,
 Action<string>
>;
export const fetchCartRequest: AppThunk = () => {
 return (dispatch: Dispatch, state: ApplicationState): Action => {
 try {
 return dispatch({
 type: CartActionTypes.FETCH_CART_SUCCESS,
 payload: state.cart
 });
 } catch (e) {
 return dispatch({
 type: CartActionTypes.FETCH_CART_ERROR
 });
 }
 };
};
export const addToCart: ActionCreator<ThunkAction<
 void,
 ApplicationState,
 Inventory,
 Action<string>
>> = item => {
 return (dispatch: Dispatch): Action => {
 try {
 return dispatch({
 type: CartActionTypes.ADD_TO_CART,
 payload: item
 });
 } catch (e) {
 return dispatch({
 type: CartActionTypes.ADD_TO_CART_FAILURE,
 payload: null
 });
 }
 };
};
action.ts contains all the actions that handle the cart domain functionalities.
Here, we’re using redux-thunk to make an API fetch call. We mocked it for the purpose of this tutorial, but in production, you can fetch an API inside action creators.
Finally, write the code for the cart domain reducer. Create a file, name it reducer.ts, and add the following code.
import { Reducer } from "redux";
import { CartActionTypes, cartState } from "./types";
export const initialState: cartState = {
 data: {
 id: 0,
 items: []
 },
 errors: undefined,
 loading: false
};
const reducer: Reducer<cartState> = (state = initialState, action) => {
 switch (action.type) {
 case CartActionTypes.FETCH_CART_REQUEST: {
 return { ...state, loading: true };
 }
 case CartActionTypes.FETCH_CART_SUCCESS: {
 return { ...state, loading: false, data: action.payload };
 }
 case CartActionTypes.FETCH_CART_ERROR: {
 return { ...state, loading: false, errors: action.payload };
 }
 case CartActionTypes.ADD_TO_CART: {
 return {
 errors: state.errors,
 loading: state.loading,
 data: {
 ...state.data,
 id: state.data.id,
 items: [...state.data.items, action.payload]
 }
 };
 }
 case CartActionTypes.REMOVE_FROM_CART: {
 return {
 errors: state.errors,
 loading: state.loading,
 data: {
 ...state.data,
 id: state.data.id,
 items: state.data.items.filter(item => item !== action.payload.id)
 }
 };
 }
 default: {
 return state;
 }
 }
};
export { reducer as cartReducer };
Now it’s time to configure the store for our application.
Create a file named configureStore.ts in the root directory and add the following code.
import { Store, createStore, applyMiddleware } from "redux";
import thunk from "redux-thunk";
import { routerMiddleware } from "connected-react-router";
import { History } from "history";
import { ApplicationState, createRootReducer } from "./store";
export default function configureStore(
 history: History,
 initialState: ApplicationState
): Store<ApplicationState> {
 const store = createStore(
 createRootReducer(history),
 initialState,
 applyMiddleware(routerMiddleware(history), thunk)
 );
 return store;
}
We created a function called configureStore, which takes history, and initialState as an argument.
We need to define the type for arguments such as history and initialState. initialState should have the type of ApplicationStore, which is defined in the store. The configureStore function returns the type Store, which contains the ApplicationState.
After that, create a store that takes the root reducer, initialStore, and middlewares, which are routerMiddleware and redux-thunk here.
We’re finally done with the Redux part. Next we’ll demonstrate how to implement the components for it.
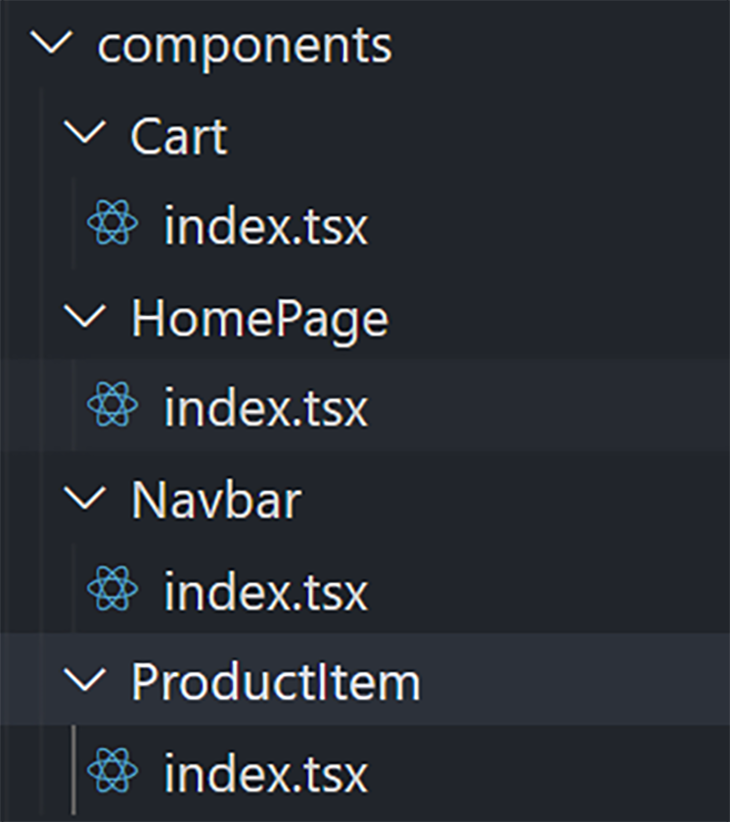
Let’s zoom in on our components.
👁 Redux store component structure
HomePage handles the main page, which renders the ProductItem componentNavbar renders the navbar and cart items countCart contains the list items that are added to the cartOnce you know how to structure a type-safe Redux application, implementing components is fairly straightforward. Take the component part as an exercise and leave a comment below with your GitHub link.
You can find the complete source code for reference on GitHub.
Now that you know how to build a type-safe Redux application using React Redux, Redux, and Redux Thunk, you may notice that it takes a lot of code just to set up Redux in your application.
Fortunately, there’s a solution to this problem: Redux Toolkit. This package is designed to ease the process of implementing Redux.
Here is a quick outline of Redux Toolkit:
configureStore() is like a wrapper of creatorStore() in Redux that comes with some Redux dev tools out of the box, eliminating the need to set it upcreateReducer() is a utility function that replaces the traditional reducers boilerplate in the Redux applicationscreateAction() is basically a helper function for defining Redux action types and creatorscreateSlice() is a function that automatically generates action creators and action types based on an initialState and reducer functionAdding a type check can help you create a joyful developer experience. It allows you to avoid bugs at compile time and keeps your app scalable as the number of developers working on the project and its features starts to grow.
State management is one of the core parts of app architecture, and having TS aligned with your state management can result in higher productivity and more readability of code. For further reading, understanding these concepts will help you along your type checking journey.
Install LogRocket via npm or script tag. LogRocket.init() must be called client-side, not
server-side
$ npm i --save logrocket

// Code:

import LogRocket from 'logrocket';
LogRocket.init('app/id');
// Add to your HTML:

<script src="https://cdn.lr-ingest.com/LogRocket.min.js"></script>
<script>window.LogRocket && window.LogRocket.init('app/id');</script>
TSRX adds first-class control flow, conditional hooks, and scoped styles to React via a TypeScript compiler extension — no new framework required.
Learn how to build a full React Native auth system using Better Auth and Expo — with email/password login, Google OAuth, session persistence, and protected routes.
Compare the top AI development tools and models of June 2026. View updated rankings, feature breakdowns, and find the best fit for you.
Learn how Bloom filters reduce database lookups for username availability checks while preserving correctness at scale.
Would you be interested in joining LogRocket's developer community?
Join LogRocket’s Content Advisory Board. You’ll help inform the type of content we create and get access to exclusive meetups, social accreditation, and swag.
Sign up now