 |
VOOZH | about |
|
VOOZH | about |
Similar to native applications, progressive web apps (PWAs) are a popular solution to running web applications on mobile devices. With PWAs, users can experience web applications with the same ease and familiarity as mobile apps; similarly, companies are able to host apps directly on the internet instead of different mobile app stores.
👁 PWA Svelte Sapper SvelteKitIn this tutorial, we’ll create our own PWA with Svelte, a modern framework that is based on imperative vs. declarative applications. With traditional frameworks like React, you must individually build out all of the pieces of your application; however, Svelte can pre-render your application’s build with just a small amount of code.
First, we’ll explore how PWAs work by building our own in Svelte. Then, we’ll look at some features of Sapper and SvelteKit that you can use to bring PWA features to your apps. We’ll be referencing a sample project that can be accessed at my repo on GitHub. Let’s get started!
The Replay is a weekly newsletter for dev and engineering leaders.
Delivered once a week, it's your curated guide to the most important conversations around frontend dev, emerging AI tools, and the state of modern software.
Before building our own, let’s take a closer look at how PWAs work. The following two features work in conjunction with progressive enhancement to create an experience similar to native applications.
Service workers act as intermediaries or proxies for web applications, enabling the use of caching resources and handling poor internet connections gracefully.
For example, when internet connection is lost, we may use a service worker to display a message to a user so that the app does not crash suddenly. Similarly, a service worker may cause our app to save local activity and resync after regaining internet connection.
Web manifests enable users to download or install apps on specific platforms. The app that the user sees in the browser can be run offline or in a state similar to a native implementation. Although manifests are still considered experimental, they are heavily supported by modern browsers.
Now that we understand the features that define PWAs, let’s build our own using Svelte. The example found in this section is based on an example from GitHub.
First, head to your terminal and create a new Svelte project by running the code below:
npx degit sveltejs/template svelte-pwa
Next, we’ll install our JavaScript dependencies. Navigate into the directory that you just created and run the code below:
cd svelte-pwa
npm install
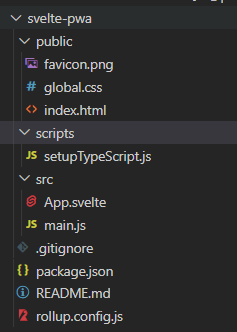
When we used degit to create a new project, Svelte scaffolded a basic app with the following structure:
👁 Scaffolded Svelte App Structure
We’ll primarily be working with the files in the src directory. The App.svelte file is our project’s entry point and contains the following code:
<script>
 export let name;
</script>
<main>
 <h1>Hello {name}!</h1>
 <p>Visit the <a href="https://svelte.dev/tutorial">Svelte tutorial</a> to learn how to build Svelte apps.</p>
</main>
<style>
 main {
 text-align: center;
 padding: 1em;
 max-width: 240px;
 margin: 0 auto;
 }
 h1 {
 color: #ff3e00;
 text-transform: uppercase;
 font-size: 4em;
 font-weight: 100;
 }
 @media (min-width: 640px) {
 main {
 max-width: none;
 }
 }
</style>
.svelte files have separate sections for styles, the view html, and any JavaScript code <scripts>.
Add the following code to your main.js file to bootstrap your app and tell the bundler to build the project with your .svelte App file:
import App from './App.svelte';
const app = new App({
 target: document.body,
 props: {
 name: 'world'
 }
});
export default app;
To create a PWA, first, we’ll create a service worker inside of the service-worker.js file in the public directory:
"use strict";
// Cache Name
const CACHE_NAME = "static-cache-v1";
// Cache Files
const FILES_TO_CACHE = ["/offline.html"];
// install
self.addEventListener("install", (evt) => {
 console.log("[ServiceWorker] Install");
 evt.waitUntil(
 caches.open(CACHE_NAME).then((cache) => {
 console.log("[ServiceWorker] Pre-caching offline page");
 return cache.addAll(FILES_TO_CACHE);
 })
 );
 self.skipWaiting();
});
// Active PWA Cache and clear out anything older
self.addEventListener("activate", (evt) => {
 console.log("[ServiceWorker] Activate");
 evt.waitUntil(
 caches.keys().then((keyList) => {
 return Promise.all(
 keyList.map((key) => {
 if (key !== CACHE_NAME) {
 console.log("[ServiceWorker] Removing old cache", key);
 return caches.delete(key);
 }
 })
 );
 })
 );
 self.clients.claim();
});
// listen for fetch events in page navigation and return anything that has been cached
self.addEventListener("fetch", (evt) => {
 console.log("[ServiceWorker] Fetch", evt.request.url);
 // when not a navigation event return
 if (evt.request.mode !== "navigate") {
 return;
 }
 evt.respondWith(
 fetch(evt.request).catch(() => {
 return caches.open(CACHE_NAME).then((cache) => {
 return cache.match("offline.html");
 });
 })
 );
});
In the code block above, we register events handled by the service worker, including install and fetch events. To handle offline usage of the project, we’ll cache files used in navigation and record what we cache. Using PWAs, you can cache only what is needed, improving your UX.
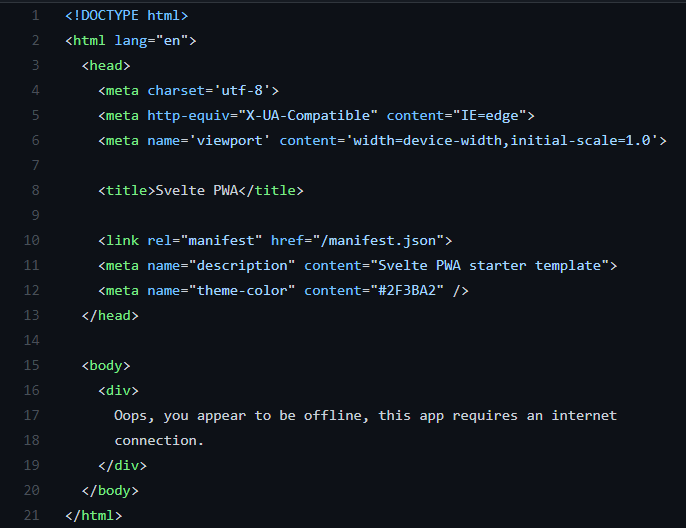
Next, we’ll create an offline.html file, which will be cached to navigation. Add the following code in the public directory:
👁 Svelte Cache Public Directory
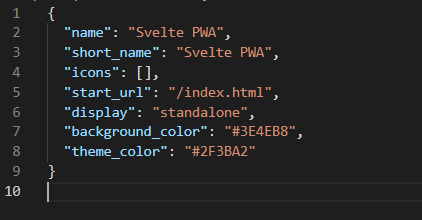
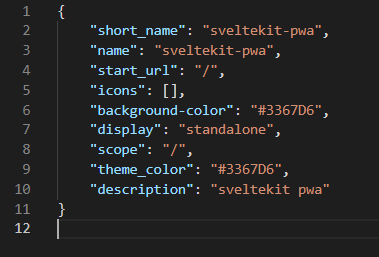
Now, let’s create a manifest.json file in the public directory:
You can use the icons entry to set install icons for different devices, however, I left it blank for simplicity.
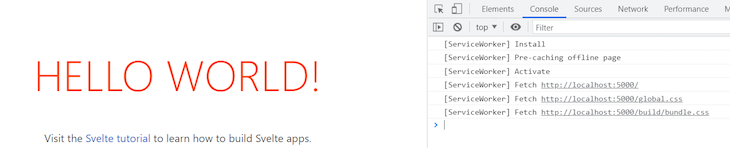
Now, when Svelte builds your app, it will read these files and create a running service worker that caches a navigation resource whenever offline activity is detected. Running npm run dev will start your app with the service worker. If you open DevTools in Chrome, you’ll see the service worker starting:
👁 Svelte App Run Service Worker
To see the service worker in action, you can also go into the network tab and move your session offline:
👁 Svelte Service Worker Offline
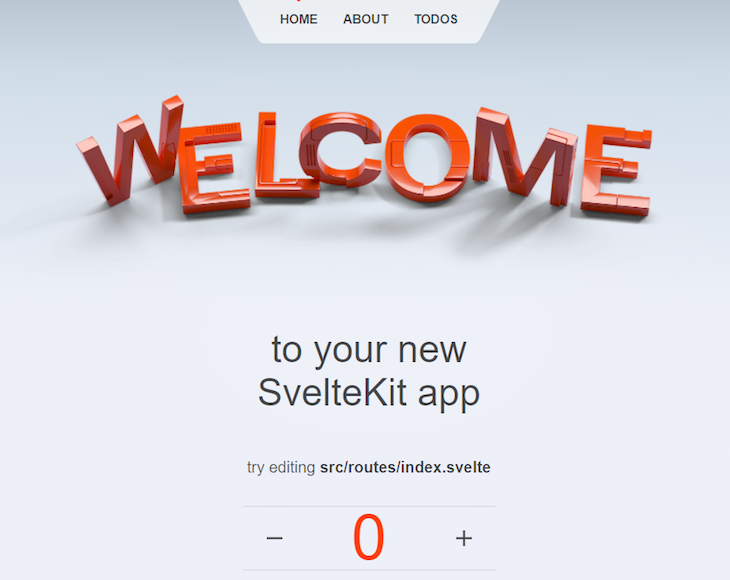
Now, let’s create a PWA using SvelteKit. For this example, we’ll create a “Hello, World!” application. Run the code below in your terminal:
npm init svelte@next sveltekit-pwa
The CLI will ask you if you’d like to create a demo app or a skeleton project. Select demo app:
The CLI will also ask you if you’d like to use TypeScript, Prettier, or ESLint. Add the configuration below:
👁 Svelte Sapper TypeScript Prettier Eslint Configuration
Now, head into your SvelteKit project directory and install the required dependencies with the following code:
cd sveltekit-pwa
npm install
To run your project, add the code below:
npm run dev -- --open
Now that our project is created, we can make it a PWA using the same steps we followed to create a basic Svelte PWA. Create a manifest.json file in the static directory:
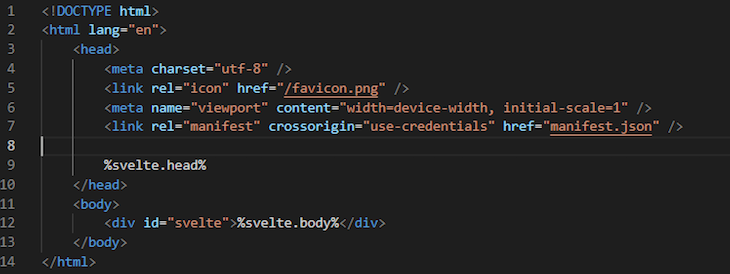
Next, modify the app.html file in the src directory to include a reference to the manifest.json file:
👁 Reference Manifest Json File
Lastly, create a service-worker.js file in the src directory:
import { build, files, timestamp } from '$service-worker';
const worker = (self as unknown) as any;
const FILES = `cache${timestamp}`;
const to_cache = build.concat(files);
const staticAssets = new Set(to_cache);
// listen for the install events
worker.addEventListener('install', (event) => {
 event.waitUntil(
 caches
 .open(FILES)
 .then((cache) => cache.addAll(to_cache))
 .then(() => {
 worker.skipWaiting();
 })
 );
});
// listen for the activate events
worker.addEventListener('activate', (event) => {
 event.waitUntil(
 caches.keys().then(async (keys) => {
 // delete old caches
 for (const key of keys) {
 if (key !== FILES) await caches.delete(key);
 }
 worker.clients.claim();
 })
 );
});
// attempt to process HTTP requests and rely on the cache if offline
async function fetchAndCache(request: Request) {
 const cache = await caches.open(`offline${timestamp}`);
 try {
 const response = await fetch(request);
 cache.put(request, response.clone());
 return response;
 } catch (err) {
 const response = await cache.match(request);
 if (response) return response;
 throw err;
 }
}
// listen for the fetch events
worker.addEventListener('fetch', (event) => {
 if (event.request.method !== 'GET' || event.request.headers.has('range')) return;
 const url = new URL(event.request.url);
 // only cache files that are local to your application
 const isHttp = url.protocol.startsWith('http');
 const isDevServerRequest =
 url.hostname === self.location.hostname && url.port !== self.location.port;
 const isStaticAsset = url.host === self.location.host && staticAssets.has(url.pathname);
 const skipBecauseUncached = event.request.cache === 'only-if-cached' && !isStaticAsset;
 if (isHttp && !isDevServerRequest && !skipBecauseUncached) {
 event.respondWith(
 (async () => {
 // always serve static files and bundler-generated assets from cache.
 // if your application has other URLs with data that will never change,
 // set this variable to true for them and they will only be fetched once.
 const cachedAsset = isStaticAsset && (await caches.match(event.request));
 return cachedAsset || fetchAndCache(event.request);
 })()
 );
 }
});
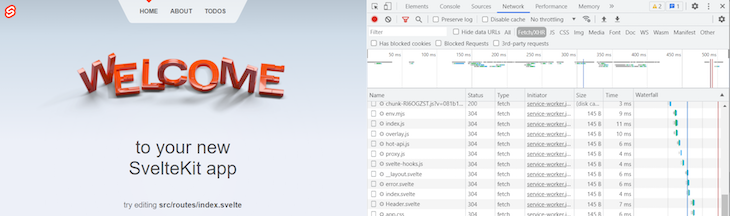
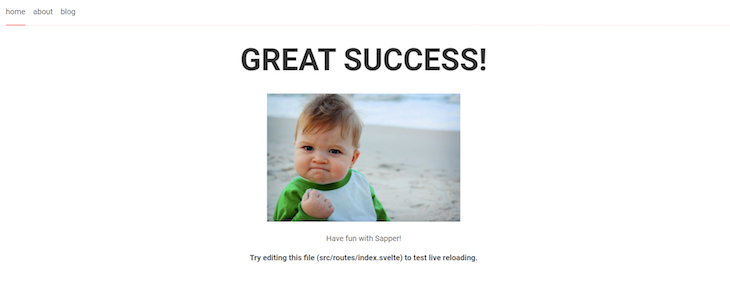
With our SvelteKit PWA finished, we can connect it to the internet and see it running:
👁 SvelteKit PWA Internet Connection
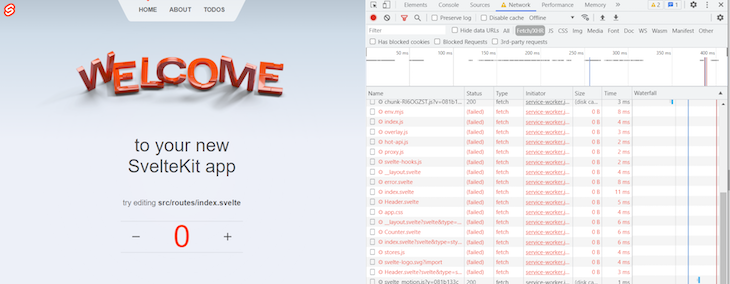
Without internet connection, our app will look like the image below:
👁 SvelteKit PWA Without Internet
Despite the obvious HTTP errors, the app is able to gracefully handle being disconnected from the internet.
As stated in the official Sapper docs: Sapper’s succesor, SvelteKit, is currently available for use. All development efforts moving forward will be focused on SvelteKit. The Sapper docs include a helpful migration guide. If you prefer to build you application with Sapper despite the lack of support, read ahead:
Sapper allows you to develop your app as you would with Svelte, however, it has the added benefit of support for PWAs. Create a Sapper application by running the following code in your terminal:
npx degit "sveltejs/sapper-template#rollup" sapper-pwa
Install the required dependencies by running the code below:
cd sapper-pwa
npm install
Now, to see your Sapper application in action, add the local run command as follows:
npm run dev
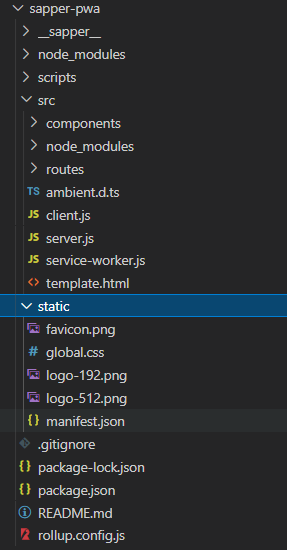
Looking at the generated code, you’ll see that the project already includes a service worker and a manifest file:
👁 Svelte Sapper Service Worker Manifest File
With this process, you can basically develop a Sapper application just like you would with Svelte.
In this article, we explored the benefits of building PWAs and examined how they are built using service workers and web manifests. Then, we explored three methods for building PWAs using Svelte, SvelteKit, and Sapper.
PWAs are likely going to continue growing in use due to the popularity of native applications. Thankfully, building a PWA is fairly straightforward when you use a modern framework like Svelte. I hope you enjoyed this tutorial!
Install LogRocket via npm or script tag. LogRocket.init() must be called client-side, not
server-side
$ npm i --save logrocket

// Code:

import LogRocket from 'logrocket';
LogRocket.init('app/id');
// Add to your HTML:

<script src="https://cdn.lr-ingest.com/LogRocket.min.js"></script>
<script>window.LogRocket && window.LogRocket.init('app/id');</script>
TSRX adds first-class control flow, conditional hooks, and scoped styles to React via a TypeScript compiler extension — no new framework required.
Learn how to build a full React Native auth system using Better Auth and Expo — with email/password login, Google OAuth, session persistence, and protected routes.
Compare the top AI development tools and models of June 2026. View updated rankings, feature breakdowns, and find the best fit for you.
Learn how Bloom filters reduce database lookups for username availability checks while preserving correctness at scale.
Would you be interested in joining LogRocket's developer community?
Join LogRocket’s Content Advisory Board. You’ll help inform the type of content we create and get access to exclusive meetups, social accreditation, and swag.
Sign up now