 |
VOOZH | about |
|
VOOZH | about |
The Replay is a weekly newsletter for dev and engineering leaders.
Delivered once a week, it's your curated guide to the most important conversations around frontend dev, emerging AI tools, and the state of modern software.
Have you ever thought of making your projects available through a live URL without having to go through the stress of hosting providers?
👁 Deploy A React App For Free Using VercelIn the past, before the emergence of cloud platforms like Vercel, hosting was only carried out by hosting providers (e.g., GoDaddy) that require you to upload your static assets (like a project build folder) every time you make changes. This upload is done either by FTP software or some kind of system like cPanel, which could become very stressful and technical.
Today with the emergence of GitHub, developers have access to cloud platforms like Vercel that make deployments easy.
Vercel is a serverless cloud platform that allows developers (basically frontend developers) to host websites and online services that launch instantaneously, grow automatically, and require no monitoring, all with minimal/no configuration. Vercel is a perfect choice for deploying your React applications easily providing comprehensive tools to build high-performance websites and applications.
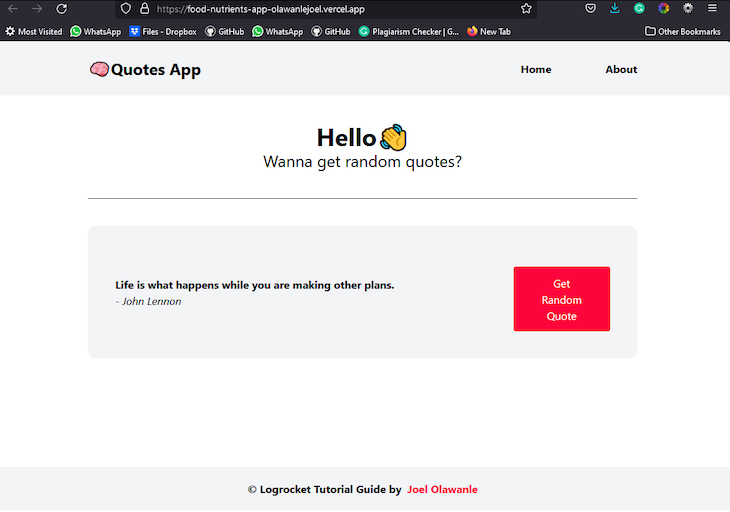
For this guide, we will make use of a random quotes generator app that gets random quotes from an API.
Before getting started, let’s take a look at some prerequisites needed to make use of Vercel:
For you to deploy your applications/projects on Vercel, you need to push your project to any Git provider.
For this guide, I will make use of GitHub via the terminal to push our React application.
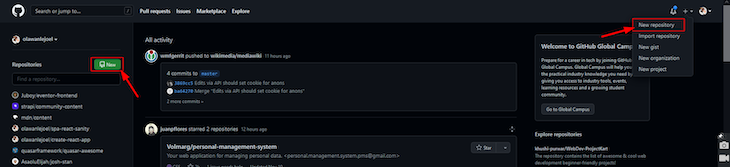
First thing, let’s create a repository on GitHub:
👁 Creating A New Repository in Vercel
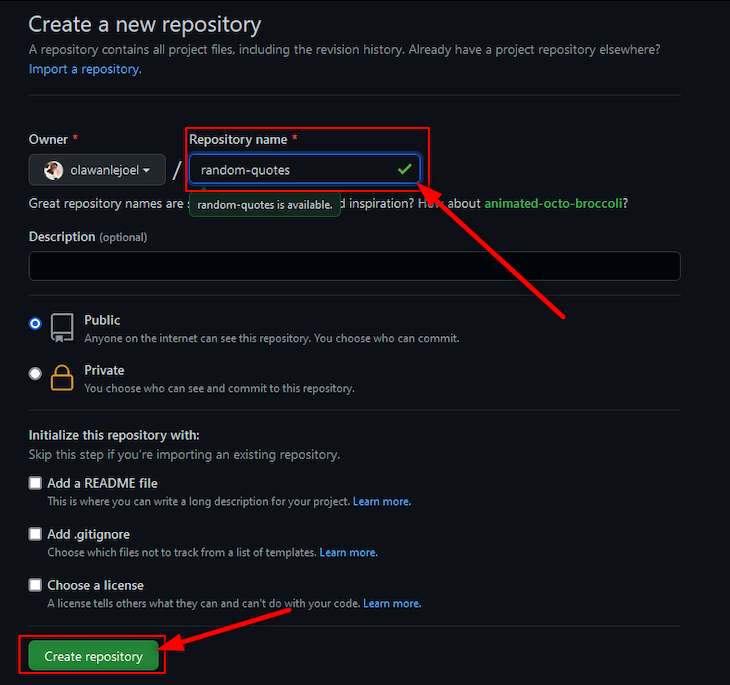
Then ensure you fill in the necessary information and click Create repository:
👁 Creating A New Repository in Vercel
Back in the terminal, let’s start by staging all our files so we can commit them to the repository, then create a new branch main using the following commands:
git init
git add .
git commit -m "first commit"
git branch -M main
Once this is done, we can now push to the created remote repository using the following commands:
git remote add origin https://github.com/olawanlejoel/random-quotes.git
git push -u origin main
N.B., replace the GitHub remote URL with yours.
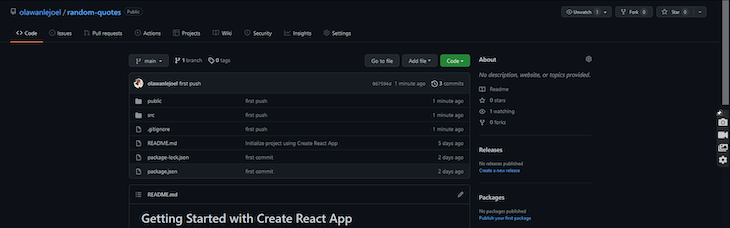
When you refresh your repository, your code should show up!
Moving on, there are about four ways to make deployments to Vercel, but we will only consider the two major methods (this works with every other framework).
Let’s explore both methods, which are manual deployment (Vercel for Git) and terminal deployment via the Vercel CLI. At the end, we will conclude which is best.
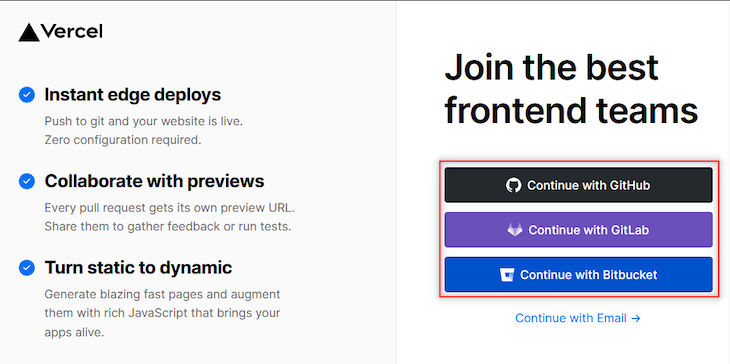
This first step would be to visit https://vercel.com/ and click the Sign Up button in the top-right corner. You can signup with either GitHub, GitLab, or Bitbucket:
Once that is successful, your dashboard will look like this:
The next step would be to install the Vercel CLI. We will only make use of the necessary commands to push our project to React for this guide. You can check out their CLI documentation for more commands and their functions.
To install the Vercel CLI globally, you would run the command below on your terminal:
npm i -g vercel
N.B., to confirm if it installed successfully, you can run vercel--version on your terminal.
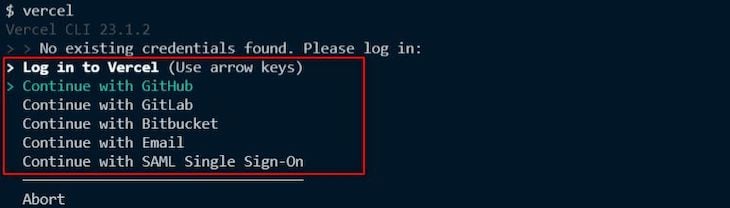
Once it has been successfully installed, the next step would be to push our codes. Since this is our first time, we would need to log in to Vercel via our terminal. Run the command below on your terminal:
vercel
It would bring up the following:
Use your direction buttons to either move up or down and tap the enter button to select your preferred option.
This will redirect you to a browser tab where it will either show it’s successful or failed.
N.B., ensure you log in with the account you used to create a Vercel account earlier.
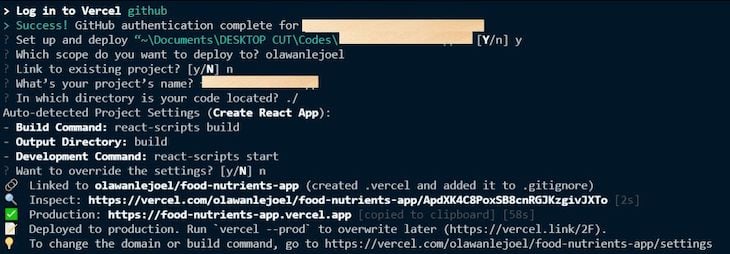
The next step would be to return to the terminal and continue what you started. 😄 By answering the questions, the first thing will be to confirm that this is the project you want to deploy:
? Set up and deploy “path to your project”? [Y/n] y
The next question would be to confirm which account to deploy your app:
? Which scope do you want to deploy to? Your Vercel Account
N.B., this would provide a default option; just hit Enter to continue.
Moving on, you’ll be asked if you want to link this to the existing project. Just type N:
? Link to existing project? [y/N] n
The next step is to name your project:
? What’s your project’s name? project-name
You’ll now be prompted to specify the path. This will make use of the default option ./ since we’re already in the project directory:
? In which directory is your code located? ./
Finally, one awesome feature the CLI has is its automatic framework detection, which allows it to detect the framework you are using and offer default project settings accordingly. This includes Build Command, Output Directory, and Development Command.
This simply means that it will auto-detect whether your project was initialized using create-react-app and configure the settings accordingly. Otherwise, you will be asked to set them:
Auto-detected Project Settings (Create React App):
- Build Command: `npm run build` or `react-scripts build`
- Output Directory: build
- Development Command: react-scripts start
The last question would be to confirm if you want to override the settings. Just type n:
? Want to override the settings? [y/N] n
Hurray, your project is successfully deployed! Here is a summary of what it looks like:
👁 Deployed Project In Vercel Terminal
Once this is successful, Vercel automatically copies your production link to your clipboard. Go to your browser and paste the production link or ctrl + click the link in your terminal.
👁 Pasting A Production Link in The Vercel Terminal
Let’s now take a look at another method of deployment. This method is preferable for individuals who are not familiar with the terminal and love to perform their deployments manually.
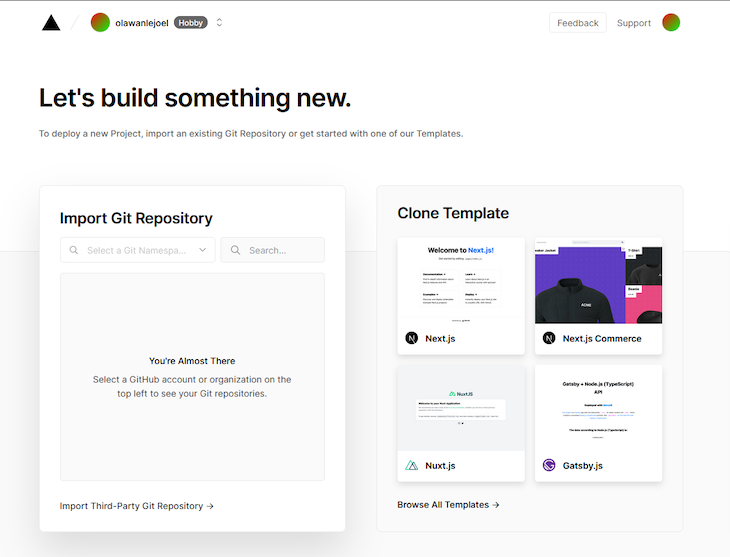
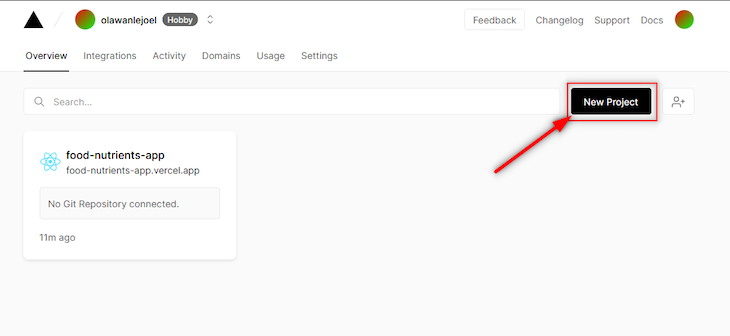
The first step would be to visit your dashboard and click New Project.
👁 Creating A New Project On The Vercel Dashboard
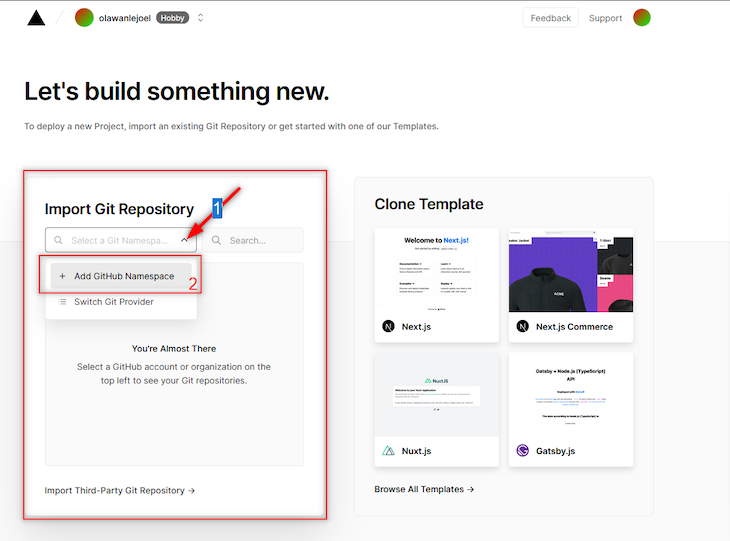
This will redirect you to a page where you can create a project. The next thing would be to click on the search bar to Add GitHub Namespace.
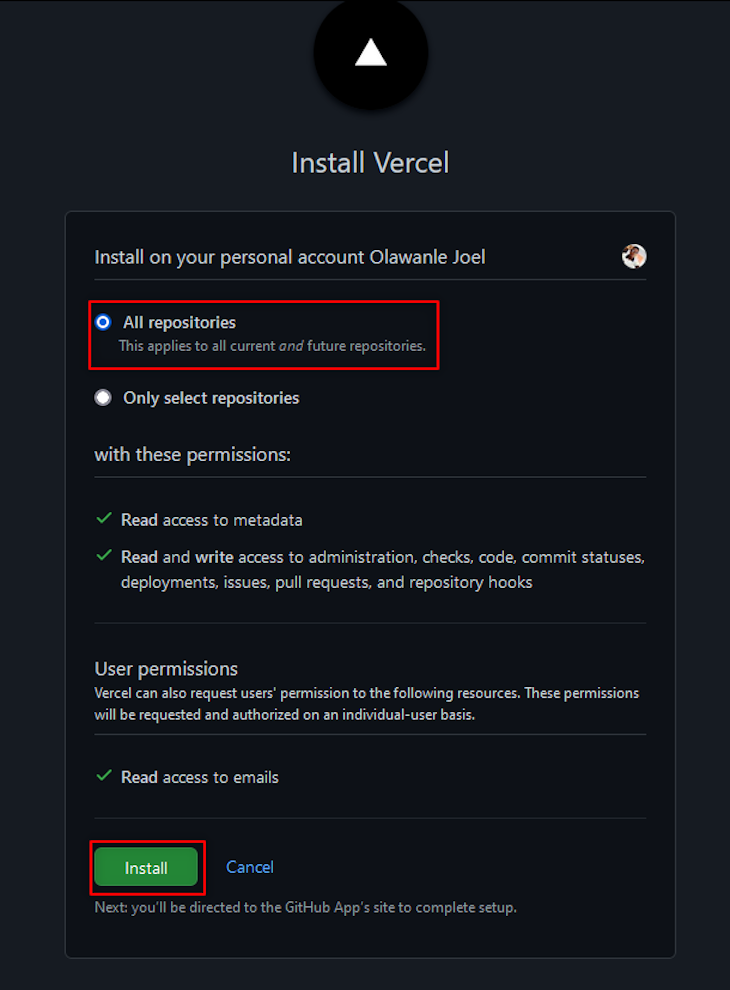
This will pop up an authorization page from GitHub. Ensure you click the account you wish to deploy from (it could be your personal account or organization account). It will then ask you to install Vercel.
N.B., you would be required to confirm it’s your account by entering your GitHub password.
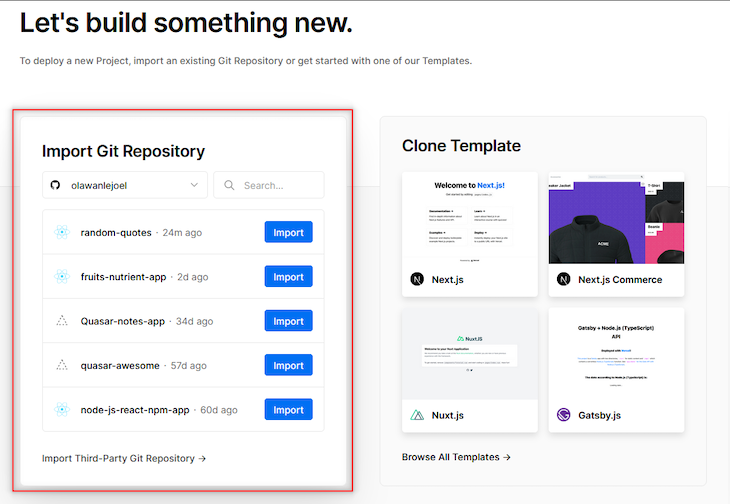
Once that is successful, all your GitHub repositories will appear, the next step would be to select the repository you want to import and deploy.
👁 Select Repository To Deploy In Vercel
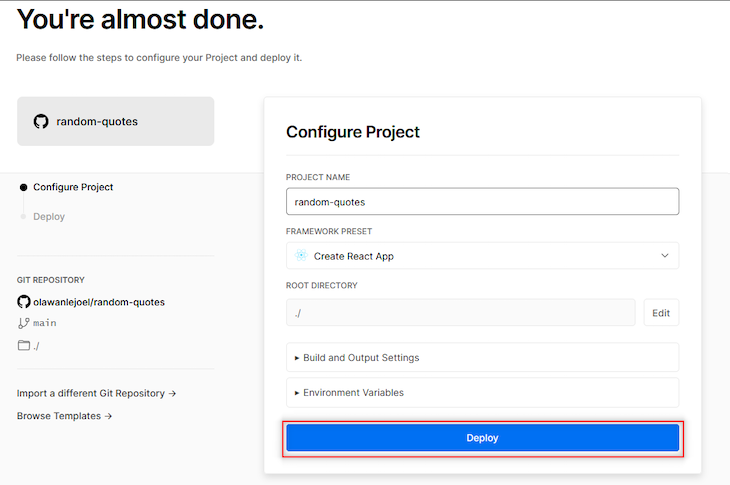
Import the repository and then this will appear:
👁 Configure Your Vercel Project Before Deployment
N.B., Vercel automatically detects your framework preset.
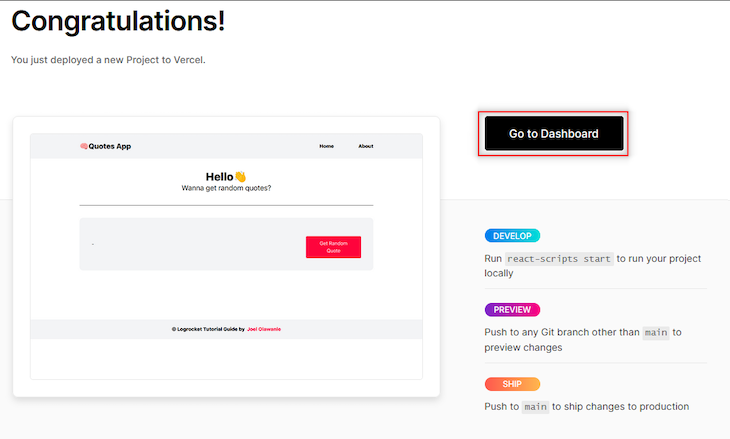
You can now click the Deploy button. This will begin to deploy your project by running builds, checks, and finally, assigning a domain.
👁 Assign A Domain To Your Deployed Project
You can click the Go to Dashboard button to see details about our deployed application such as the domain name and other deployment information.
Both methods perform the same functions but via different means/methods. Choosing which is best would be based on your own preference as a developer.
Let me know which method you think is best in the comment section and why you think it’s best, but for me, I’d always pick the Vercel CLI because it makes deployment a lot easier and doesn’t take me off my IDE. 😋
In this article, we have been able to see how to deploy a React app to Vercel. We saw two major methods and how they work. You can check out the following resources to learn more about deployments and some more features that Vercel offers you:
Install LogRocket via npm or script tag. LogRocket.init() must be called client-side, not
server-side
$ npm i --save logrocket

// Code:

import LogRocket from 'logrocket';
LogRocket.init('app/id');
// Add to your HTML:

<script src="https://cdn.lr-ingest.com/LogRocket.min.js"></script>
<script>window.LogRocket && window.LogRocket.init('app/id');</script>
Learn how to test Nuxt apps with Vitest, @nuxt/test-utils, runtime mocks, server route mocks, and Playwright e2e tests.
I had four weeks to build a complete app from scratch using AI tools like OpenCode and Claude Opus: here’s how it went.
Learn how to build a reusable Vue 3 table engine that powers tables, cards, and lists with shared sorting and pagination logic.
Compare the best React chart libraries for 2026, including Recharts, Nivo, visx, Apache ECharts, MUI X Charts, and more.
Hey there, want to help make our blog better?
Join LogRocket’s Content Advisory Board. You’ll help inform the type of content we create and get access to exclusive meetups, social accreditation, and swag.
Sign up now