 |
VOOZH | about |
|
VOOZH | about |
You want to know how old I am? Fine. I’m old enough that my earliest memories of computing involve loading games from a tape into a tape drive. The player even had rewind and fast-forward buttons. That’s right, I’m talking about the Amstrad with the tape-drive attachment (if that sounds familiar, you’re probably in the same boat as me).
👁 ImageOf course, tapes gave way to CDs, then DVDs, flash storage, Blu-ray, and everything after. Storage has come a long way. That Amstrad tape drive managed around 1 kilobit per second, while an M5 MacBook Pro can hit 6 gigabytes per second. That’s roughly in the range of DDR3 RAM, which is kind of wild when you think about it.
The way we develop and release software has followed a similar trajectory, and here I’m focusing specifically on the release side.
The Replay is a weekly newsletter for dev and engineering leaders.
Delivered once a week, it's your curated guide to the most important conversations around frontend dev, emerging AI tools, and the state of modern software.
It’s a simplification, but getting software from development into production usually looks like this:
The number of ways this can go wrong is honestly surprising. If the consequences weren’t so severe, it would almost be funny. The developer sent the wrong zip file. The deployment team picks up the wrong one. The wrong migration script gets run, or it’s pointed at the wrong database.
Then things start to spiral. Panic sets in. Before long, the developer is directly connected to production (which is very much a no-no), trying to figure out why everything works perfectly on their machine but not on the server. Quick fixes get bundled into files with names like Software-Version-3.1.5-HOTFIX-USE_THIS_ONE.zip. Downtime drags on. In the chaos, someone runs a migration on the wrong database or drops rows from the wrong table, and now you’re looking at a restore.
After it’s all over, the team swears they’ll never do this again on a Friday afternoon. They promise that on Monday, once the adrenaline settles and voices recover from all the shouting, they’ll run a proper retrospective and figure out how to prevent it next time.
Then something else breaks over the weekend. Monday becomes firefighting again, and that retrospective quietly disappears.
This is obviously an extreme example, but if you knew how often deployments go sideways in real companies, it would be surprising.
Over time, this process started to improve. One of the big shifts was the introduction of Continuous Integration and Continuous Deployment. Instead of manually crafting builds and compressing them, software began to build automatically in response to events like repository changes or pull requests. At this point, it’s fair to say most software today is built through a CI/CD pipeline before it even reaches testing, whether that testing is automated or manual.
There’s a good reason for that. Releases are usually tied to a specific version number or commit hash, so you know exactly what’s been deployed. Nobody needs to manually trigger builds anymore; they just run when something changes. Rolling back is also much simpler. Since each release is versioned, you can redeploy a previous version if something goes wrong.
The catch is that all of this still has to run somewhere. If you’re building software, you need a place to build it. The same goes for deployment.
And over time, those environments start to drift. Build machines slowly accumulate changes as dependencies get updated. A broken build agent might get patched manually by someone trying to help, but whatever they did often isn’t documented. What started as a clean setup gradually becomes messy. Setting these machines up isn’t trivial either. Install the OS, install the agent, install hundreds of tools, and keep tweaking things until the build finally works.
The same pattern shows up in deployment environments. If you’re deploying a website, you stop the old version, clear out directories, extract new files, and bring everything back up. If something doesn’t shut down cleanly or another issue crops up, the deployment fails. And just like with build machines, drift becomes a problem. Dependencies age, tooling falls out of date, and even something as simple as updating Node turns into a decision tree. Which version manager should you use? Should you use one at all? And so it goes.
The CI/CD space has had its share of controversy recently, with GitHub briefly deciding to charge for self-hosted runners before walking it back. It highlights an important point: if something you rely on is free, that can change at any time.
To understand where Dokploy fits in, it helps to step back and look at what typically makes up an application. At any given moment, your app likely includes:
There are plenty of other moving parts, but this is the core shape. Traditionally, your software is built on one machine, packaged up, then passed through a release pipeline where it’s extracted, configured, and deployed.
Dokploy takes a different approach. As the name suggests, it leans entirely on Docker containers. And this is one of those cases where the change almost always makes things better. Instead of dealing with start and stop scripts or worrying about environment drift, each deployment builds a fresh container and swaps it into place. The new version comes up, the old one goes away.
Since switching to Dokploy, I’ve stopped using GitHub Actions entirely and prefer this workflow.
It’s easier to see the value than to describe it, so let’s walk through a simple example. We’ll use Dokploy to host a basic web server that shows the current time, along with a small piece of storage to track which deployment number we’re on.
To keep things simple, we’ll inline the Python script directly inside the Docker Compose file. You wouldn’t do this in a real project, but it keeps the example focused on how Dokploy works.
In Dokploy, start by clicking “Create Project.”
And then we can give some details:
After that, click on “Create service > Compose”:
Because this is our only service for our app, we’ll just call it “main”:
In our service, we’ll specify “raw” because we have our Docker Compose text:
This is where we’d paste in our Docker Compose contents:
version: '3.8'

services:
 web-app:
 image: python:3.11-slim
 container_name: dokploy-time-server
 restart: always
 ports:
 - "8080"
 volumes:
 - version_persistence:/data
 environment:
 - TZ=Australia/Brisbane
 command:
 - python3
 - -c
 - |
 import os, datetime, time
 from http.server import BaseHTTPRequestHandler, HTTPServer

 # Set the timezone for the process based on the TZ env var
 if os.name != 'nt':
 time.tzset()

 # Ensure directory exists and handle versioning
 os.makedirs('/data', exist_ok=True)
 version_file = '/data/version.txt'

 if not os.path.exists(version_file):
 version = 1
 else:
 with open(version_file, 'r') as f:
 try:
 version = int(f.read().strip()) + 1
 except:
 version = 1

 with open(version_file, 'w') as f:
 f.write(str(version))

 class ServerHandler(BaseHTTPRequestHandler):
 def do_GET(self):
 self.send_response(200)
 self.send_header('Content-type', 'text/html')
 self.end_headers()

 # Get local time based on the TZ environment variable
 current_time = datetime.datetime.now().strftime('%Y-%m-%d %H:%M:%S')

 content = f"""
 <html>
 <body style="font-family: sans-serif; text-align: center; margin-top: 50px; background-color: #f4f7f6;">
 <div style="display: inline-block; padding: 20px; border: 1px solid #ddd; border-radius: 8px; background: white; box-shadow: 0 4px 6px rgba(0,0,0,0.1);">
 <h1 style="color: #2c3e50; margin-bottom: 10px;">Deployment Version: {version}</h1>
 <p style="font-size: 1.2em; color: #34495e;">
 <strong>Current Brisbane Time:</strong><br>{current_time}
 </p>
 <hr style="border: 0; border-top: 1px solid #eee; margin: 20px 0;">
 <p style="color: #95a5a6; font-size: 0.9em;">Environment: Dokploy | Port: 8080</p>
 </div>
 </body>
 </html>
 """
 self.wfile.write(content.encode())

 print(f"Starting Version {version} in Australia/Brisbane timezone...")
 HTTPServer(('0.0.0.0', 8080), ServerHandler).serve_forever()

volumes:
 version_persistence:
A quick note: Most Docker Compose files define port bindings in the format internal: external, like 8080:8080, to expose a container port to the outside world. Don’t do this with Dokploy. Dokploy only needs to know how to route traffic into your container; it handles the rest for you. If you start managing your own bindings, you’ll run into port conflicts sooner or later.
Now, let’s deploy it.
We get redirected to the deployment page.
It actually finished building before I could get an image of the build in process 😂. But the orange dot next to “main” indicates that this service is building. And the initial deployment here, which took six seconds to bring in the Python environment, has finished building.
This is the build output:
Initializing deployment
File 'docker-compose.yml' created: ✅
╔══════════════════════════════════════════════════════════════════════════════╗
║ ║
║ App Name: timetest-main-wxw3zo ║
║ Build Compose 🐳 ║
║ Detected: 0 mounts 📂 ║
║ Command: docker compose -p timetest-main-wxw3zo -f docker-compose.yml up -d ║
║ --build --remove-orphans ║
║ Source Type: docker raw ✅ ║
║ Compose Type: docker-compose ✅ ║
║ ║
╚══════════════════════════════════════════════════════════════════════════════╝
time="2026-03-31T03:32:45Z" level=warning msg="/etc/dokploy/compose/timetest-main-wxw3zo/code/docker-compose.yml: the attribute `version` is obsolete, it will be ignored, please remove it to avoid potential confusion"
Image python:3.11-slim Pulling
f4badedbec24 Already exists 0B
b4822ed67dff Pulling fs layer 0B
d6c44f24ac6d Pulling fs layer 0B
ccdb4a613b5c Pulling fs layer 0B
b4822ed67dff Downloading 13.27kB
d6c44f24ac6d Downloading 143.2kB
b4822ed67dff Verifying Checksum 0B
b4822ed67dff Download complete 0B
b4822ed67dff Extracting 32.77kB
ccdb4a613b5c Downloading 249B
ccdb4a613b5c Verifying Checksum 0B
ccdb4a613b5c Download complete 0B
d6c44f24ac6d Downloading 7.373MB
b4822ed67dff Extracting 262.1kB
b4822ed67dff Extracting 1.274MB
b4822ed67dff Extracting 1.274MB
d6c44f24ac6d Downloading 12.53MB
d6c44f24ac6d Verifying Checksum 0B
b4822ed67dff Pull complete 0B
d6c44f24ac6d Extracting 163.8kB
d6c44f24ac6d Extracting 2.13MB
d6c44f24ac6d Extracting 3.277MB
d6c44f24ac6d Extracting 7.373MB
d6c44f24ac6d Extracting 8.52MB
d6c44f24ac6d Extracting 10.49MB
d6c44f24ac6d Extracting 11.8MB
d6c44f24ac6d Extracting 12.62MB
d6c44f24ac6d Extracting 13.6MB
d6c44f24ac6d Extracting 14.32MB
d6c44f24ac6d Pull complete 0B
ccdb4a613b5c Extracting 249B
ccdb4a613b5c Extracting 249B
ccdb4a613b5c Pull complete 0B
Image python:3.11-slim Pulled
Network timetest-main-wxw3zo_default Creating
Network timetest-main-wxw3zo_default Created
Volume timetest-main-wxw3zo_version_persistence Creating
Volume timetest-main-wxw3zo_version_persistence Created
Container dokploy-time-server Creating
Container dokploy-time-server Created
Container dokploy-time-server Starting
Container dokploy-time-server Started
Docker Compose Deployed: ✅
So, quite quickly, it has retrieved the Python container as needed and has deployed what we need.
Now let’s head over to the Domains tab:
Typically, you’d need to set up a new domain through a provider like Cloudflare or something similar. It’s not particularly difficult, but it does add cost and a bit of extra setup. With Dokploy, you can skip that entirely. It can assign Traefik domain names for free. The only catch is that certificates can’t be automatically retrieved for those Traefik domains.
At a high level, we’re just telling Dokploy how to route traffic into this container from the outside world. I clicked the dice icon next to the “host” field, which generated a traefik.me domain automatically. Then, in the Docker Compose file, we define the port the container should listen on.
Once the domain is set, redeploy the app. It might feel a bit odd, but that step is what actually links the domain to the container. And just like that, the app is up and accessible.
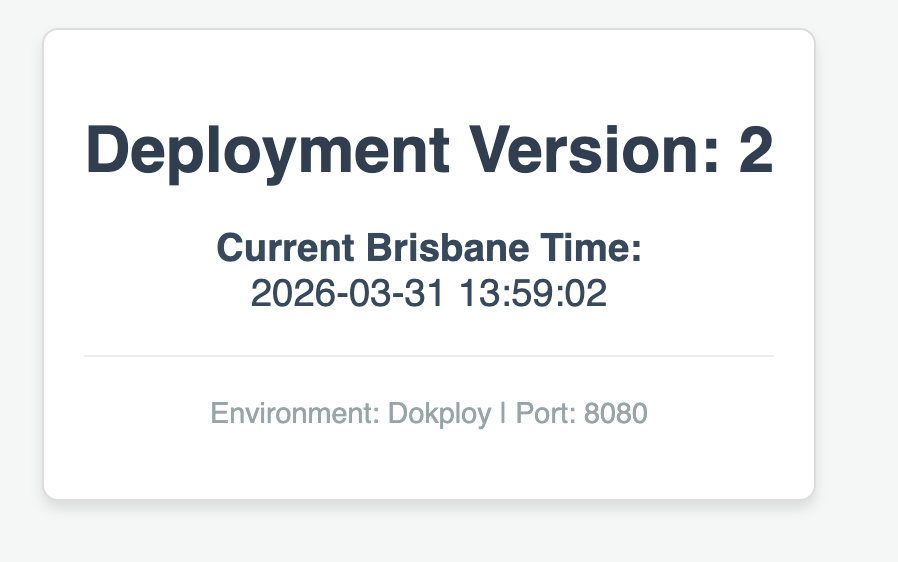
If I deploy the app again, the version increments:
Of course, no applications run entirely out of a Docker Compose file. They’re usually checked into source control. Dokploy works best when it responds to changes there, rebuilding and redeploying apps when something like a PR gets merged.
For this example, we’ll use a Docker Compose file with two containers. One acts as the main application, and the other is a Redis store. When you write something in the web UI, it gets sent to Redis in the second container.
These containers communicate over their own internal network, while only the web container is exposed to the dokploy-network. That way, we avoid exposing unnecessary services to the outside world.
You can check out the repository here:
https://github.com/azimuthdeveloper/dokploytest
Back within Dokploy, if we create another new service, we can see that we have a few options for source control providers, like GitHub, Bitbucket, and the like. In our case, we’ll use GitHub. I’ve already set up the GitHub integration, but it’s trivial to do so – essentially, you just set up a service account for Dokploy to use.
Fairly straightforward. Every time there is a push to our main branch, we’ll redeploy this Docker Compose file.
One very nice thing that we can glean from this is that, with it being Docker, each stage in the build process is cached. So while this build only took a short while to build, if the Dockerfile doesn’t change, then future builds will complete much faster, as the cached image layer will be used instead of manually running the build again for the Docker container.
This is best demonstrated by showing how the initial build took 22 seconds, but the second build only took 4 seconds to run. This is the same for much more complex builds, which might take tens of minutes to run, as Docker sees that the underlying Dockerfile has not changed and just re-uses what it made last time.
Once we set up a domain, we’re good to go.
Using Dokploy to build containers and deploy them automatically into your environments, with straightforward domain setup and SSL configuration, makes the whole process much simpler than it used to be.
To give you an idea, here’s what my setup looks like for the apps running on my Dokploy instance:
There’s a lot more to Dokploy than what we’ve covered here, like environments and DNS configuration, but those are worth digging into another time.
My builds are now far less flaky, and things run much more reliably. Hopefully, you’ll get the same experience with Dokploy.
Learn how to build a full React Native auth system using Better Auth and Expo — with email/password login, Google OAuth, session persistence, and protected routes.
Compare the top AI development tools and models of June 2026. View updated rankings, feature breakdowns, and find the best fit for you.
Learn how Bloom filters reduce database lookups for username availability checks while preserving correctness at scale.
Learn how to test Nuxt apps with Vitest, @nuxt/test-utils, runtime mocks, server route mocks, and Playwright e2e tests.
Hey there, want to help make our blog better?
Join LogRocket’s Content Advisory Board. You’ll help inform the type of content we create and get access to exclusive meetups, social accreditation, and swag.
Sign up now