 |
VOOZH | about |
|
VOOZH | about |
Wouldn’t you like to move your application out of your local development environment and put it in a publicly accessible URL? Still, finding a good (and free) service to deploy your Node.js application is not that easy.
👁 Services Deploy Nodejs App FreeIn this tutorial, we will see how to deploy a Node.js API built with Express.js and MySQL to three different services. We will use the API app for programming languages that I built for my previous post on Node.js and MySQL.
All the services listed in this post are absolutely free, and the best part that is you don’t need to reach for your credit card — it will not be required at all. Just a reminder, though: when we don’t pay anything, there will be some trade-offs to make.
As mentioned above, we will be using the Programming Languages API, which is connected with MySQL on freeDB.tech. Before continuing, however, make sure:
Let’s get cracking! To proceed further, please fork this GitHub repository as we will use this as the example.
The Replay is a weekly newsletter for dev and engineering leaders.
Delivered once a week, it's your curated guide to the most important conversations around frontend dev, emerging AI tools, and the state of modern software.
Qovery bills itself as “the simplest way to deploy your full-stack apps.” You will need to dockerize your Node.js app for it to be easily deployed to Qovery, so go ahead and follow this tutorial for Node.js and Docker if your app is not already dockerized.
The Qovery UI is intuitive and very useful. We will get started by registering on Qovery. Go to the login/signup page and click the Sign in with GitHub button. After you authorize Qovery in Github, you should be logged in to the Qovery console. After you’ve logged, in click the Create a new project button in the top left:
Consequently, we will see the following screen:
👁 Qovery UI Create New Project Screen
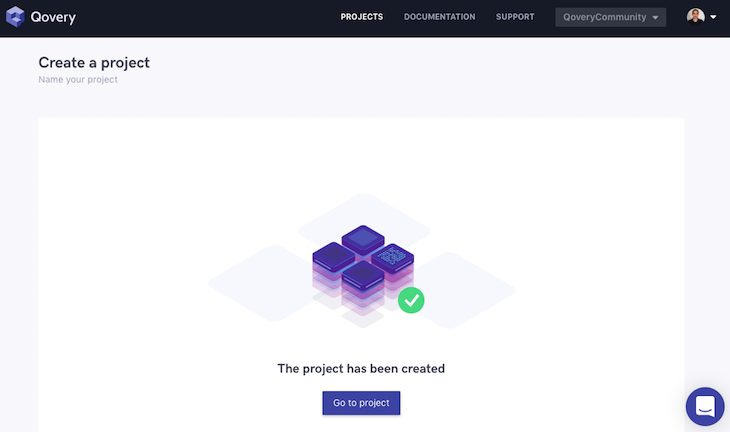
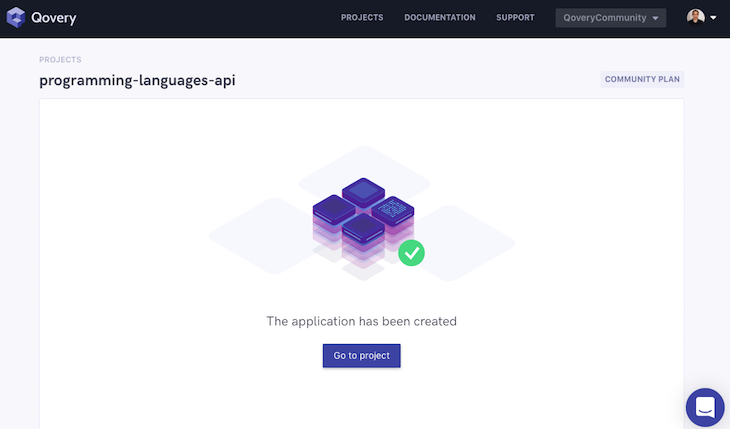
Select QoveryCommunity as the organization and type in programming-languages-api in the Project Name field. Click Create, and we will see the next screen:
👁 Quovery Community Project Created Screen
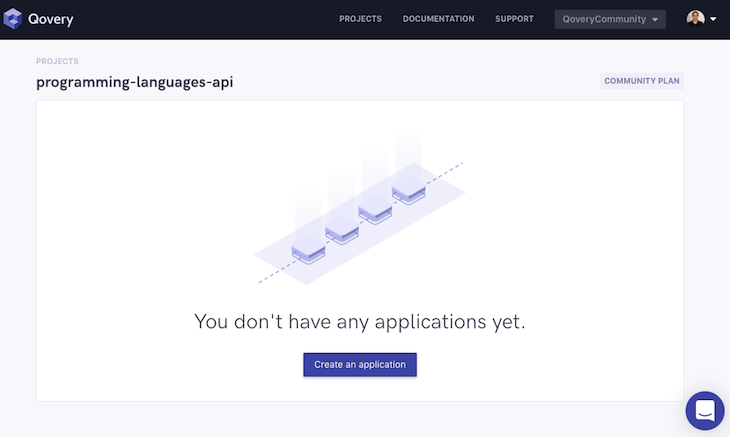
Subsequently, click Go to project. You should see something similar to the page below:
👁 Qovery Programming Languages Api Go To Project Page
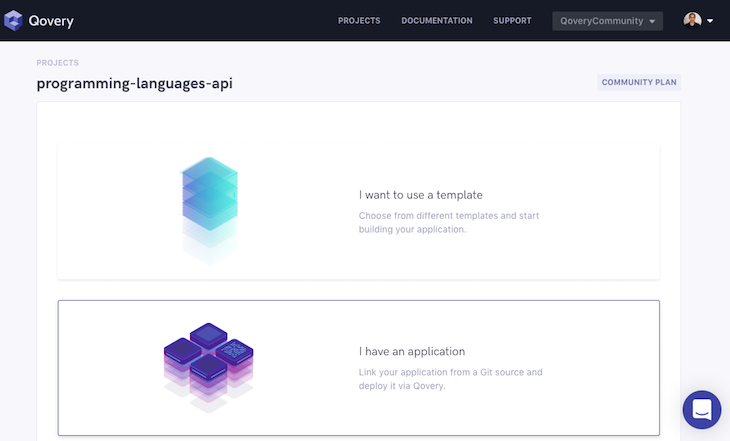
On this page, click Create an application.
Then click I have an application.
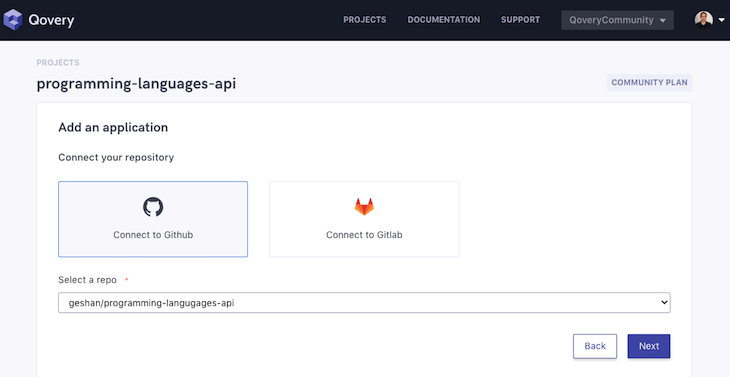
👁 Qovery Connect Github Repo Programming Languages
Now select Connect to GitHub and choose the repo programming-languages-api that we forked earlier.
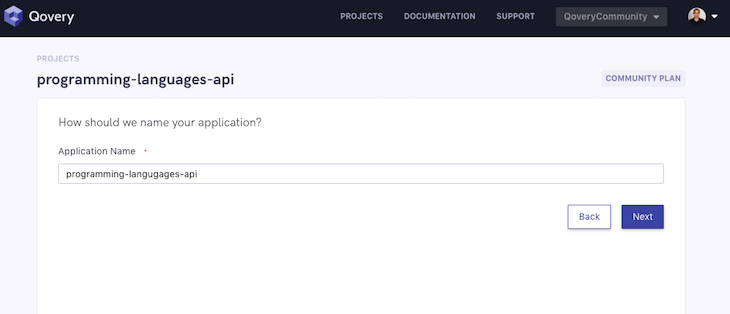
After that, check the name of the application (you can change it if you want) and hit Next.
👁 Qovery Database Selection Screen
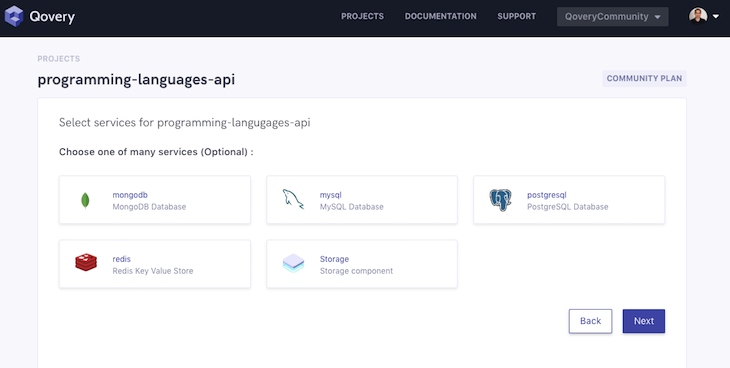
On the database selection screen, hit Next without selecting any database since our MySQL database is already hosted and configured on a different service.
👁 Quovery Programming Languages API Repository
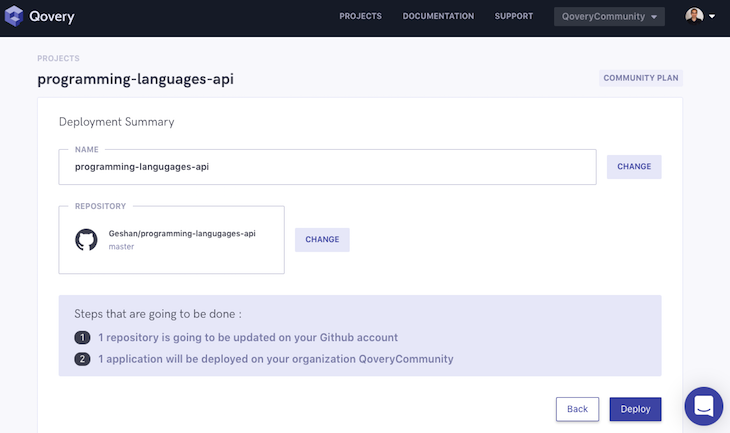
Finally, hit Deploy and wait for some time for the app to be ready.
👁 Quovery Programming Languages API Application Created
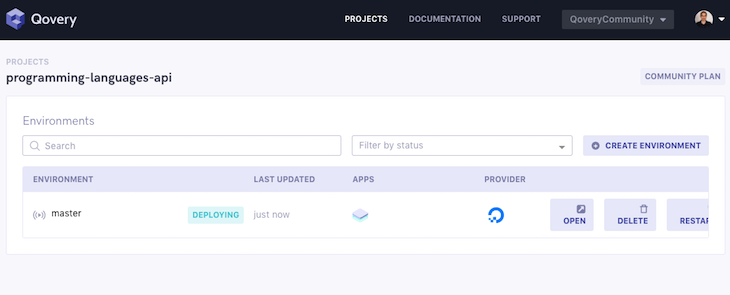
Next, click the “Go to project” button.
👁 Qovery Go To Project Status Deploying
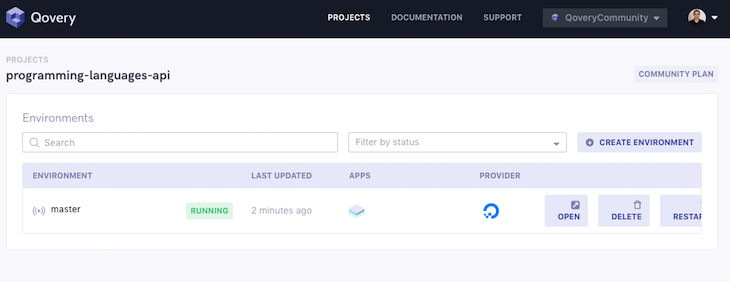
Wait for some more time for the app to be deployed. You’ll see the status change to running, like below:
👁 Quovery App Deploying Status Running
Click the Open link to see our app running:
👁 Open Link App Running Visual
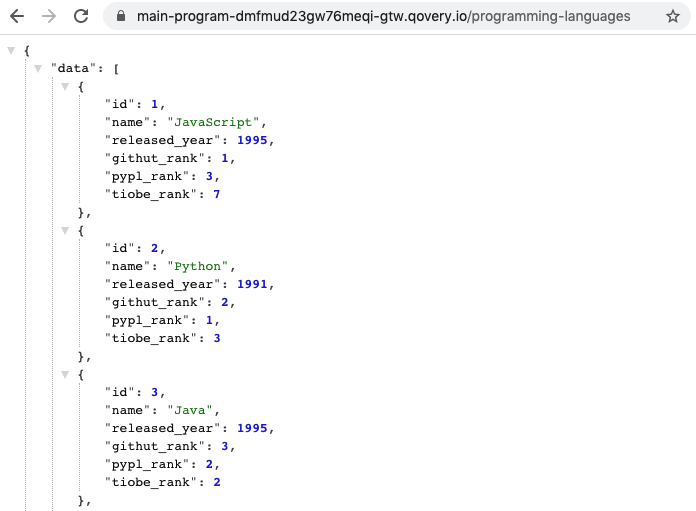
We can add /programming-languages to the URL to see the list of our programming languages served by the GET API as follows:
👁 Program Languages List Add Url Get Api
Great! Our app is running on Qovery. In addition to easy deployment, Qovery also provides other great features, like an environment and URL for each branch. For more features, have a look at the Qovery docs.
Vercel, formerly known as Zeit, acts as a layer on top of AWS Lambda to run your applications. It is a serverless platform that can run a variety of things with a stronger focus on frontend. Fortunately, Node.js is one of the official runtimes on Vercel. Our regular Node.js Express API can run on Vercel with a well-configured vercel.json file. Let’s see how:
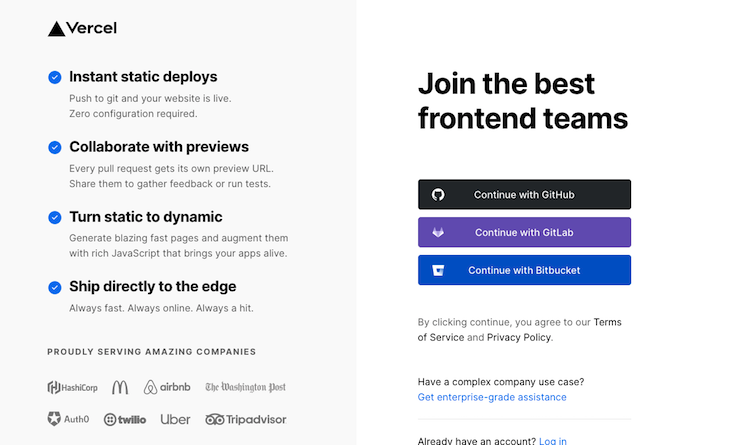
Go to the Vercel signup page and click on Continue with GitHub. After you have authenticated, click on New Project:
👁 Vercel New Project Profile Page
You’ll see the screen below:
👁 Vercel New Project Homepage Clone Template Import Git Repository
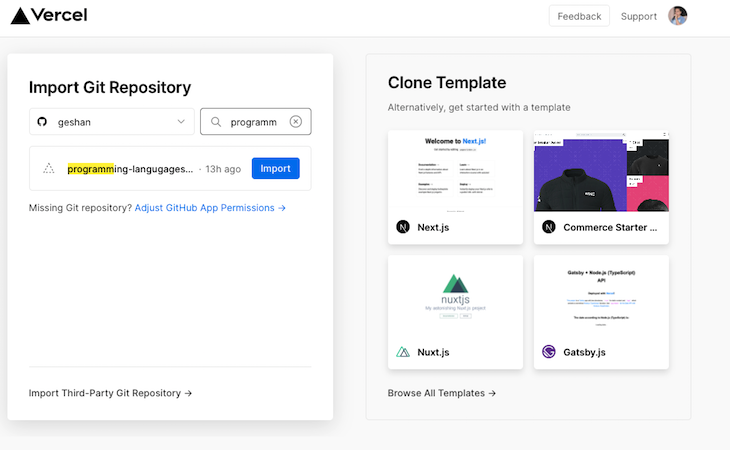
In the list of your GitHub repositories, search for programming and find the programming-languages-api repo, then click Import.
👁 Github Programming Languages Api Repo Select
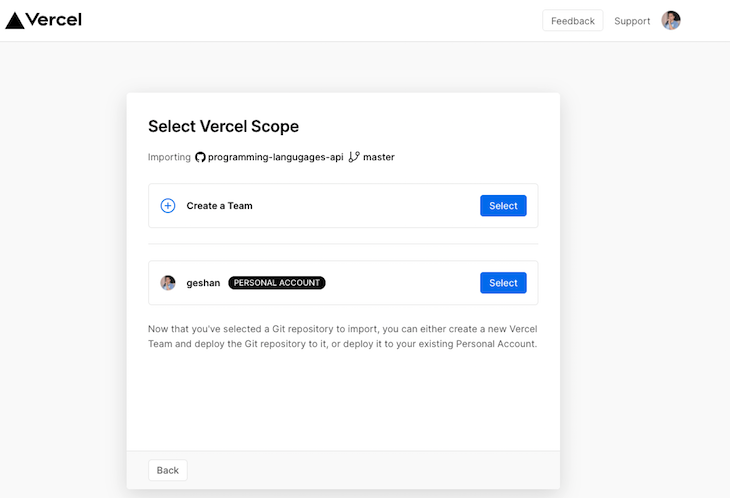
Consequently, click Select on your personal account — note that only personal accounts are free on Vercel.
👁 Vercel Import Programming Languages Api Project
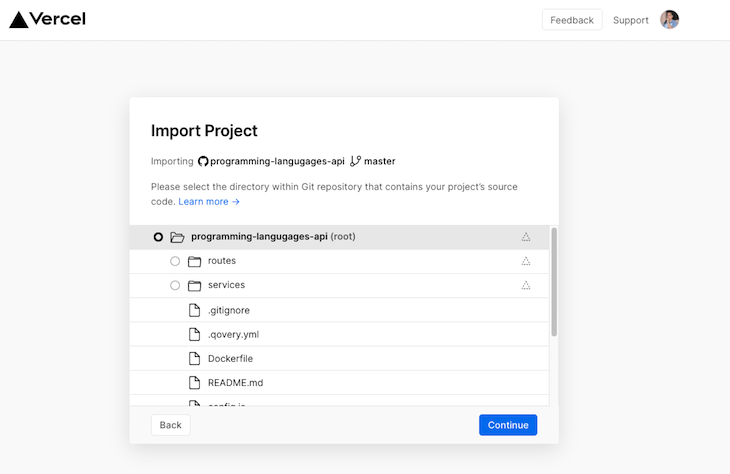
After that click, Continue to confirm the root is the base folder, as above.
👁 Vercel Import Project Preset Other Deploy
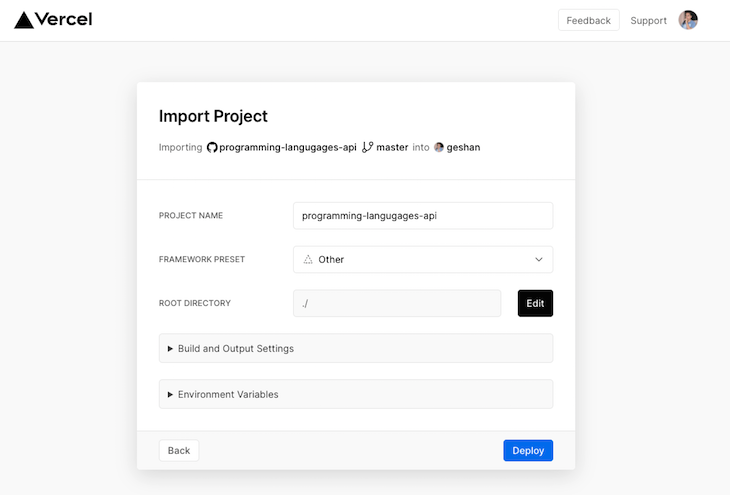
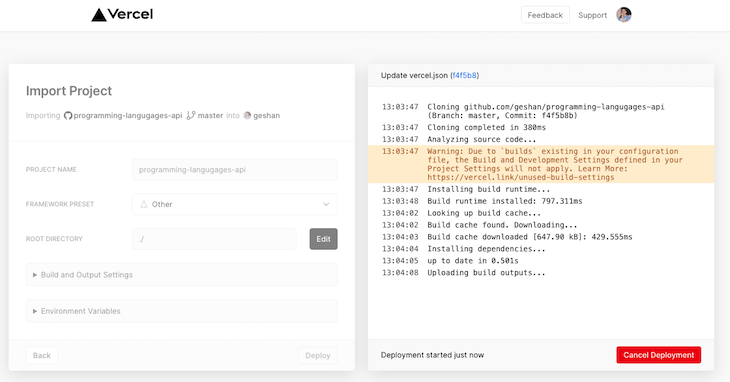
In the above screen, select Other as the framework and click Deploy. It will take some time to build the project:
👁 Vercel Project Deployed Build Time
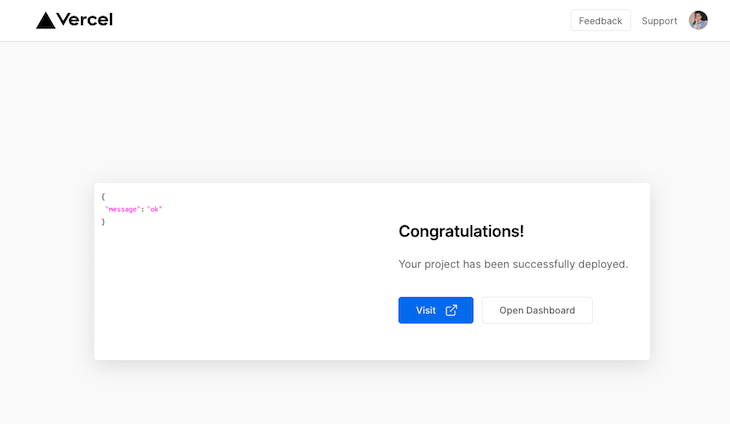
Then you will see the congratulations page to visit the deployed project:
👁 Vercel Congratulations Page Deployed
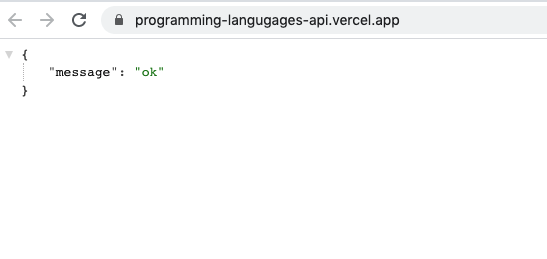
When you click Visit, you’ll see something like the below:
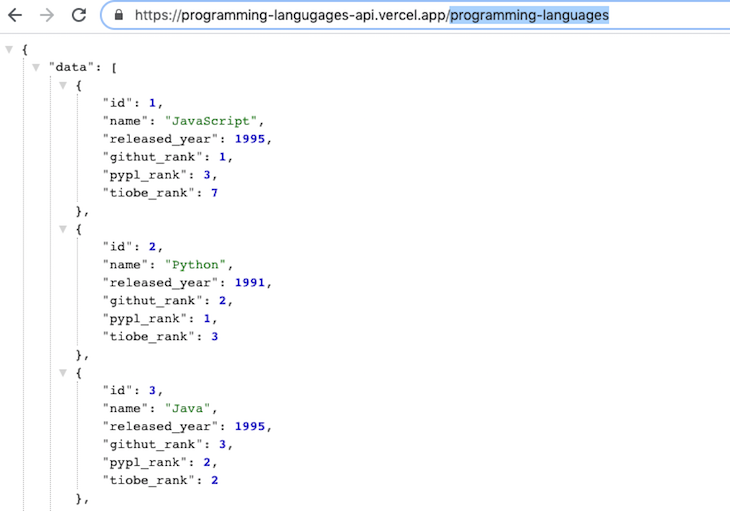
To check the database connection, we can add /programming-languages to view the following output:
👁 Database Connection Check Add Programming Languages
Hurray! Our app is running on Vercel now. Please be careful of the vercel.json file in the repo — that config is required for Vercel to run the Node.js build for our project.
Heroku is a pioneer in the platform-as-a-service market. It started out as a Ruby deployment service and has expanded to support languages like Node.js, Python, and PHP, to name a few.
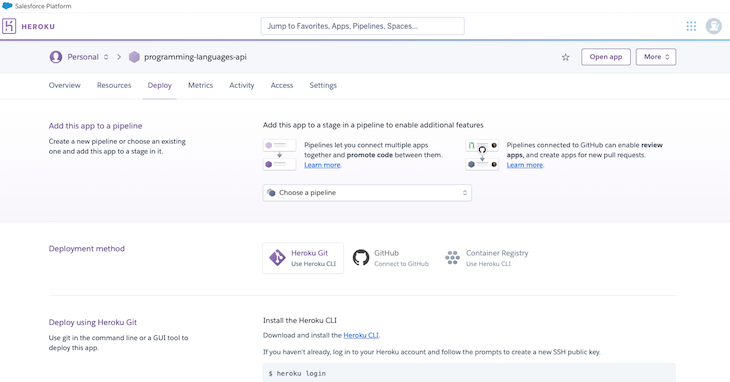
Let’s proceed to deploy our application to Heroku. First, you will need to sign up:
Then log in to Heroku.
👁 Heroku Log In Personal Account
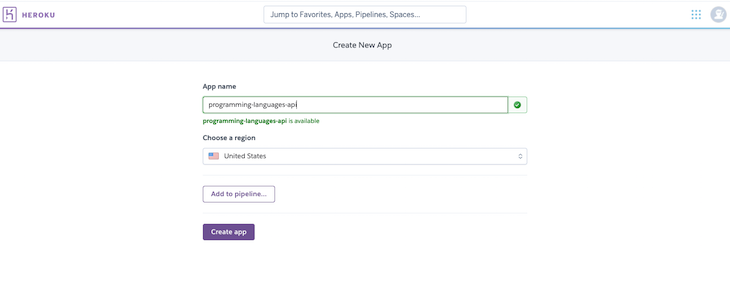
On the dashboard page, click on New and then Create new app, as above.
After that, type in a name for the app, like programming-languages-api in the above case. You might need to type in something different and available. Consequently, hit the “Create app” button.
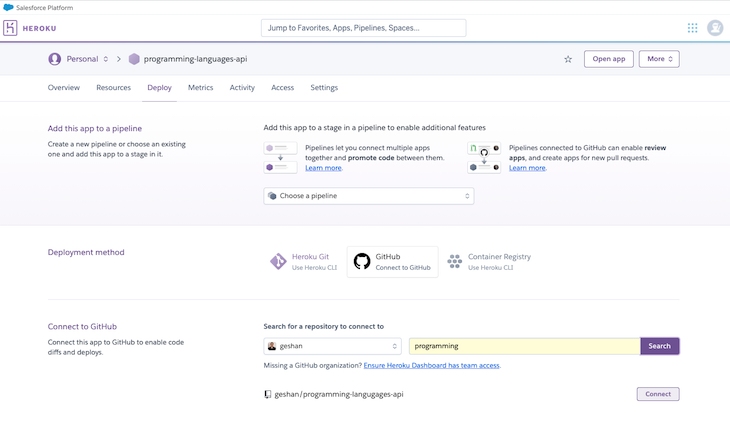
👁 Heroku Github Connect Programming Languages Repo
On the above screen, click GitHub and select Connect beside the programming-languages-api repo you had forked in the first step.
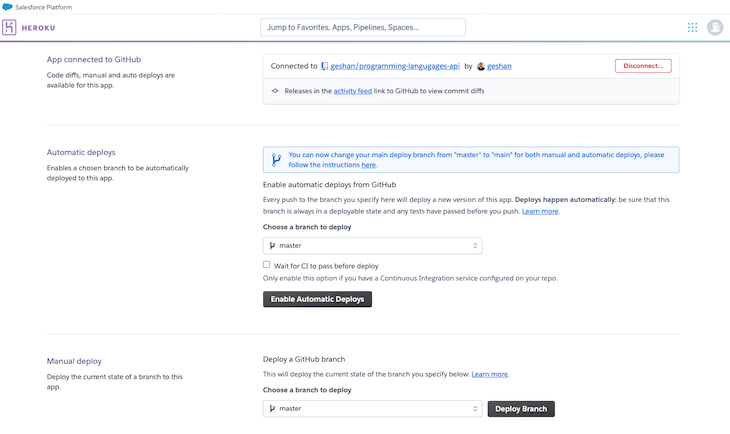
👁 Heroku Connect Github Repository
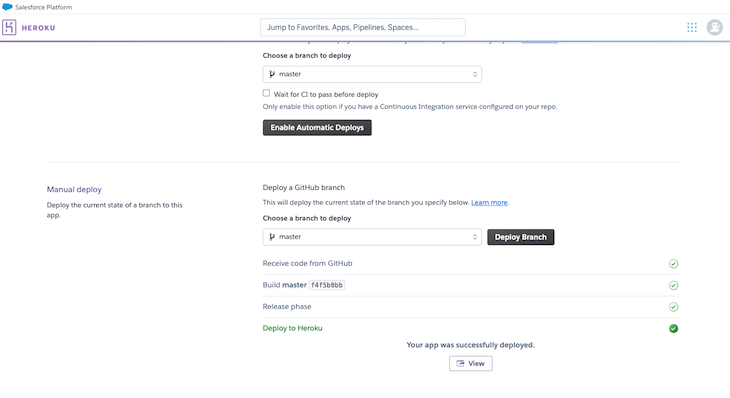
After that, scroll down and click Deploy Branch for the master branch.
👁 Heroku Deploy Branch Master Branch
We will see the build, deployment logs, and a success message, like below:
👁 Heroku Build Deployment Logs Success Message
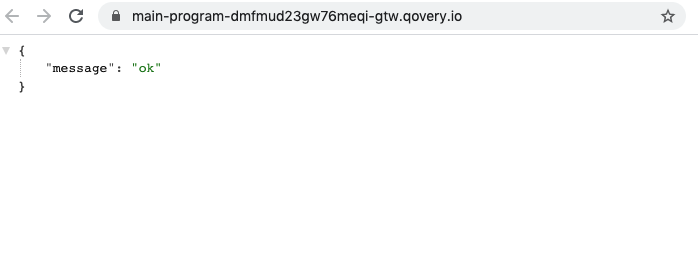
Click on View to see an output like below:
👁 Heroku View Output Message Ok
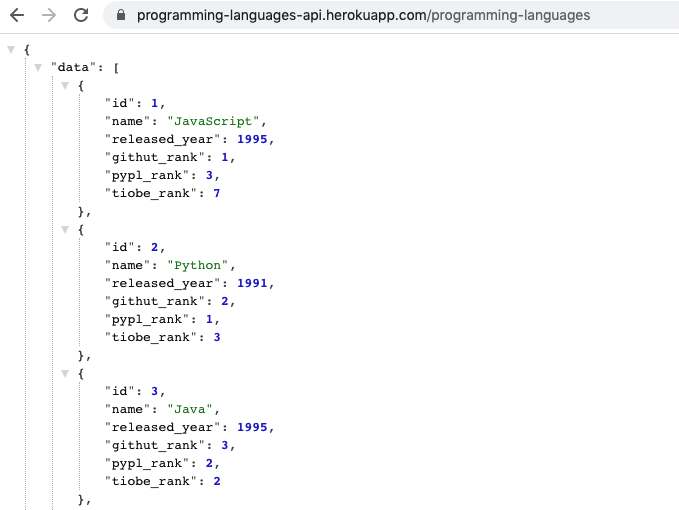
Next, we can add /programming-languages to the URL to see that the app is able to connect to the database and render the rows correctly:
👁 Heroku View Output Message Okk
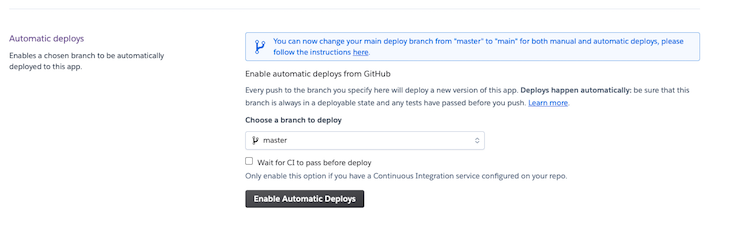
Yay! Our app is working fine on Heroku, too. Another tip is to turn on the Enable Automatic Deploys for your master/main branch. This means each change to the main branch will be automatically deployed.
You can find the Enable Automatic Deploy button above the Manual deploy section, as seen below:
One issue with the Heroku free plan is that the dyno sleeps after 30 minutes of inactivity. A workaround is to use Kaffeine to keep your apps awake even after 30 minutes of no requests hitting it.
Those were the three amazing services that let us deploy a Node.js application for no cost at all, with no need to enter our credit card number. Of course, there are other services with which you could potentially run your Node.js app for no cost, but you will need to enter your billing information.
Here are some options I have tried:
If you are comfortable putting down your credit card, any of the above options work in a pinch.
All the above free services have a command line tool, too. If you are more comfortable with the CLI, you can give that a try as well.
The next good step would be to try mapping custom domains to your apps where applicable. It would be good to look at deployment logs and application logs on the mentioned services.
Till next time, happy deploying!
Deploying a Node-based web app or website is the easy part. Making sure your Node instance continues to serve resources to your app is where things get tougher. If you’re interested in ensuring requests to the backend or third-party services are successful, try LogRocket.
👁 LogRocket Network Request MonitoringLogRocket lets you replay user sessions, eliminating guesswork around why bugs happen by showing exactly what users experienced. It captures console logs, errors, network requests, and pixel-perfect DOM recordings — compatible with all frameworks.
LogRocket's Galileo AI watches sessions for you, instantly identifying and explaining user struggles with automated monitoring of your entire product experience.
LogRocket instruments your app to record baseline performance timings such as page load time, time to first byte, slow network requests, and also logs Redux, NgRx, and Vuex actions/state. Start monitoring for free.
Build dynamic LLM routing in Next.js with OpenRouter, TanStack AI, task classification, model fallbacks, and cost-aware routing.
TSRX adds first-class control flow, conditional hooks, and scoped styles to React via a TypeScript compiler extension — no new framework required.
Learn how to build a full React Native auth system using Better Auth and Expo — with email/password login, Google OAuth, session persistence, and protected routes.
Compare the top AI development tools and models of June 2026. View updated rankings, feature breakdowns, and find the best fit for you.
Hey there, want to help make our blog better?
Join LogRocket’s Content Advisory Board. You’ll help inform the type of content we create and get access to exclusive meetups, social accreditation, and swag.
Sign up now