 |
VOOZH | about |
|
VOOZH | about |
If you’ve ever wanted to try out new, experimental, or nonstandard CSS properties in your code, then you know browser vendors require you to add prefixes to make them work until they are fully standardized.
.some-element {
 box-sizing: border-box;
 -webkit-box-sizing: border-box; // chrome, safari prefix
 -moz-box-sizing: border-box; // firefox
 -o-box-sizing: border-box; // old opera versions
 -ms-box-sizing: border-box; // IE, Microsoft Edge
}
You have to monitor the different CSS properties to know when browser vendors begin supporting them, at which point you can remove the respective prefixes.
Thankfully, now we have Autoprefixer. It’s a CLI tool from npm that scans through your code and adds vendor prefixes to CSS rules using values from Can I Use. Autoprefixer is one of the many PostCSS plugins, and it captures the essence of PostCSS.
PostCSS is a tool for transforming CSS with JavaScript plugins. It provides features via its extensive plugin ecosystem to help improve your CSS writing experience. You can pick the plugins you need or even write a custom one for yourself.
Generally, PostCSS plugins allow you to write plain CSS as you normally would, and once invoked, they scan through the code to perform the desired transformations.
Do note, however, that there are PostCSS plugins that do not transform plain CSS, but operate on Sass-like syntax. One example is the PostCSS Simple Variables plugin, which allows you to implement variables (just like in Sass) that you can reuse throughout your code, as shown below.
$color-brand: darkgrey;
$font-size: 1em;
body {
 color: $color-brand;
 font-size: $font-size;
}
This feature isn’t especially relevant at this time because /CSS variables/ has been released as an inherent feature in CSS, and PostCSS can transform the latest CSSNext syntax into friendly CSS that older browsers can understand.
Let’s take a look at a few use cases for PostCSS via the power of its plugins.
As previously mentioned, the Autoprefixer plugin will add vendor prefixes to CSS properties using values from Can I Use. This reduces clutter in your code and improves readability. For example, this input:
:fullscreen {
}
Gives this output:
:-webkit-:full-screen {}
:-moz-:full-screen {}
:full-screen {}
With the PostCSS Preset Env plugin, you can write future CSS syntax, and the plugin will convert it to CSS that browsers will understand by working out the necessary polyfill. For example, this input:
@custom-media --med (width <= 50rem);
@media (--med) {
 a {
 &:hover {
 color: color-mod(black alpha(54%));
 }
 }
}
Gives this output:
@media (max-width: 50rem) {
 a:hover {
 color: rgba(0, 0, 0, 0.54);
 }
}
The stylelint plugin points out errors in your CSS code. It supports the latest CSS syntax. For example, this input:
a {
 color: #d3;
}
Gives this output:
app.css
2:10 Invalid hex color
With the CSS Modules plugin, you can write CSS that is locally scoped to components, meaning there won’t be any conflicts between your CSS class names no matter how generic they are. For example, this input:
.name {
 color: grey;
}
Gives this output:
.Logo__name__SVK0g {
 color: gray;
}
The LostGrid plugin uses calc() to create grids based on fractions you define without the need to pass a lot of options. For example, this input:
div {
 lost-column: 1/3
}
Gives this output:
div {
 width: calc(99.9% * 1/3 -
 (30px - 30px * 1/3));
}
div:nth-child(1n) {
 float: left;
 margin-right: 30px;
 clear: none;
}
div:last-child {
 margin-right: 0;
}
div:nth-child(3n) {
 margin-right: 0;
 float: right;
}
div:nth-child(3n + 1) {
 clear: both;
}
PostCSS can do the same work as preprocessors like Sass, Less, and Stylus, but PostCSS is modular and, in my experience, faster.
The main difference between PostCSS and CSS preprocessors is that you can pick the features you need. Sass and Less give you lots of features you may or may not use, and which you can’t extend.
If you want to keep Sass, Less, or Stylus in your current stack but still want to get PostCSS to perform other functions Sass can’t (e.g., autoprefixing or linting), this article details how to do just that.
There are also PostCSS plugins like PostCSS Sass and PreCSS, which are essentially complete replacements for Sass. This means you could literally write your own preprocessor powered by PostCSS.
Start by signing in to Codepen.io, and perform the following steps:
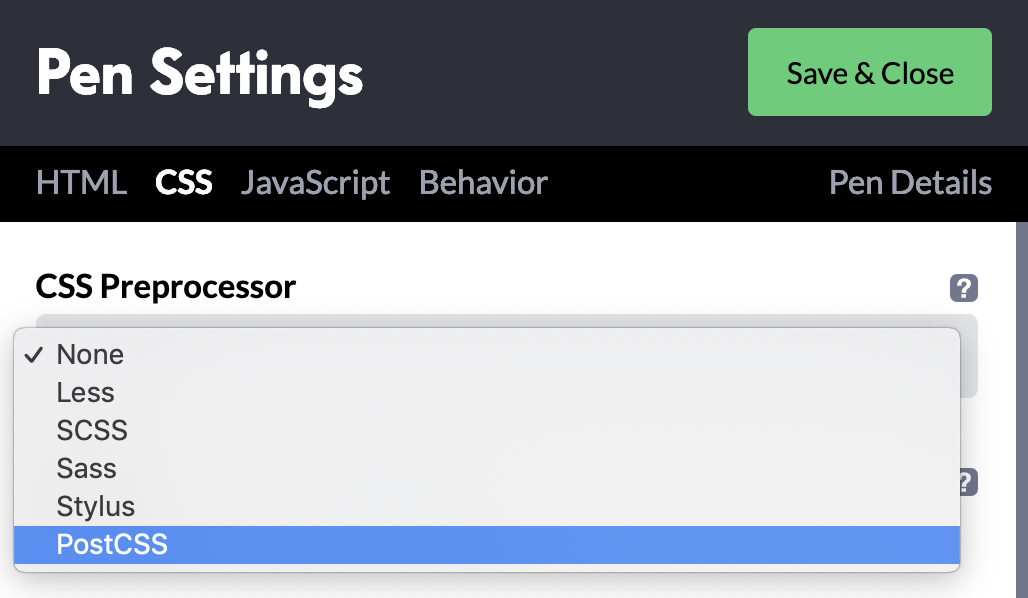
3. Select CSS from the top tab to reveal CSS settings.
4. Select the CSS Processor dropdown, then choose PostCSS from the dropdown.
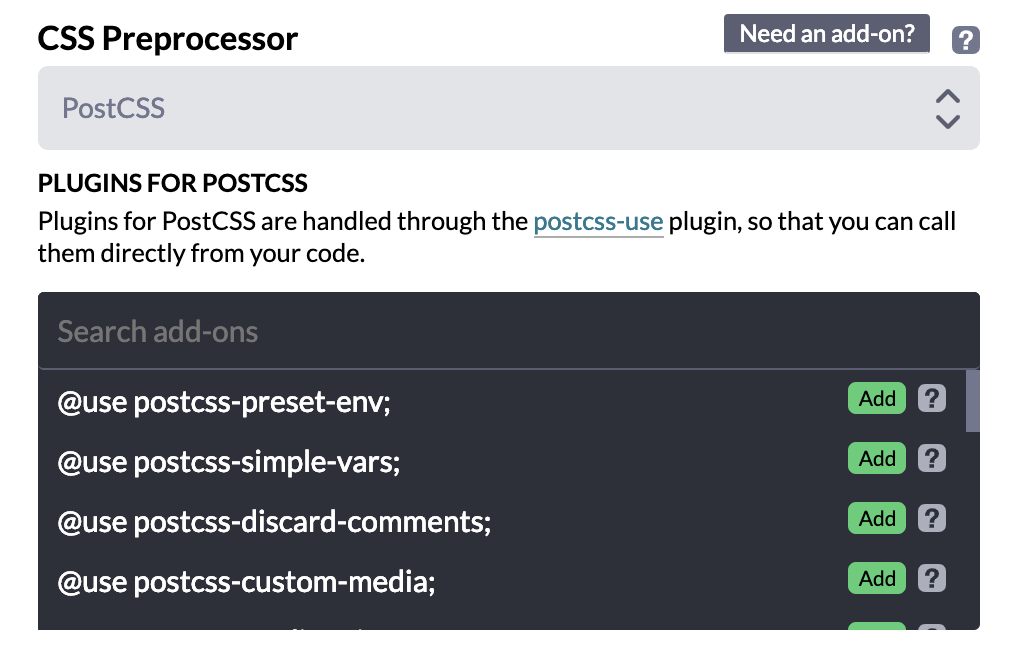
5. Click on the Need an add-on? badge that shows up. A list of add-ons will be displayed, from which you can search and select a needed plugin. Let’s Add the postcss-simple-vars plugin to experiment with variables. Select Save & Close.
The Replay is a weekly newsletter for dev and engineering leaders.
Delivered once a week, it's your curated guide to the most important conversations around frontend dev, emerging AI tools, and the state of modern software.
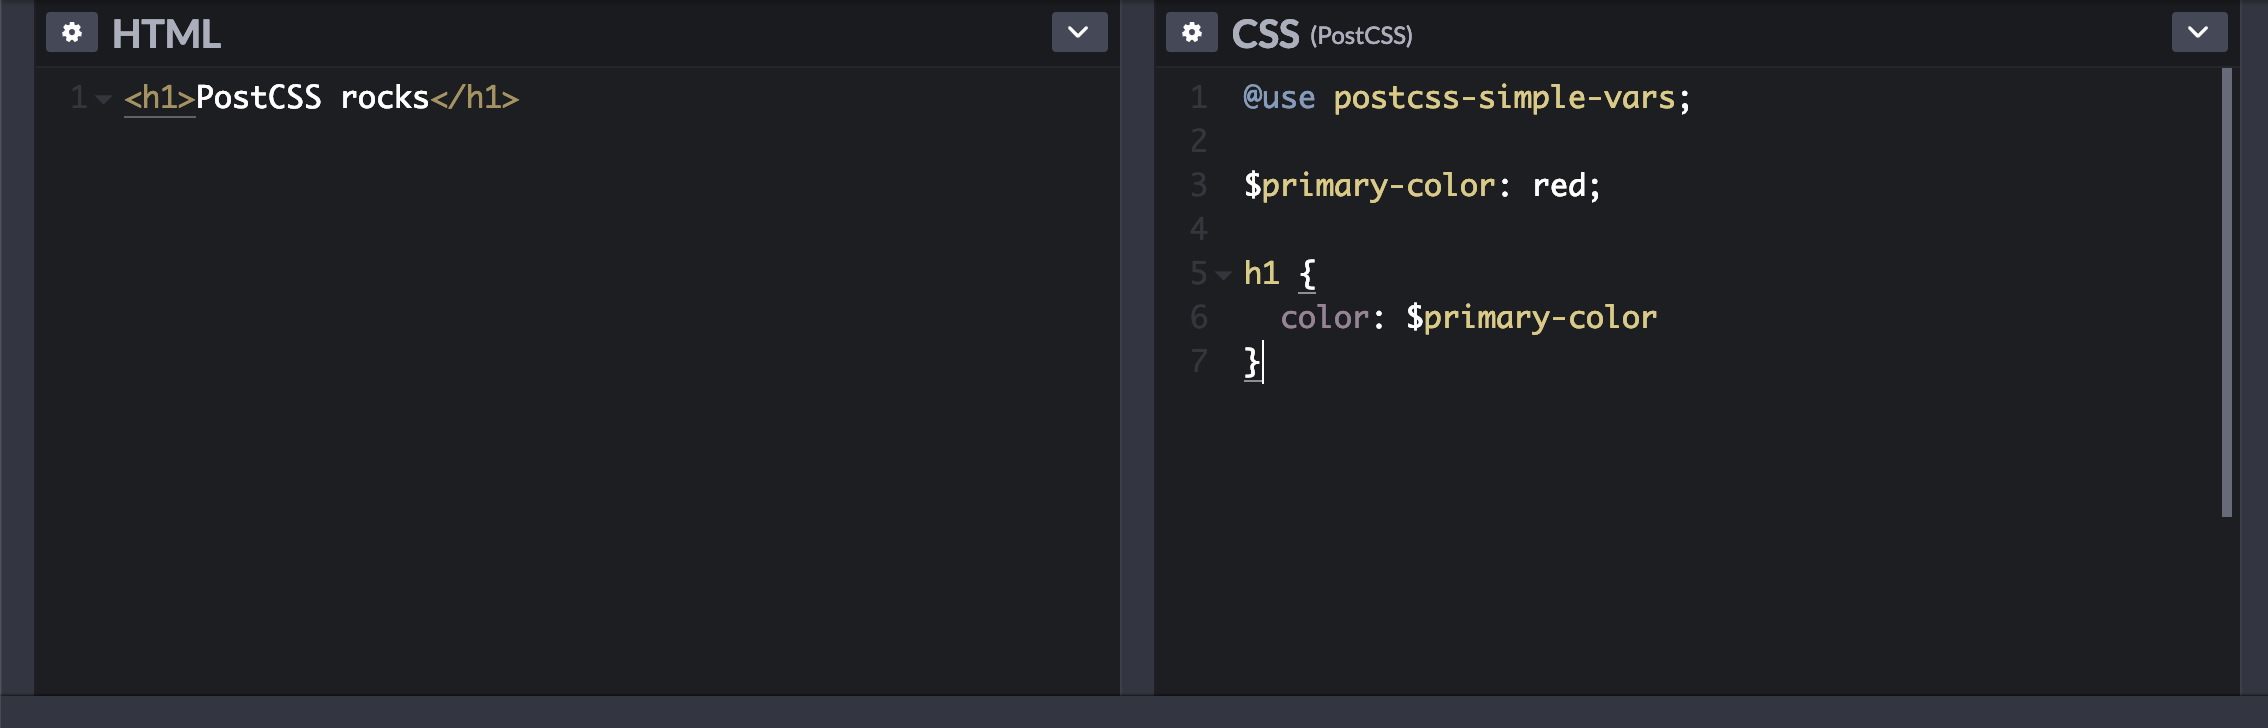
Back on the CSS window, you will notice that the plugin has been referenced for use. We are now free to access all its features.
@use postcss-simple-vars;
Insert a sample HTML and CSS using variables in the CSS window:
See the Pen
Really simple PostCSS example by Emmanuel Yusufu (@emmyyusufu)
on CodePen.
There are several ways to set up PostCSS with build tools such as Gulp, Webpack, or Parcel. In this post, I will focus on using the PostCSS CLI.
With npm installed, run the following on your command line:
npm install -g postcss-cli
Or use yarn:
yarn global add postcss-cli
You can also add plugins to projects using npm. For example:
yarn add --dev autoprefixer postcss-nested postcss-cli
In our projects, we can generally transform CSS with a PostCSS plugin this way:
postcss --use autoprefixer -o main.css css/*.css
The above command will run Autoprefixer through all the files contained in the /css/ folder and output the transformed CSS into main.css. You can also use an alias to run commands by adding it to scripts in your package.json file:
{
...
"scripts": {
 "start": "node index.js",
 "postcss": "postcss --use autoprefixer -o main.css css/*.css"
 }
...
}
It is worth mentioning that scaffolded React and Vue projects such as Create React App and VueCLI use PostCSS internally. Also note that the internal PostCSS is set up with a few select plugins; you can add more plugins with more configuration.
PostCSS is a highly useful tool that has been around for a while now. It encourages you to write more of plain CSS and allows you to use or write your own powerful plugins to transform it. Learning this tool, or at least becoming more aware of its uses, will improve your front-end workflow in 2019.
If you would like to dive deeper into PostCSS, I highly recommend this tutorial series. Thanks for reading 🙏.
As web frontends get increasingly complex, resource-greedy features demand more and more from the browser. If you’re interested in monitoring and tracking client-side CPU usage, memory usage, and more for all of your users in production, try LogRocket.
👁 LogRocket Dashboard Free Trial BannerLogRocket lets you replay user sessions, eliminating guesswork around why bugs happen by showing exactly what users experienced. It captures console logs, errors, network requests, and pixel-perfect DOM recordings — compatible with all frameworks.
LogRocket's Galileo AI watches sessions for you, instantly identifying and explaining user struggles with automated monitoring of your entire product experience.
Modernize how you debug web and mobile apps — start monitoring for free.
Build dynamic LLM routing in Next.js with OpenRouter, TanStack AI, task classification, model fallbacks, and cost-aware routing.
TSRX adds first-class control flow, conditional hooks, and scoped styles to React via a TypeScript compiler extension — no new framework required.
Learn how to build a full React Native auth system using Better Auth and Expo — with email/password login, Google OAuth, session persistence, and protected routes.
Compare the top AI development tools and models of June 2026. View updated rankings, feature breakdowns, and find the best fit for you.
Hey there, want to help make our blog better?
Join LogRocket’s Content Advisory Board. You’ll help inform the type of content we create and get access to exclusive meetups, social accreditation, and swag.
Sign up now