 |
VOOZH | about |
|
VOOZH | about |
The long-awaited Nuxt 3 beta was launched on 12 October 2021, making it a momentous day for the Nuxt and Vue developer ecosystems. This is an updated version that has been rearchitected for improved performance and lighter builds. And in this article, we will look at the new features in Nuxt 3, as well as the installation process and how to migrate your existing Nuxt apps (Nuxt 2) to this latest version.
👁 What's New in Nuxt 3The Replay is a weekly newsletter for dev and engineering leaders.
Delivered once a week, it's your curated guide to the most important conversations around frontend dev, emerging AI tools, and the state of modern software.
N.B., before we begin, please keep in mind that Nuxt 3 currently only supports Node v14 or v16.
While there is currently no stable migration technique for a smooth transition from Nuxt 2 to Nuxt 3, Nuxt Bridge (which we will discuss in more detail later) can be used to try out some of the new capabilities of Nuxt 3 in prior versions.
To do this, first delete any package-lock files (package-lock.json or yarn.lock) from your project, then remove the Nuxt dependency and create a new entry in your package.json file for the most recent version of nuxt-edge:
- "nuxt": "^2.15.0"
+ "nuxt-edge": "latest"
The next step is to reinstall all of your dependencies:
npm install
# OR
yarn install
And you are ready to go!
You can also choose to install Nuxt Bridge as a development dependency:
npm install -D @nuxt/bridge@npm:@nuxt/bridge-edge
# OR
yarn add --dev @nuxt/bridge@npm:@nuxt/bridge-edge
However, doing so will also require updating your package.json file to reflect the fact that Nuxt will now generate a Nitro server as a build result.
The process of creating a new application in Nuxt 3 differs significantly from earlier versions. Because Nuxt 3 is still in beta, you’ll have to start by initializing a fresh app:
npx nuxi init project-name
The next step is to install the dependencies that were included in the generated package.json file:
cd project-name
npm install
# OR
yarn install
Once these steps are completed, we can go ahead and start our application:
npm run dev
# OR
yarn dev
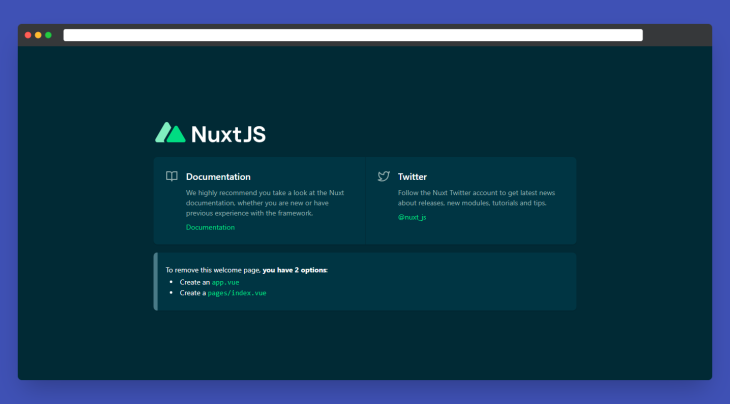
If everything works fine, a browser window should automatically open for http://localhost:3000 with an output like in the image below:
Nuxt 3 has a new cross-platform server engine that adds full-stack capabilities to Nuxt applications. Nitro engine also includes out-of-the-box serverless functionality and is believed to be the first JavaScript application server that works with a wide range of current cloud hosting services. This makes integrating APIs into your Nuxt apps a breeze.
To use this functionality, just create a new /server directory in your project root folder. This directory will hold your project’s API endpoints and server middleware, and Nuxt will automatically read any files in the /server/api directory to create API endpoints:
// server/api/hello.js
export default async (req, res) => {
 return {
 foo: "bar",
 };
};
This will generate a new API endpoint that can be accessed at http://localhost:3000/api/hello.
Nitro Engine also supports adding middleware to API endpoints. Similar to how an API works, Nuxt will read any files in the /server/middleware directory to generate server middleware for your project. But unlike API routes, which are mapped to their own routes, these files will be executed on every request. This is usually done so that you may add a common header to all responses, log responses, or alter an incoming request object.
Below is an example that adds someValue to every API request:
// server/middleware/addValue.js
export default async (req, res) => {
 req.someValue = true
}
Nuxt 3 now includes Nuxt Bridge, a forward-compatibility layer that enables you to access many of the new Nuxt 3 features by simply installing and activating a Nuxt module.
You can use Nuxt Bridge to ensure that your project is (nearly) ready for Nuxt 3 and that your developers have the greatest experience possible without having to do a large rewrite or risk breaking modifications.
While we’ve already discussed how migration with Nuxt Bridge works, you can learn more about Nuxt Bridge here.
Nuxt Context, which provides access to runtime app context from within composables, components, and plugins, has now been renamed to NuxtApp in Nuxt 3.
And within components and plugins, we can access NuxtApp with useNuxtApp:
import { useNuxtApp } from "#app";

function useMyComposable() {
 const nuxtApp = useNuxtApp();
 // access runtime nuxt app instance
 console.log(nuxtApp);
}
In addition, the inject function, which makes functions and/or values available across your Nuxt application, is now known as provide.
For example, creating a plugin that logs a provided name to the console in Nuxt 2:
// plugins/hello.js
export default ({ app }, inject) => {
 inject("hello", (name) => console.log(`Hello ${name}!`));
};

// Can be accessed using
this.$hello('Elijah')
In Nuxt 3, it becomes this:
const nuxtApp = useNuxtApp()
nuxtApp.provide('hello', (name) => console.log(`Hello ${name}!`))

// Can be accessed using
nuxtApp.$hello('Elijah');
The pages/ directory is now optional in Nuxt 3, and if it is not there, Nuxt will not include the vue-router dependency. Instead, the new app.vue serves as the core component of your Nuxt application; everything you add to it (JS and CSS) will be global and included on all pages.
This is advantageous when working on a one-page application, such as a landing page, or an application that does not require routing.
Nuxt 3 also includes support for a new composables/ directory that is used for auto-importing Vue composables into your application.
If you are not already familiar with what composables are in Vue, this was introduced in Vue 3, and you can learn more about composables here.
With the Nuxt composable directory, we can easily create both named and default composables.
Example:
// composables/useFoo.js
import { useState } from '#app'

export const useFoo = () => {
 return useState('foo', () => 'bar')
}
Our composable is exported as useFoo in this case; if no export name is supplied, the composable will be accessible as the pascalCase of the file name without the extension.
They are also auto-imported, and we can access them in any page or component:
<template>
 <div>
 {{ foo }}
 </div>
</template>

<script setup>
const foo = useFoo()
</script>
Nuxt 3 was designed to work with Vue 3. Because Nuxt 3 is developed in Vue 3, you’ll have access to features like the Composition API, enhanced module imports, and better overall app speed. Vite support is included in Nuxt 3, and it is backward compatible with Nuxt 2.
In this post, we’ve gone through the new features in Nuxt 3, as well as how to convert existing Nuxt apps to this newest version.
You should keep in mind that Nuxt 3 is still in beta, so anticipate things to break. It is also recommended that you do not utilize it in production until the first stable release.
Install LogRocket via npm or script tag. LogRocket.init() must be called client-side, not
server-side
$ npm i --save logrocket

// Code:

import LogRocket from 'logrocket';
LogRocket.init('app/id');
// Add to your HTML:

<script src="https://cdn.lr-ingest.com/LogRocket.min.js"></script>
<script>window.LogRocket && window.LogRocket.init('app/id');</script>
TSRX adds first-class control flow, conditional hooks, and scoped styles to React via a TypeScript compiler extension — no new framework required.
Learn how to build a full React Native auth system using Better Auth and Expo — with email/password login, Google OAuth, session persistence, and protected routes.
Compare the top AI development tools and models of June 2026. View updated rankings, feature breakdowns, and find the best fit for you.
Learn how Bloom filters reduce database lookups for username availability checks while preserving correctness at scale.
Hey there, want to help make our blog better?
Join LogRocket’s Content Advisory Board. You’ll help inform the type of content we create and get access to exclusive meetups, social accreditation, and swag.
Sign up now