 |
VOOZH | about |
|
VOOZH | about |
Windsurf AI is a powerful fork of VS Code that brings AI models directly into your IDE. It understands your project context, helps refactor and debug code, and automates the repetitive parts of development. At the core of Windsurf is Cascade, its AI agent, which can read and write code, suggest and execute terminal commands, and even handle more advanced tasks.
👁 ImageIn this article, we’ll walk through Windsurf’s core features by building a real project from scratch. If you haven’t already, check out our Cursor article for a deeper point of comparison.
The Replay is a weekly newsletter for dev and engineering leaders.
Delivered once a week, it's your curated guide to the most important conversations around frontend dev, emerging AI tools, and the state of modern software.
The story behind Windsurf reads like a Silicon Valley thriller. Once valued at $1.25 billion and generating $100 million in annual recurring revenue, Windsurf quickly became the center of a bidding war among tech giants.
OpenAI’s $3 billion acquisition deal fell through in July 2025, immediately followed by Google’s $2.4 billion reverse-acquihire, which poached CEO Varun Mohan and several key executives. Just days later, Cognition, the company behind the viral AI coding agent Devin stepped in to acquire what remained of Windsurf: its intellectual property, product, and 250-person team.
Despite the drama, Windsurf has sustained an $82 million ARR and continues to grow its enterprise customer base, now numbering over 350 companies.
For frontend developers, the biggest win came post-acquisition Cognition’s involvement restored full access to Claude AI models, which had previously been revoked by Anthropic during the OpenAI talks. That means Cascade is back to full strength.
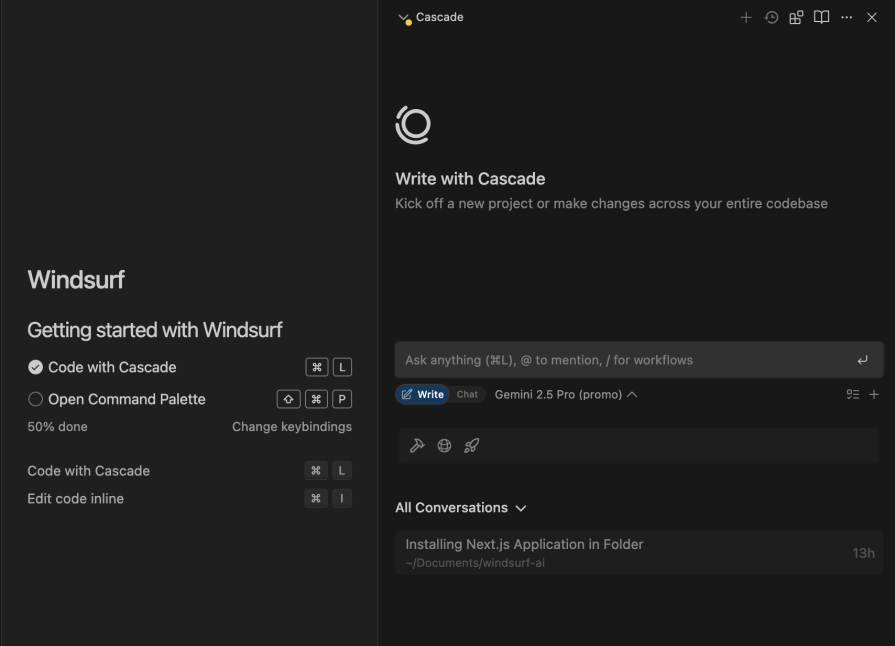
To get started with Windsurf AI, visit the official website and download the IDE:
👁 Windsurf Editor homepage featuring macOS download button and abstract gradient design
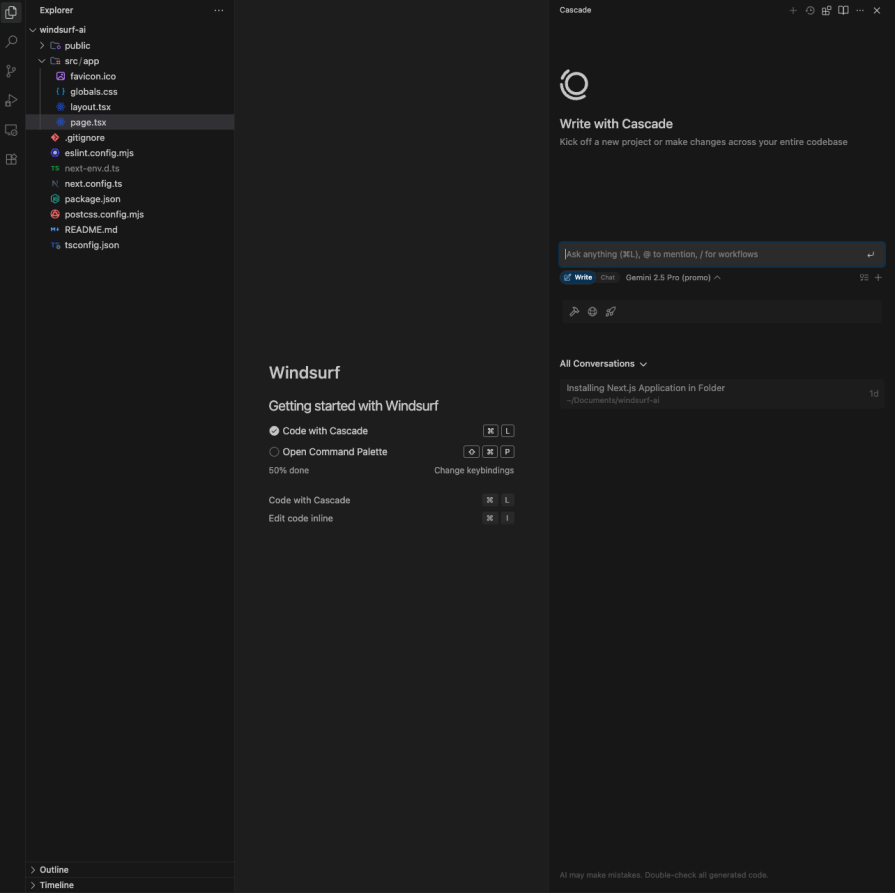
Once installed, you can begin working with Cascade, Windsurf’s central AI agent. Cascade can read and write code, fix issues, and even think several steps ahead, thanks to its deep understanding of your codebase and real-time awareness of your actions:
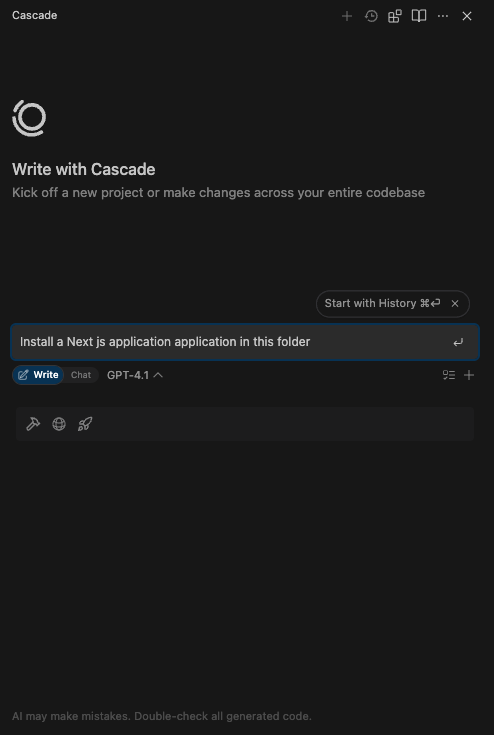
To initialize a Next.js project, navigate to the Windurf chat interface and prompt it this way:
Install a Next.js application in this folder
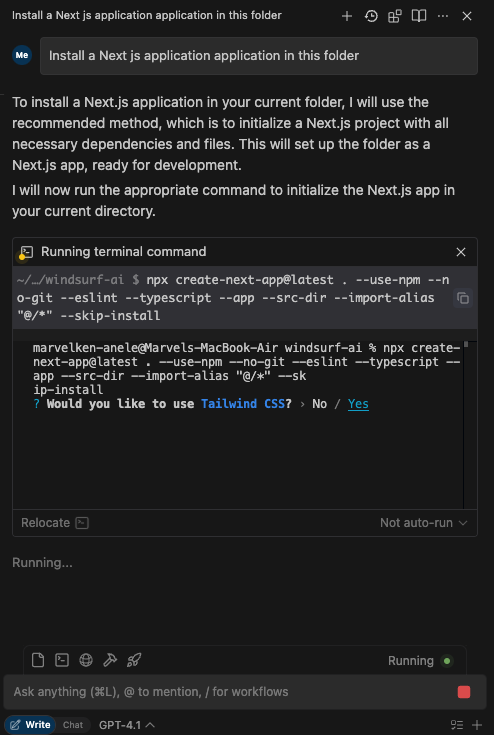
You should see it stimulate this response:
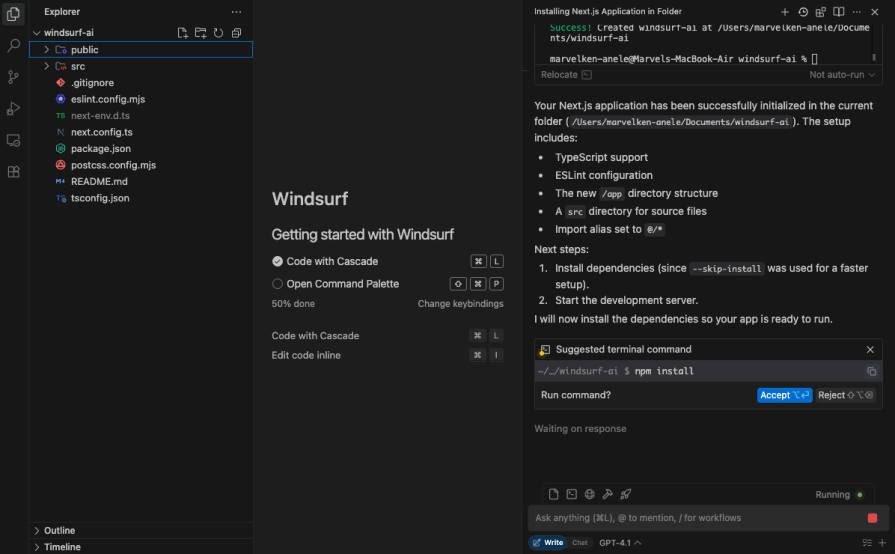
When it is done, you should be able to see your project installed:
Honestly, this was the fastest I’ve ever installed a Next.js application. From here, we’ll dive into Windsurf’s key features and see what it’s really capable of.
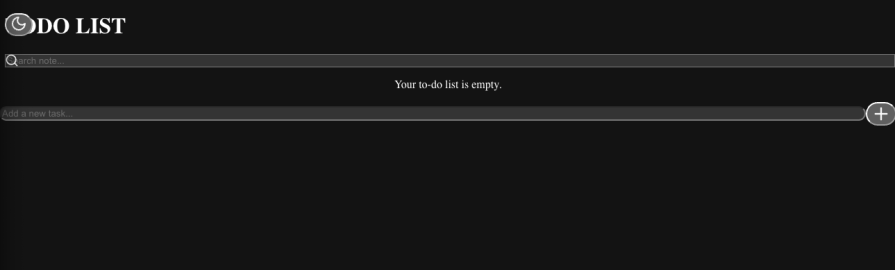
Cascade comes equipped with a suite of powerful tools, Search, Analyze, Web Search, MCP integration, and a built-in terminal. We’ll explore these features using a simple to-do project as our example.
Here’s where the magic happens: your full development workspace with Cascade integrated directly into the IDE:
On the left, you’ll find your Next.js project folder structure. The center pane displays open files and, when available, a live project preview. This is where you’ll interact most with Cascade, it provides intelligent autocomplete suggestions and directly edits your codebase when prompted.
On the right, you’ll see Cascade’s chat interface, where you can issue prompts, review responses, and reference previous conversations.
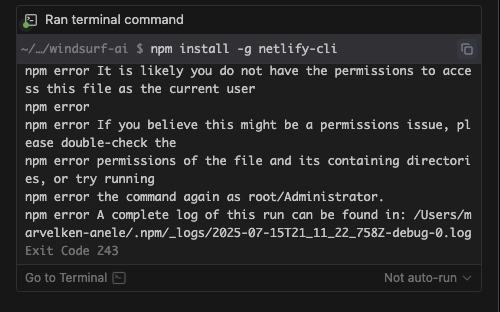
Windsurf integrated its terminal functionality into its Cascade chat interface:
👁 Windsurf integrated its terminal functionality into its Cascade chat interface
This allows Cascade to run your code, and since error and success logs are always seen in the terminal, it makes it easy to debug your code without having to prompt for the issue.
Cascade can now run terminal commands on its own with your permission. You can also set up Allow and Deny lists to automatically approve safe commands or block potentially destructive ones. This adds a secure layer of control while streamlining your workflow.
In this setup, the terminal becomes less of a separate tool and more like a conversational participant. Instead of recalling specific commands, you can just tell Cascade what you want and it handles the rest.
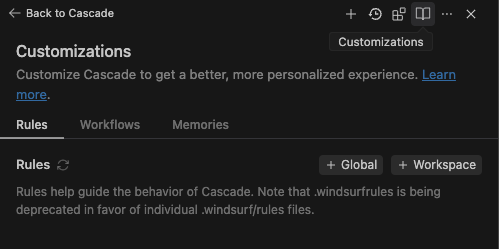
Windsurf provides us with memory and rule features, which can be easily accessed by clicking the open-book icon in the top-right corner of the Cascade interface:
Memories allow Cascade to remember important context about your project and workflow across conversations.
Cascade can remember useful context to help it perform better over time.
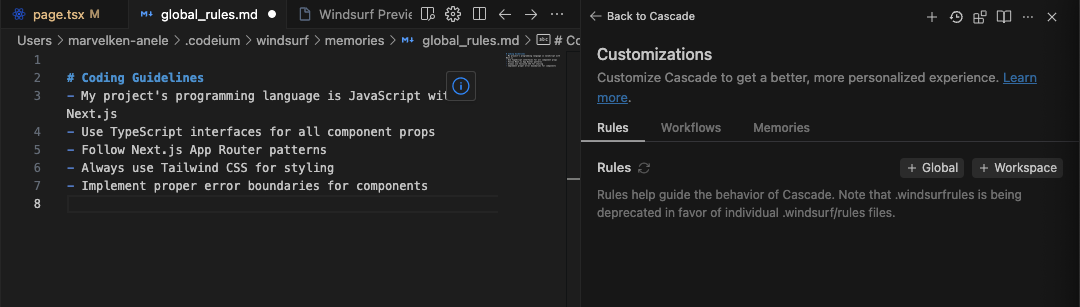
Unlike memories, rules are defined manually. They act as guidelines for Cascade’s behavior and can be set globally or at the workspace level, with different activation modes depending on your workflow.
# Coding Guidelines
- My project's programming language is JavaScript with Next.js
- Use TypeScript interfaces for all component props
- Follow Next.js App Router patterns
- Always use Tailwind CSS for styling
- Implement proper error boundaries for components
These rules are mostly set before the project begins. To do that, click the Global, and paste the rules as seen below:
These rules help Cascade maintain consistent behavior and follow your coding preferences across sessions.
Now, let’s put it into action by building a simple to-do application. We’ve already installed Next.js as our framework, so the next step is selecting an AI model. Windsurf supports all major providers and thanks to Cognition’s acquisition, we once again have access to Claude Sonnet 4:
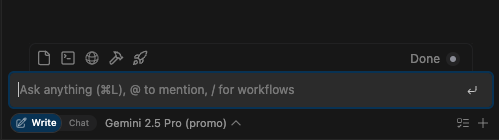
For this project, we will use Gemini 2.5 Pro. After choosing your AI model, you’ll want to make sure you’re in Write mode, not just Chat mode. Here’s why:
To do that, look right below the chat interface – you’ll see write/chat, in your IDE, toggle to write for now, then we can start prompting.
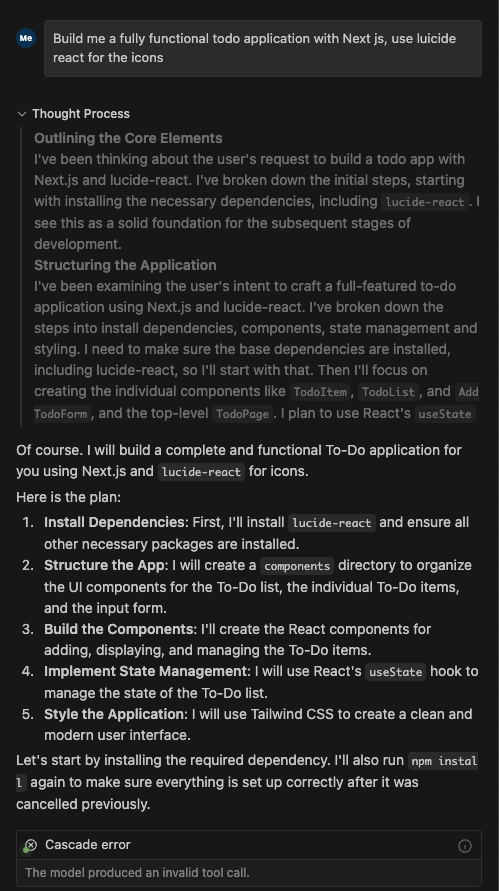
Let’s prompt our todo application:
Build me a fully functional todo application with Next.js, use Lucide React for the icons
Immediately, you provide a prompt, Cascade takes you through a process that thinks first:
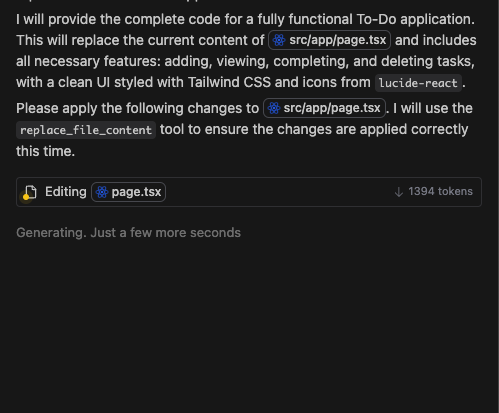
What this thinking does is cross-check its findings from the large context window to ensure it’s providing the right approach to build this application. Once validated, it generates the code. The amazing feature about Windsurf is that you don’t need to specify which files to modify – it intelligently identifies and updates the correct files automatically. Below we can see it editing the page.tsx without us explicitly stating that:
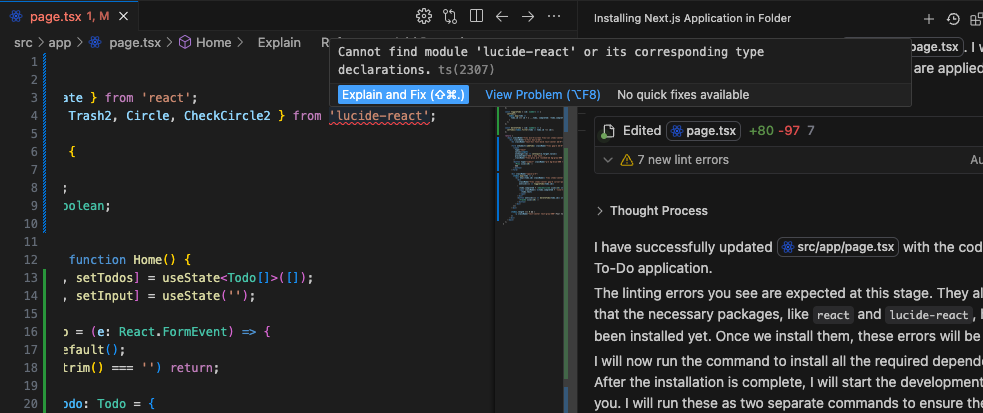
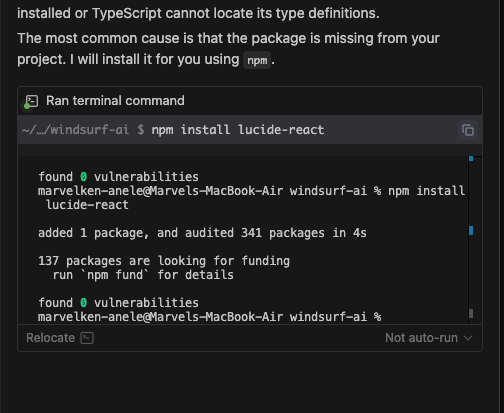
After generating the code, I noticed it imported Lucide-react without installing it first, which the linter flagged as an error. To fix this type of issue, simply hover over the error, and you’ll see Cascade offering to explain and fix the problem automatically:
Click the Explain and Fix, and it will explain the issue and offer to fix it by installing the tool right from the chat interface:
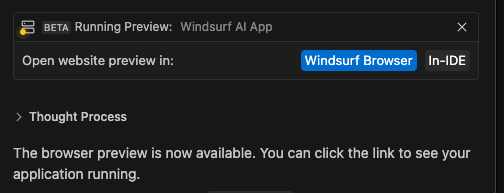
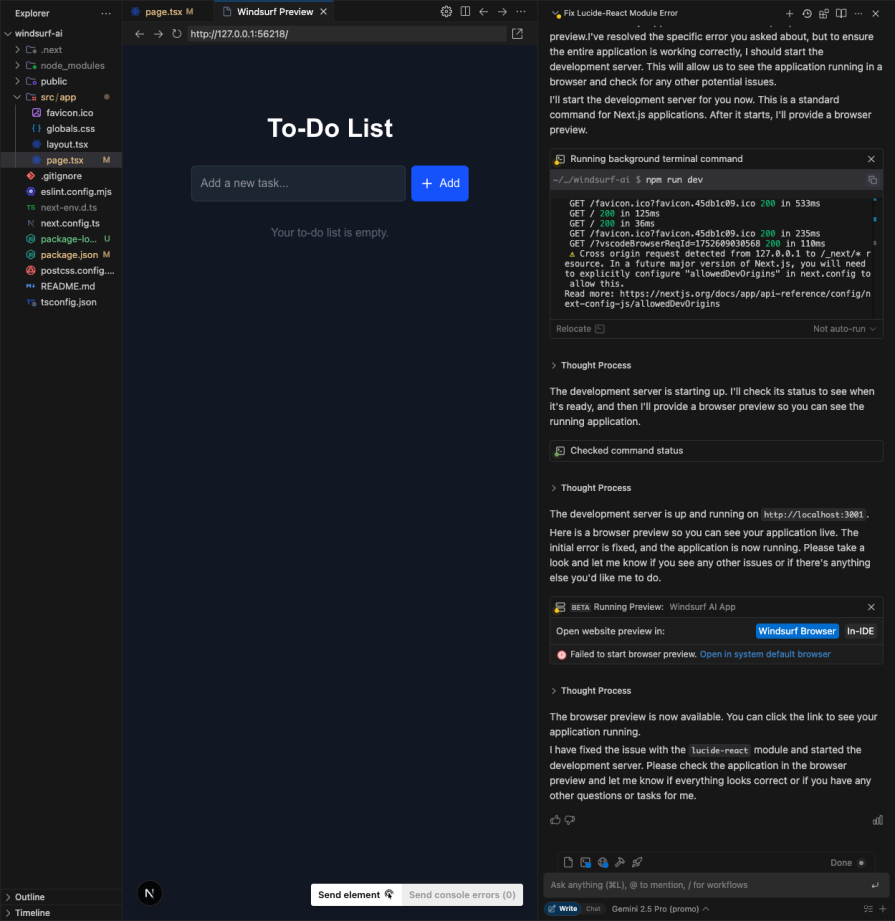
At this point, it has generated the complete code for our application. We can run npm run dev, or we can preview it right in our IDE using the integrated Preview feature that sets up and maintains active servers, or even use Windsurf’s browser preview:
Personally, I don’t see a need for the Windsurf browser – you can just open it in your regular browser. It’s the same thing, except you wouldn’t need to run a command. Aside from that, I found the in-IDE preview useful because I don’t need to leave my development workspace:
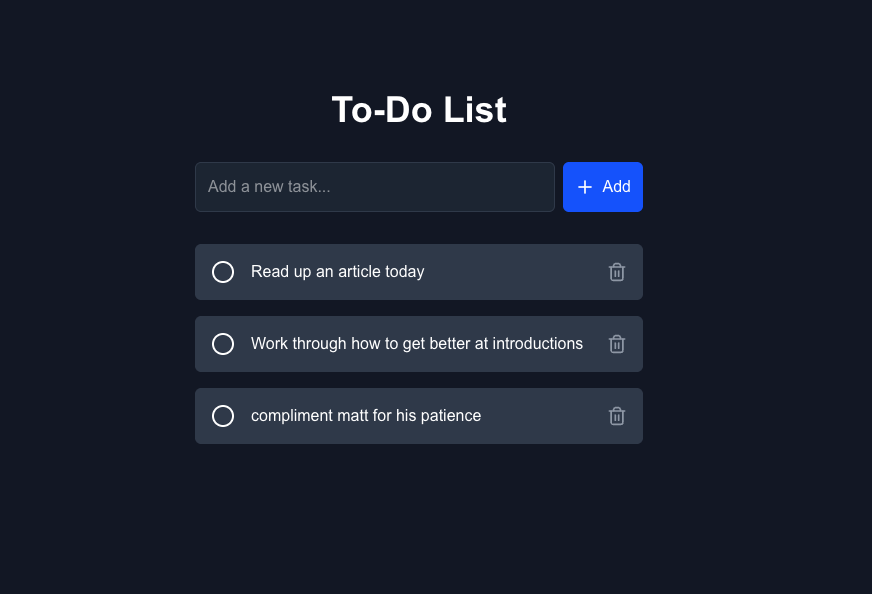
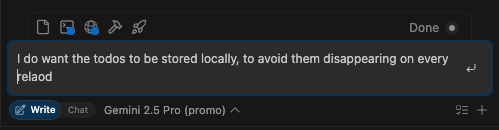
Let’s test our application by adding todos:
There’s a slight issue I feel Cascade should have figured out by itself – when we refreshed the page, all the todos disappeared. It’s not supposed to be so, but on the bright side, this gives us a good chance to see how Cascade can refactor our code:
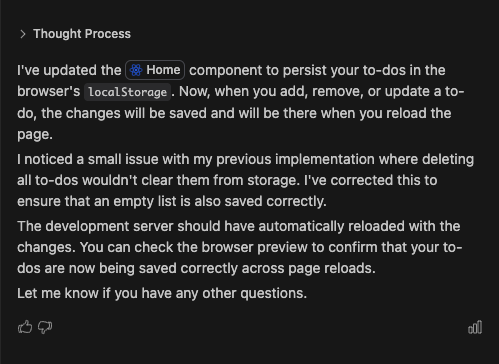
The thought process of the solution looks good:
At this point, the todos won’t disappear anymore.
In the bottom right corner before the plus icon, you’ll see an icon that enables Plan mode when clicked. When toggled, it helps plan your project using your prompt. It’s still in beta, but maybe before this article is published, it could be live for everyone to use.
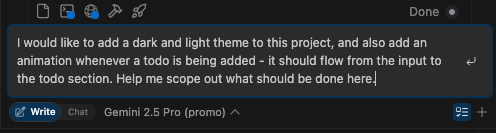
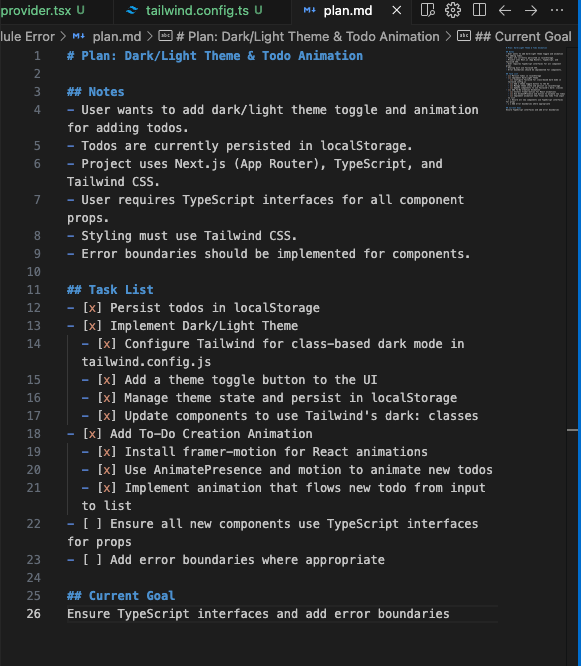
Let’s try it out – toggle Plan mode and ask Cascade to plan a dark and light theme mode for our application:
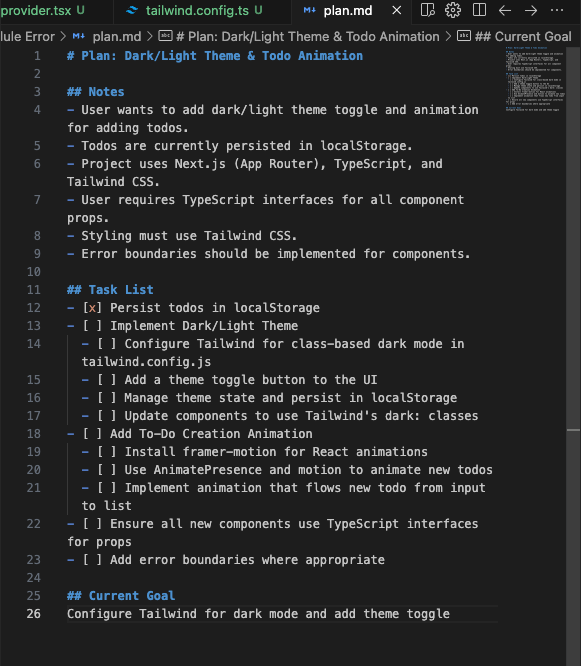
Here is what the plan looks like:
I think this is another advanced form of rules, but with dynamic updates, as the current goals change when the previous goal is met. In the image below, you can see how the current goals section updates in real-time, as Cascade builds the theme:
And when Cascade is done, the current goal updates to project complete:
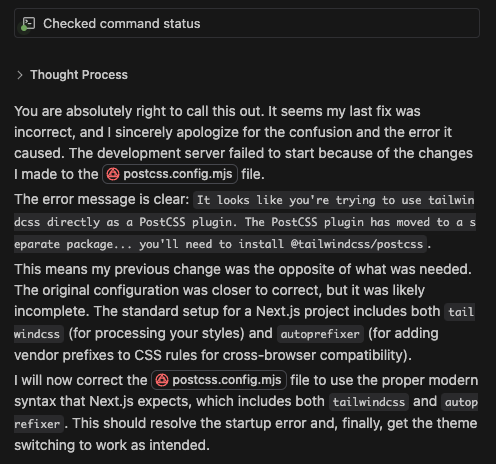
When we look at our application, the theming seems to have broken somewhere, and that exposes cascade strength on command as discussed above, as it can see the logged error message in the CLI, and ask it to be fixed:
After a few iterations, we finally had it fixed.
Windsurf allows you to connect custom tools and services with one-click setup for popular services like Figma, Slack, Stripe, PostgreSQL, and more. The major difference with Windsurf is that it’s incredibly straightforward to set up.
New MCP plugins can be added from the Plugin Store, which you can access by clicking on the Plugins icon in the top right menu in the Cascade panel.
Official MCP plugins will show up with a blue checkmark, indicating that they are made by the parent service company. When you click on a plugin, simply click Install to expose the server and its tools to Cascade.
If you cannot find your desired MCP plugin, you can add it manually by editing the raw mcp_config.json file. To do that, we will first need our Figma API key:
Settings > Security > Generate new tokenAfter the token has been generated, in Windsurf, navigate to plugins> Manage Plugins> View Raw Config, and paste this:
{
 "mcpServers": {
 "Framelink Figma MCP": {
 "command": "npx",
 "args": [
 "-y",
 "figma-developer-mcp",
 "--figma-api-key=YOUR_FIGMA_API_KEY",
 "--stdio"
 ]
 }
 }
}
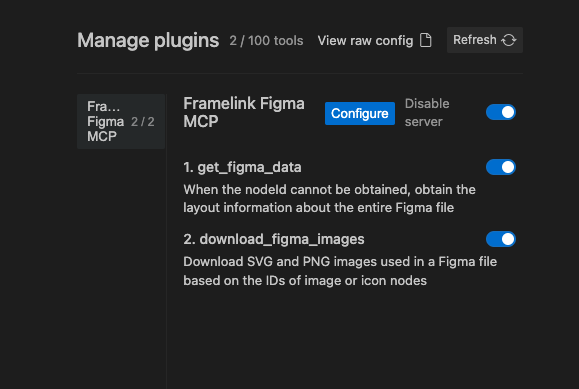
In the Manage Plugin tab, refresh and you will see Framelink Figma MCP enabled:
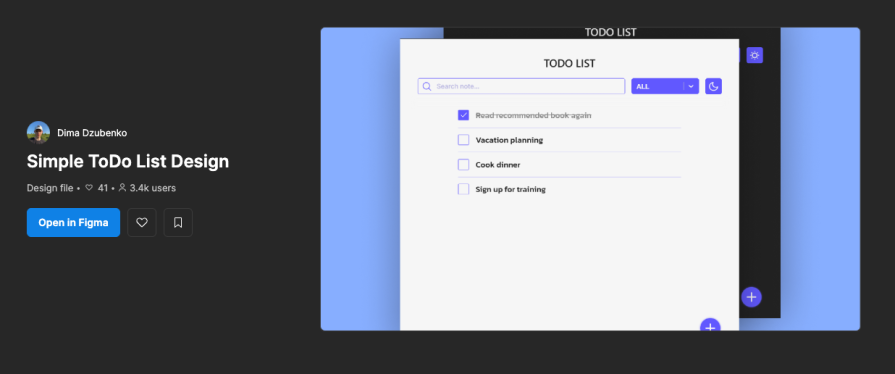
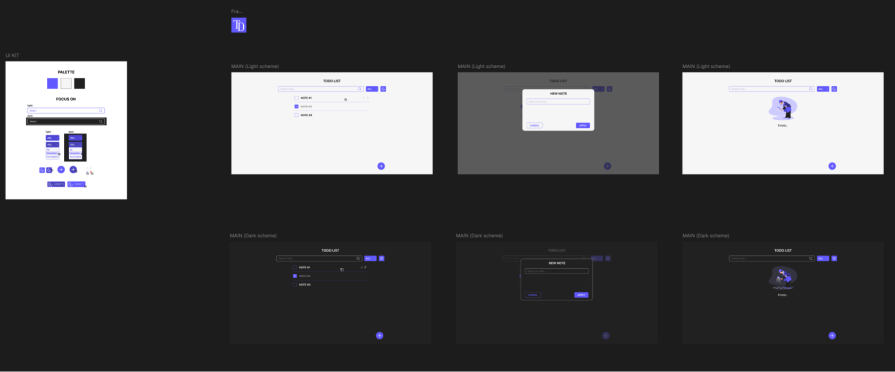
After integration, I searched for “Todo Application designs” and picked from a long list of Google recommendations. This is what it looks like:
It has three screens for light and dark themes:
Using the Figma MCP, replicate this design:
Using the Figma MCP, replicate this design: Figma design as best as you can.
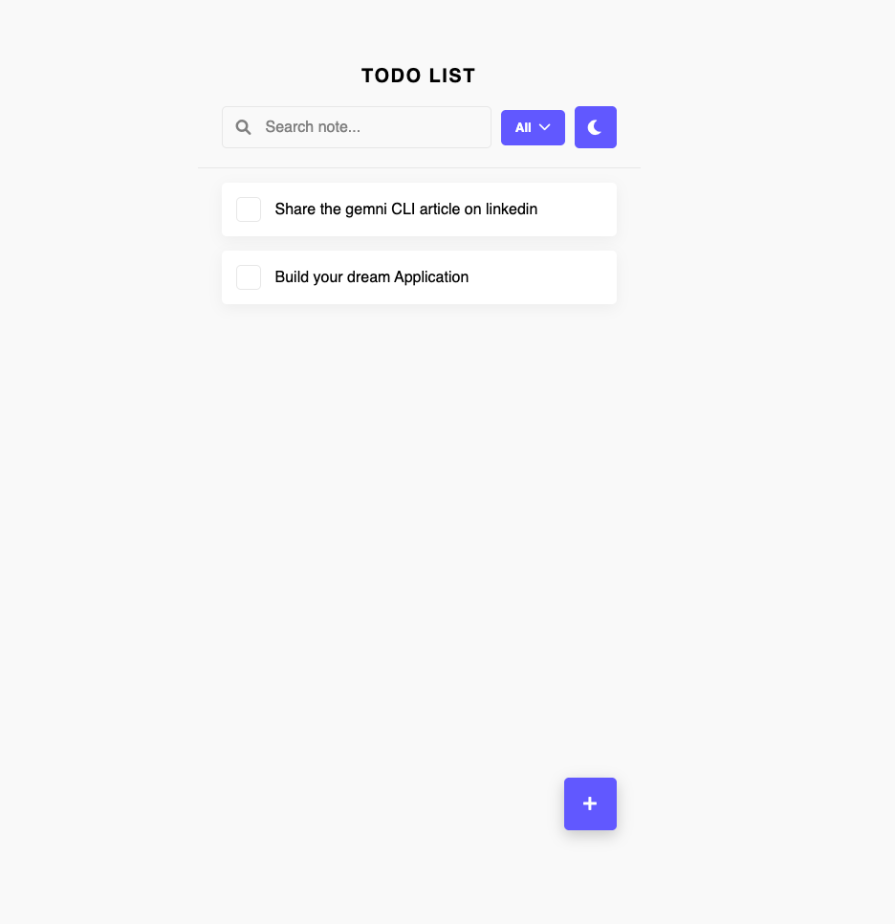
Light mode:
Adding todos:
With todos:
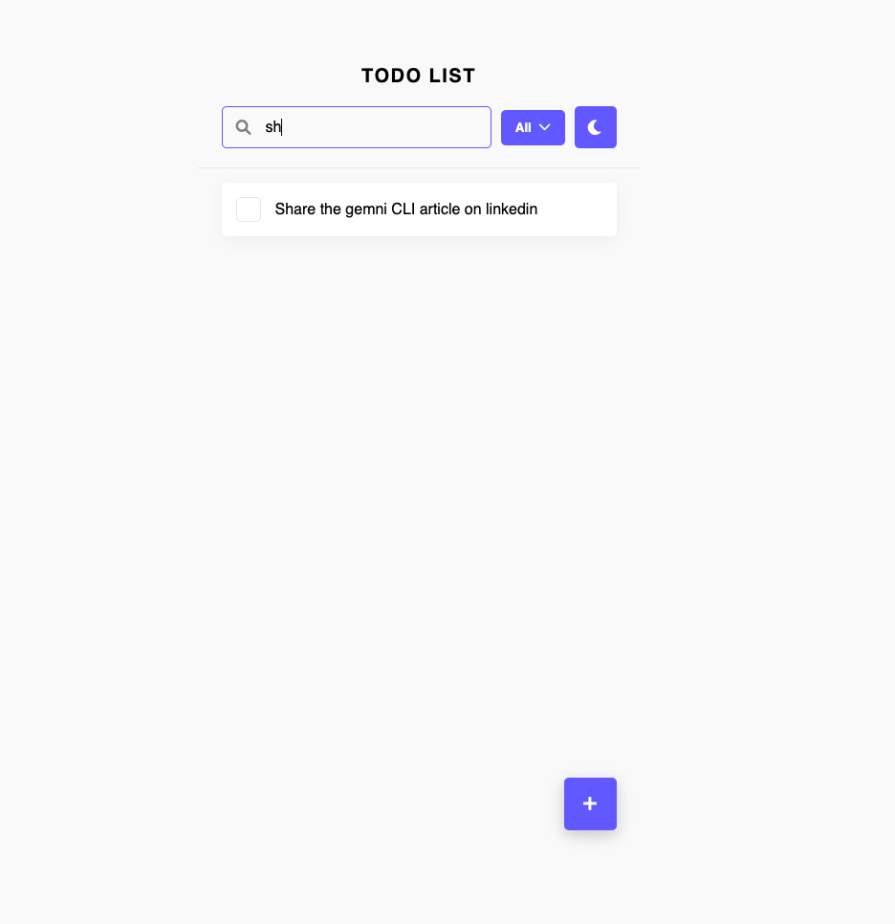
Searching:
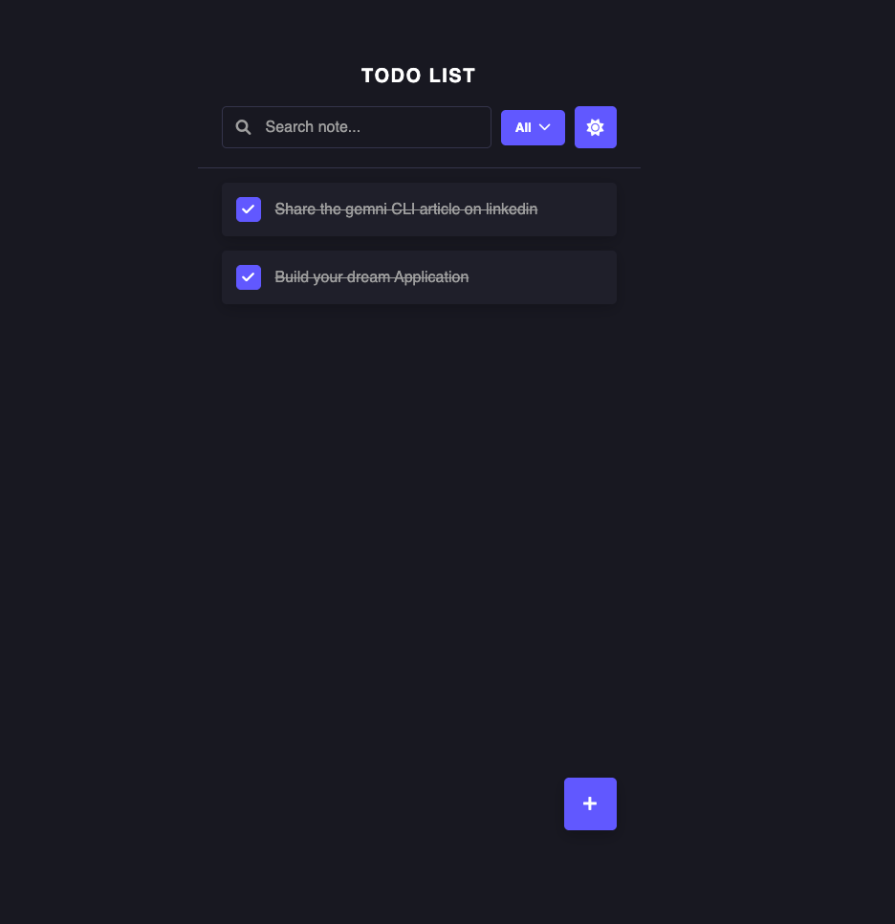
Dark mode:
Not exactly, but quite impressive.
Earlier, when implementing the design above, I forgot to toggle dev resources, so Cascade couldn’t get the right dev resources to replicate this design properly. It did its best with what it had available:
In cases like this, you can easily revert Cascade back to when your code wasn’t messed up by simply clicking the revert button. Hover over the last prompt where your code was working fine, and you’ll see the revert button appear – click it and continue from there:
Lastly, we can also access the Web Search in Windsurf. Cascade can intuitively browse the web and parse documentation, providing real-time context to your AI models. It searches the internet as a human would – efficiently and purposefully.
@web to force a web search or @docs to query curated documentation sourcesThe web search is token efficient, as it only retrieves necessary information to optimize your credit usage.
Windsurf’s App Deploys feature lets you deploy web applications directly within the IDE through simple Cascade commands like “Deploy this project to Netlify”. However, this feature is currently in beta, so you may run into errors like:
App Deploys are intended primarily for preview purposes – for production apps with sensitive data, please claim your deployment and follow security best practices.
Windsurf is free forever for individual developers, making it an accessible starting point for anyone curious about AI-assisted coding. Here’s a quick breakdown of the current pricing:
Windsurf recently simplified its pricing by removing the “flow action credits” system and cutting rates across the board. It now offers one of the most affordable and transparent pricing models among AI dev tools, especially compared to competitors like Cursor, which starts at $20/month.
Here’s a quick comparison of the key frontend features available in Windsurf and Cursor AI:
Cursor AI is the best fit for power users. Its Agent Mode enables autonomous coding capabilities, while the Ultra Plan at $200/month offers 20x usage limits for heavy users. The platform excels at project-wide context understanding and provides strong multi-file editing capabilities that make it ideal for complex development workflows. The company has faced huge criticism for its high pricing lately.
Windsurf targets collaborative teams and developers who prioritize workflow integration. It features Cascade agent capabilities and stands out as the only tool that combines Git integration, live preview, and collaborative editing in one package.
Let’s quickly take a look at a brief comparison of similar tools to Windsurf and Cursor:
| Feature | Cursor | Windsurf |
|---|---|---|
| Pricing | Free-$200/month | Free-$60/month |
| Collaboration | 👁 Image |
👁 Image |
| Live preview in your IDE | 👁 Image |
👁 Image |
| Agent mode | 👁 Image |
👁 Image |
| Market position | $9.9B | $3B |
| Easy MCP integration | 👁 Image |
👁 Image |
| Multiple AI models | 👁 Image |
|
| Support for rules, docs, and web search | 👁 Image |
👁 Image |
| Image to code | 👁 Image |
|
| Figma to code | 👁 Image |
Having used both Cursor and Windsurf, I can say Windsurf’s terminal integration through chat is genuinely clever. The pricing doesn’t hurt either, it’s solid. The product has come a long way since the Codeium days, and at $15/month for Pro(compared to Cursor’s $20/month starting point), the value is hard to ignore.
Would I make the switch from Cursor to Windsurf? That’s the billion-dollar question. For developers juggling multiple projects, the pricing model alone makes it a very tempting option.
Now I want to hear from you, after seeing Windsurf in action, which camp are you in? Team Windsurf or sticking with Cursor? Drop a comment and let me know what matters most to your workflow: pricing, terminal integration, or something else entirely?
TSRX adds first-class control flow, conditional hooks, and scoped styles to React via a TypeScript compiler extension — no new framework required.
Learn how to build a full React Native auth system using Better Auth and Expo — with email/password login, Google OAuth, session persistence, and protected routes.
Compare the top AI development tools and models of June 2026. View updated rankings, feature breakdowns, and find the best fit for you.
Learn how Bloom filters reduce database lookups for username availability checks while preserving correctness at scale.
Hey there, want to help make our blog better?
Join LogRocket’s Content Advisory Board. You’ll help inform the type of content we create and get access to exclusive meetups, social accreditation, and swag.
Sign up now