
Trending
- DZone
- Testing, Deployment, and Maintenance
- Deployment
- How to Integrate Your GitHub Repository to Your Jenkins Project
How to Integrate Your GitHub Repository to Your Jenkins Project
Integrating your SCM tool with your CI tool saves you time and keeps your project updated all the time.
Join the DZone community and get the full member experience.
Join For FreeOne of the basic steps of implementing CI/CD is integrating your SCM (source control management) tool with your CI tool. This saves you time and keeps your project updated all the time. One of the most popular and valuable SCM tools is GitHub. In this article, we will explain how to integrate Jenkins with GitHub projects.
The integration presented in this post will teach you to:
- Schedule your build.
- Pull your code and data files from your GitHub repository to your Jenkins machine.
- Automatically trigger each build on the Jenkins server, after each Commit on your Git repository.
But first, let's configure the GitHUb and Jenkins integration. Let's begin with the GitHub side!
Step 1: Go to your GitHub repository and click on Settings.
👁 Image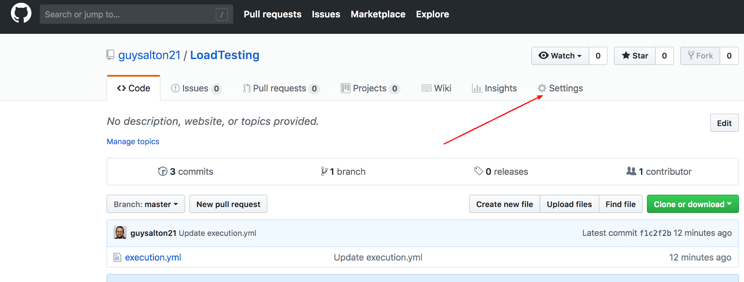
Step 2: Click on Webhooks and then click on Add webhook.
👁 Image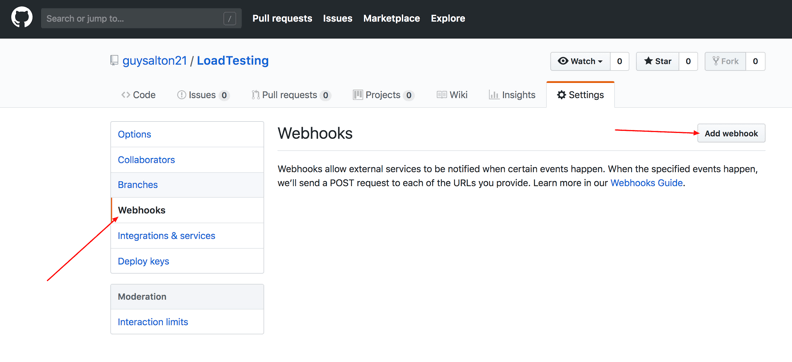
Step 3: In the Payload URL field, paste your Jenkins environment URL. At the end of this URL, add /github-webhook/. In the Content type select application/json and leave the Secret field empty.
👁 Image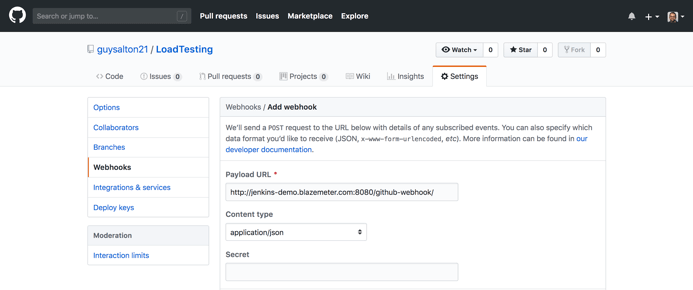
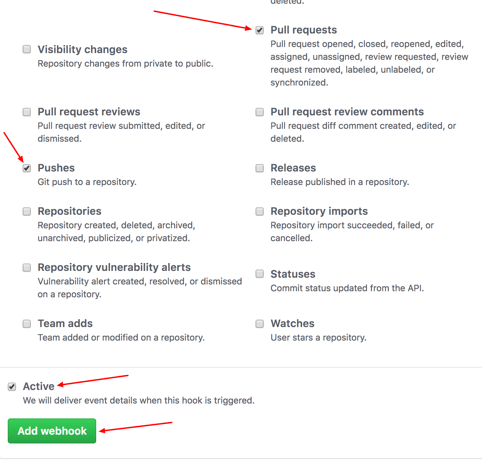
Step 4: In the 'Which events would you like to trigger this webhook?' section, choose Let me select individual events. Then, check Pull Requests and Pushes. At the end of this option, make sure that Active is checked and click on Add webhook.
👁 Image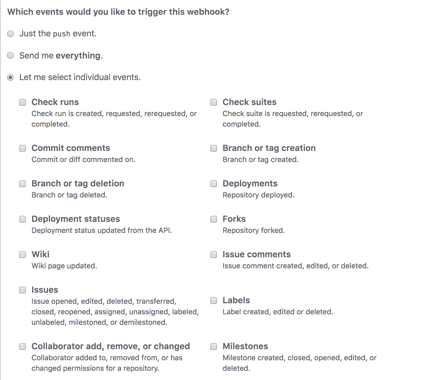
👁 Image
We're done with the configuration on GitHub's side! Now, let's move on to Jenkins.
Step 5: In Jenkins, click on New Item to create a new project.
👁 Image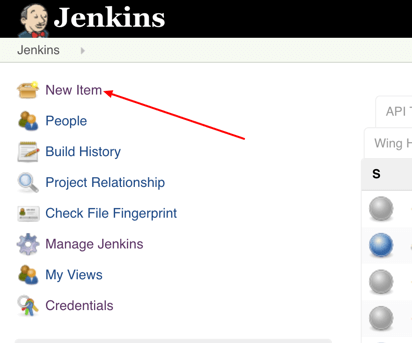
Step 6: Give your project a name, them choose Freestyle project and finally, click OK.
👁 Image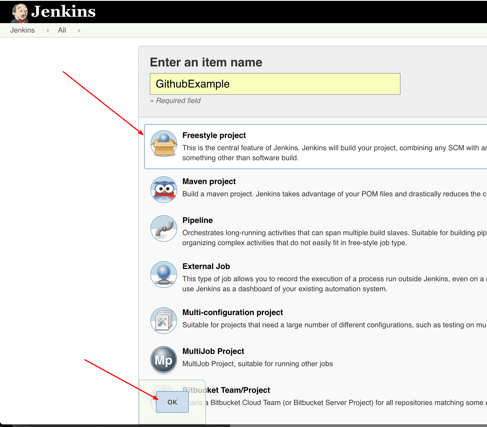
Step 7: Click on the Source Code Management tab.
👁 Image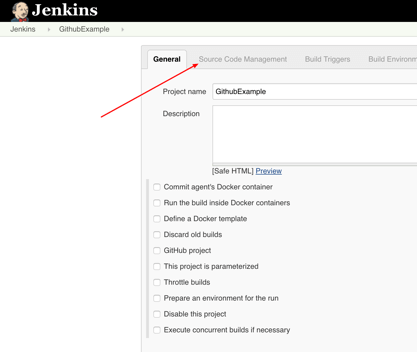
Step 8: Click on Git and paste your GitHub repository URL in the Repository URL field.
👁 Image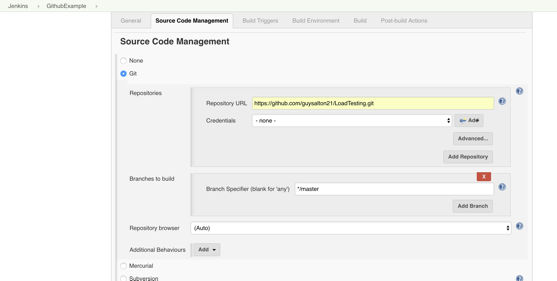
Step 9: Click on the Build Triggers tab and then on the GitHub hook trigger for GITScm polling. Or, choose the trigger of your choice.
👁 Image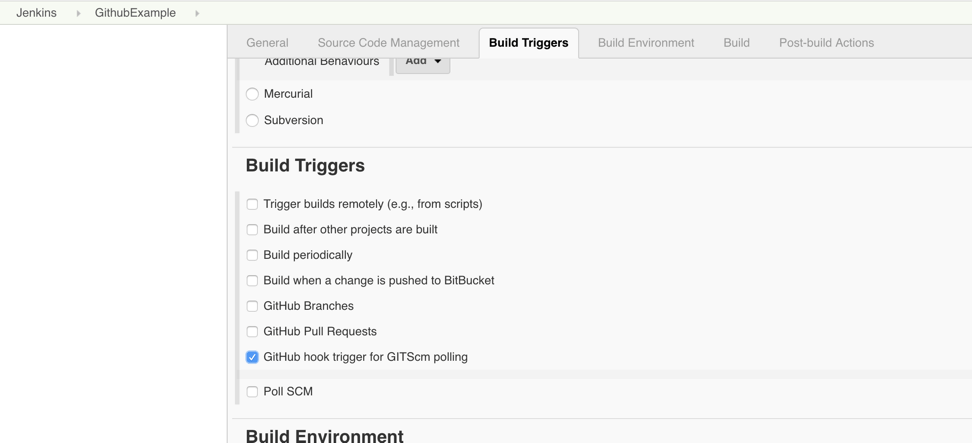
That's it! Your GitHub repository is integrated with your Jenkins project. You can now use any of the files found in the GitHub repository and trigger the Jenkins job to run with every code commit.
For example, I will show you how to run a Taurus script that I uploaded to my GitHub repository from my Jenkins project.
Step 10: Click on the Build tab, then click on Add build step and choose Execute shell.
👁 Image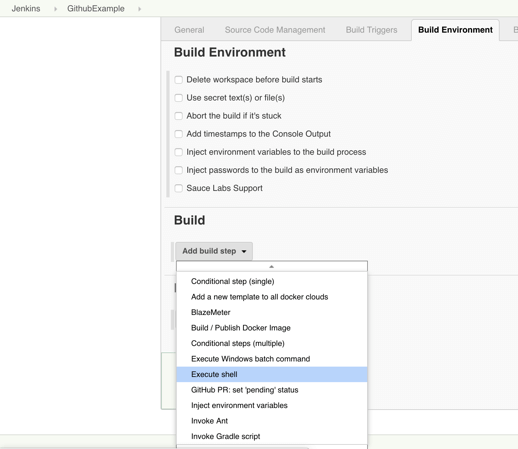
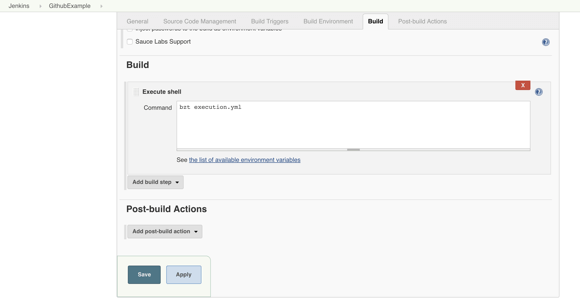
Step 11: To run a Taurus test, simply use the bzt command, followed by the name of your YML file and click on Save.
Step 12: Go back to your GitHub repository, edit the Taurus script, and commit the changes. We will now see how Jenkins ran the script after the commit.
👁 Image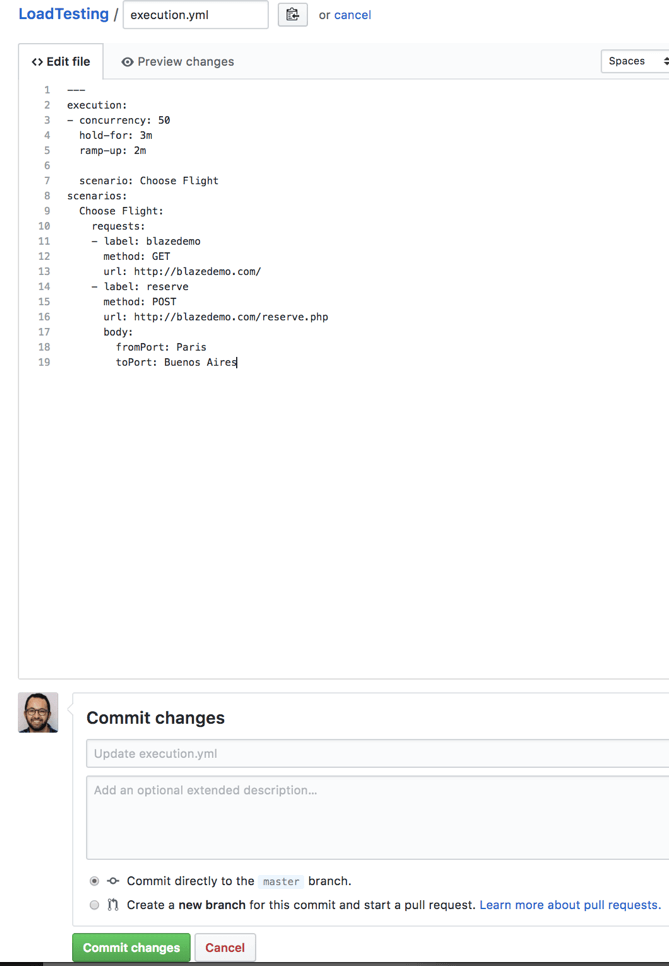
Step 13: Go back to your Jenkins project and you'll see that a new job was triggered automatically from the commit we made at the previous step. Click on the little arrow next to the job and choose Console Output.
👁 Image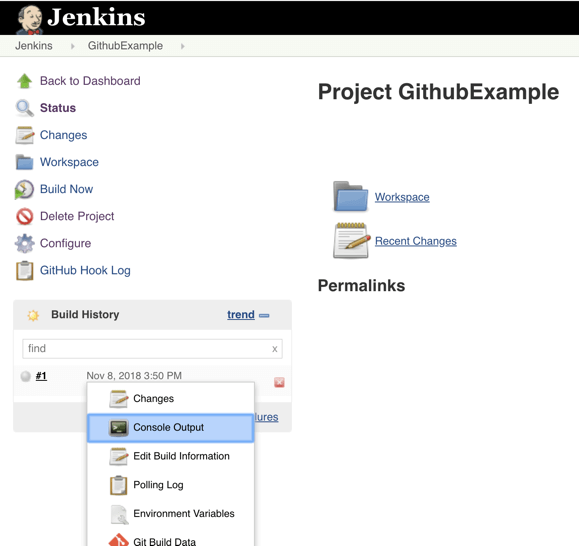
Step 14: You can see that Jenkins was able to pull the Taurus script and run it!
👁 Image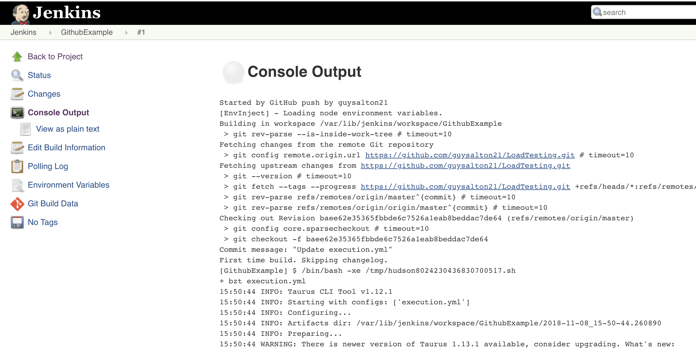
Congratulations! Every time you publish your changes to Github, GitHub will trigger your new Jenkins job.
Once the GitHub plugin is fully installed and integrated into your Jenkins project, you have completed a very crucial step towards the full CI process. Now, you can proceed to the testing phase. To complete the full CI process, integrate your load testing into your CI tool. For more details about how to do this with Taurus, an open-source automation tool, see here.
Published at DZone with permission of Guy Salton. See the original article here.
Opinions expressed by DZone contributors are their own.
Related
-
Jenkins in the Age of Kubernetes: Strengths, Weaknesses, and Its Future in CI/CD
-
CI/CD: 5 Simple Steps To Deploy a Mule 4 Application in CloudHub Using Jenkins and GitHub
-
Build a GitHub Slack Bot With AWS Bedrock and MCP, Part 2
-
Build a GitHub Slack Bot With AWS Bedrock and MCP, Part 1