
- DZone
- Data Engineering
- Databases
- How to Use Backendless With React.js, Part 4: Build and Deploy
How to Use Backendless With React.js, Part 4: Build and Deploy
A quick post to finish off the series, we run a few commands to build and deploy the app we've created.
Join the DZone community and get the full member experience.
Join For Free
In this article, we are going to continue developing our React.js web application using Backendless for the backend. This is Part 4 of our series, so be sure you've read through parts 1-3, linked below:
- How to Use Backendless With React.js
- How to Use Backendless With React.js, Part 2: CRUD Tutorial
- How to Use Backendless With React.js: Real-Time Database Integration Tutorial
If you have already read those then read on. Otherwise, we recommend you either read read all of the articles and build the app step-by-step, or you can clone the app from this GitHub repository and use this commit as a starting point. Today we will build our app for the first time and deploy it to Backendless Files.
Build the App
We will deploy our app as static files into Backendless Files, and the app will be served by a URL like this one: https://backendlessappcontent.com/{APP_ID}/{REST_API_KEY}/some/directory/index.html. All app assets and files must be defined with a relative path; you can get more info here. Simply add the key/value pair to the package.json file:
"homepage": ".",Now run the build npm script command:
npm run buildA new directory, build, must be created.
Deploy the App
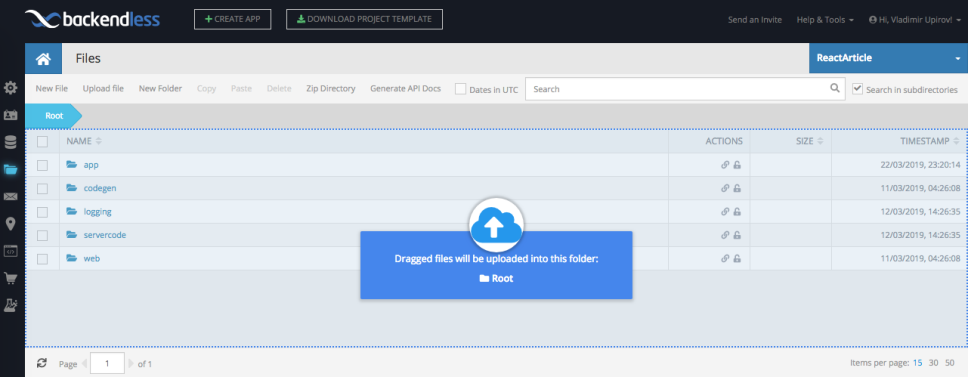
Next, let's archive the builddirectory and drag and drop it into Backendless Files:
👁 Image
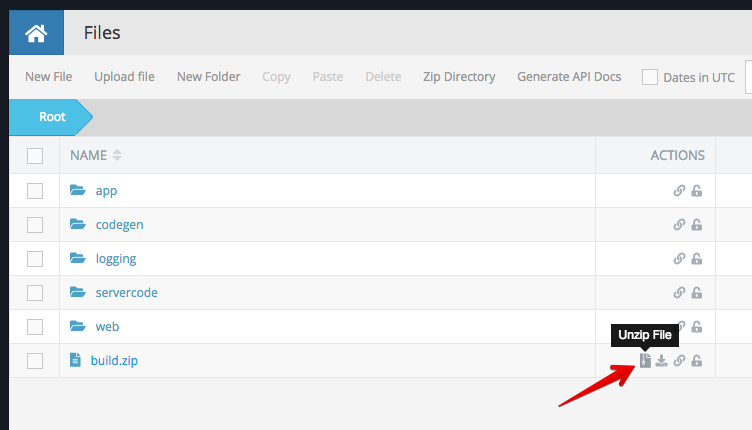
Then unzip the build.zipfile:
👁 Image
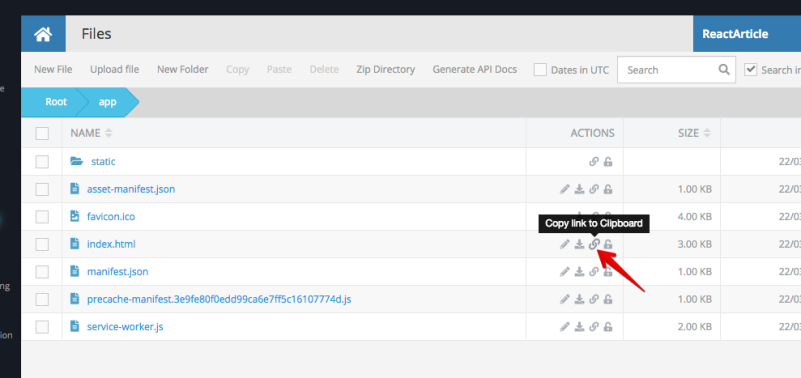
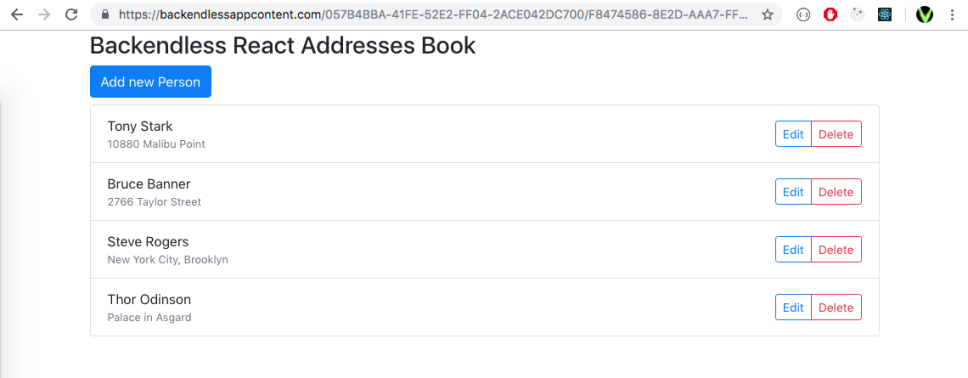
Remove everything from the unzipped directory into the appfolder (I created this folder earlier; you can create it now if you don't have one). Now copy the link to the index.htmlfile to the clipboard and paste it into a new browser page.
Here we go, it works. You can test the app I've built at this link.
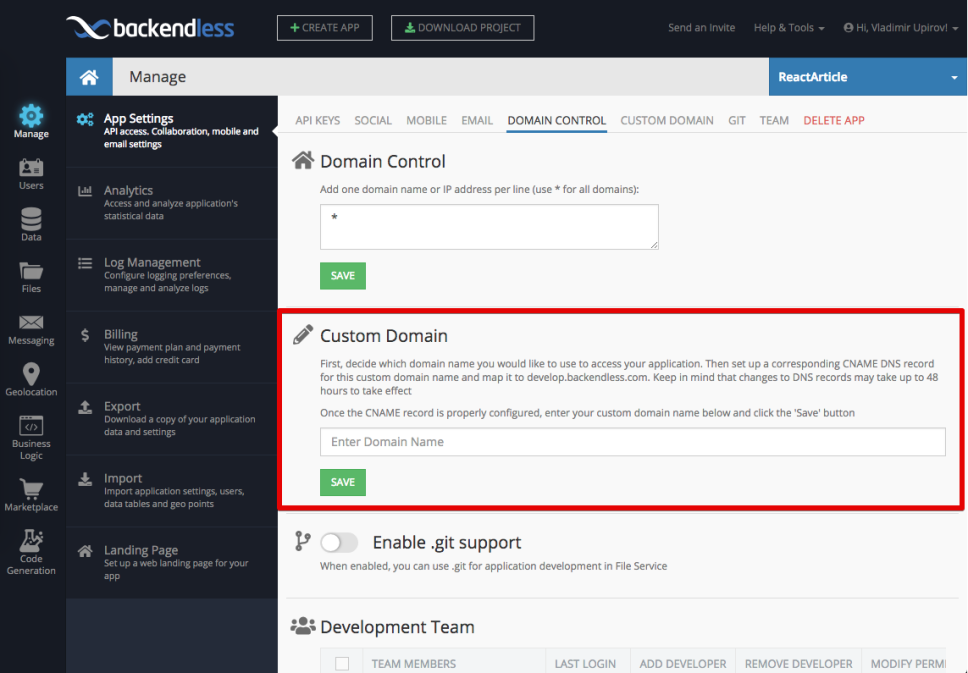
Custom Domain
If you've got your own domain, you can deploy the app into the directory, then go to the Backendless App Setting page and specify the domain there:
In this case, your React app will be served on "http://my-custom-domain.com." You can read more about custom domains in the docs.
Thanks for reading and I hope you enjoyed the series!
If you enjoyed this article and want to learn more about React, check out this collection of tutorials and articles on all things React.
Published at DZone with permission of Vladimir Upirov. See the original article here.
Opinions expressed by DZone contributors are their own.
Related
-
How to Build a Full-Stack App With Next.js, Prisma, Postgres, and Fastify
-
Build a Plagiarism Checker Using Machine Learning
-
Expert Techniques to Trim Your Docker Images and Speed Up Build Times
-
Build Quicker With Zipper: Building a Ping Pong Ranking App Using TypeScript Functions