
Trending
- Stop Choosing Sides: An Engineering Leader's Framework for Build, Buy, and Hybrid AI Agents in 2026
- WebSocket Debugging Without a Proxy — A Browser-First Workflow
- Building AI-Powered Java Applications With Jakarta EE and LangChain4j
- The Hidden Cost of AI Tokens: Engineering Patterns for 10x Resource Efficiency
Integrating Mule and RabbitMQ
RabbitMQ can be deployed in distributed environments to meet high-scale, high-availability requirements.
Join the DZone community and get the full member experience.
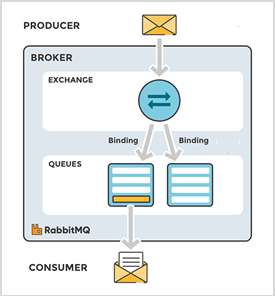
Join For FreeRabbitMQis one of the open source message brokers or queue manager software, which uses Advanced Message Queuing Protocol (AMQP). It implements a broker architecture, meaning that messages are queued on a central node called Exchange before being sent to clients. This approach makes RabbitMQ very easy to use and deploy. RabbitMQ can be deployed in distributed environments to meet high-scale, high-availability requirements.
The Message Flow in RabbitMQ
Objective
Integrating RabbitMQ with Mule and publishing an Employee Details onto a queue using RabbitMQ.
Prerequisites
- Mule Anypoint Studio.
- RabbitMQ server and server details.
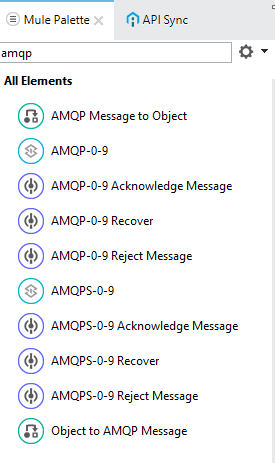
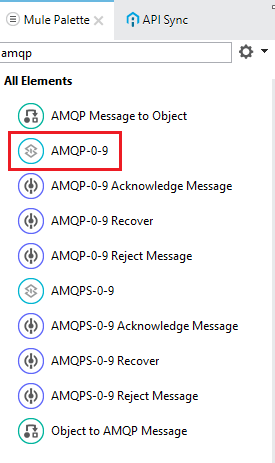
To Integrate RabbitMQ with Mule, you need to have AMQP connector installed in Anypoint studio. So, first, download and install AMQP connector from the Anypoint exchange. Once the connector is installed, you can find all the endpoints and transformers related to AMQP in Mule Palette section.
Creating Mule Project to Publish Messages to RabbitMQ:
Configuring the AMQP Connector:
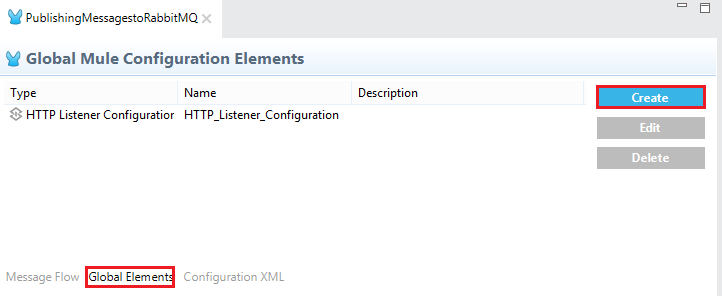
Go to global elements and select create the new global element.👁 Image title
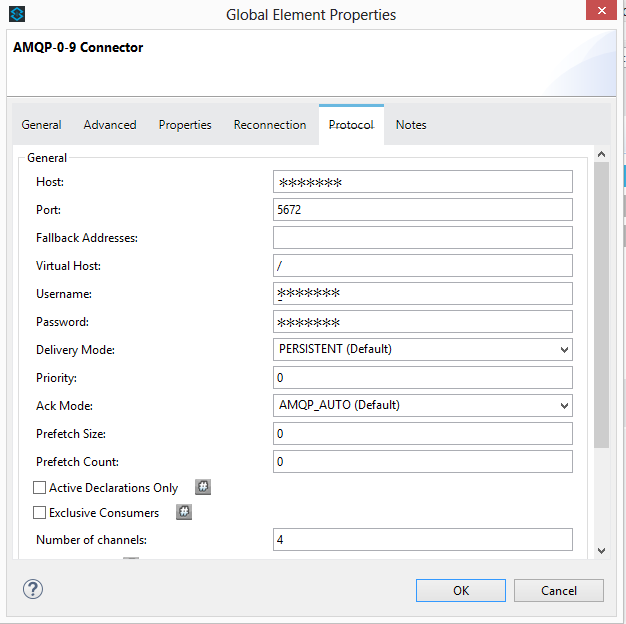
Now go to protocol part and provide all the RabbitMQ server details like RabbitMQ host, port, Username, password, and other details. Once the configuration is done, proceed by selecting ok.👁 Image title
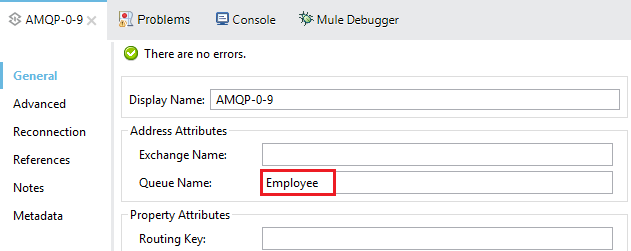
Note: Unlike ActiveMQ it will not create a queue if it is not present.
One should provide the name of the queue which is already present in the server queues.
I have already created a queue (Employee) in the server, so I am just providing the name here.👁 Image title
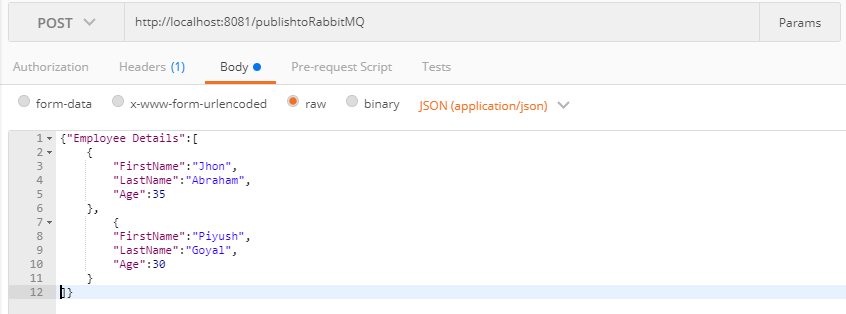
Once this done, deploy the application in the Anypoint studio. Once the application is deployed successfully, invoke the rest service. In my case, I am posting the employee details to the rest service.👁 Image title
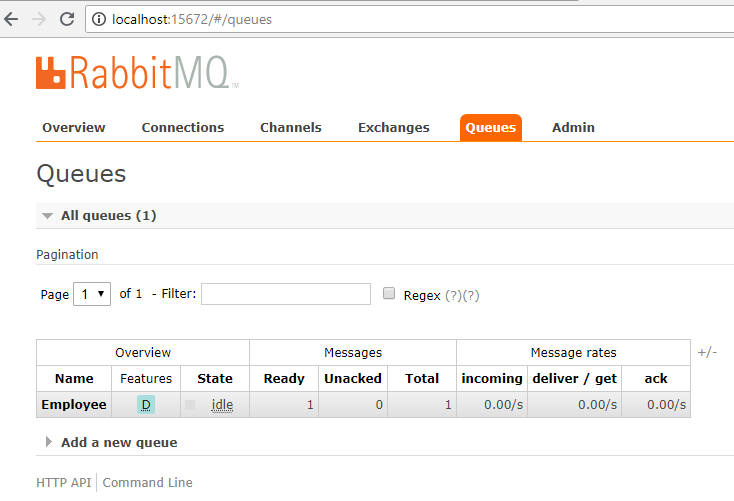
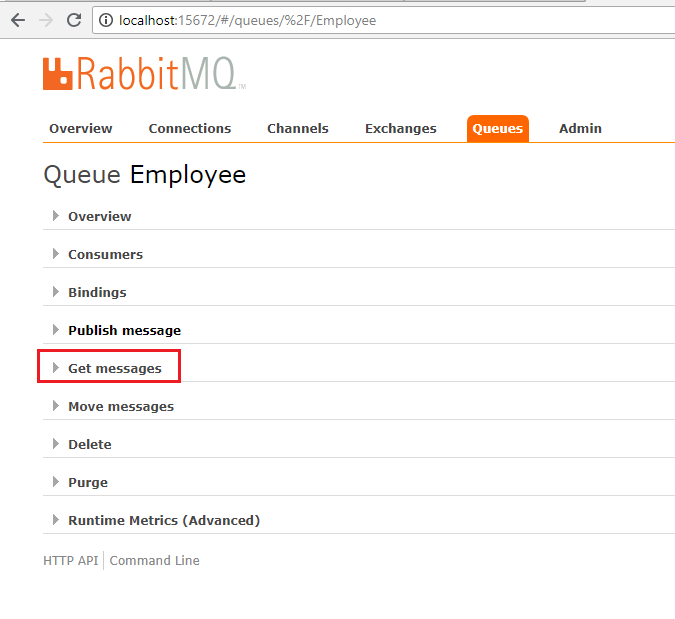
After invoking the service, go to RabbitMQ console and select the queue to which you have published the message. 👁 Image title
Here, you can find a list of the actions that can be performed on the queue. Expand Get messages.👁 Image title
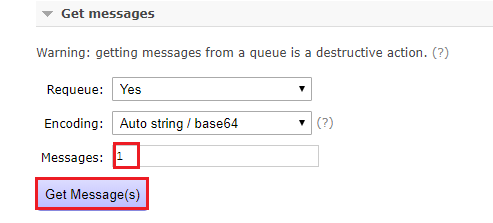
After expanding the Get messages action, configure the number of messages that need to be retrieved and other details, and then select Get Message(s).👁 Image title
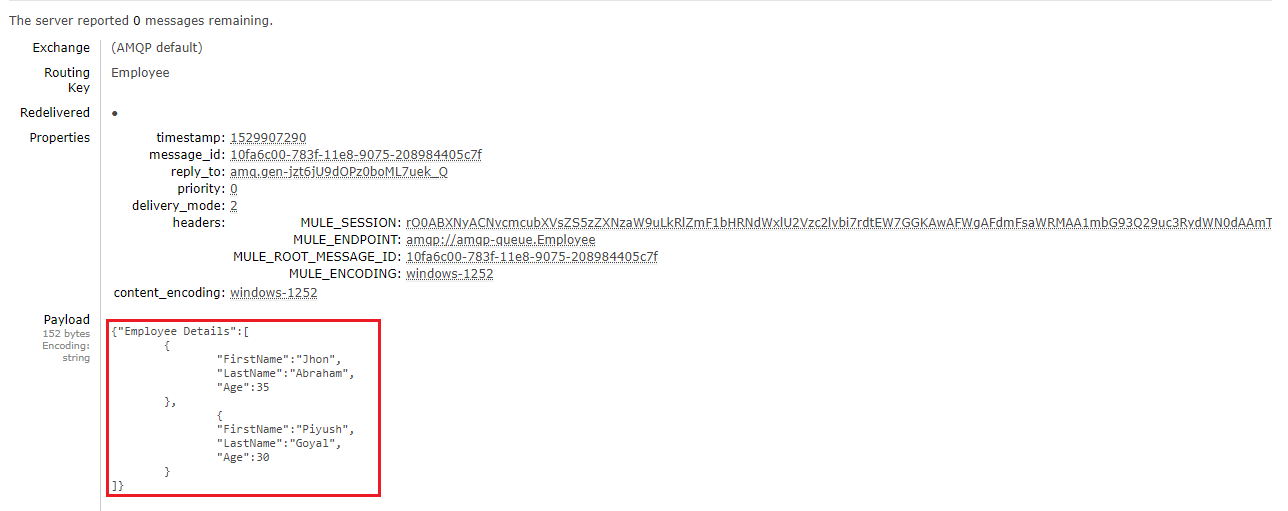
Now you can see the message that had been published and other JMS properties. 👁 Image title
Conclusion
Opinions expressed by DZone contributors are their own.
Related
-
The Real-time Data Transfer Magic of Doris Kafka Connector's "Data Package": Part 1
-
Designing a Java Connector for Software Integrations
-
Kafka JDBC Source Connector for Large Data
-
Make Your Integration Seamless By Using Ballerina Client Connectors