
UiPath Tutorial for Beginners
In this UiPath Tutorial, I will get into the details of the UiPath tool i.e. types of projects, UiPath components, UiPath installation, and more.
Join the DZone community and get the full member experience.
Join For FreeIn the previous article, you got an introduction to RPA. Now in this UiPath Tutorial, I will get into the details of the UiPath tool i.e. types of projects, UiPath components, UiPath installation and more, which enables you to automate the repetitive tasks and convert the tedious tasks into simpler tasks.
UiPath Tutorial For Beginners
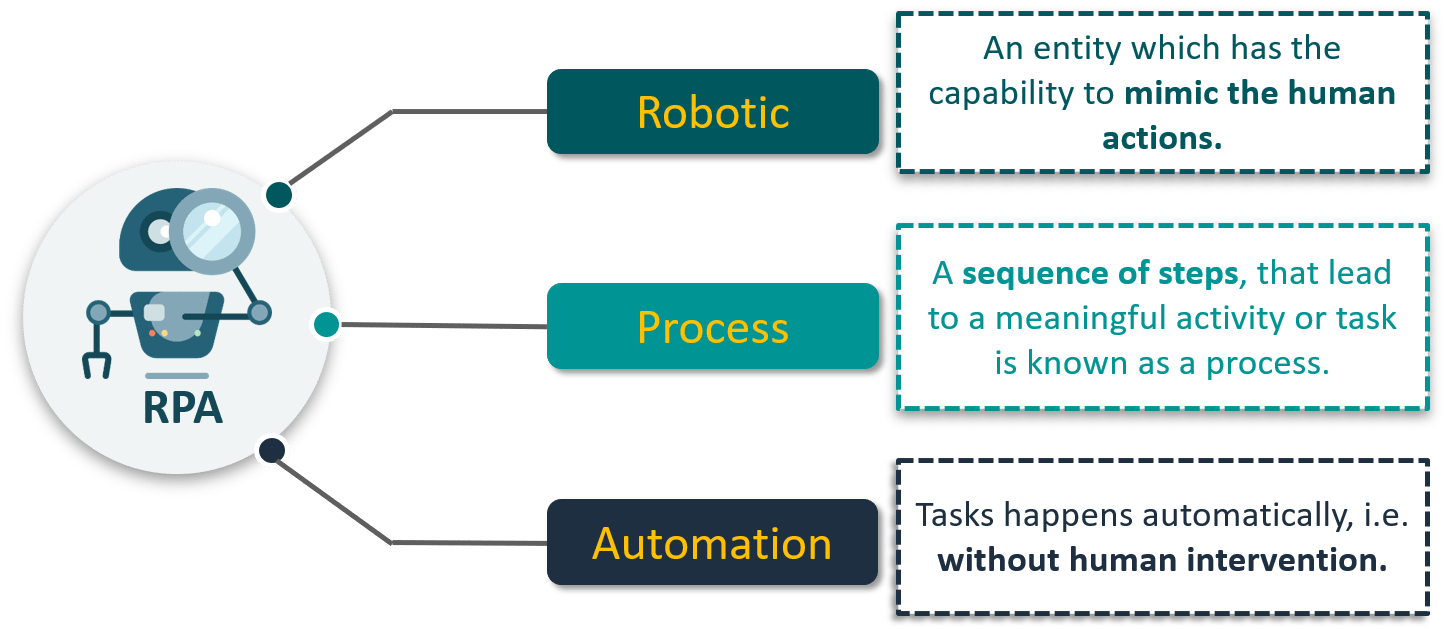
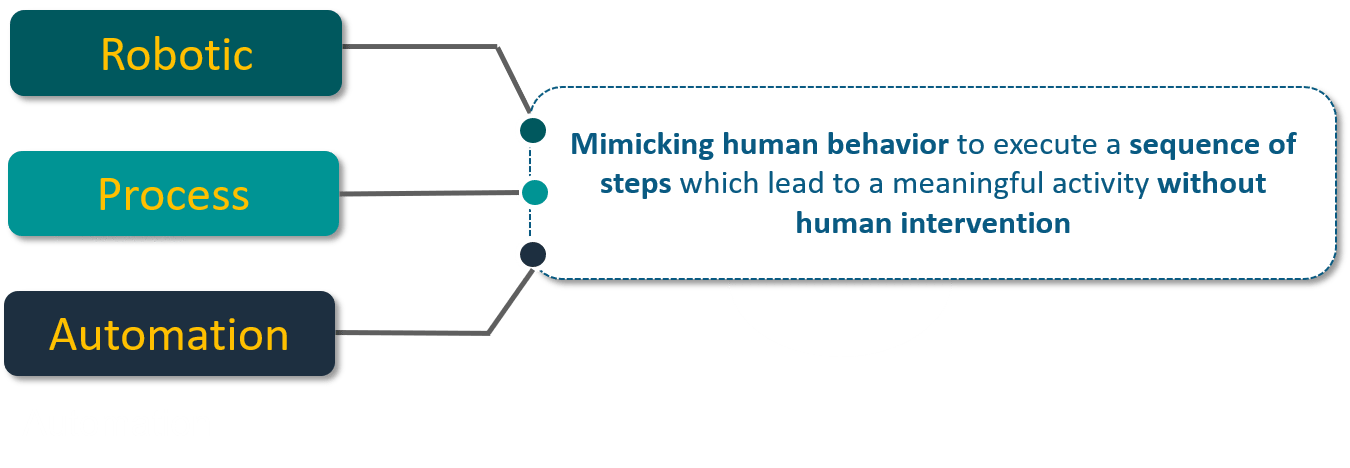
What is Robotic Process Automation?
👁 Image
Now, let me talk about one of the most popular tools for automation i.e. UiPath. So, what is it?
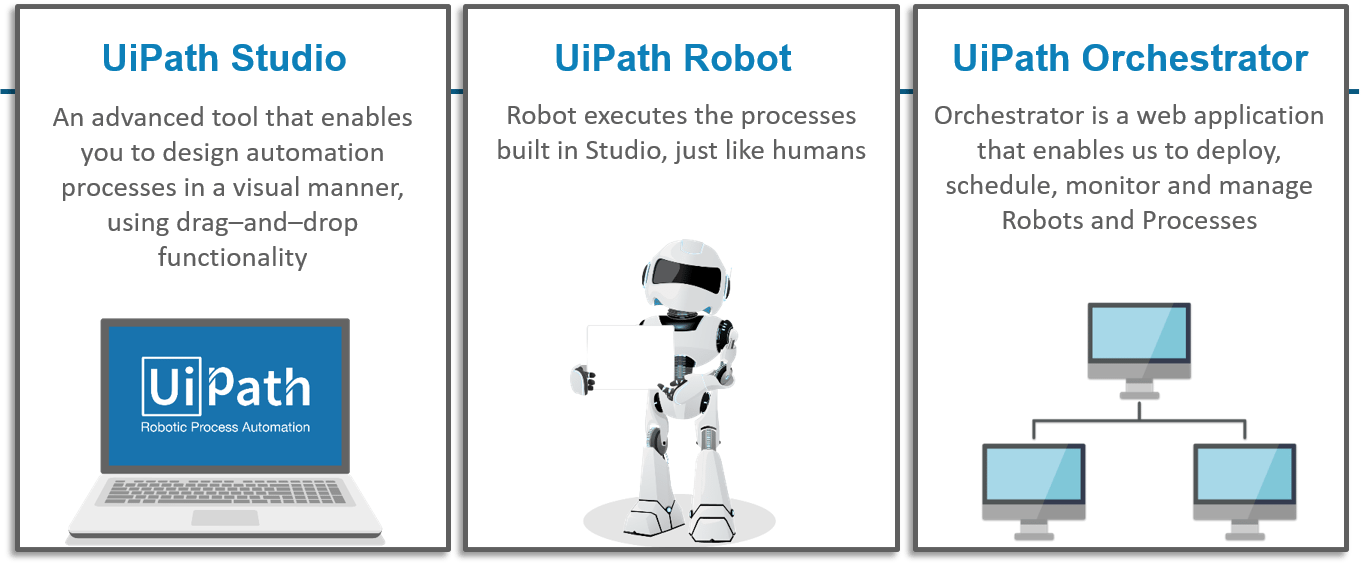
UiPath Tutorial: What is UiPath?
- UiPathis a Robotic Process Automation tool that is used for Windows desktop automation.
- It is used to automate redundant tasks and eliminates the human intervention.
- The tool is simple to use and has a drag and drop functionality of activities.
- UiPath has a standard Studio version which has a trial period of 60 days.
- The best part is, UiPath also comes with a Community Edition, which is free for life and has most of the functionality of the Studio version.
Now that you understand what UiPath is, let's see how can you install UiPath studio on your system.
UiPath Tutorial: How to Install UiPath Studio?
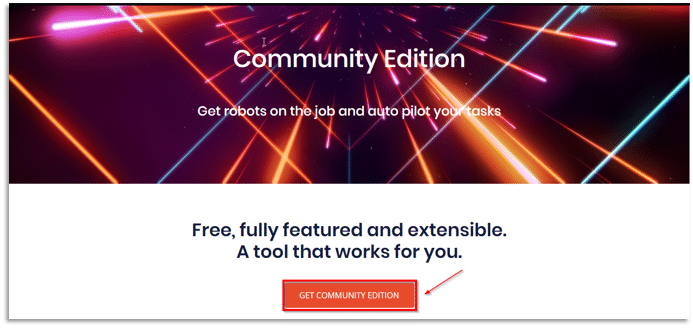
Step 1: Go to the following link: https://www.uipath.com/community and click on "Get Community Edition."
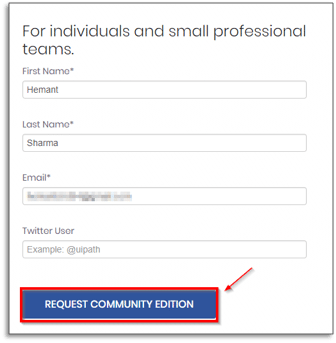
Step 2: Fill in the details to register, and click on "Request Community Edition."
Step 3: Now, open your registered email to get the instructions to download UiPath.
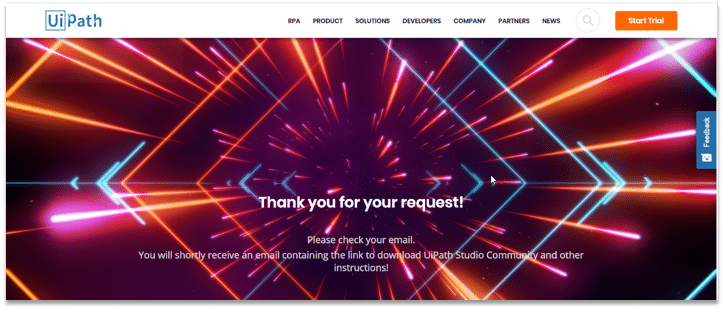
Step 4: Double click on the downloaded file.
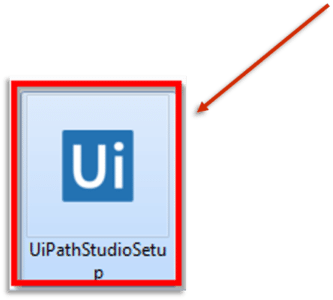
Step 5: After installing UiPath, UiPath tool will open.
Step 6: Enter the email address with which you registered and click on the Activate button.
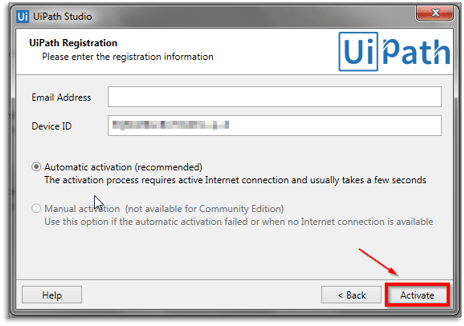
Step 7: Once installed, you will get this acknowledgment page stating the successful installation.
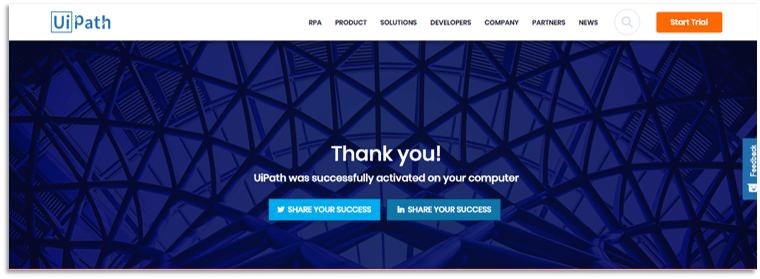
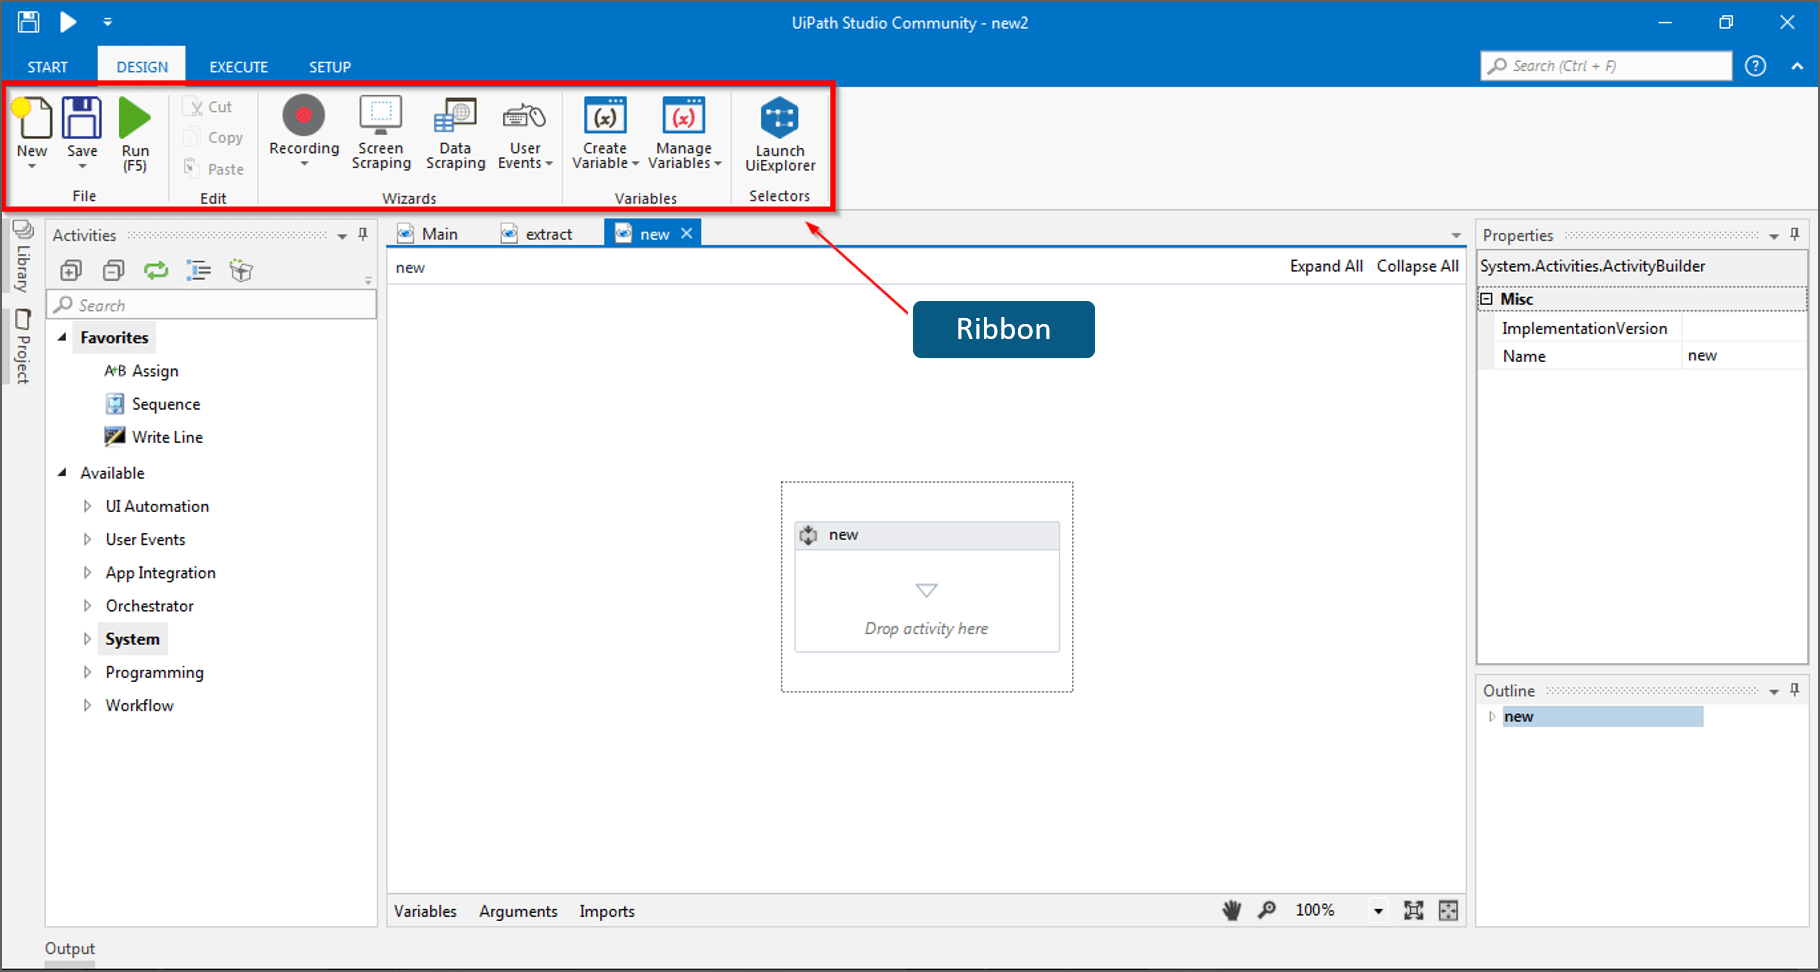
This is how it looks after opening the UiPath Studio.
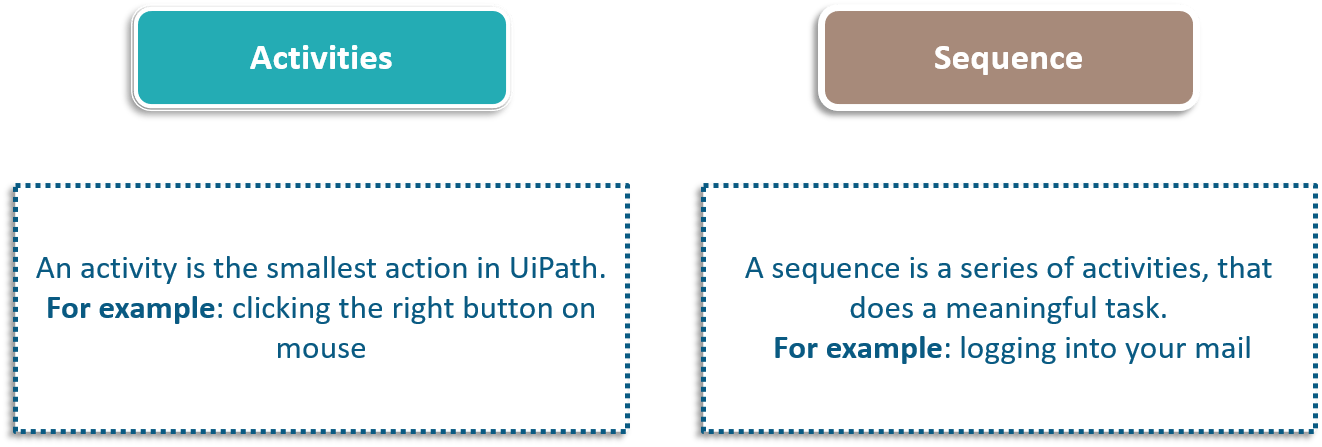
Now, before moving on to the different types of projects in UiPath, let's discuss some of the important terms/concepts in UiPath i.e. Sequence and Activities.
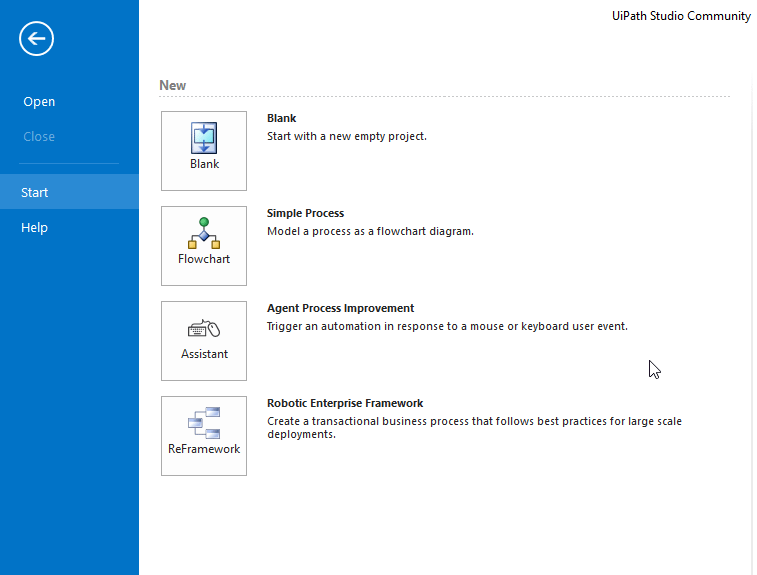
UiPath Tutorial: Types of Projects in UiPath
There are 4 types of projects in UiPath:
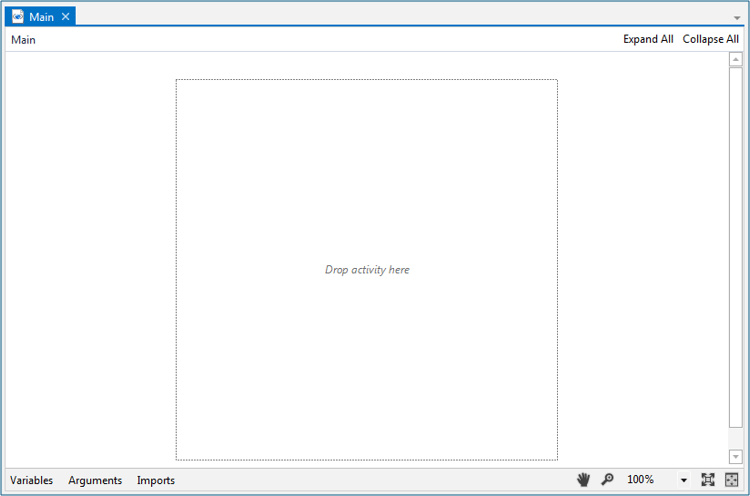
Blank: A blank projectis a clean slate; you can build your projects from scratch. The below screenshot is the screen of a blank project. It has no templates nor anything predefined on your workspace. You have to define everything from scratch to build a new project.
👁 Image
Simple Process: Simple Process basically gives us a template of a flowchart i.e. a diagram of a sequence of activities.
You can refer to the screenshot below for better understanding:
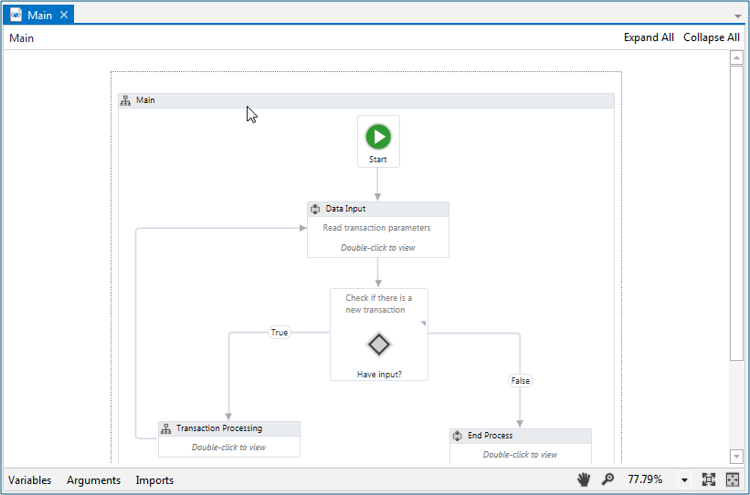
👁 Image
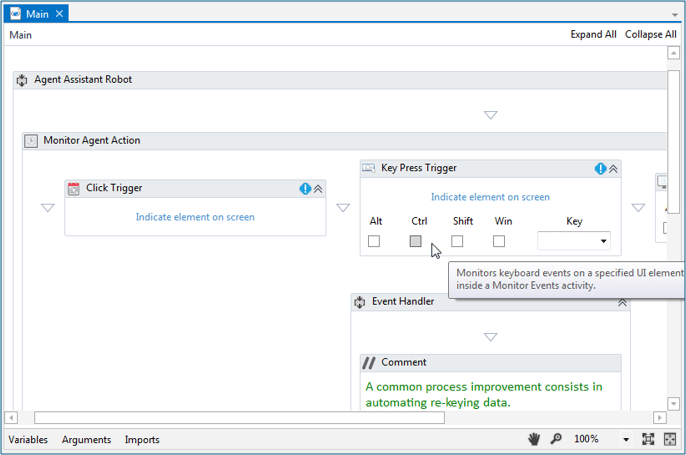
Agent Process Improvement: Agent Process Improvementassists the user by automating the tasks. It is used to assess any user working on the system. For Example, if you're working on a system and you want to cut(ctrl + x) the task, one way to do that is to right-click it and then choose to cut. Another way to do that is to simply select that particular icon and then choose to cut. This would cut that particular icon.
So, whenever you want to define your own shortcuts, you can use agent process improvement as you can see in the screenshot that it can configure a trigger through which it can do a particular set of tasks.
Robotic Enterprise Frameworkis used to define states in a project, which are useful in business processes. So, basically those kinds of projects in which you want to include 👁 Image
Robotic Enterprise Framework: States, we use this particular project.
Let's see with an example, so when you start your computer you see a starting Windows screen. This starting Windows screen stays there until and unless each and every process required for your operating system isn't loaded in the memory. Once all the required processes are loaded, it moves from the starting state to the execution state and from this state, it goes to the shutting state, wherein it kills all the processes. So, if you don't want to go to the next state without completing all the tasks in the present state, then you use Robotic Enterprise Framework.
You can refer the screenshot below for better understanding:
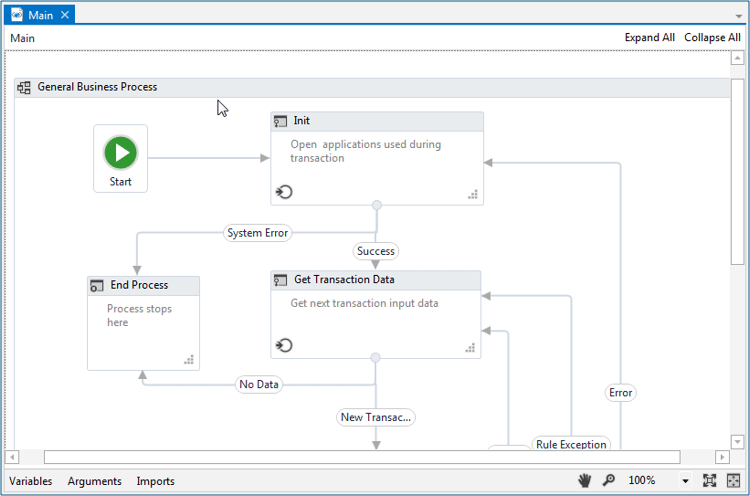
Before creating your own projects, let's understand the various components of UiPath platform.
UiPath Tutorial: UiPath Components
UiPath is generally divided into 2 components:
- UiPath Platform Components
- UiPath Studio Components
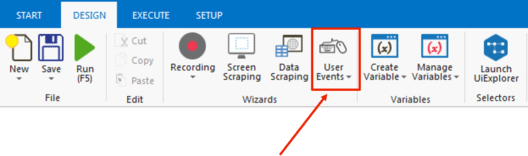
1. UiPath Platform Components
UiPath Platform consists of three main components:
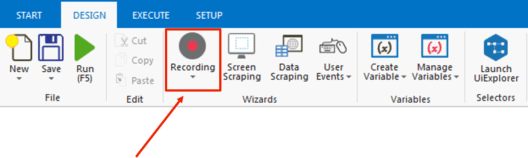
Recording: This UiPath's Recorder allows users to record UI mouse movements and keyboard activities to generate automation scripts.
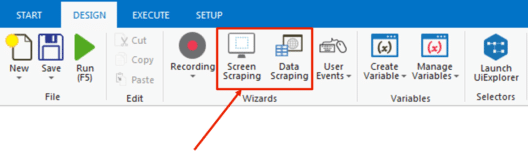
Screen Scraping and Data Scraping: Scraping made easy with Screen Scraping and Data Scraping
User Events: This Captures User Events. For eg. Mouse Click, Keypress, etc.
Variables: This helps you to Create and Manage Variables.
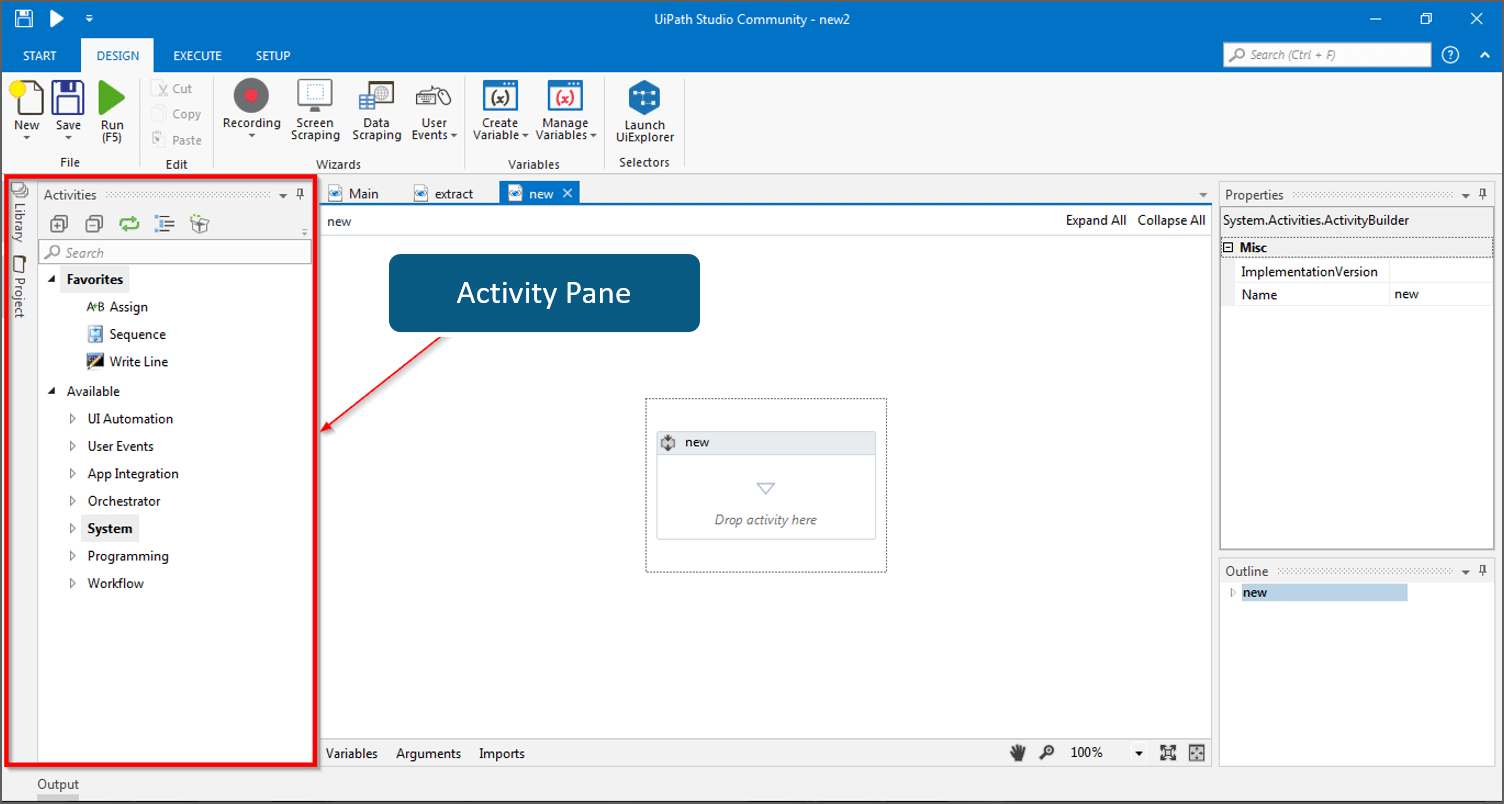
2. Activity Pane: On the left side you have the activity pane where all the small tasks are present. All you have to do is drag and drop it in the workspace and configure it so that it works according to the requirement for every activity.
3. Properties Pane: The configuration can be handled here in the properties pane, like setting the output of a particular activity or the task.
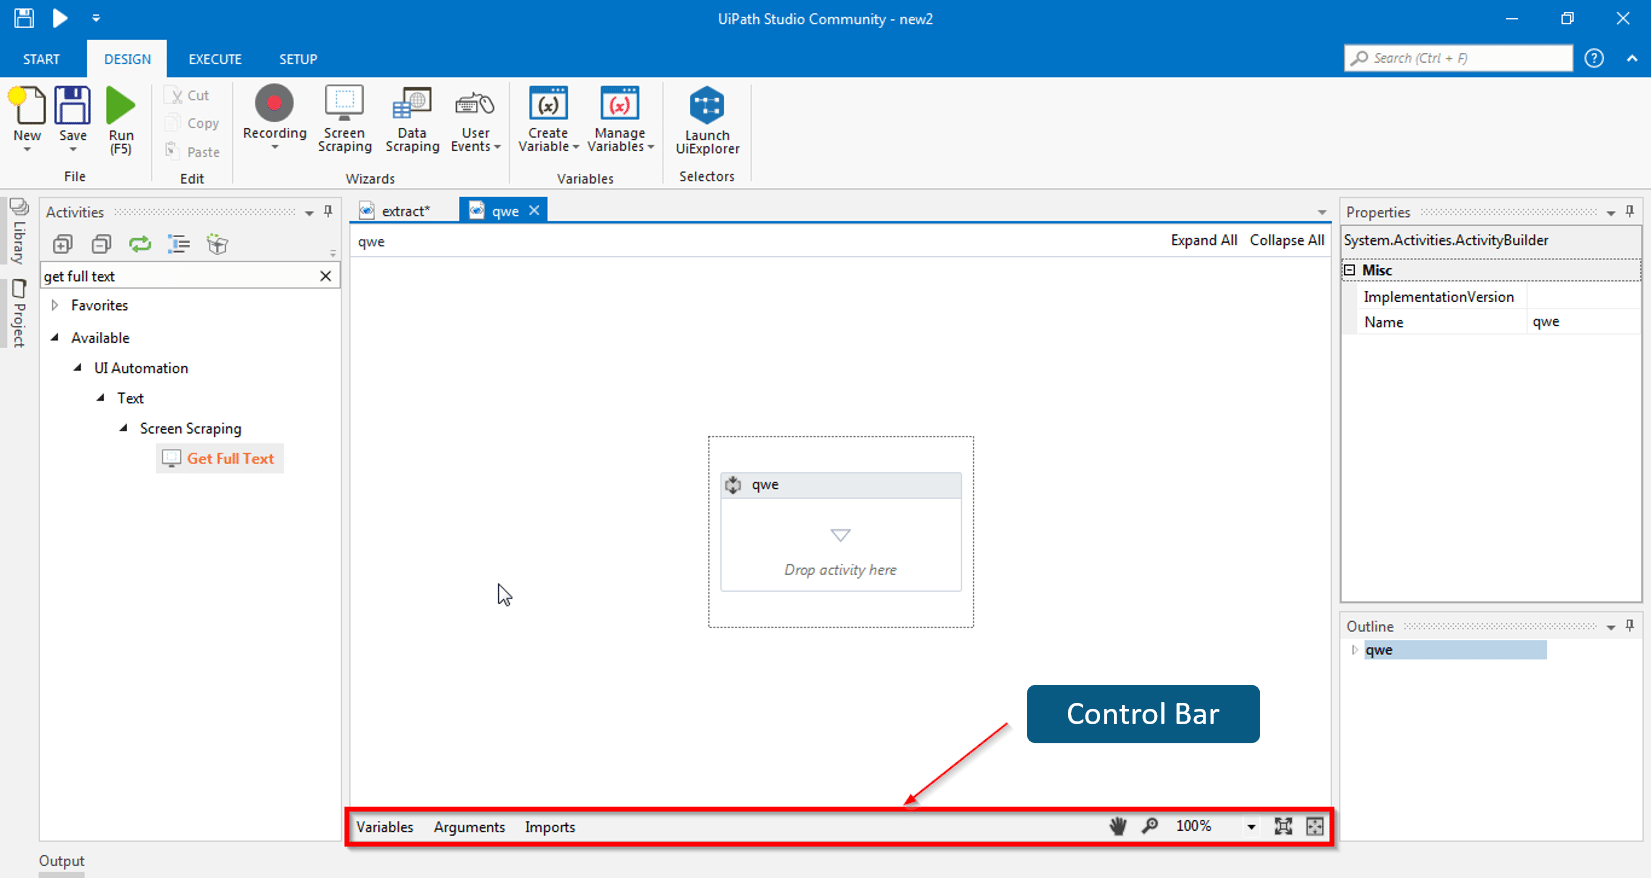
4. Control Bar/Pane: If you see the bottom section of the UI path tool, it has variables, arguments, and imports.This is the section where you can create variables, delete variables, and deal with arguments.
Now that we have understood the basic concepts of UiPath, let's implement these concepts in the UiPath.
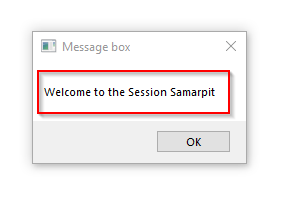
Let's create a simple project which will greet you with the name i.e. "Welcome to the Session Samarpit "
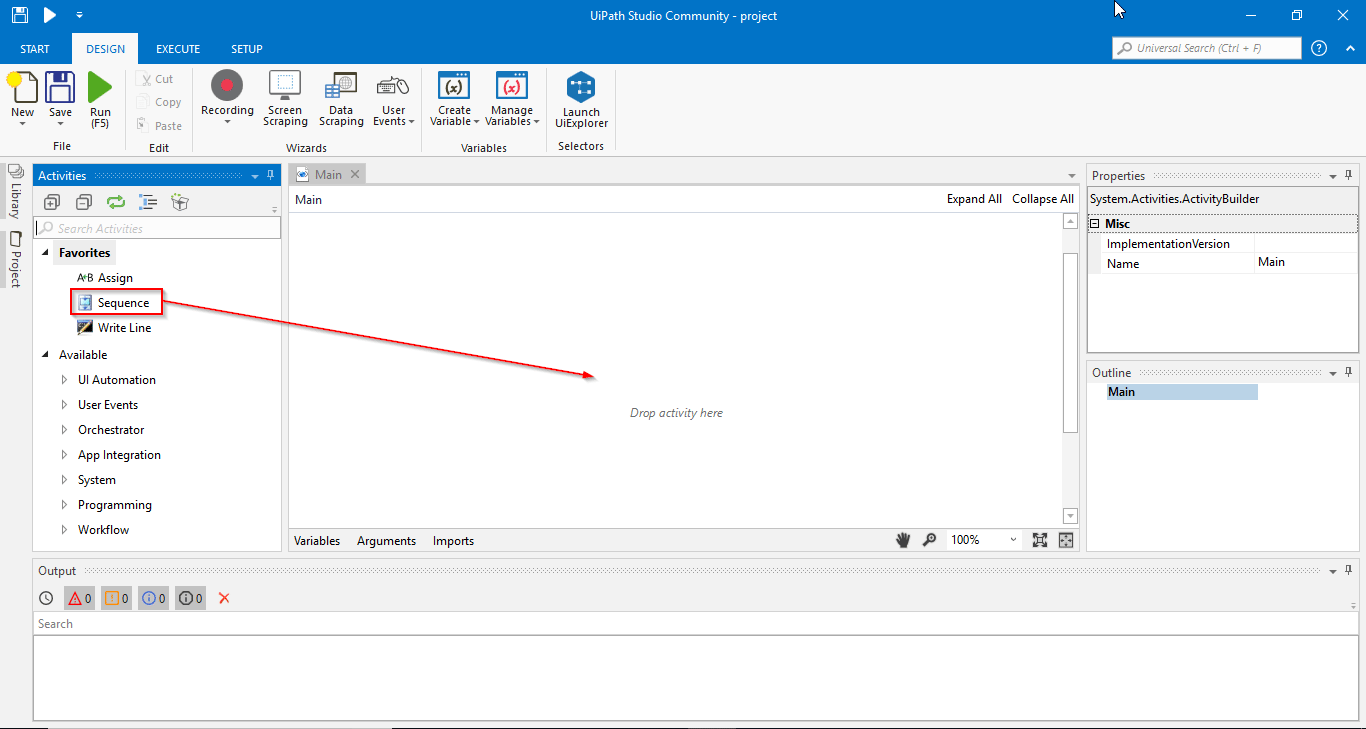
Step 1: Open your UiPath Studio and click on "Blank" project.
Step 2: First, drag-and-drop the sequence in the workspace.
This is how it looks after drag and drop.
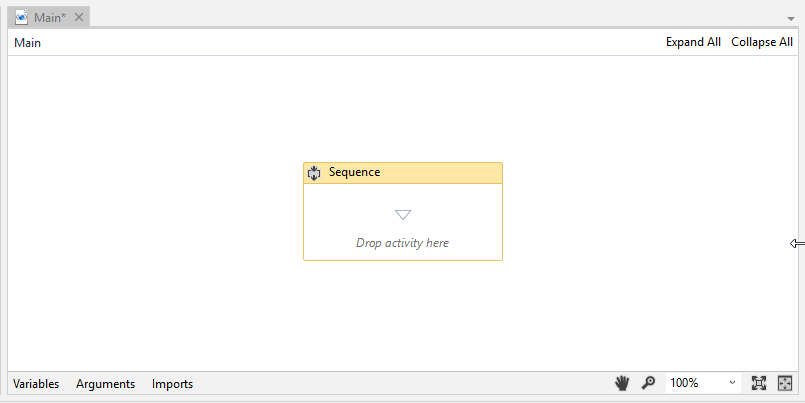
Step 3: So, we want our program to ask my name. For that, I'll search for the input dialog and then drag and drop it in the sequence activity.
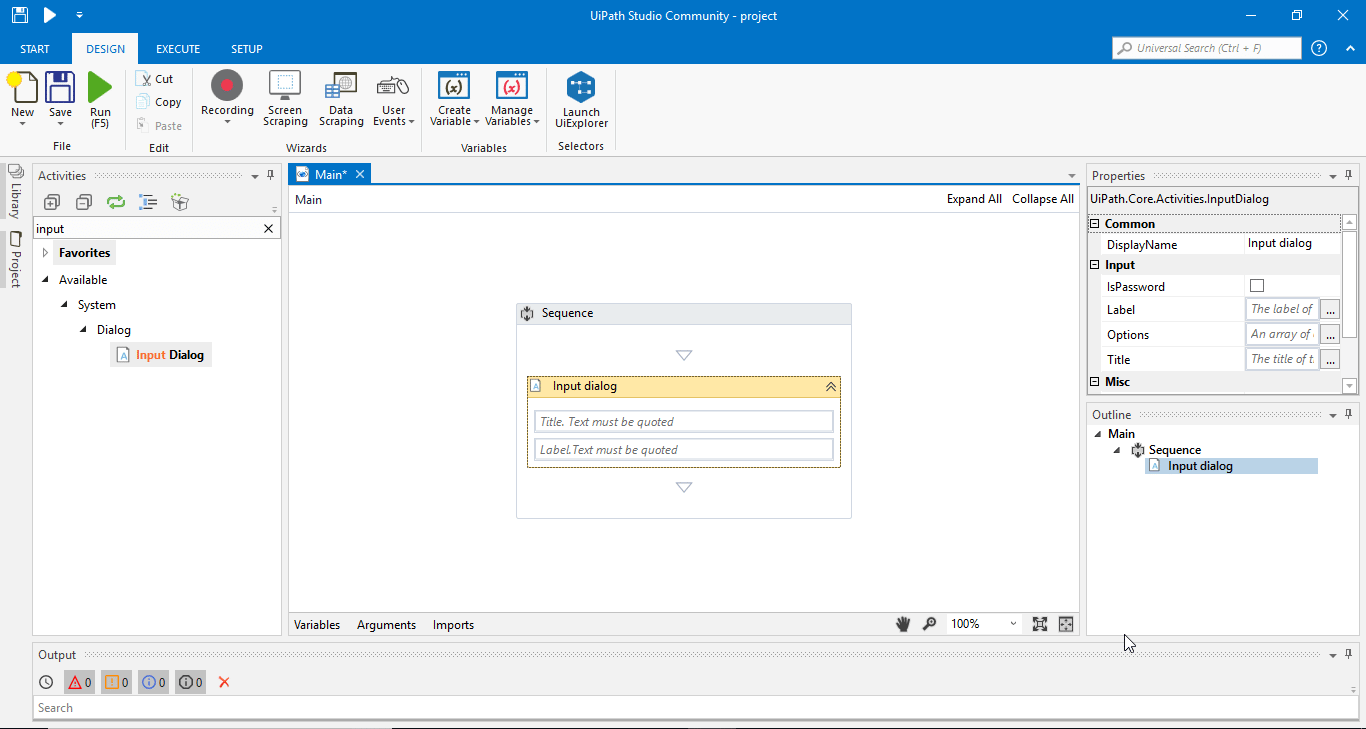
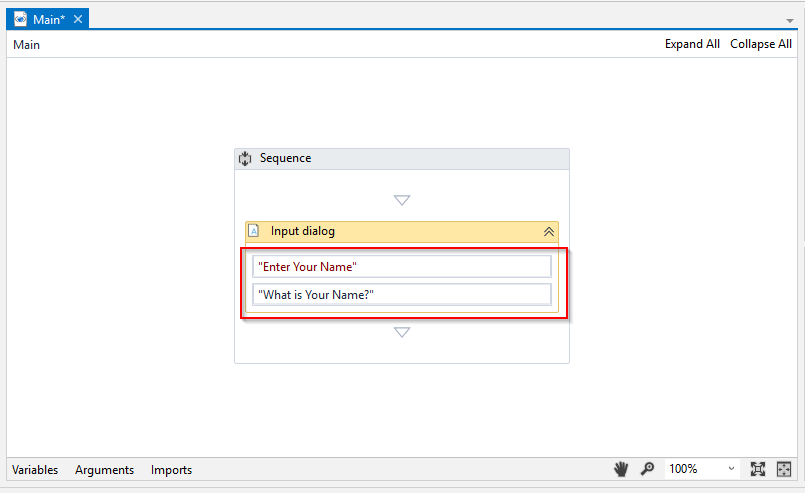
Step 4: For the title, let's just say "Enter Your Name." Then, to fill in the label, we will type in "What is your Name?"
Note: Every text that you use in the UiPath should be in double quotes (" "). When you're using variables or numbers, you won't be using double quotes (" ").
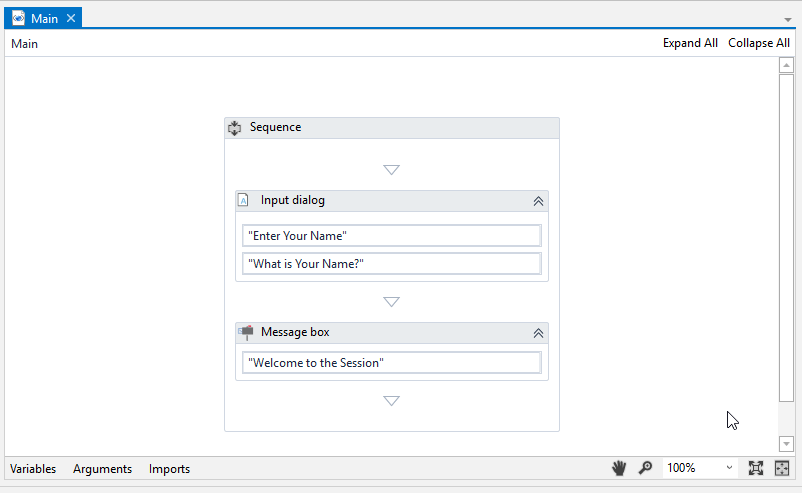
Step 5: Once it asks my/your name, we want it to display a message saying, "Welcome to the Session." For that, drag and drop it under the Input dialog box activity.
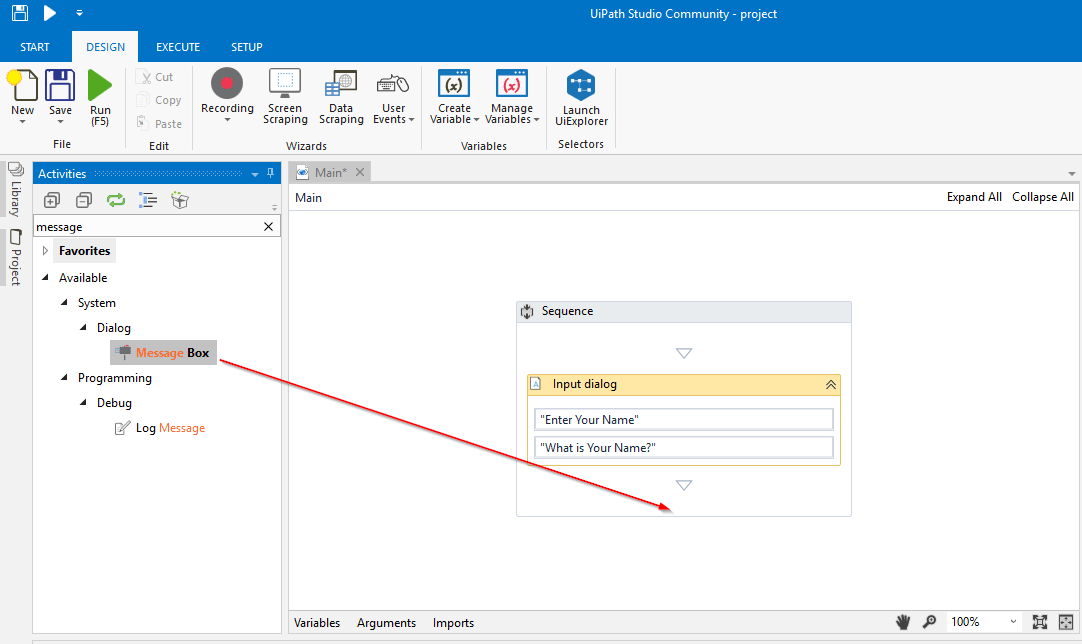
This is how it looks after drag and drop.
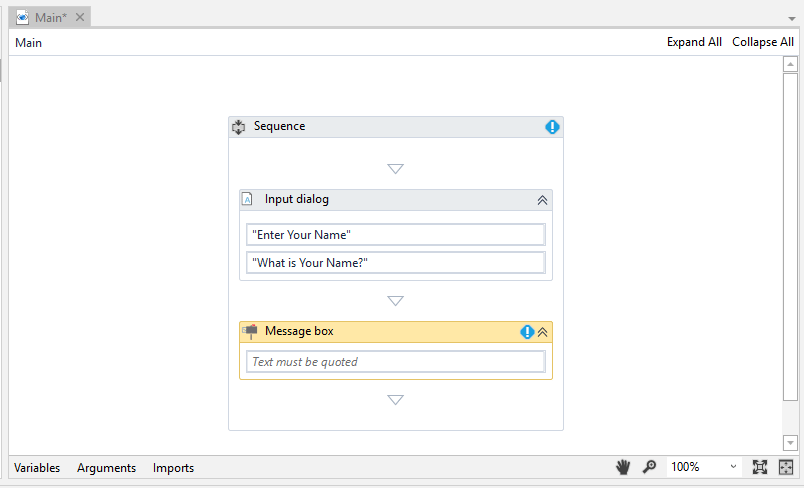
Step 6: Once the above steps are done, type in the text in the message box so that it displays "Welcome to this Session." Then, run the program.
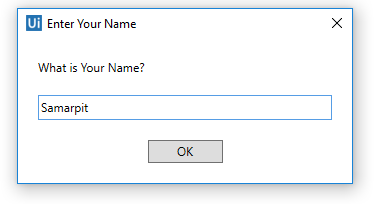
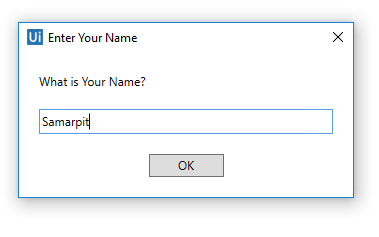
Step 7: When you run this program, you will get a dialog box with the title entered as "Enter Your Name." Enter your name in the dialog box and click OK.
Step 8: We will create a variable "entername" of type string.
This is how it looks after creating a variable.
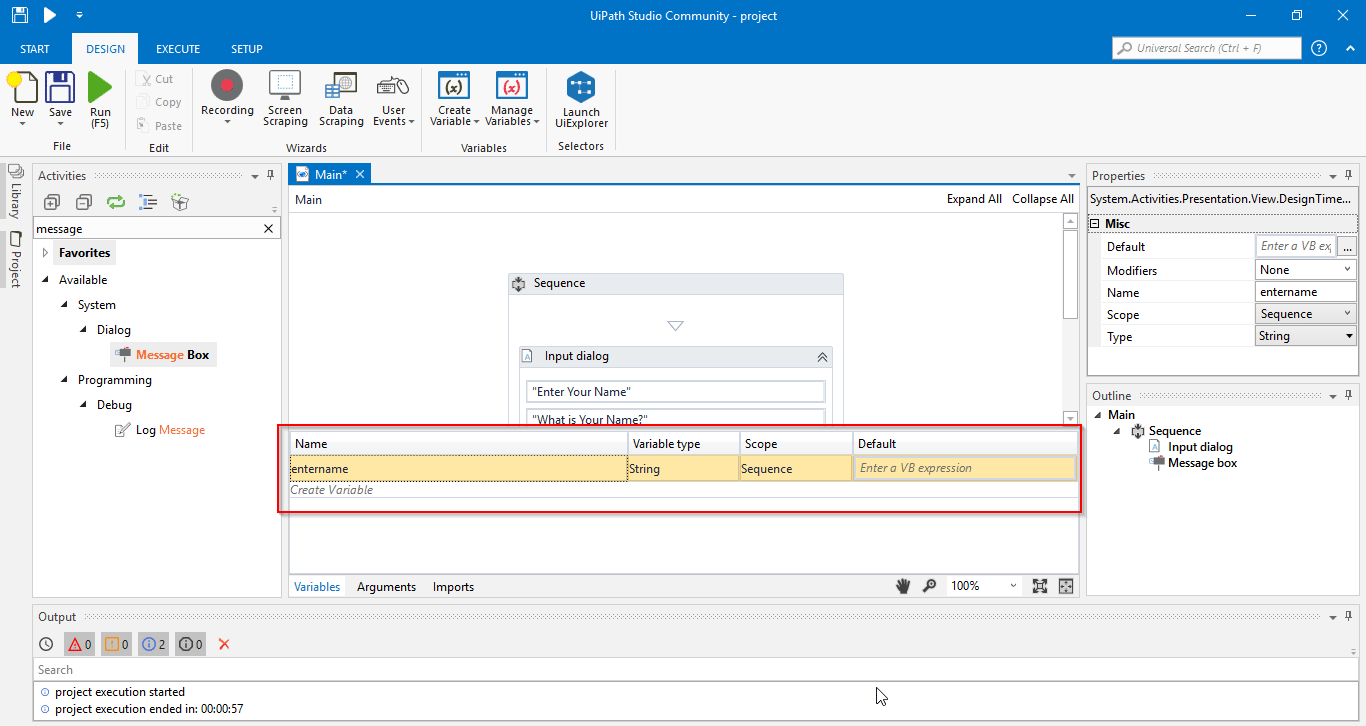
Step 9: Go to the property section of the input dialog and Enter "entername" in the Result.
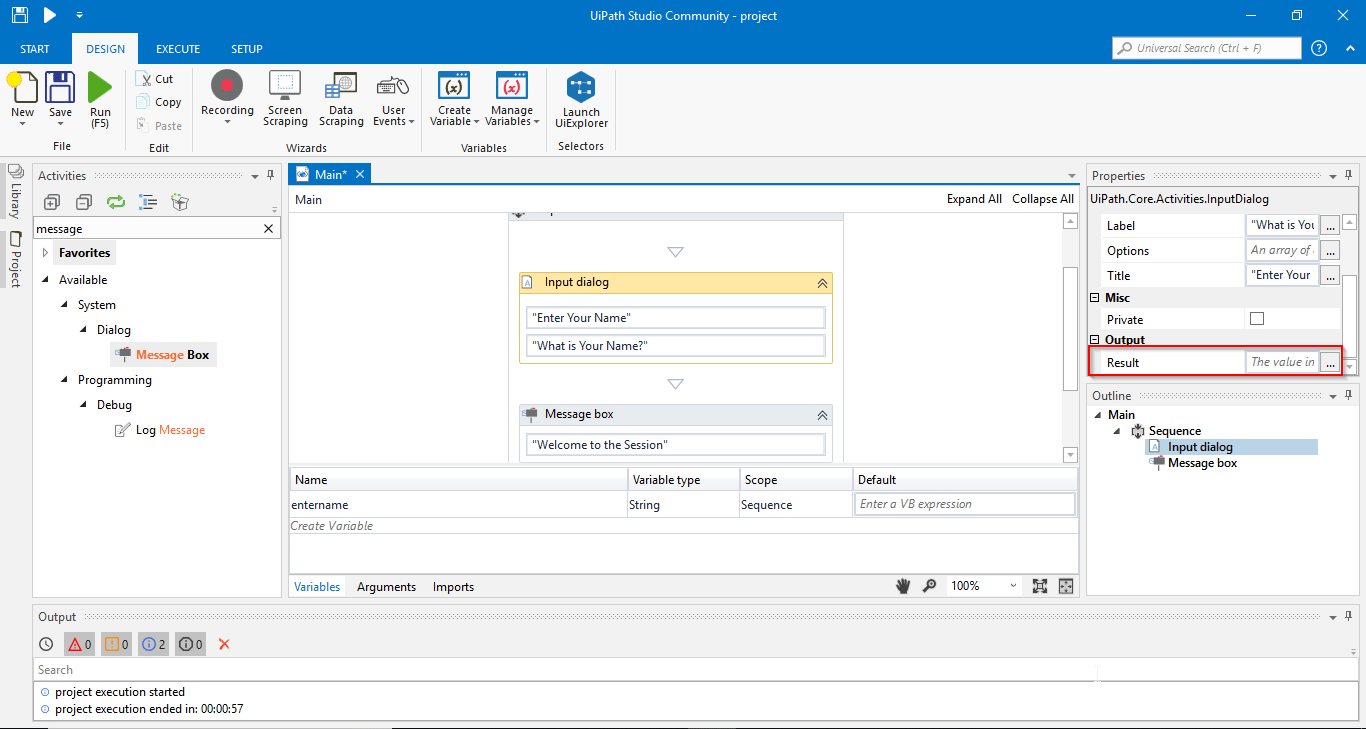
This is how it looks after assigning the value to the Result.
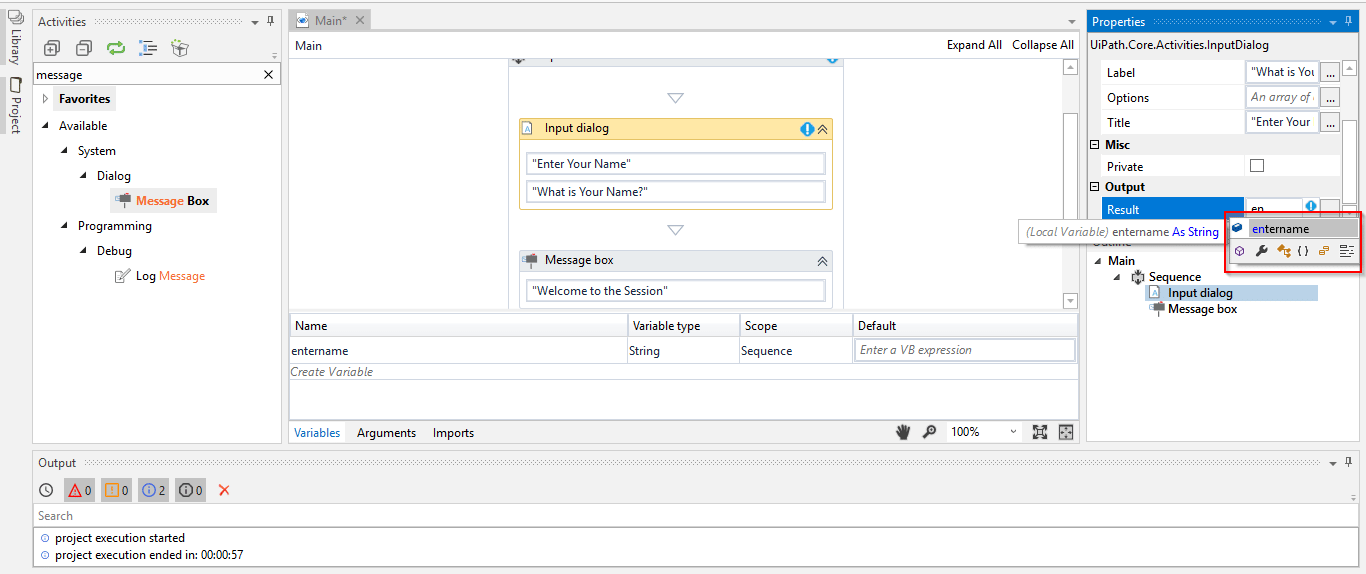
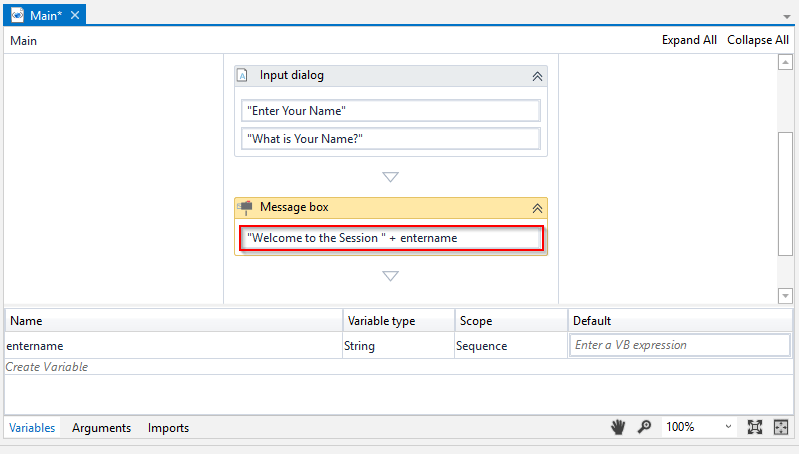
Step 10: Once it is done, type in the text "Welcome to the Session" and use "+" operator for appending the text. Then, add the variable and run the program.
Step 11: Enter your name in the dialog box.
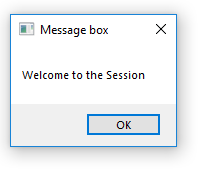
It will display a message with your Name.
So, this was all about the UiPath tutorial. If you are interested in learning more about Robotic Process Automation, this article series will be updated frequently.
Got a question for us? Please mention it in the comments section, and we will get back to you.
Published at DZone with permission of Samarpit Tuli. See the original article here.
Opinions expressed by DZone contributors are their own.
Related
-
An ARM Cortex-M3-Based Bare-Metal OS
-
Transforming Warehouse Operations: Harnessing the Power of AI and Automation
-
How to Accelerate Hyper-Automation With Industrial IoT
-
How to Save Money Using Custom LLMs for Specific Tasks