I have written about dual booting Windows and Ubuntu in the past. The process has improved so much in the last few years. Ubuntu and other Linux play very well with secure boot and UEFI now.
So, why I am I writing about installing Ubuntu with Windows 10 once again? Because these days Windows 10 Pro version comes with BitLocker encryption and hence when you try to dual boot like normal, it either refuses or creates issue.
I noticed it with my new Dell XPS 13. I bought the last Dell XPS in France and it was preinstalled with Ubuntu. Unfortunately, Dell India had no option other than buying the Windows 10 version. In a way, that’s good because it helped me to write this tutorial.
To be honest, dual booting with BitLocker encrypted disk is also not complicated. It just involves the extra step of disabling encryption before starting the dual boot and re-enable it after installing Linux.
Don’t worry. I won’t leave you just like that with my words. I’ll show you each and every step with appropriate details.
Installing Ubuntu with BitLocker Encrypted Windows 10
Please keep in mind that I have used Ubuntu here, but the steps should be applicable to Linux Mint and other Ubuntu-based distributions as well.
Attention!
This dual boot guide is exclusively for systems that have Windows 10 installed with BitLocker. Since it is relatively a newer thing, the steps are only for UEFI systems with GPT portioning scheme. Please check your system first before following the steps.
I also recommend reading the entire steps before you start following it. This may help you locate pain points and you may prepare accordingly.
Prerequisite
Here are the things you need:
A Windows 10 system with BitLocker encryption.
A USB key (also known as pen drive or USB drive) of at least 4 GB in size and no data on it.
Microsoft account for saving the recovery key of BitLocker encryption (external USB can be used as well but MS account will be more convenient).
Internet connection.
Optional: External USB disk for making back up of your data.
Optional: Windows recovery disk.
Some time and patience (mandatory).
If you prefer videos, you may watch this video I made to show the steps in action:
Step 1: Make a backup of your important data on an external disk
This is optional yet recommended. You should make a backup of your important files on an external disk because you are going to deal with disk partitions.
If you are not sure of anything, I suggest look for documents, music, movies and other important stuff you must not lose and copy them on an external USB disk. You can use an external HDD (slower but cheaper) or SSD (faster but expensive).
You may also use a pen drive for copying files and storing it on some other computer (if you have more than one system).
If possible, have a Windows 10 recovery disk with you (optional)
This one is optional too but could be helpful if anything goes wrong. You could fix the boot records and restore Windows.
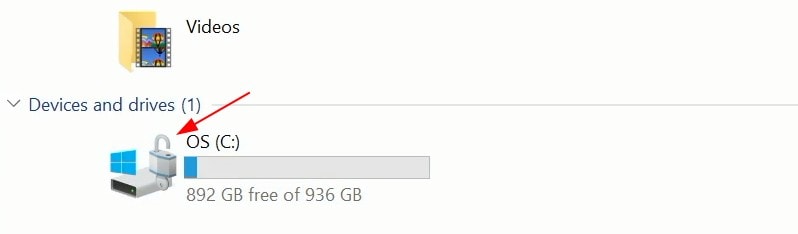
Step 2: Verify that you have BitLocker encrypted disk
First thing first, check if you actually have BitLocker encryption enabled. How do you do that? It’s simple. Go to file explorer and check if your main drive has a lock displayed.
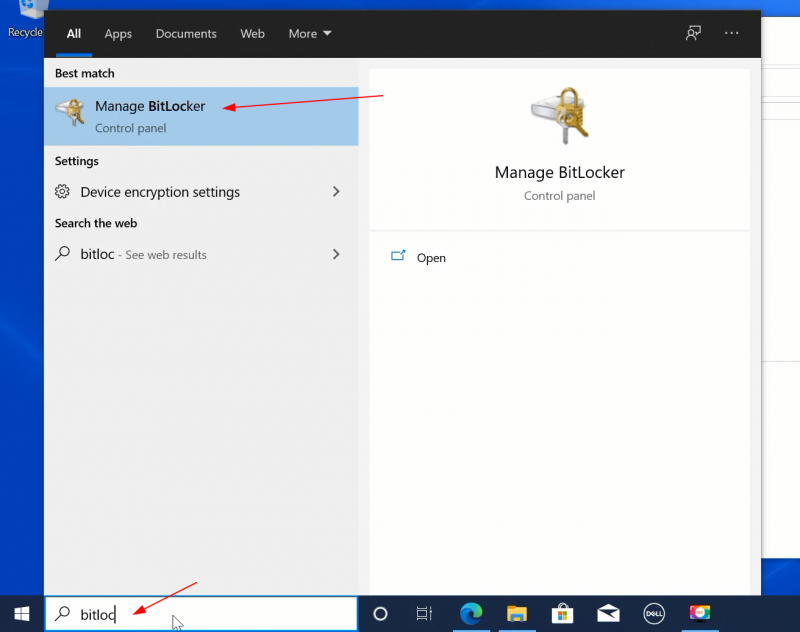
Step 3: Back up recovery key and disable BitLocker encryption
Now that you know that you have BitLocker encryption enabled on your system, the next step is to disable it.
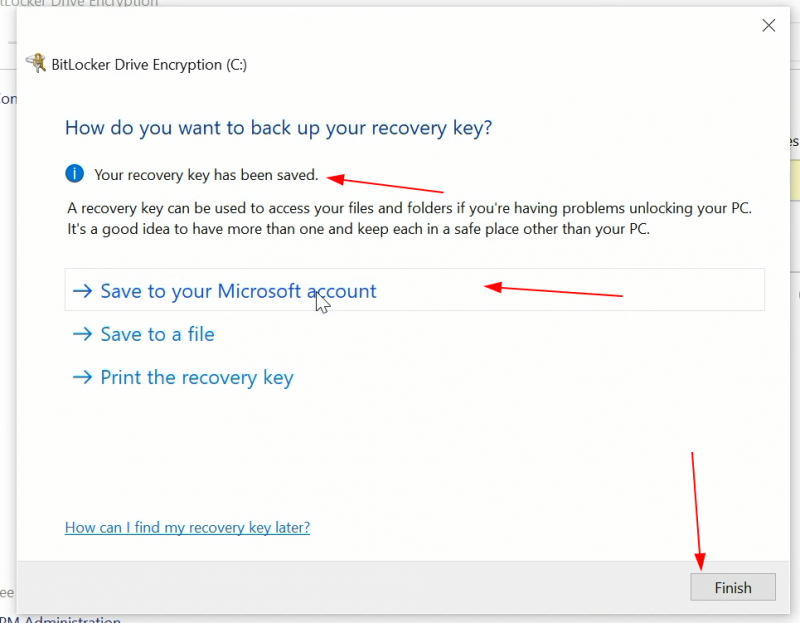
Before you do that, you must back up your recovery key. It is a 40 digit key to reset BitLocker encryption. Why? Because you are going to change the boot settings and BitLocker won’t like that. It will ask you to enter the recovery key to ensure that your encrypted disk is in safe hands.
You may back up the key on an external USB disk or to your Microsoft account. I saved it to my Microsoft account because it is easier to keep track of the recovery keys at one central place. Of course, you must ensure that you have access to a Microsoft account.
Verify that your recovery key is properly saved by going to this link and logging into your Microsoft account.
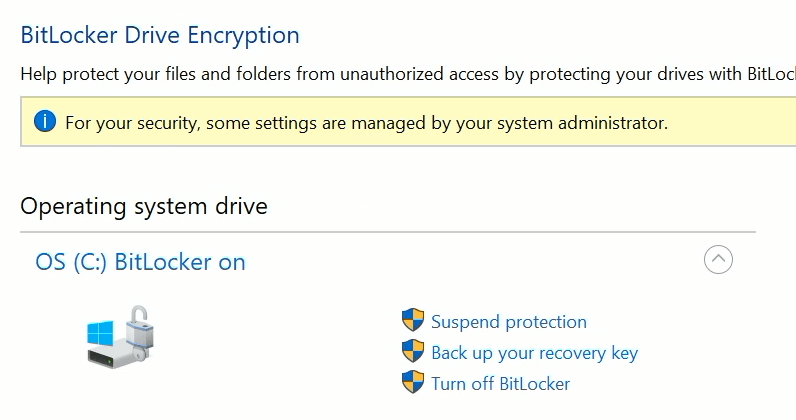
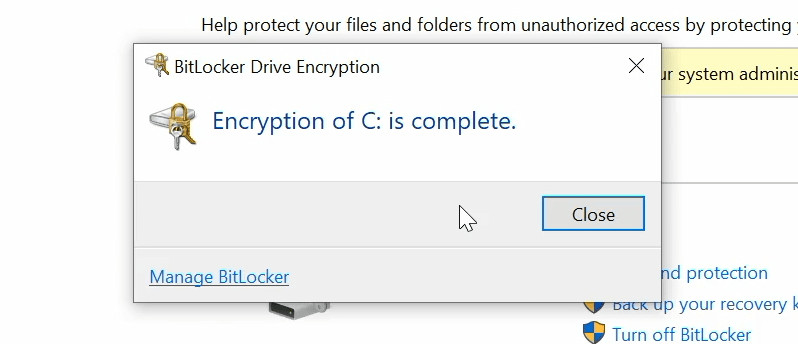
Once you have saved the recovery key, disable BitLocker encryption. The decryption process may take some time depending on how much disk space you had already utilized.
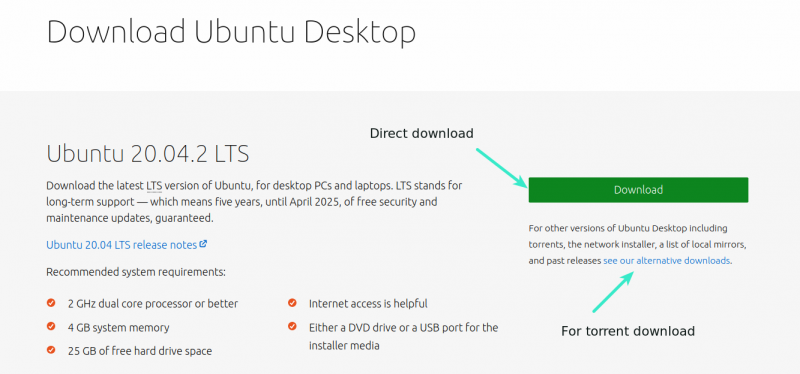
While you wait for the decryption to complete, you should go on and download Ubuntu ISO. Once BitLocker is disabled, you would notice that the lock has disappeared from the drive icon.
While the disk is being decrypted, you should utilize the time in downloading the ISO image of Ubuntu desktop version. It’s a single file of around 2 GB in size and you may download it directly or use torrent if you have a slow and inconsistent internet.
You may use Etcher on Linux, Windows and macOS. However, the way Etcher creates a bootable disk leaves the USB in a weird state and you’ll have a difficult time formatting the disk after the dual boot is over.
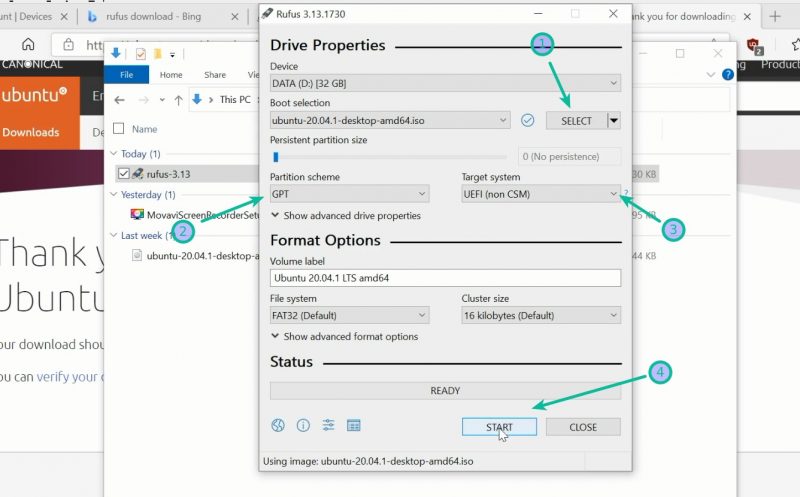
For this reason, you are using Windows, I recommend using a free tool like Rufus. Download Rufus from its website.
Plug in the USB key. Since the USB will be formatted, make sure it doesn’t consist of any important data.
Rufus automatically identifies the plugged in USB keys but it will still be a good idea to make sure that it is pointing to the correct USB. Then you should browse to the location of the downloaded ISO image.
You must ensure that it uses GPT partitioning scheme and UEFI target system.
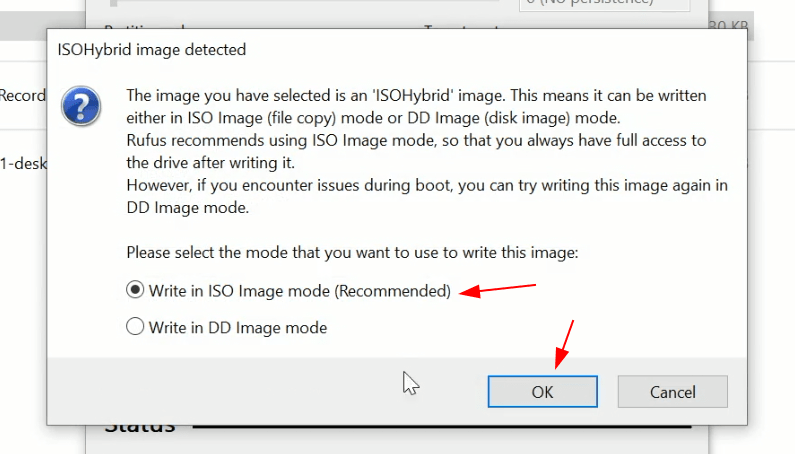
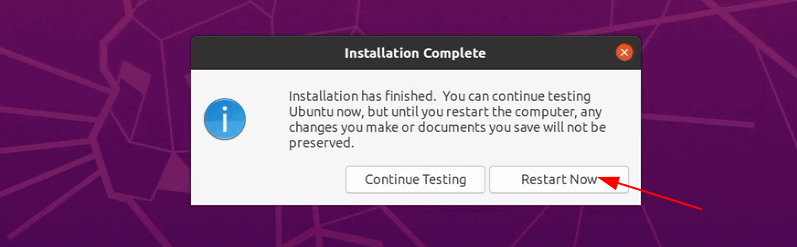
It will take a few minutes to complete the process. Once you have the live USB ready, the next step is the actual installation of Ubuntu Linux.
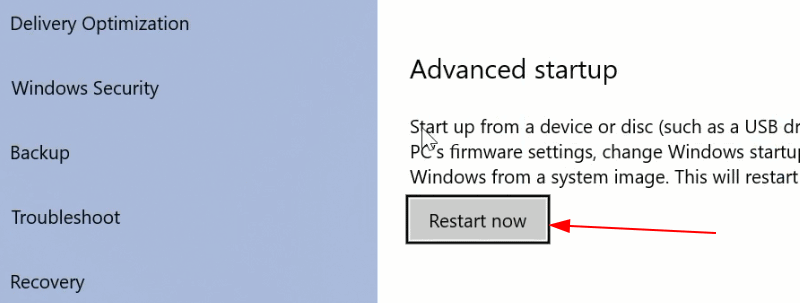
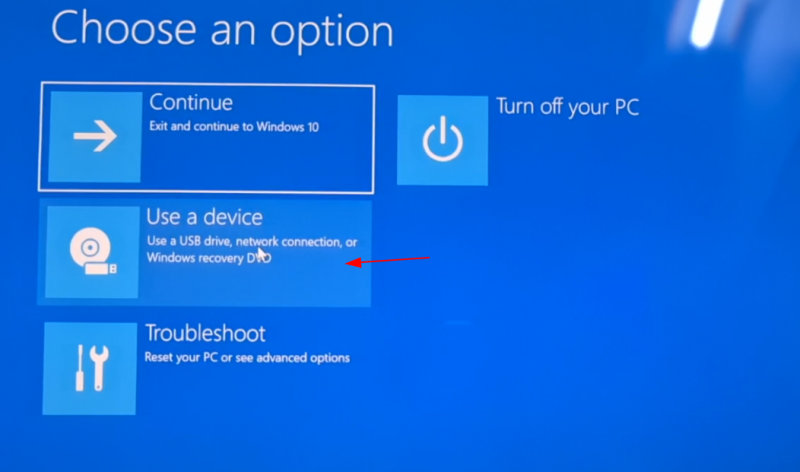
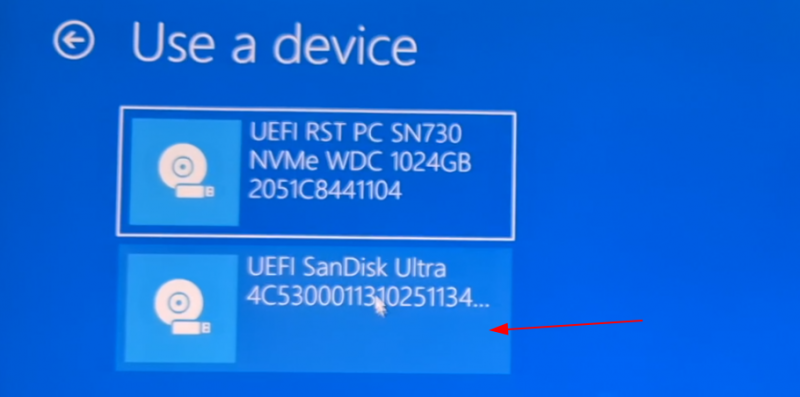
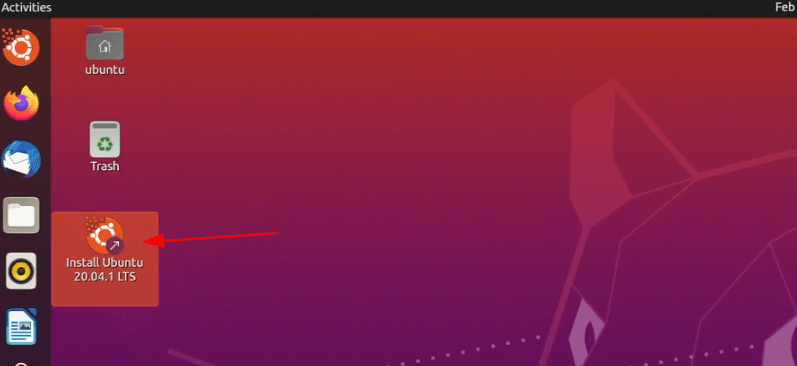
Step 6: Boot from live USB
With the live USB of Ubuntu plugged in to your Windows system, it’s time to boot into this live system. There are two ways to do that:
Restart the system and at the boot time, press F2/F10 or F12 to access boot settings. From here, move ‘booting from removable media’ up the order to boot from USB.
Now it will power off your system and reboot into the disk you chose which should be the live USB disk.
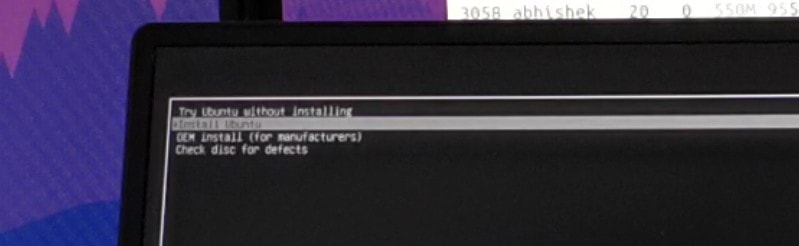
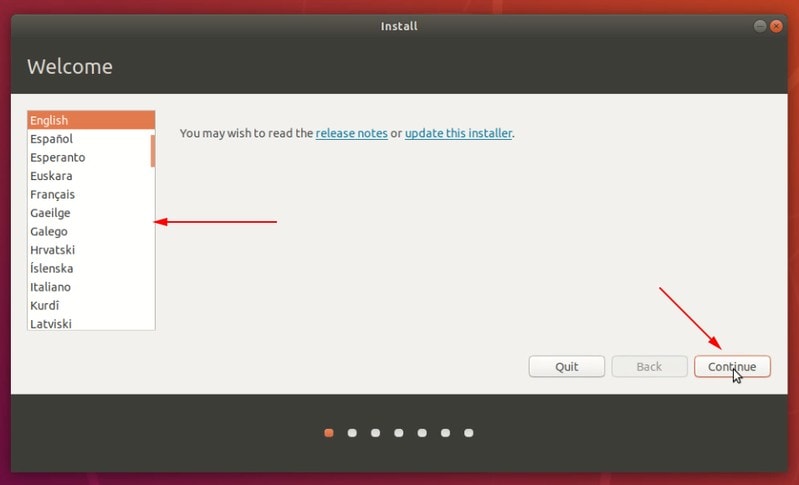
Step 7: Installing Ubuntu with Windows
When you boot from the live USB, you should see the GRUB screen that presents you the option to try Ubuntu in live USB or install it right away. You may go with either option.
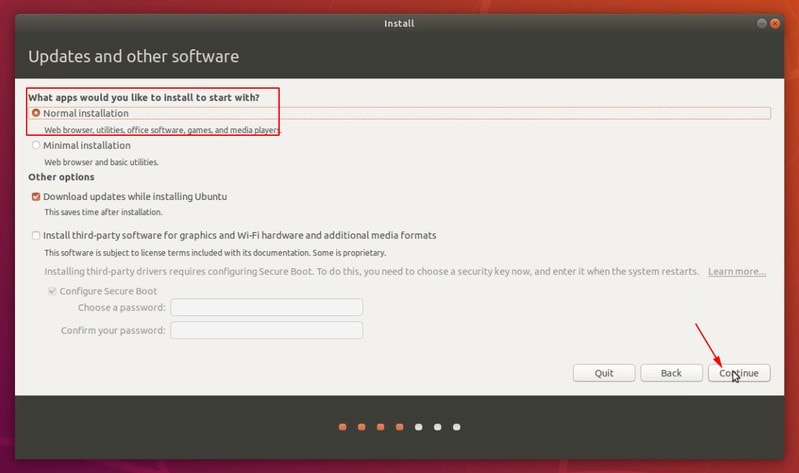
On the next screen, it asks for the kind of installation. Go with Normal installation. No need to download updates or install third-party software just yet. You may do it after installation completes. In my experience, it increases the installation duration and may create issues at times. I prefer to avoid it.
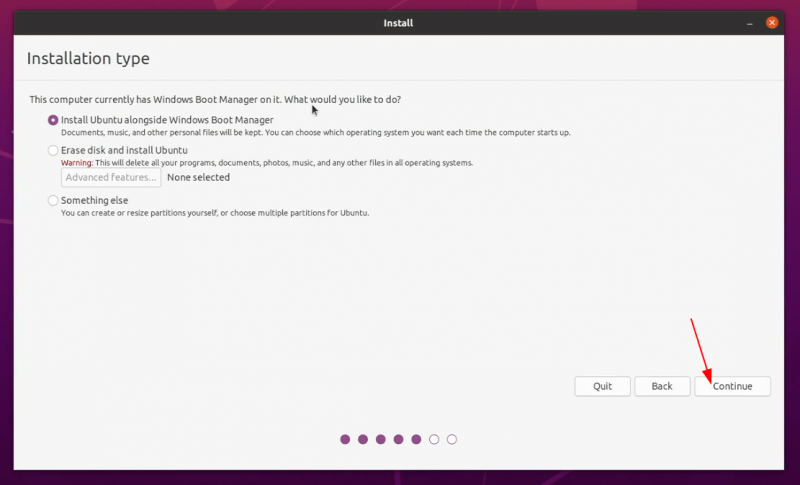
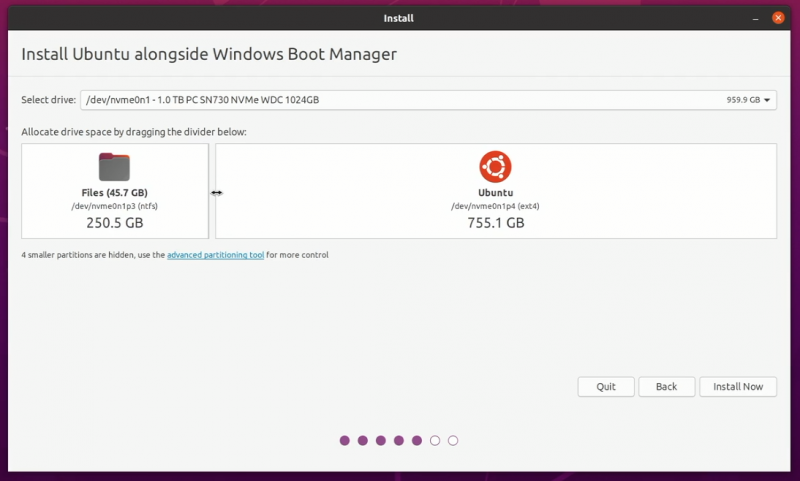
If you see the ‘Install Ubuntu alongside Windows Boot Manager’, it’s good news. You can proceed with the rest of the installation which means dragging the divider to allocate disk partitioning for Ubuntu.
But if you are one of the unlucky ones who don’t see this option, you’ll have to quit the installation and do some additional efforts that I have explained under the expandable section.
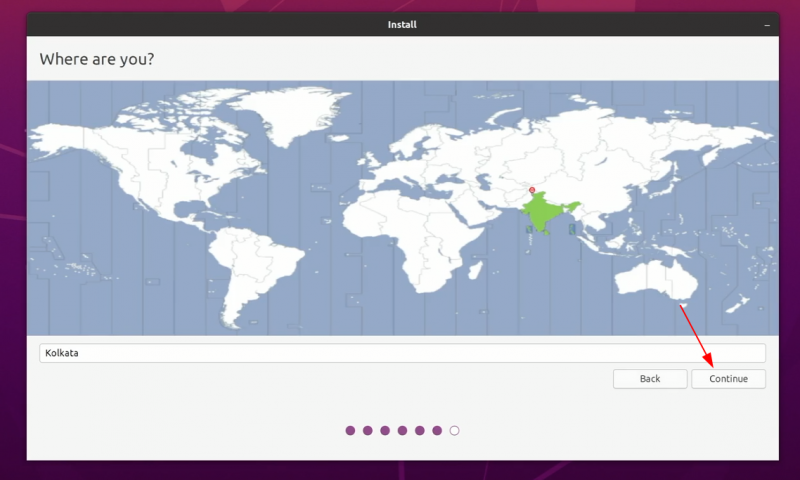
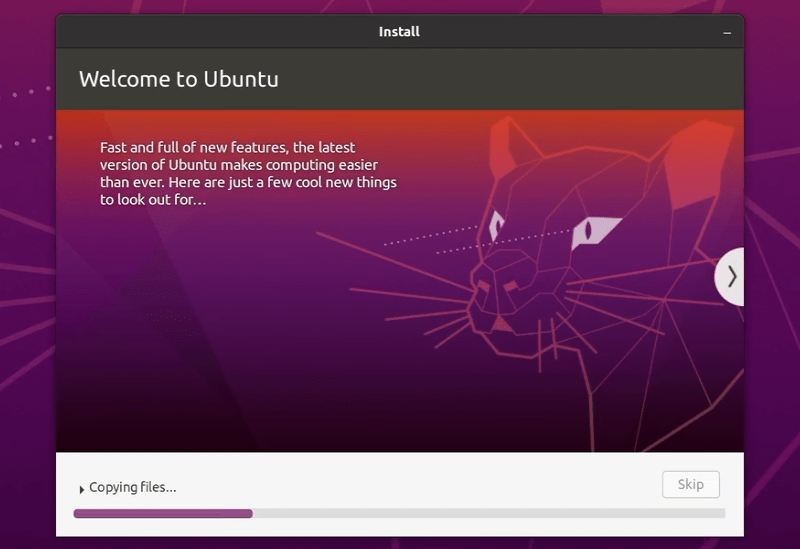
Things are pretty straightforward from here. You’ll be asked to select a timezone.
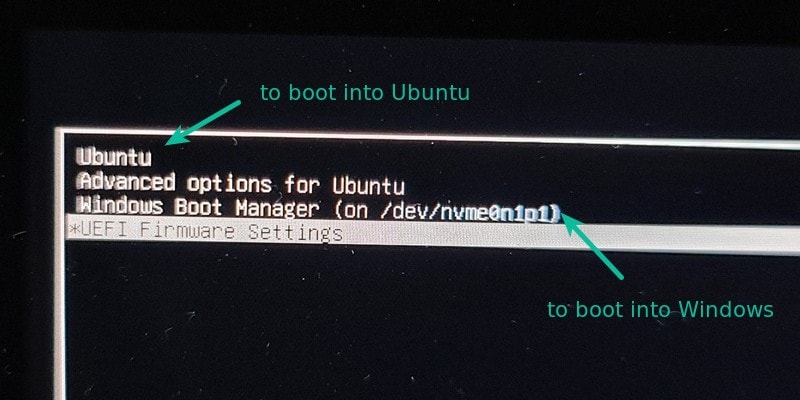
If everything went smooth, you should see the grub screen once the system powers on. Here, you can choose Ubuntu to boot into Ubuntu and Windows boot manager to boot into Windows. Pretty cool, right?
If you don’t see the option to install Ubuntu alongside Windows, quit the installation, turn off the system and boot into Windows. Here, make some free space on your disk by shrinking your disk size.
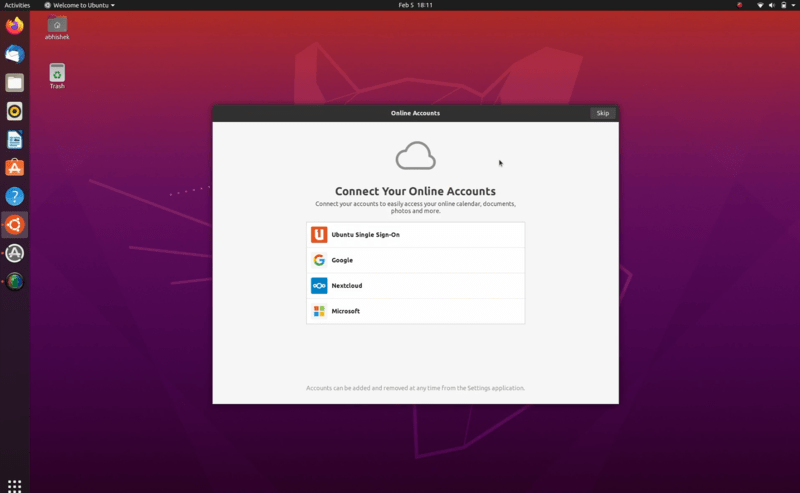
When you boot into Ubuntu, you should see this welcome screen.
You are at penultimate stage. The only remaining part is to re-enable BitLocker for your Windows partitioning, if you want encryption again. You may leave it unencrypted as well. It’s really up to you.
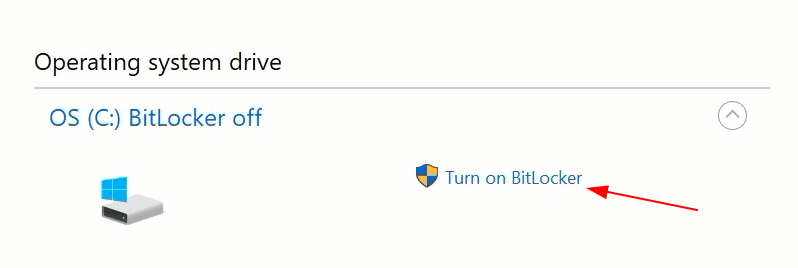
Step 8: Enable Bitlocker after installing Ubuntu successfully
Restart your system and select Windows boot manager at the grub screen to boot into Windows. In Windows, go to BitLocker settings and click on ‘Turn on BitLocker’ option.
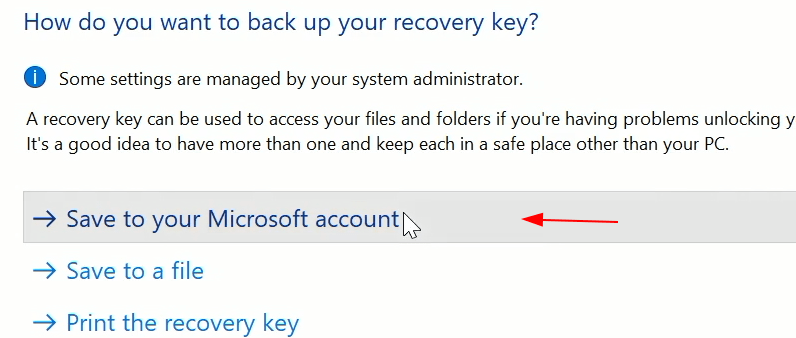
Here’s an important thing. Each time you disable and re-enable BitLocker the recovery key changes. This is why you’ll be asked to back up your recovery key once again. Save it to your account once again.
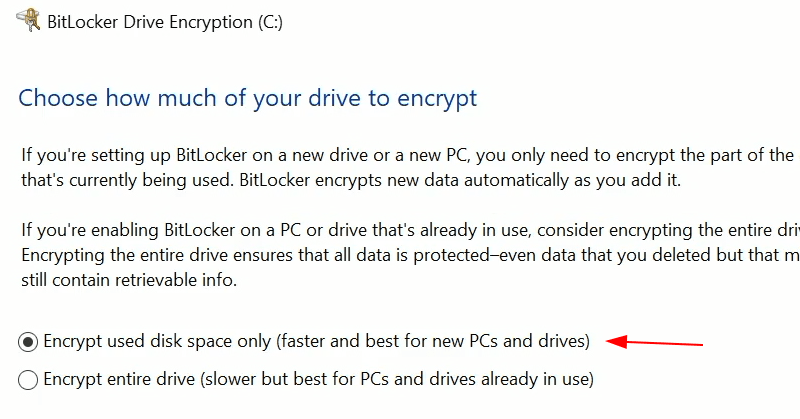
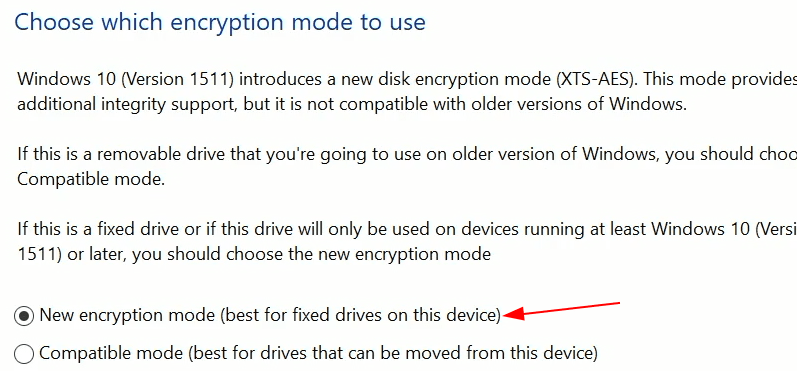
Start the encryption. Please keep in mind that encrypting the disk will take some time (based on your used disk space) and consumes considerable processing power. Have patience.
Things look all set. Before ending the tutorial, I’ll also show you what to do when Windows asks for the BitLocker recovery key.
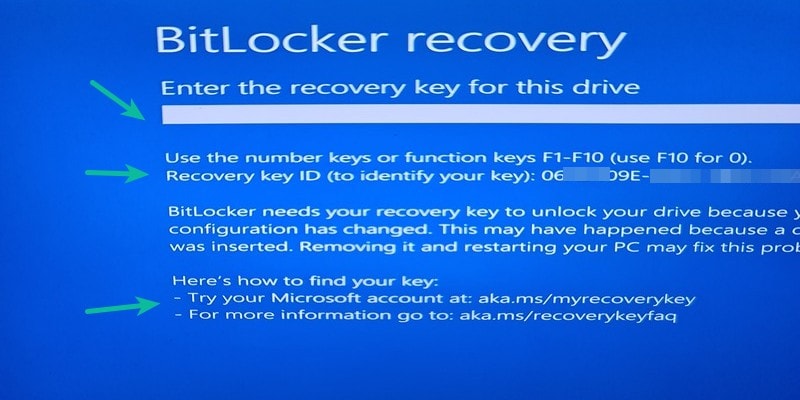
Bonus Tip: Using BitLocker recovery (when asked for it)
When you re-enable BitLocker, it can sense that the boot settings has been changed. For that reason, it will ask for the recovery key when you try to boot into Windows after re-enabling BitLocker.
It mentions the recovery key ID. The first eight characters are important to identify the correct recovery key.
You may have more than one recovery keys on the account of saving the key multiple times. This is where the recovery key ID comes in handy. Take a note of the 40 digit recovery key associated to that recovery key ID.
Were you able to successfully dual boot Windows 10 with Ubuntu and BitLocker?
I know it was long read with too many steps and images. I actually tried to give you all the necessary details so that you don’t feel uncomfortable or lost at any stage. I am also working on a video for these steps so that you can see things in action.
If you tried the tutorial, did it work for you? Do you still have problems or questions? Please feel free to ask in the comment section.
Created It's FOSS 13 years ago to share my Linux adventures. Have a Master's degree in Engineering and years of IT industry experience. Huge fan of Agatha Christie detective mysteries 🕵️♂️
With the FOSS Weekly Newsletter, you learn useful Linux tips, discover applications, explore new distros and stay updated with the latest from Linux world
