
More than 5 years have passed since last update.
Swiftで作られたイケてるUIライブラリたち
Spring ★431
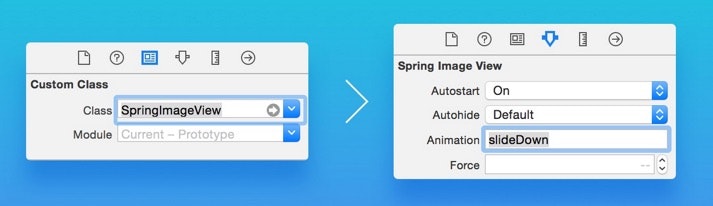
手軽にアニメションが行えるライブラリです。SrotyBoardからアニメションの設定を行えるのがいいですね。
インストール
Xcodeに手動でドロップします。
サンプルコード
アニメションのコードはとってもシンプルです。
layer.animation = "squeezeDown"
layer.animate()
26種類のアニメションパターンを設定できます。
- shake
- pop
- morph
- squeeze
- wobble
- swing
- flipX
- flipY
- fall
- squeezeLeft
- squeezeRight
- squeezeDown
- squeezeUp
- slideLeft
- slideRight
- slideDown
- slideUp
- fadeIn
- fadeOut
- fadeInLeft
- fadeInRight
- fadeInDown
- fadeInUp
- zoomIn
- zoomOut
- flash
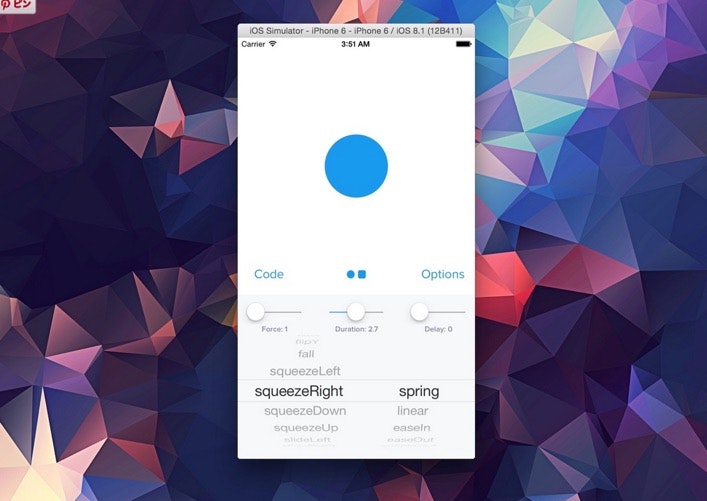
デモ
デモアプリでアニメションの動きを確認できます。
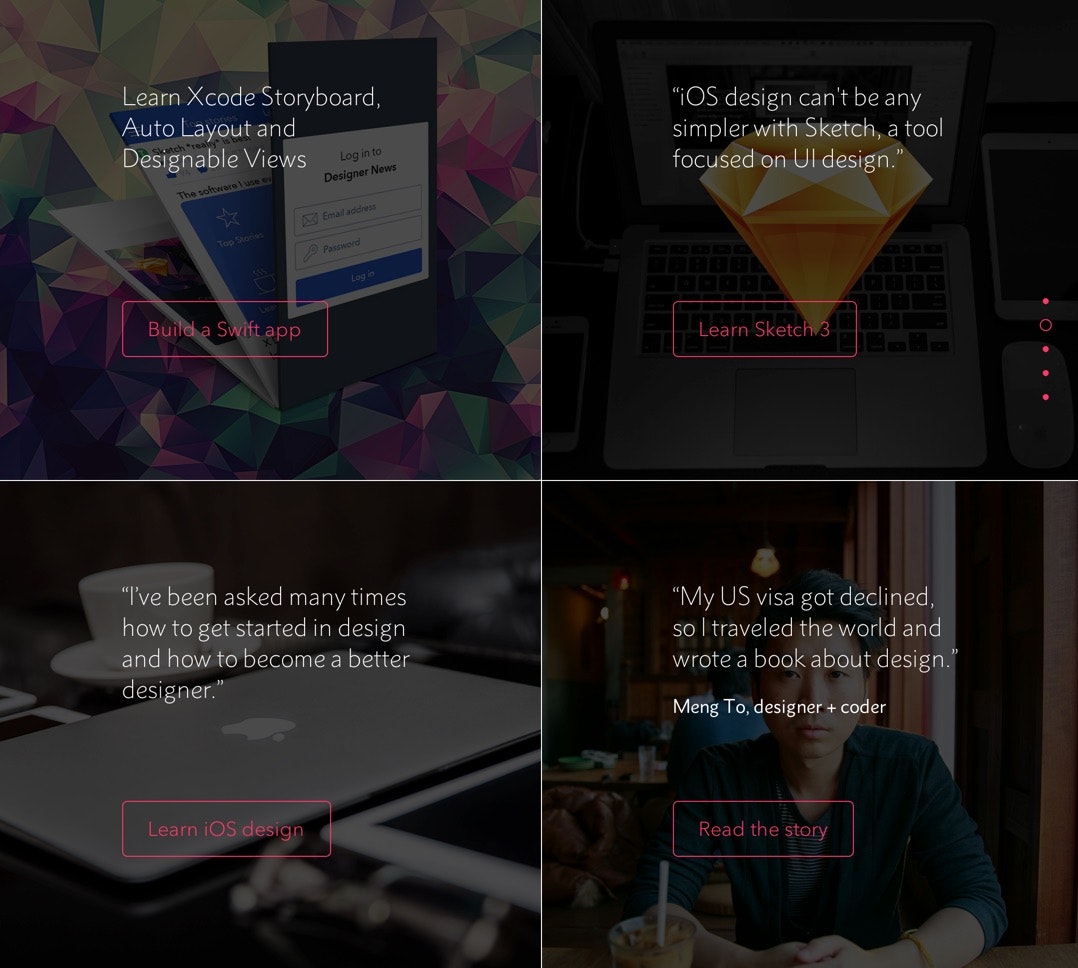
design+code
Springの開発元ではDesignとCodeを連携した開発手法の情報を有料で販売しています。$50です。ほしい。
👁 Design_Code__Learn_iOS_design_and_Xcode.jpg
PageMenu ★425
左右にスワイプすることで画面の表示をアニメションしながら切り替えるライブラリです。
インストール
CocoaPodsに対応しています。
CocoaPods
pod 'PageMenu'
サンプルコード
それぞれの画面はUIViewController単位で管理できます。
// Array to keep track of controllers in page menu
var controllerArray : [UIViewController] = []

// Create variables for all view controllers you want to put in the
// page menu, initialize them, and add each to the controller array.
// (Can be any UIViewController subclass)
// Make sure the title property of all view controllers is set
// Example:
var controller : UIViewController = UIViewController(nibName: "controllerNibName", bundle: nil)
controller.title = "SAMPLE TITLE"
controllerArray.append(controller)

// Initialize page menu with the controllers
pageMenu = CAPSPageMenu(viewControllers: controllerArray)

// Set frame for page menu
// Example:
pageMenu!.view.frame = CGRectMake(0.0, 0.0, self.view.frame.width, self.view.frame.height)

// Customize page menu to your liking (optional) or use default settings
// Example:
pageMenu!.scrollMenuBackgroundColor = UIColor(red: 30.0/255.0, green: 30.0/255.0, blue: 30.0/255.0, alpha: 1.0)
pageMenu!.viewBackgroundColor = UIColor(red: 20.0/255.0, green: 20.0/255.0, blue: 20.0/255.0, alpha: 1.0)
pageMenu!.selectionIndicatorColor = UIColor.orangeColor()
pageMenu!.bottomMenuHairlineColor = UIColor(red: 70.0/255.0, green: 70.0/255.0, blue: 80.0/255.0, alpha: 1.0)
pageMenu!.menuItemFont = UIFont(name: "HelveticaNeue", size: 13.0)
pageMenu!.menuHeight = 40.0

// Lastly add page menu as subview of base view controller view
// or use pageMenu controller in you view hierachy as desired
self.view.addSubview(pageMenu!.view)
BWWalkthrough ★790
かっこよくウォークスルーのページ遷移アニメションを行うライブラリです。
インストール
Xcodeに手動でドロップします。
サンプルコード
 // Get view controllers and build the walkthrough
 let stb = UIStoryboard(name: "Walkthrough", bundle: nil)
 let walkthrough = stb.instantiateViewControllerWithIdentifier(“Master”) as BWWalkthroughViewController
 let page_one = stb.instantiateViewControllerWithIdentifier(“page1”) as UIViewController
 let page_two = stb.instantiateViewControllerWithIdentifier(“page2”) as UIViewController
 let page_three = stb.instantiateViewControllerWithIdentifier(“page3”) as UIViewController

 // Attach the pages to the master
 walkthrough.delegate = self
 walkthrough.addViewController(page_one)
 walkthrough.addViewController(page_two)
 walkthrough.addViewController(page_three)
RAMAnimatedTabBarController ★1922
タブのボタでにアニメションを行えるライブラリです。
アニメションパターン
バウンスや回転など9種類のアニメションが利用できます。
- RAMBounceAnimation
- RAMLeftRotationAnimation
- RAMRightRotationAnimation
- RAMFlipLeftTransitionItemAniamtions
- RAMFlipRightTransitionItemAniamtions
- RAMFlipTopTransitionItemAniamtions
- RAMFlipBottomTransitionItemAniamtions
- RAMFrameItemAnimation
- RAMFumeAnimation
コードサンプル
class RAMBounceAnimation : RAMItemAnimation {

 override func playAnimation(icon : UIImageView, textLable : UILabel) {
 playBounceAnimation(icon)
 textLable.textColor = textSelectedColor
 }

 override func deselectAnimation(icon : UIImageView, textLable : UILabel, defaultTextColor : UIColor) {
 textLable.textColor = defaultTextColor
 }

 override func selectedState(icon : UIImageView, textLable : UILabel) {
 textLable.textColor = textSelectedColor
 }

 func playBounceAnimation(icon : UIImageView) {

 let bounceAnimation = CAKeyframeAnimation(keyPath: "transform.scale")
 bounceAnimation.values = [1.0 ,1.4, 0.9, 1.15, 0.95, 1.02, 1.0]
 bounceAnimation.duration = NSTimeInterval(duration)
 bounceAnimation.calculationMode = kCAAnimationCubic

 icon.layer.addAnimation(bounceAnimation, forKey: "bounceAnimation")
 }
}
LTMorphingLabel ★1912
モーフィングのアニメションを利用したラベルです。
インストール
CocoaPodsとCarthageに対応しています。
CocoaPods
pod 'LTMorphingLabel'
事前にSwift(DynamicFramework)に対応したCocoaPodsをインストールする必要があります。
$ gem install cocoapods --pre
Carthage
github "lexrus/LTMorphingLabel"
サンプルコード
let label = LTMorphingLabel(frame: CGRectMake(0,0,120,50))
label.text = "Test"
label.morphingEffect = .Evaporate
デモ
.Scale - default
👁 LTMorphingLabel
.Evaporate
👁 LTMorphingLabel-Evaporate
.Fall
👁 LTMorphingLabel-Fall
.Pixelate
👁 LTMorphingLabel-Pixelate
.Sparkle
👁 LTMorphingLabel-Sparkle
Side Menu ★
かっこ良くサイドメニューをオーバーレイして表示するライブラリです。
インストール
CocoaPodsとCarthageに対応しています。
CocoaPods
pod 'YALSideMenu'
事前にSwift(DynamicFramework)に対応したCocoaPodsをインストールする必要があります。
$ gem install cocoapods --pre
Carthage
github "yalantis/Side-Menu.iOS"
サンプルコード
class MyFancyMenuViewController: UIViewController, Menu {
 @IBOutlet
 var menuItems = [UIView] ()
Register as a new user and use Qiita more conveniently
- You get articles that match your needs
- You can efficiently read back useful information
- You can use dark theme