
More than 3 years have passed since last update.
Nerves Livebook Firmwareを使って温度・湿度のグラフをかいてみる
13
Last updated at Posted at 2021-08-07
はじめに
-
Elixir楽しんでいますか👁 :bangbang:
👁 :bangbang:
👁 :bangbang:
- この記事は、「SORACOMを使ったIoTにチャレンジしよう!」というQiitaエンジニアフェスタ2021の中の1つのテーマに応募した記事です
- Elixirという素敵なプログラミング言語がありまして、そのElixirで楽しめる、ナウでヤングでcoolなIoTフレームワークNervesというものがあります
- NervesにLivebookという、これまたプログラム言語Elixir謹製のノートブックを組み合わせたものがNerves Livebook Firmwareです
- めちゃくちゃ簡単にNervesをはじめられます!
- どんなことができるの? というのが気になるとおもいます
- こんなことができますですよ
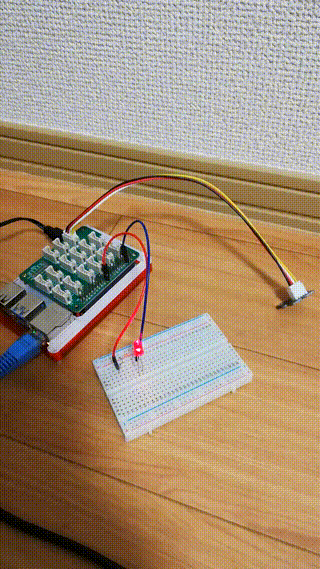
必要なもの
👁 スクリーンショット 2021-08-07 12.13.34.png
- 私はRaspberry Pi 4を使いました
-
Prerequisitesに書いてあるターゲットをお持ちの方はぜひお試しください! - 温度・湿度の測定には手先が不器用ですからな私でもIoTを楽しめるSeeedさんの製品を使いました
- Raspberry Pi用Grove Base Hat
-
Grove AHT20 I2C温度および湿度センサー 工業用グレード
- この記事では、私が持っているセンサーを使います
- そのほかのセンサーでもこの記事を参考に楽しめるとおもいます
- センサーから値を読み込むElixirのプログラムを作っていただく必要はあります
- そんなの無いよう〜 という方のために、この記事でつかった
Raspberry Pi 4さえあれば楽しめる手順は後ほど書いておきます
- 私の開発マシンはmacOS Catalina 10.15.7です
- Windowsでも大丈夫なはずです (すみません。試してはいません)
準備
- https://github.com/fhunleth/nerves_livebook にすべて書いてあります
①ファームウェアを焼き込むツールをインストールします
- 私は
fwupを使いました - https://github.com/fwup-home/fwup#installing
②ファームウェアをダウンロードします
- https://github.com/fhunleth/nerves_livebook/releases
- お持ちのターゲットと合致するものをダウンロードします
- 私は
nerves_livebook_rpi4.fwをダウンロードしました
③ファームウェアをmicroSDカードに焼き込みます
- 開発マシンにmicroSDカードをさして以下のコマンドを実行します
LANケーブルでネットワークに接続する場合
$ fwup nerves_livebook_rpi4.fw
Use 15.84 GB memory card found at /dev/rdisk2? [y/N] y
Wi-Fiでネットワークに接続する場合
$ sudo NERVES_WIFI_SSID='access_point' NERVES_WIFI_PASSPHRASE='passphrase' fwup nerves_livebook_rpi4.fw
④こんがり焼き上がったmicroSDカードをターゲットに差し込んで電源ON
- 10秒から30秒程度、👁 :coffee:
でも飲んでお待ちください -
ping nerves.localで反応があることを確かめたら、ブラウザでhttp://nerves.localにアクセスしてみてください - こんな画面がでてきましたら、
Passwordには迷わずnervesと叩き込んでください!
👁 スクリーンショット 2021-08-07 12.34.25.png
温度・湿度のグラフを書いてみる
Livebook v0.2 is out! I have recorded a video with our latest features: https://t.co/jvbL5lNrjX
— José Valim (@josevalim) June 17, 2021
After the initial announcement, we have added user profiles, notebook importing, inputs, charts, and interactive widgets with Kino!
Thread 👇 with a TL;DW [1/6] #MyElixirStatus
- ↑Elixirの作者であるJosé Valimさんの解説動画をとても参考にしています
-
nervesでAuthenticateすると以下のような画面に遷移します
👁 スクリーンショット 2021-08-07 12.37.18.png
- 右上の
New notebookでノートブックをつくります - あとはポチポチやっていく感じです
- タイトルのデフォルト値は
Untitled notebookです- そのままでもよいです
- 名前は大事なので、
temperature-humidityとでもつけておきましょう
👁 スクリーンショット 2021-08-07 12.46.30.png
グラフをかく
-
タイトルの下のほうの
+ Sectionを押します-
Graphとでも名前をつけておきます
👁 スクリーンショット 2021-08-07 12.52.56.png
-
-
そうすると
Elixirというボタンがみえるのでそれを押します
defmodule Aht20.Reader do
 alias Circuits.I2C

 @i2c_bus "i2c-1"
 @i2c_addr 0x38
 @initialization_command <<0xBE, 0x08, 0x00>>
 @trigger_measurement_command <<0xAC, 0x33, 0x00>>
 @two_pow_20 :math.pow(2, 20)

 def read do
 {:ok, ref} = I2C.open(@i2c_bus)

 I2C.write(ref, @i2c_addr, @initialization_command)
 Process.sleep(10)

 I2C.write(ref, @i2c_addr, @trigger_measurement_command)
 Process.sleep(80)

 ret = I2C.read(ref, @i2c_addr, 7)

 I2C.close(ref)

 value(ret)
 end

 defp value({:ok, val}), do: {:ok, convert(val)}

 defp value(_), do: :error

 defp convert(<<_, raw_humi::20, raw_temp::20, _>>) do
 humi = Float.round(raw_humi * 100 / @two_pow_20, 1)
 temp = Float.round(raw_temp * 200 / @two_pow_20 - 50.0, 1)

 {temp, humi}
 end
end
- いきなり長いですね
- センサーごとにデータシートを読み解きながら、値を読み取るプログラムをつくる必要があります
- もしかしたらライブラリとして公開されているものがあるかもしれません
- Elixirがはじめての方にはもしかしたら見慣れないものが多いかもしれませんが、なんとなく感じてください
- 以下のコミュニティがきっと優しくSlackで相談にのってくれるでしょう!
👁 スクリーンショット 2021-08-07 15.53.41.png
- 続いて
+ Elixirを押して
Aht20.Reader.read()
- と入力します
- すぐ上に
> Evaluateというボタンがありますので迷わずおしてみます
👁 スクリーンショット 2021-08-07 15.56.56.png
- 温度・湿度が読み取れました
- この例では気温 28.2℃、湿度 46.4%です
- あとは定期的に値を取得してグラフ表示してみます
-
+ Elixirを押して以下のプログラムを入力してください - https://www.youtube.com/watch?v=MOTEgF-wIEI にて、José Valimさんが説明されているプログラムを参考にしています
alias VegaLite, as: Vl

layers =
 for {layer, color} <- [temp: :red, humi: :blue] do
 Vl.new()
 |> Vl.mark(:line)
 |> Vl.encode_field(:x, "iteration", type: :quantitative)
 |> Vl.encode_field(:y, Atom.to_string(layer), type: :quantitative, title: "℃, %")
 |> Vl.encode(:color, value: color, datum: Atom.to_string(layer))
 end

widget = Vl.new(width: 500, height: 200)
 |> Vl.layers(layers)
 |> Kino.VegaLite.new()
- 一度、
+ Elixirを押してプログラムを分けてください
Kino.VegaLite.periodically(widget, 200, 0, fn i ->
 {:ok, {temp, humi}} = Aht20.Reader.read()
 point = %{temp: temp, humi: humi, iteration: i}

 Kino.VegaLite.push(widget, point, window: 1000)
 {:cont, i + 1}
end)
-
evaluateを迷わず押すと、こんなグラフが表示されるとおもいます - センサーを水に近づけることで湿度があがっています
- なにもしないとまっすぐにしかならないので演出です
👁 :tada:
👁 :tada:
👁 :tada:
👁 :tada:
おまけ メモリ使用量でグラフをかく
- センサーをお持ちではない方でもお手軽に試せる方法を書いておきます
Mix.install([
 {:vega_lite, "~> 0.1.0"},
 {:kino, "~> 0.2.0"}
])

alias VegaLite, as: Vl

memory = [
 total: :red,
 processes: :yellow,
 atom: :green,
 binary: :pink,
 code: :orange,
 ets: :blue
]

layers =
 for {layer, color} <- memory do
 Vl.new()
 |> Vl.mark(:line)
 |> Vl.encode_field(:x, "iteration", type: :quantitative)
 |> Vl.encode_field(:y, Atom.to_string(layer), type: :quantitative, title: "Memory usage (MB)")
 |> Vl.encode(:color, value: color, datum: Atom.to_string(layer))
 end

widget = Vl.new(width: 500, height: 200)
 |> Vl.layers(layers)
 |> Kino.VegaLite.new()
Kino.VegaLite.periodically(widget, 200, 0, fn i ->
 point =
 :erlang.memory()
 |> Enum.map(fn {type, bytes} -> {type, bytes / 1_000_000} end)
 |> Map.new()
 |> Map.put(:iteration, i)

 Kino.VegaLite.push(widget, point, window: 1000)
 {:cont, i + 1}
end)

for i <- 1..1_000_000 do
 :"atom#{i}"
end
おまけ Lチカ
- 手前味噌の記事を参考にしてください
- Livebook Lチカをイゴかす (Elixir)
しまった👁 :bangbang:
👁 :bangbang:
👁 :bangbang:
- ここまでRaspberry Pi 4と温度・湿度センサーを使っているので、IoTに関することを書いたことにさせてください 👁 :pray:
👁 :pray_tone1:
👁 :pray_tone2:
👁 :pray_tone3:
👁 :pray_tone4:
👁 :pray_tone5:
- しかしながらSORACOMさんの要素がちっともありません
- ここからは、Nerves Livebook Firmware + SORACOM Air for セルラーのSIMを使ったデータ通信をやってみます
- データ通信端末にはL-02Cを使います
- 選出基準の「日常生活や、業務の課題解決を実現」とはほど遠いですが、私の知的好奇心は満たしていますので、私の日常生活を豊かにしてくれました
SORACOM Air for セルラーのSIMを使ったデータ通信
- ここからはNervesを使った開発経験がある方へ向けて要点だけ書いていきます
- まずは、https://hexdocs.pm/nerves/installation.html#content 等を参考に環境整備が必要です
- それが整ったら
- https://hexdocs.pm/nerves/customizing-systems.html#content
- を参考にcustom_rpi4をつくって、カスタマイズしたNerves System上でイゴくようにします
- 素のNerves Systemでは、L-02C等でのデータ通信はできません
$ mkdir livebook_project
$ cd livebook_project
$ git clone https://github.com/fhunleth/nerves_livebook.git
$ git clone https://github.com/nerves-project/nerves_system_rpi4.git custom_rpi4 -b v1.16.1
- Nerves Systemのバージョンは、
nerves_livebook/mix.lockに記録されているバージョンにあわせておくのが吉です
custom_rpi4
livebook_project/custom_rpi4/mix.exs
-defmodule NervesSystemRpi4.MixProject do
+defmodule CustomRpi4.MixProject do
 use Mix.Project

- @github_organization "nerves-project"
- @app :nerves_system_rpi4
+ @github_organization "TORIFUKUKaiou"
+ @app :custom_rpi4
-
https://github.com/nerves-networking/vintage_net_mobile#system-requirements を参考に
ppp等が使えるようにします
livebook_project/custom_rpi4/linux-5.4.defconfig
CONFIG_PPP=m
CONFIG_PPP_BSDCOMP=m
CONFIG_PPP_DEFLATE=m
CONFIG_PPP_FILTER=y
CONFIG_PPP_MPPE=m
CONFIG_PPP_MULTILINK=y
CONFIG_PPP_ASYNC=m
CONFIG_PPP_SYNC_TTY=m
CONFIG_USB_NET_CDC_NCM=m
CONFIG_USB_NET_HUAWEI_CDC_NCM=m
CONFIG_USB_NET_QMI_WWAN=m
CONFIG_USB_SERIAL_OPTION=m
livebook_project/custom_rpi4/nerves_defconfig
BR2_PACKAGE_USB_MODESWITCH=y
BR2_PACKAGE_PPPD=y
BR2_PACKAGE_PPPD_FILTER=y
BR2_PACKAGE_BUSYBOX_CONFIG_FRAGMENT_FILES="${NERVES_DEFCONFIG_DIR}/busybox.fragment"
livebook_project/custom_rpi4/busybox.fragment
CONFIG_MKNOD=y
CONFIG_WC=y
nerves_livebook
- 続いてnerves_livebookのほうをカスタマイズします
livebook_project/nerves_livebook/mix.exs
diff --git a/mix.exs b/mix.exs
index 0ca7bbb..558b54d 100644
--- a/mix.exs
+++ b/mix.exs
@@ -13,7 +13,8 @@ defmodule NervesLivebook.MixProject do
 :bbb,
 :osd32mp1,
 :x86_64,
- :npi_imx6ull
+ :npi_imx6ull,
+ :custom_rpi4
 ]

 def project do
@@ -76,7 +77,8 @@ defmodule NervesLivebook.MixProject do
 {:nerves_system_bbb, "~> 2.10", runtime: false, targets: :bbb},
 {:nerves_system_osd32mp1, "~> 0.6", runtime: false, targets: :osd32mp1},
 {:nerves_system_x86_64, "~> 1.15", runtime: false, targets: :x86_64},
- {:nerves_system_npi_imx6ull, "~> 0.2", runtime: false, targets: :npi_imx6ull}
+ {:nerves_system_npi_imx6ull, "~> 0.2", runtime: false, targets: :npi_imx6ull},
+ {:custom_rpi4, path: "../custom_rpi4", runtime: false, targets: :custom_rpi4, nerves: [compile: true]},
+ {:elixircom, "~> 0.2.0", targets: @all_targets}
 ]
 end
livebook_project/nerves_livebook/rootfs_overlay/etc/chatscripts/soracom
# This chatfile was generated by pppconfig 2.3.18.
# Please do not delete any of the comments. Pppconfig needs them.
#
# ispauth CHAP
# abortstring
ABORT BUSY ABORT 'NO CARRIER' ABORT VOICE ABORT 'NO DIALTONE' ABORT 'NO DIAL TONE' ABORT 'NO ANSWER' ABORT DELAYED
# modeminit
'' ATZ
'' ATH
# ispnumber
OK-AT-OK "ATDT*99***1#"
# ispconnect
CONNECT \d\c
# prelogin

# ispname
# isppassword
# postlogin

# end of pppconfig stuff
livebook_project/nerves_livebook/rootfs_overlay/etc/ppp/chap-secrets
# Secrets for authentication using CHAP
# client server secret IP addresses


sora * sora
"sora@soracom.io" * "sora"
"sora@soracom.io" * "sora"
livebook_project/nerves_livebook/rootfs_overlay/etc/ppp/peers/soracom
# This optionfile was generated by pppconfig 2.3.18.
#
#
hide-password
noauth
connect "/usr/sbin/chat -v -f /etc/chatscripts/soracom"
debug
/dev/ttyUSB2
115200
defaultroute
noipdefault
user "sora@soracom.io"

ipparam soracom
livebook_project/nerves_livebook/config/custom_rpi4.exs
import Config

# Configure the network using vintage_net
# See https://github.com/nerves-networking/vintage_net for more information
config :vintage_net,
 regulatory_domain: "US",
 config: [
 {"usb0", %{type: VintageNetDirect}},
 {"eth0", %{type: VintageNetEthernet, ipv4: %{method: :dhcp}}},
 {"wlan0", %{type: VintageNetWiFi}}
 ]
ビルド
- Nerves SystemのビルドでDockerを使いますので、Dockerを起動しておきます
-
mix firmwareの中で自動的にいい感じにやってくれるので起動さえしておけばよいです
-
$ cd livebook_project/nerves_livebook
$ export MIX_TARGET=custom_rpi4
$ mix deps.get
$ mix firmware
-
mix firmwareはマシンスペックやネットワーク環境などに依存するとおもいますが、けっこう時間がかかります -
👁 :coffee:
でも飲んで待ちましょう - ちなみに私の場合は、1時間弱かかりました
焼く
$ cd _build/custom_rpi4_dev/nerves/images/
$ sudo NERVES_WIFI_SSID='access_point' NERVES_WIFI_PASSPHRASE='passphrase' fwup nerves_livebook.fw
実行
- microSDカードをRaspberry Pi 4にさして電源ON
-
ping nerves.localで応答があるまで👁 :coffee:
でも飲みながらまって - それからおちついてL-02Cをさします
- 私のL-02Cは必ずモデムモードとなるように設定しています
- 参考: L-02Cがデフォルトでモデムモードになっているようにする
$ ssh livebook@nerves.local

iex> lsusb()
Bus 001 Device 004: ID 1004:618f NTT DOCOMO, INC. docomo L02C
...

iex> Elixircom.run("/dev/ttyUSB2")
入力するATコマンド
AT+COPS=1,2,"44010"
OK # 端末から返される
~.
New Notebook でElixirのプログラムを書く
defmodule CellularSample do
 use Toolshed

 def connect do
 cmd("mknod /dev/ppp c 108 0")
 cmd("pon soracom")
 end

 def update_route do
 cmd("ip rou delete default")
 cmd("ip rou add default via #{ip_address()} dev ppp0")
 end

 # ifconfigしてIP Addressを取得している感じです
 defp ip_address do
 {:ok, list} = :inet.getifaddrs()

 Enum.filter(list, fn {type, _} -> type == 'ppp0' end)
 |> Enum.at(0)
 |> elem(1)
 |> Enum.at(1)
 |> elem(1)
 |> Tuple.to_list()
 |> Enum.join(".")
 end
end

CellularSample.connect()
CellularSample.update_route()
- L-02Cが青く光っていればセルラー通信できています
- 本当にセルラー通信しているかはNervesの中に入ってピンポンできることを確かめるのが確実です
iex> ping "pong.soracom.io"
Press enter to stop
Response from pong.soracom.io (100.127.100.127): time=69.427ms
Response from pong.soracom.io (100.127.100.127): time=66.683ms
Response from pong.soracom.io (100.127.100.127): time=77.495ms
- 一応できてはいますが、本当はCustom modemsにあるようにモデムモジュールを作るのが推奨されています
Wrapping Up 👁 :lgtm:
👁 :lgtm:
👁 :lgtm:
👁 :lgtm:
- 前半は、Nerves Livebook Firmwareを丁寧に説明しました
- 丁寧に説明したつもりです
- もしタンスの肥やしになってしまっているラズベリーパイなどがありましたら、ひっぱりだしてきてぜひイゴかしてみてください
- わかりにくい箇所などありましたら補足等いたしますので、お気軽にご質問ください
- 後半は、以前自分で書いた【続】SORACOM x Nerves できたとはいえるとぼくおもいますを参考にしながら、Nerves Livebook FirmwareにおいてもカスタムNerves Systemを組み込めることを示しました
- Nerves Livebook Firmware x おもしろカスタムNerves Systemでもっとおもしろいことができるかもしれません
- この記事自体では、どなかの困りごとであるサムシングを解決できているわけではないことは認めます
- サムシングを解決するのは自分でありたいとおもいますし、はたまたどなたかのインプットとなりえたら幸いです
- Enjoy Elixir 👁 :rocket:
👁 :rocket:
👁 :rocket:
- SORACOM x Nerves の化学反応にておもしろいことがきっとはじまることを祈念して筆をおきます
俺、ディ、Discovery 2021が終わったら Nervesに取り組むんだ!
— 松下享平(Max)@ソラコム/IoTのエバンジェリスト (@ma2shita) June 5, 2021
Register as a new user and use Qiita more conveniently
- You get articles that match your needs
- You can efficiently read back useful information
- You can use dark theme