
The terms whitelist and blacklist refer to lists that control access permissions for your membership site. Whitelisting allows specified email addresses or domains, while blacklisting restricts them.
Whitelist: A whitelist contains approved email addresses or domains that are permitted to register and access your membership site. For example, if you want only users from certain email addresses to sign up, you can add those addresses to the whitelist, ensuring only they can register and log in.
Blacklist: A blacklist contains email addresses or domains that are blocked from registering or logging in. This is useful if you need to prevent certain users from accessing your membership site.
Table of Contents
How to Use this Feature
The Simple Membership plugin includes a built-in whitelisting and blacklisting feature, enabling you to control who can register and log in to your membership site.
To access this feature, navigate to the Settings menu of the Simple Membership plugin. Under the settings, you’ll find a dedicated Blacklisting & Whitelisting tab, where you can manage the email addresses or domains that are allowed or blocked.
Enabling Whitelisting
This section explains how to activate and use the whitelisting feature for email addresses in the Simple Membership plugin.
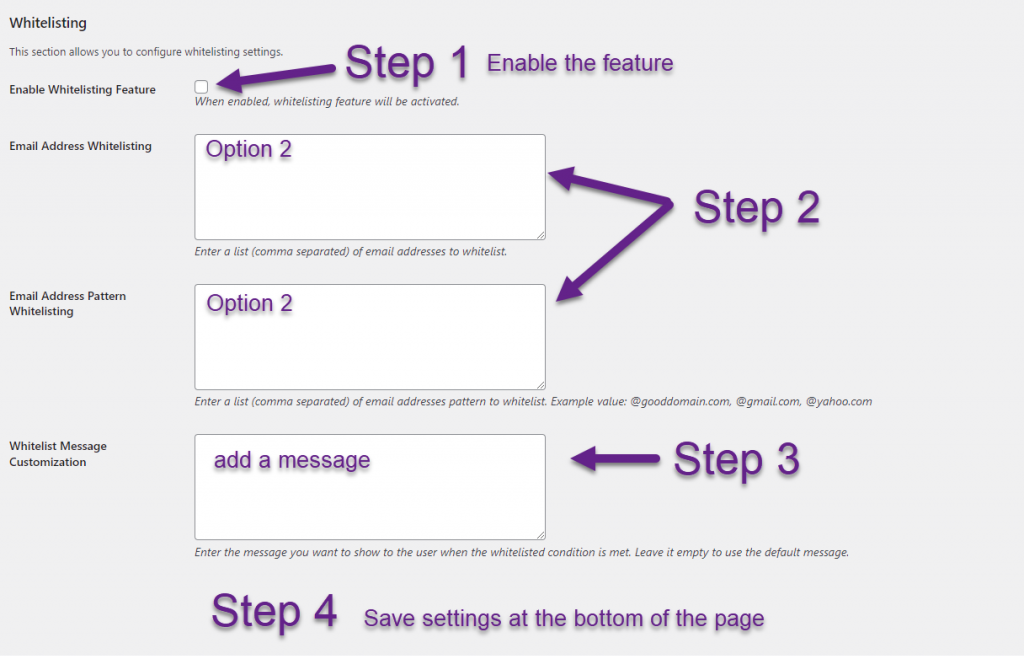
First, you must enable whitelisting by checking the “Enable Whitelisting” checkbox.
There are two ways to add emails to the whitelist:
Option 1: Email Address Whitelisting
Manually specify each email address you want to whitelist by entering them in a comma-separated list.
Example:
abc@goodmail.com, abc@gooddomain.com, abc@cooldomain.com
Option 2: Email Address Pattern Whitelisting
Whitelist groups of email addresses using patterns, such as all emails from a specific domain (e.g., @gmail.com). Any email matching the pattern will be allowed. Enter the patterns as a comma-separated list.
Example:
@gmail.com, @yahoo.com, @outlook.com
Optionally, you can customize the message shown to users when they meet the whitelist conditions. If left blank, the default message will be displayed.
Remember to save your settings at the bottom of the page.
Enabling Blacklisting
This section explains how to activate and use the blacklisting feature for email addresses in the Simple Membership plugin.
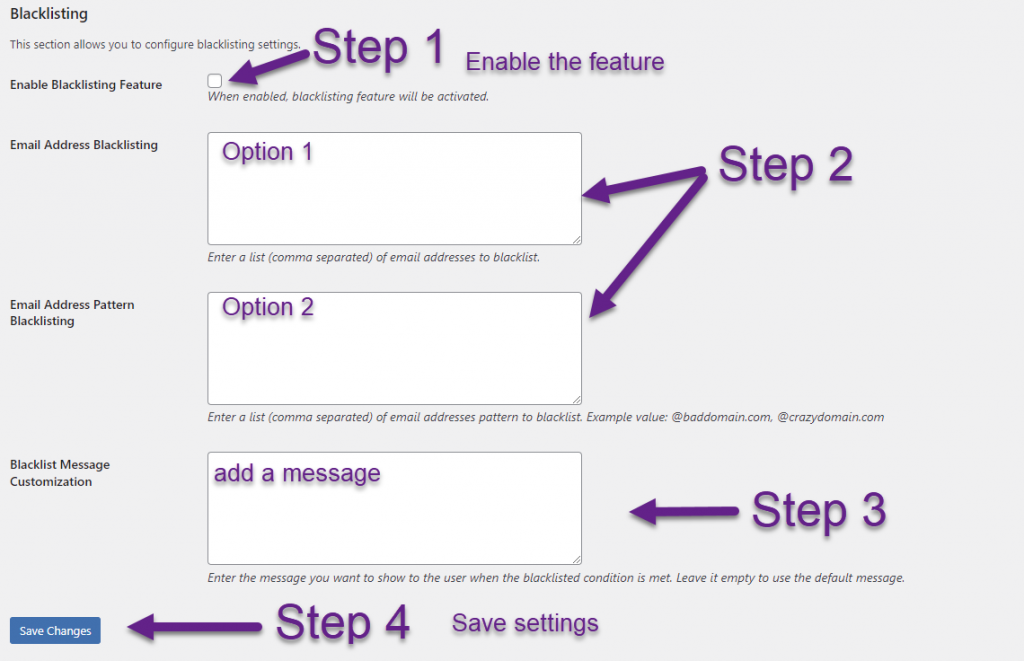
First, you need to enable blacklisting by checking the “Enable Blacklisting” checkbox.
There are two ways to add emails to the blacklist:
Option 1: Email Address Blacklisting
Manually enter the specific email addresses you want to block by listing them as a comma-separated list.
Example:
xyz@baddomain.com, xyz@spammer.com, xyz@badsite.com
Option 2: Email Address Pattern Blacklisting
Block groups of emails using patterns, such as any email from a specific domain (e.g., @baddomain.com). Any email matching the pattern will be blocked. Enter the patterns as a comma-separated list.
Example:
@baddomain.com, @badsite.com
Be sure to save your settings at the bottom of the page.
There is no limit to the number of email addresses you can add to the whitelist or blacklist. However, be cautious when setting too many conditions, as it may lead to conflicts between the two lists.