
Definitive Guide to Creating a SQL Database on Cloud with AWS and Python
An easy-to-follow comprehensive guide on using Amazon RDS, MySQL Workbench, and PyMySQL to build and deploy a cloud database for Python…
We will often generate and collect valuable data from the Python applications we build in our data science work or personal projects.
It is thus vital to have an accompanying database that is scalable and performant so that the data can be effectively stored, organized, and queried.
Fortunately, modern cloud services have made it easy for us to create cost-efficient, resizable, and fully-managed databases on the cloud.
This simple step-by-step guide explains how to integrate Amazon RDS, MySQL Workbench, and PyMySQL to start building and deploying a cloud database for free.
Contents
(1) Tools Overview (2) Setup Amazon RDS (3) Setup MySQL Server (4) Connect RDS Database Instance to MySQL Workbench (5) Create Database Schema and Table (6) Setup PyMySQL (7) Use PyMySQL to Read/Write to Database
All images and screenshots by the author, unless specified otherwise
(1) Tools Overview
(i) MySQL
MySQL is an open-source relational database management system (RDBMS) based on SQL and is widely regarded as the world’s most popular RDBMS.
It allows us to easily create, store, access, and modify relational data in databases.
(ii) Amazon RDS
Amazon Relational Database Service (RDS) is a cloud service that makes it easy to set up, operate, and scale a relational database in the cloud.
The benefits of using Amazon RDS include:
- Cost-efficient and scalable hardware capacity
- Automation of time-consuming database tasks such as scaling, monitoring, and software patching
- Excellent capabilities such as fast performance, high availability, compatibility, and security.
- Fast deployment of servers in minutes with just a few clicks
Amazon RDS supports six database engines, and we will be using the one for MySQL.
(iii) PyMySQL
PyMySQL is a pure-Python MySQL client library that allows us to access and modify MySQL databases (e.g., CRUD operations).
This package serves as the vital link between the Python application and MySQL database.
(2) Setup Amazon RDS
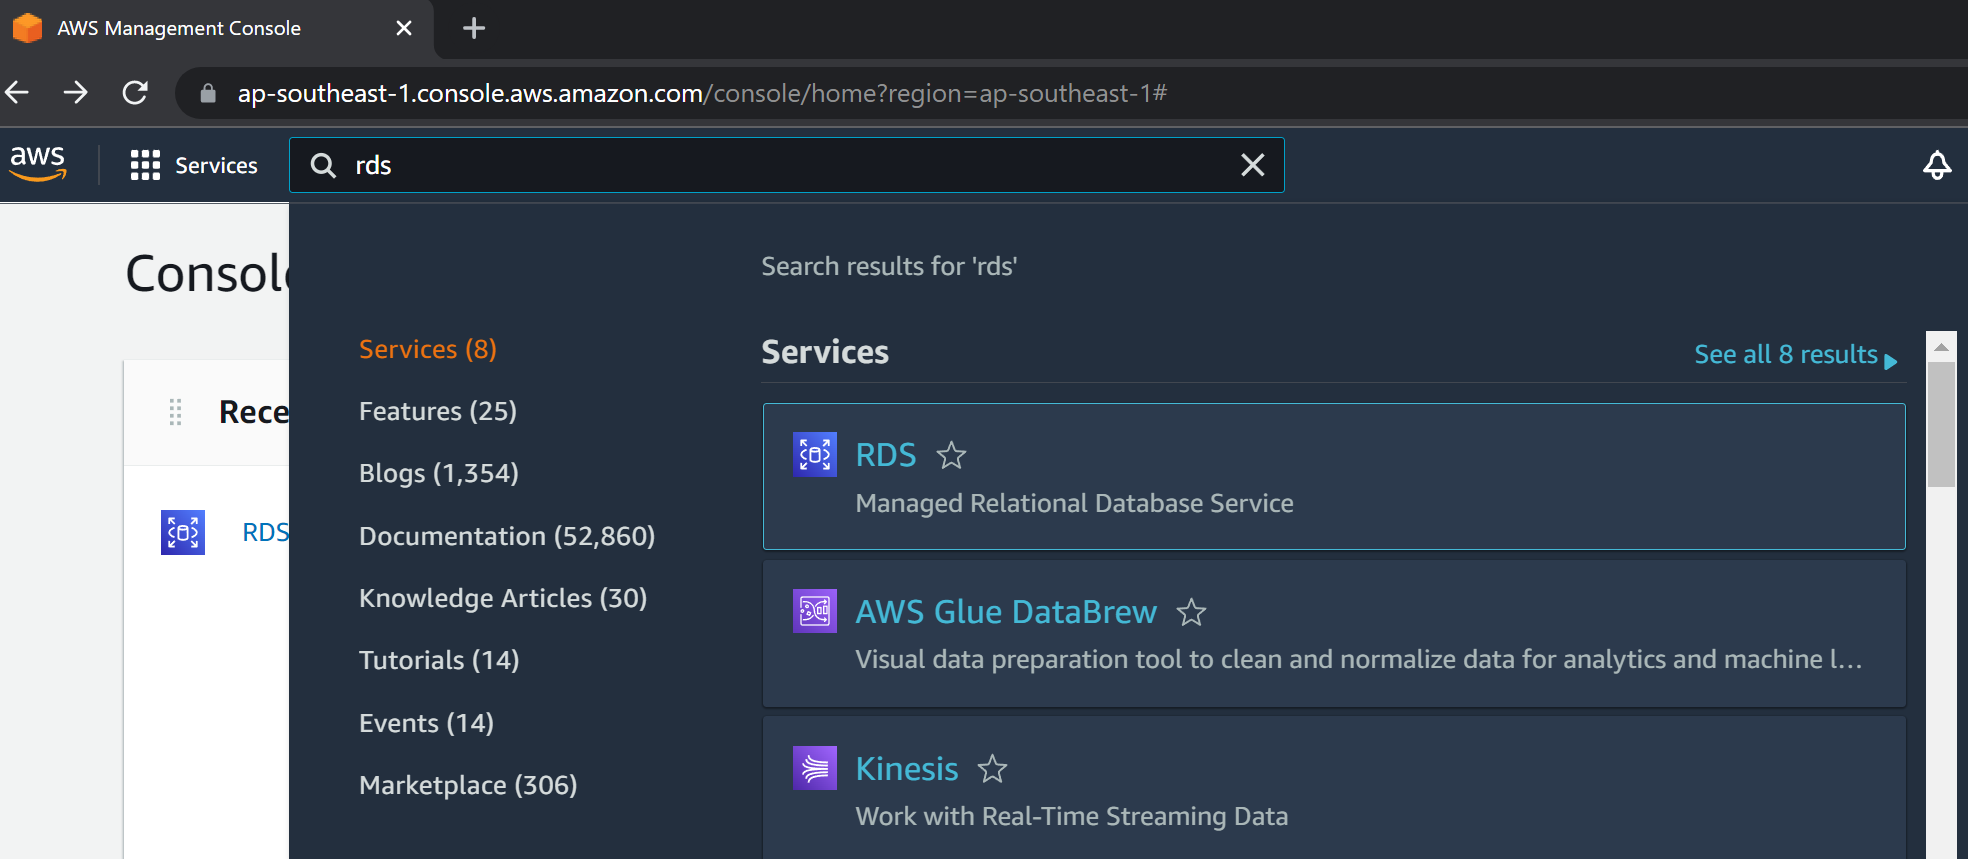
Step 1 – Create Database
After logging into the AWS Management Console, enter ‘rds‘ in the top search bar and click the first search result that says RDS.
Click Databases to reach the databases section in the left menu bar. From there, click the orange button that says ‘Create database‘ to create our first relational database on AWS.
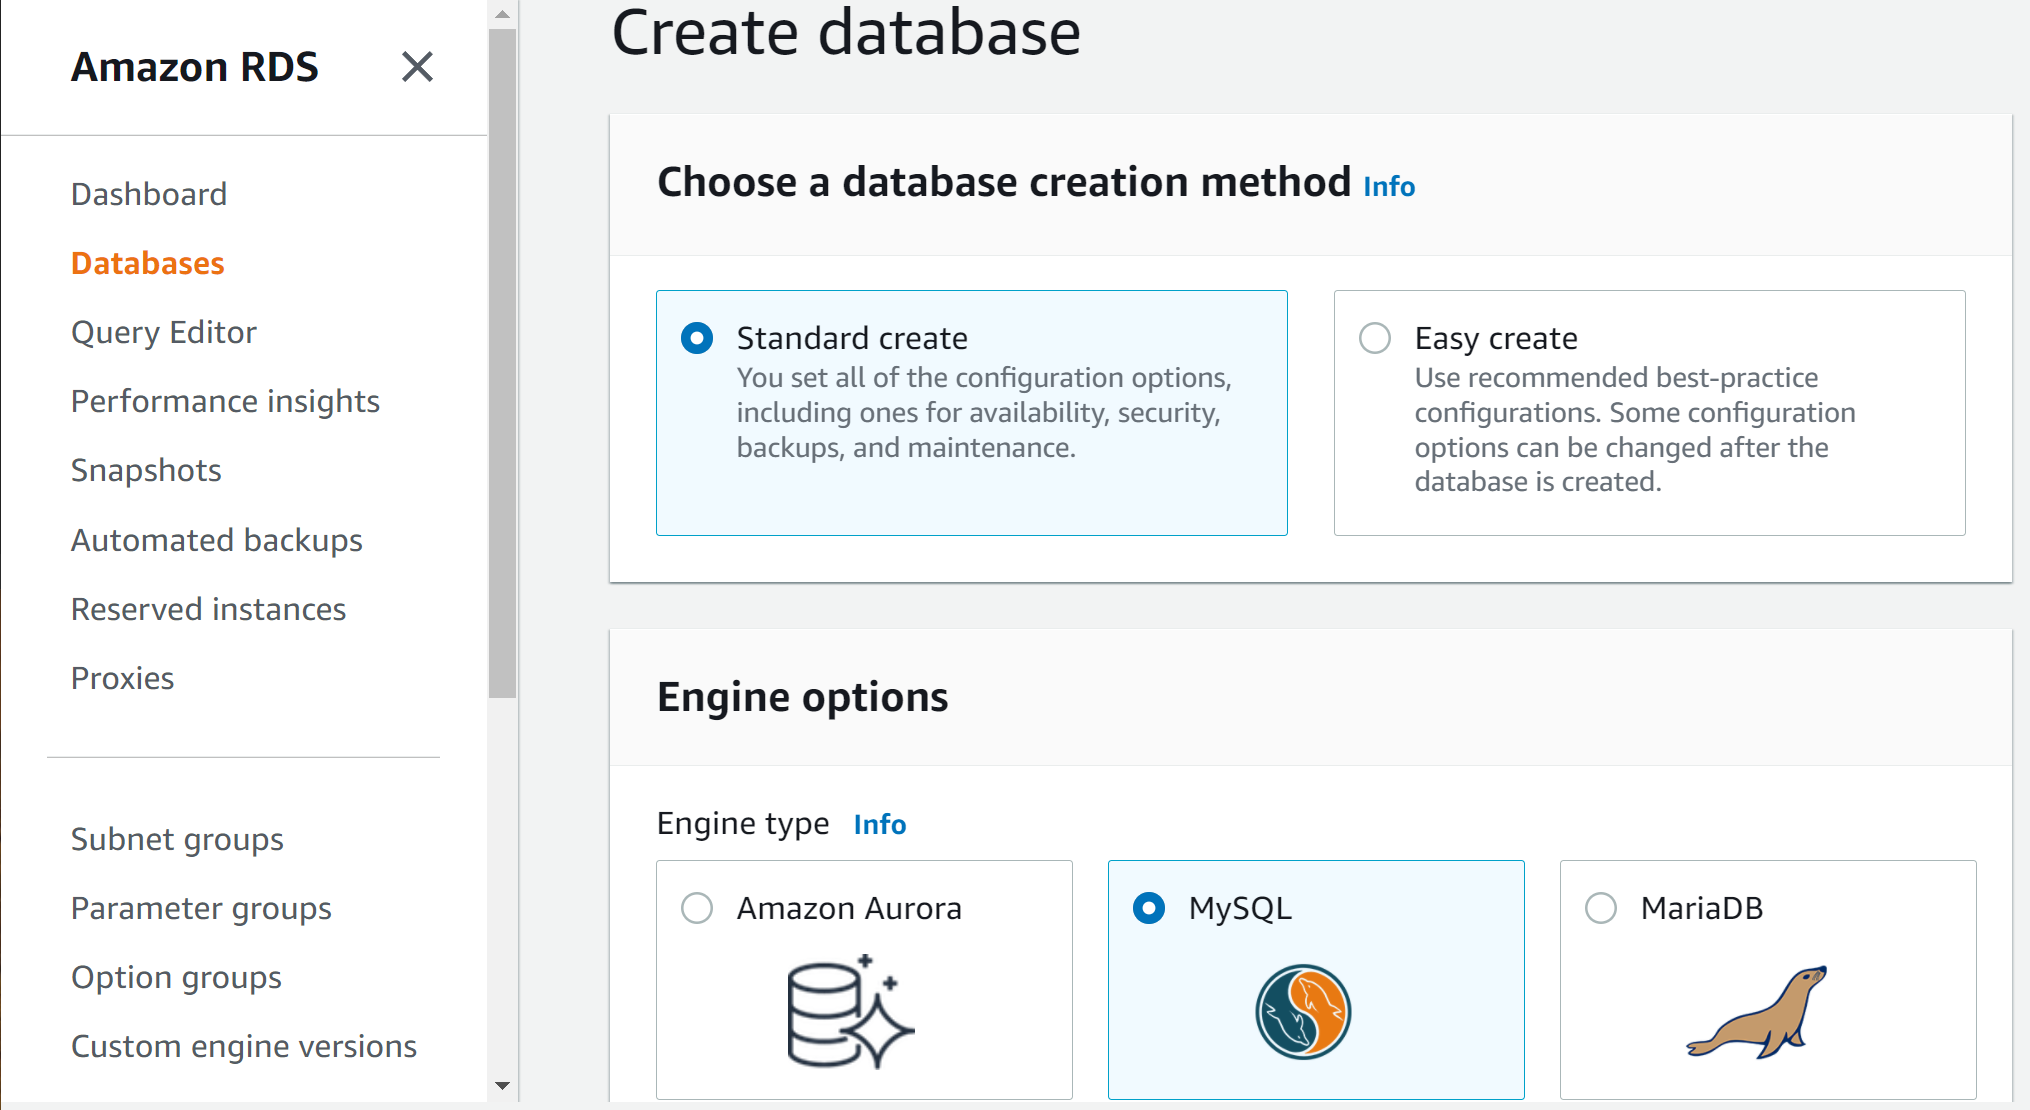
Step 2 – Modify Instance Settings
From here on, we will modify the settings of the database instance. First, we select MySQL as our database engine.
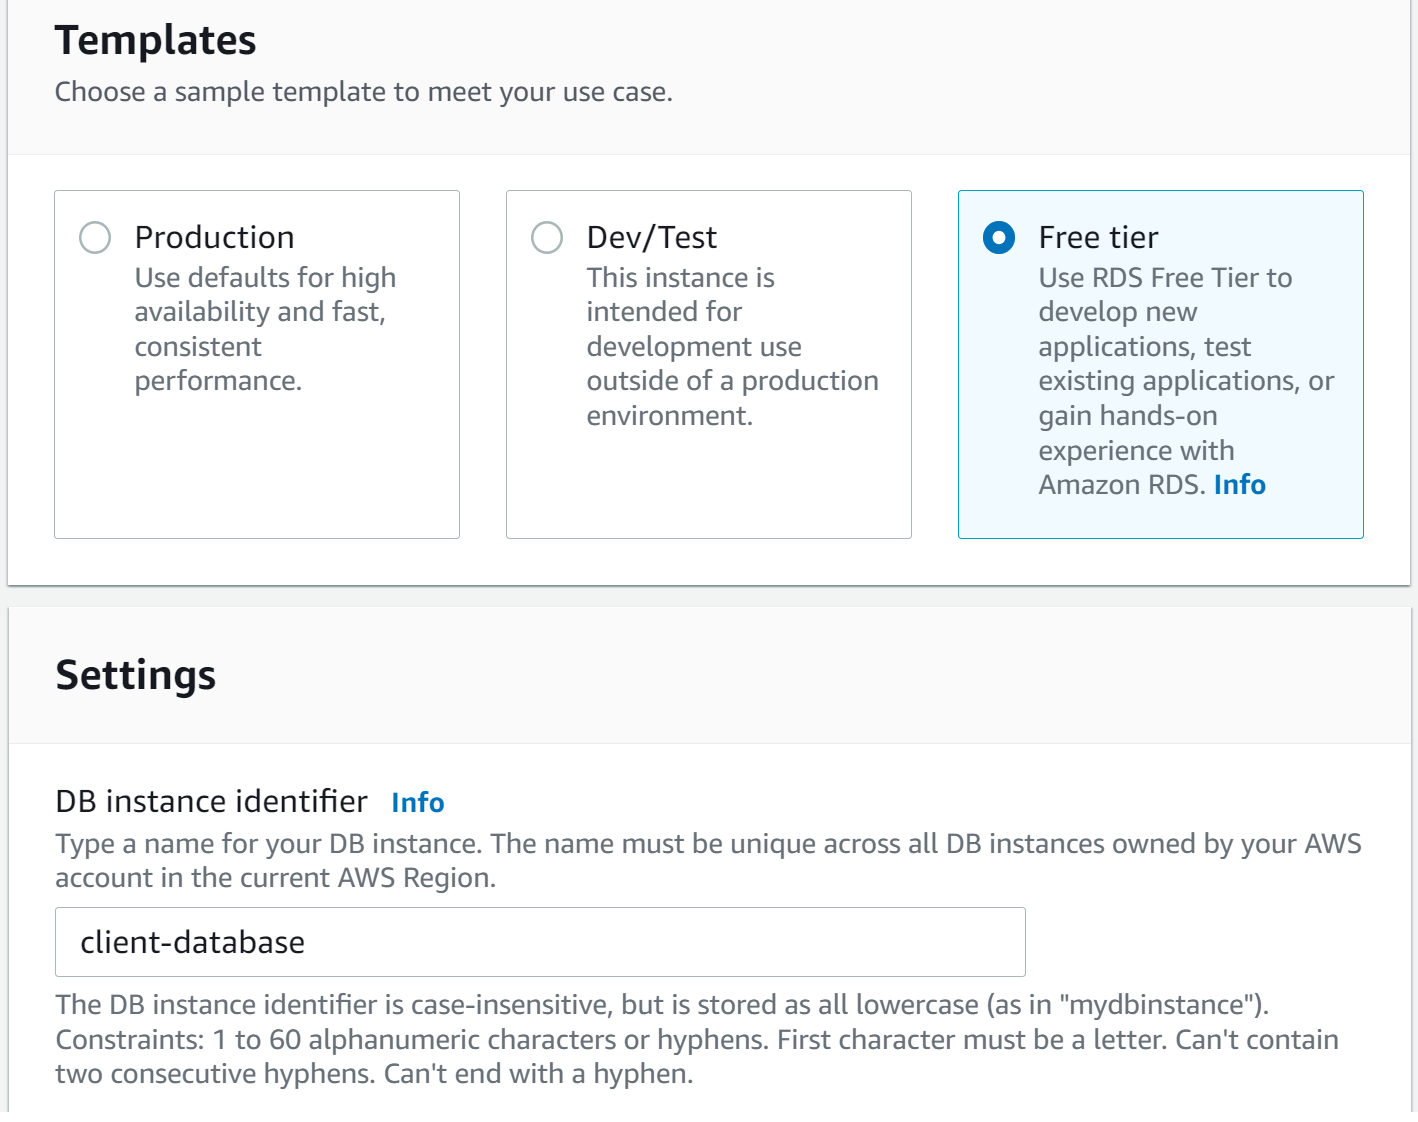
We select the ‘Free tier’ template option to get started with the managed cloud database service for free on the **** RDS Free Tier.
In addition, decide on the name for the database instance (under DB instance identifier). I have named it ‘client-database‘, but we can always customize it.
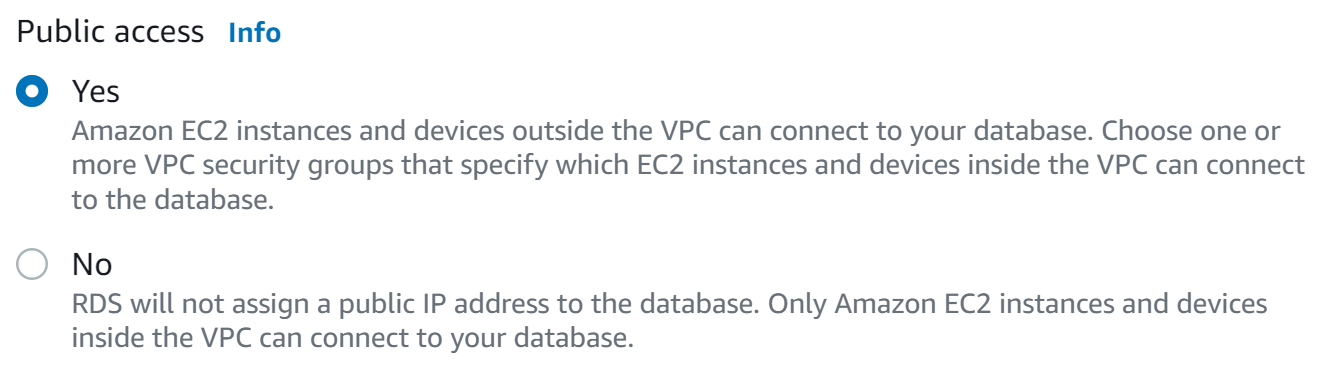
Since we are starting this project from our local machine, we want to connect to the database via the public internet. Hence, we select ‘Yes‘ for Public access.
Note: The concern of Public access is that if other parties get the connection URL to our database, they could potentially interact with it. It is thus vital to exercise caution for production instances, where we may want to restrict connections with a lockdown VPC without public access.
For other settings not mentioned above, we can keep the default values.
For credential settings, select a username and password that is secure and easy to remember. This part is vital as the credentials are needed to establish an authenticated connection to the database later.
After all the necessary changes, scroll to the bottom and click the orange ‘Create database‘ button.
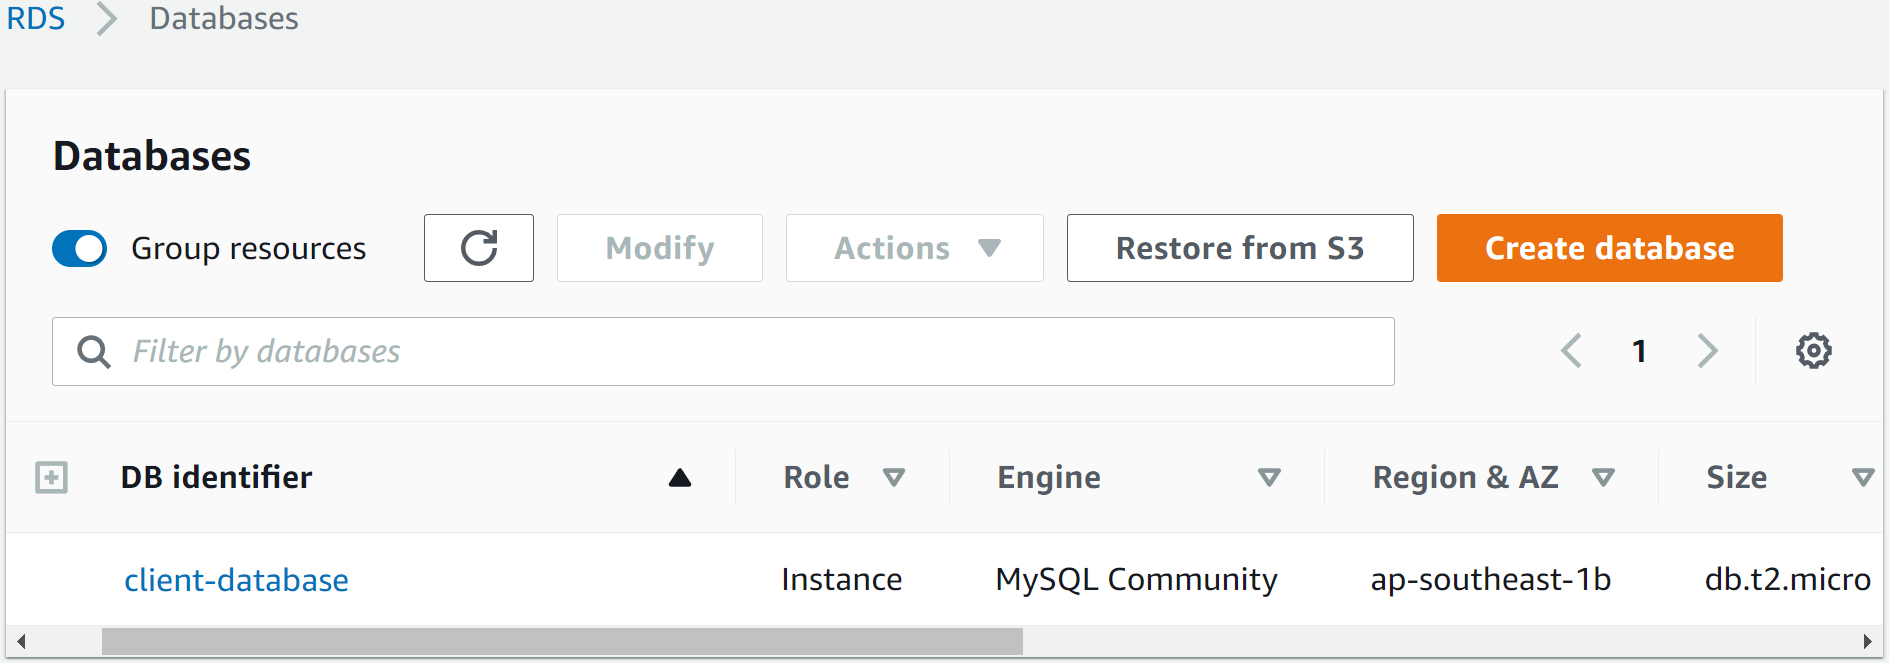
The database creation will take several minutes before our instance appears in the Databases section.
Step 3 – Edit security group configuration
To ensure a successful connection to the database, we must modify the security group configuration on our Virtual Private Cloud (VPC) to allow public internet access.
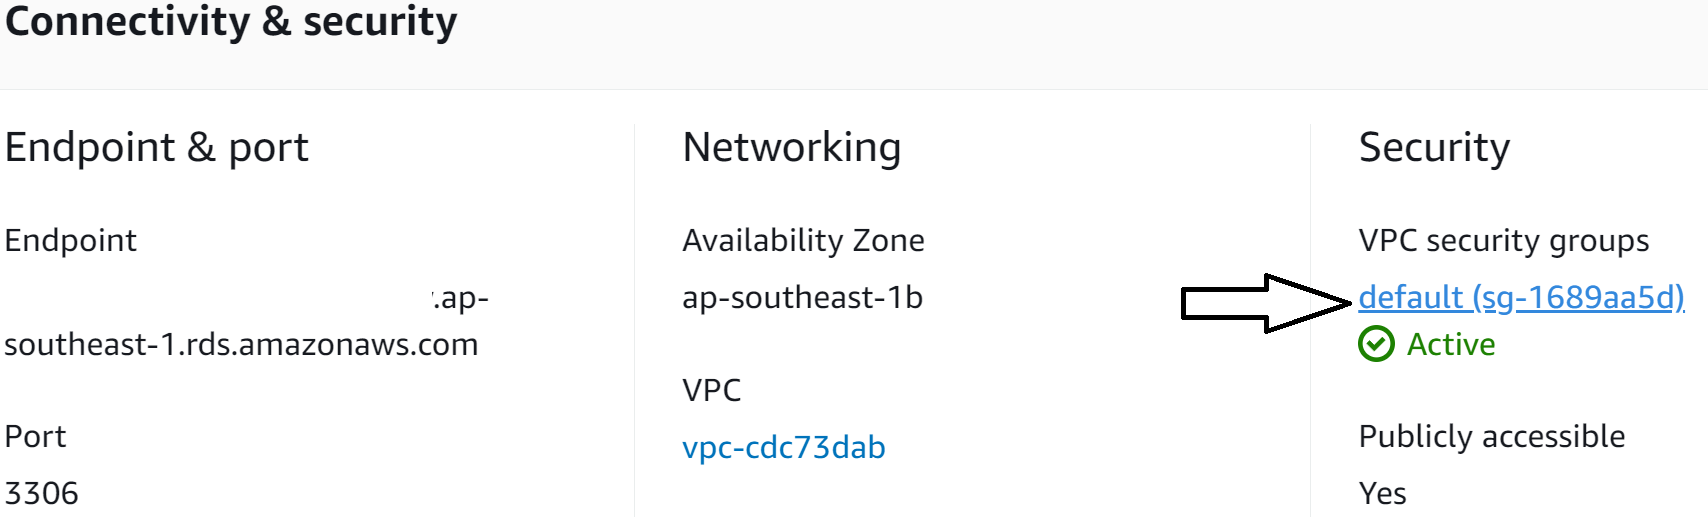
The modification is done by first clicking the database link we just created (i.e., client-database under DB identifier). On the subsequent page, click the default link under VPC security groups.
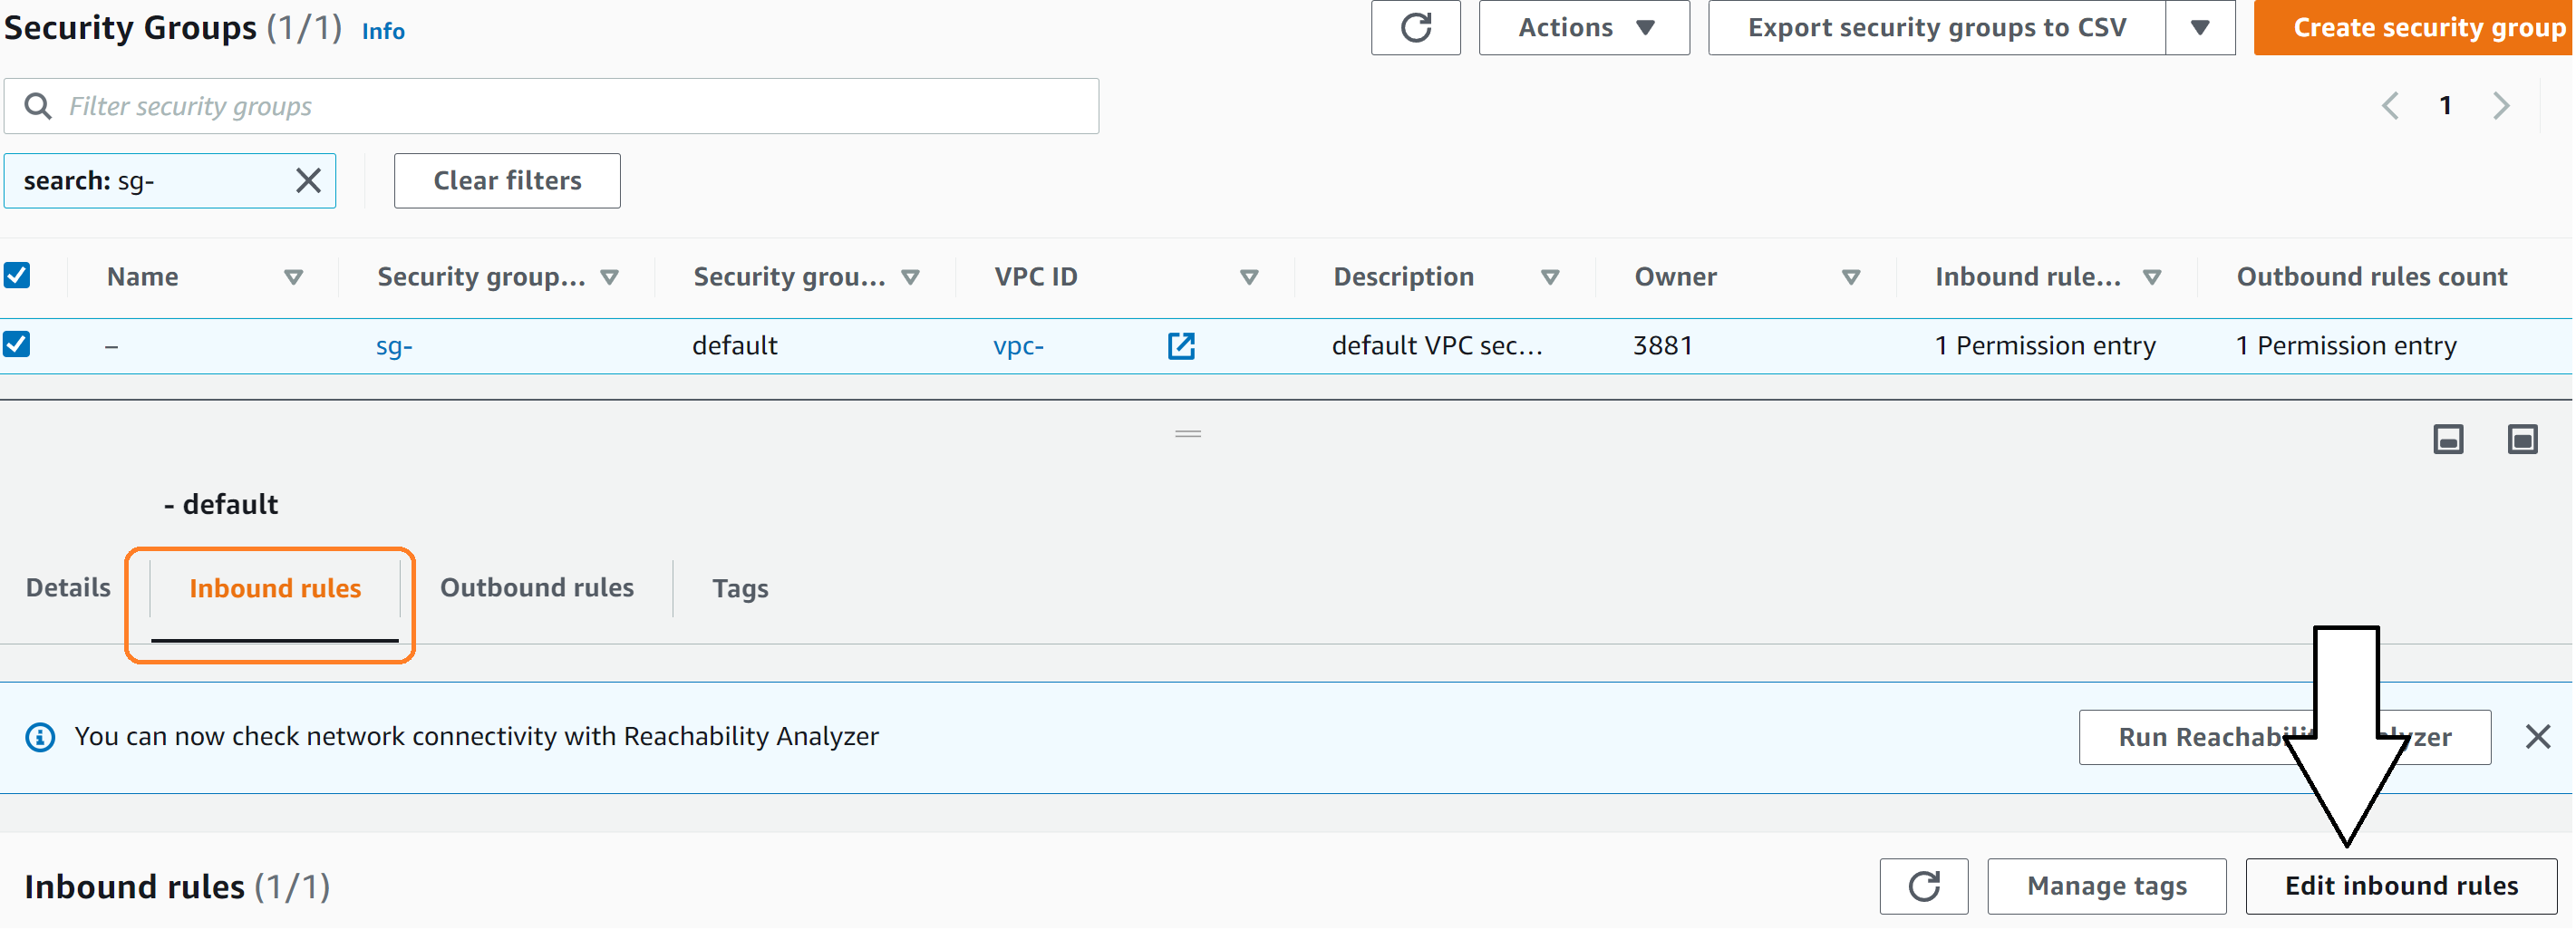
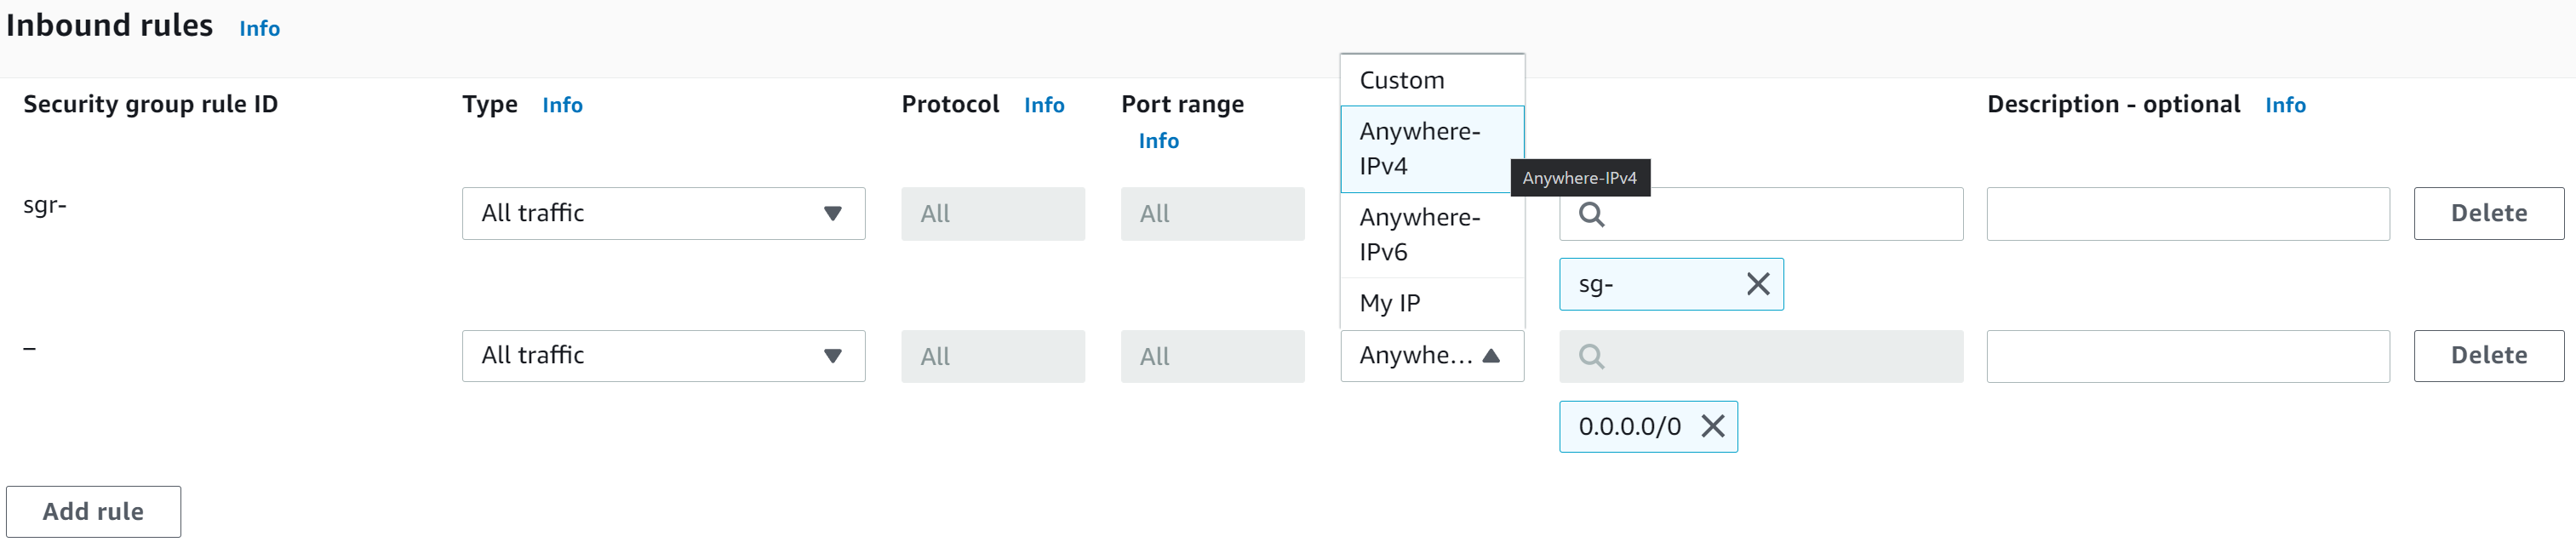
Next, select the Inbound subtab and click the ‘Edit inbound rules’ button at the bottom right.
We click ‘Add rule‘ to add a new inbound rule that allows us to access the database anywhere, as long as we have the correct password authentication.
The new rule should have the type of ‘All traffic‘, and the source of ‘Anywhere-IPv4‘. Finally, save the new rules by clicking the orange ‘Save rules’ button.
After completing the above, we have successfully set up our first MySQL database instance hosted on AWS RDS.
3) Setup MySQL Server
Step 1 – Download and Installation
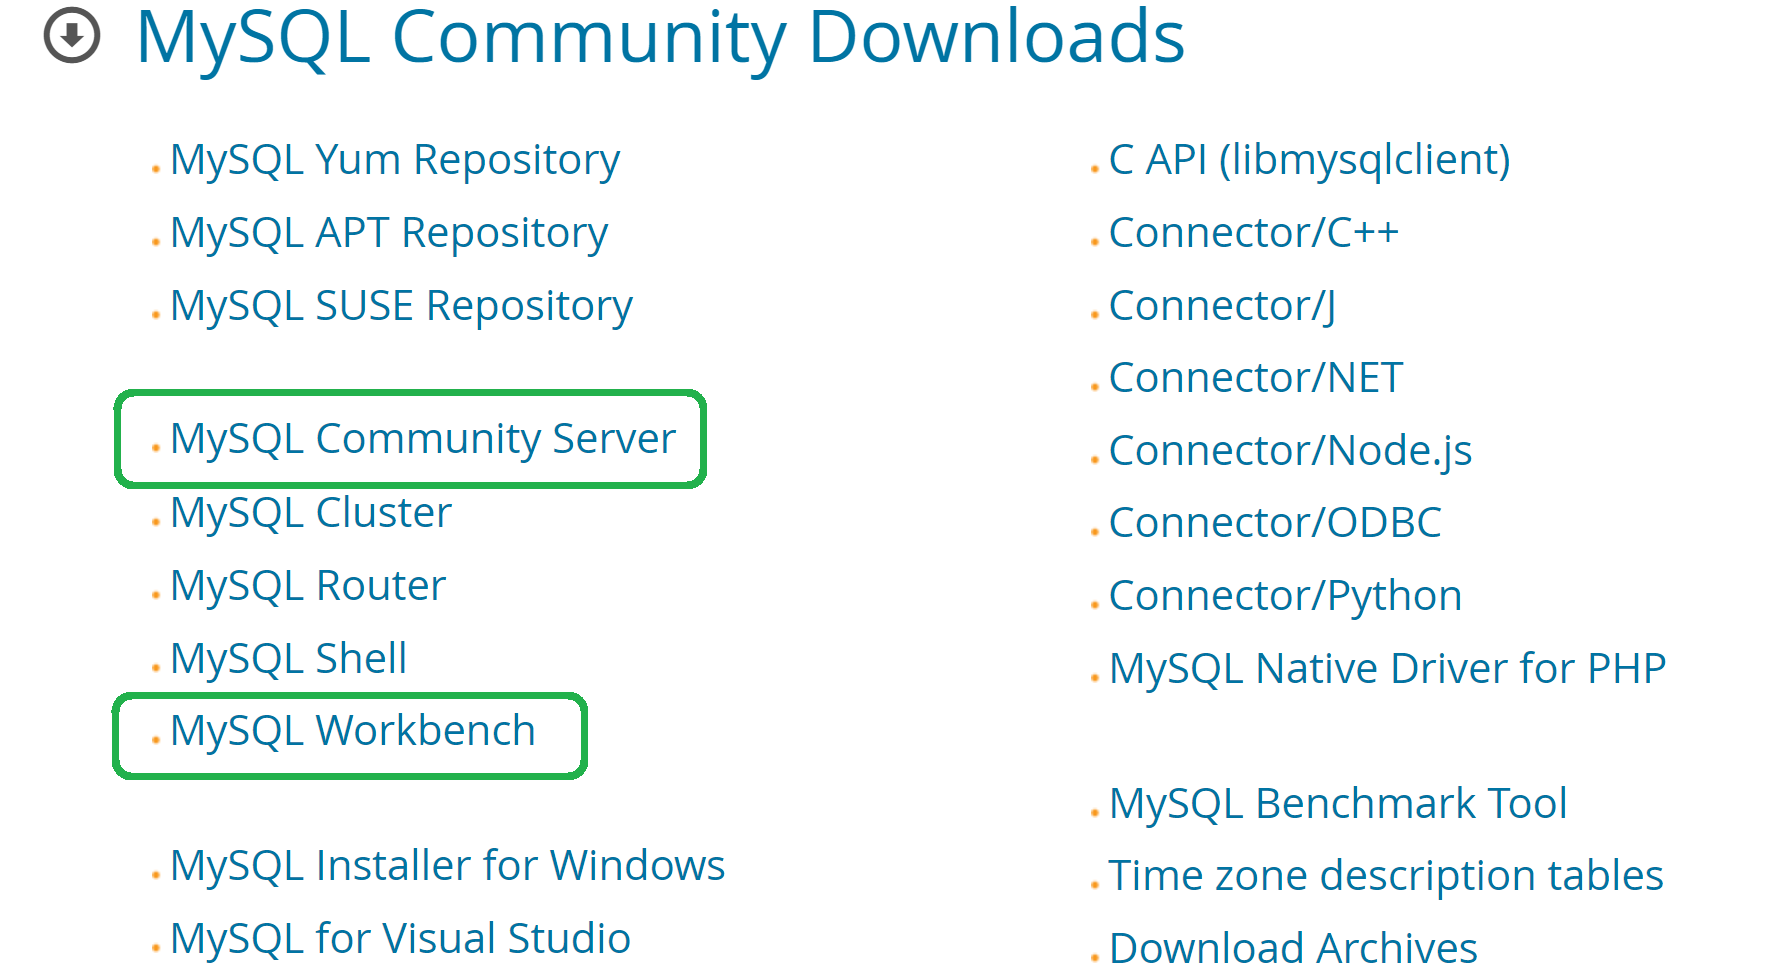
Before using MySQL, we first install two MySQL software on our local machine – MySQL Community Server and MySQL Workbench.
(i) MySQL Community Server is the free-to-use RDBMS server that powers the querying and connectivity capabilities of MySQL. We can think of it as the MySQL database engine installed in our local machine.
(ii) MySQL Workbench is the unified graphical tool for working with MySQL Servers and databases. This visual software makes it easy to design, model, generate, and manage our databases.
We can find the installer links on the MySQL Downloads page, and the correct links to both tools are circled below.
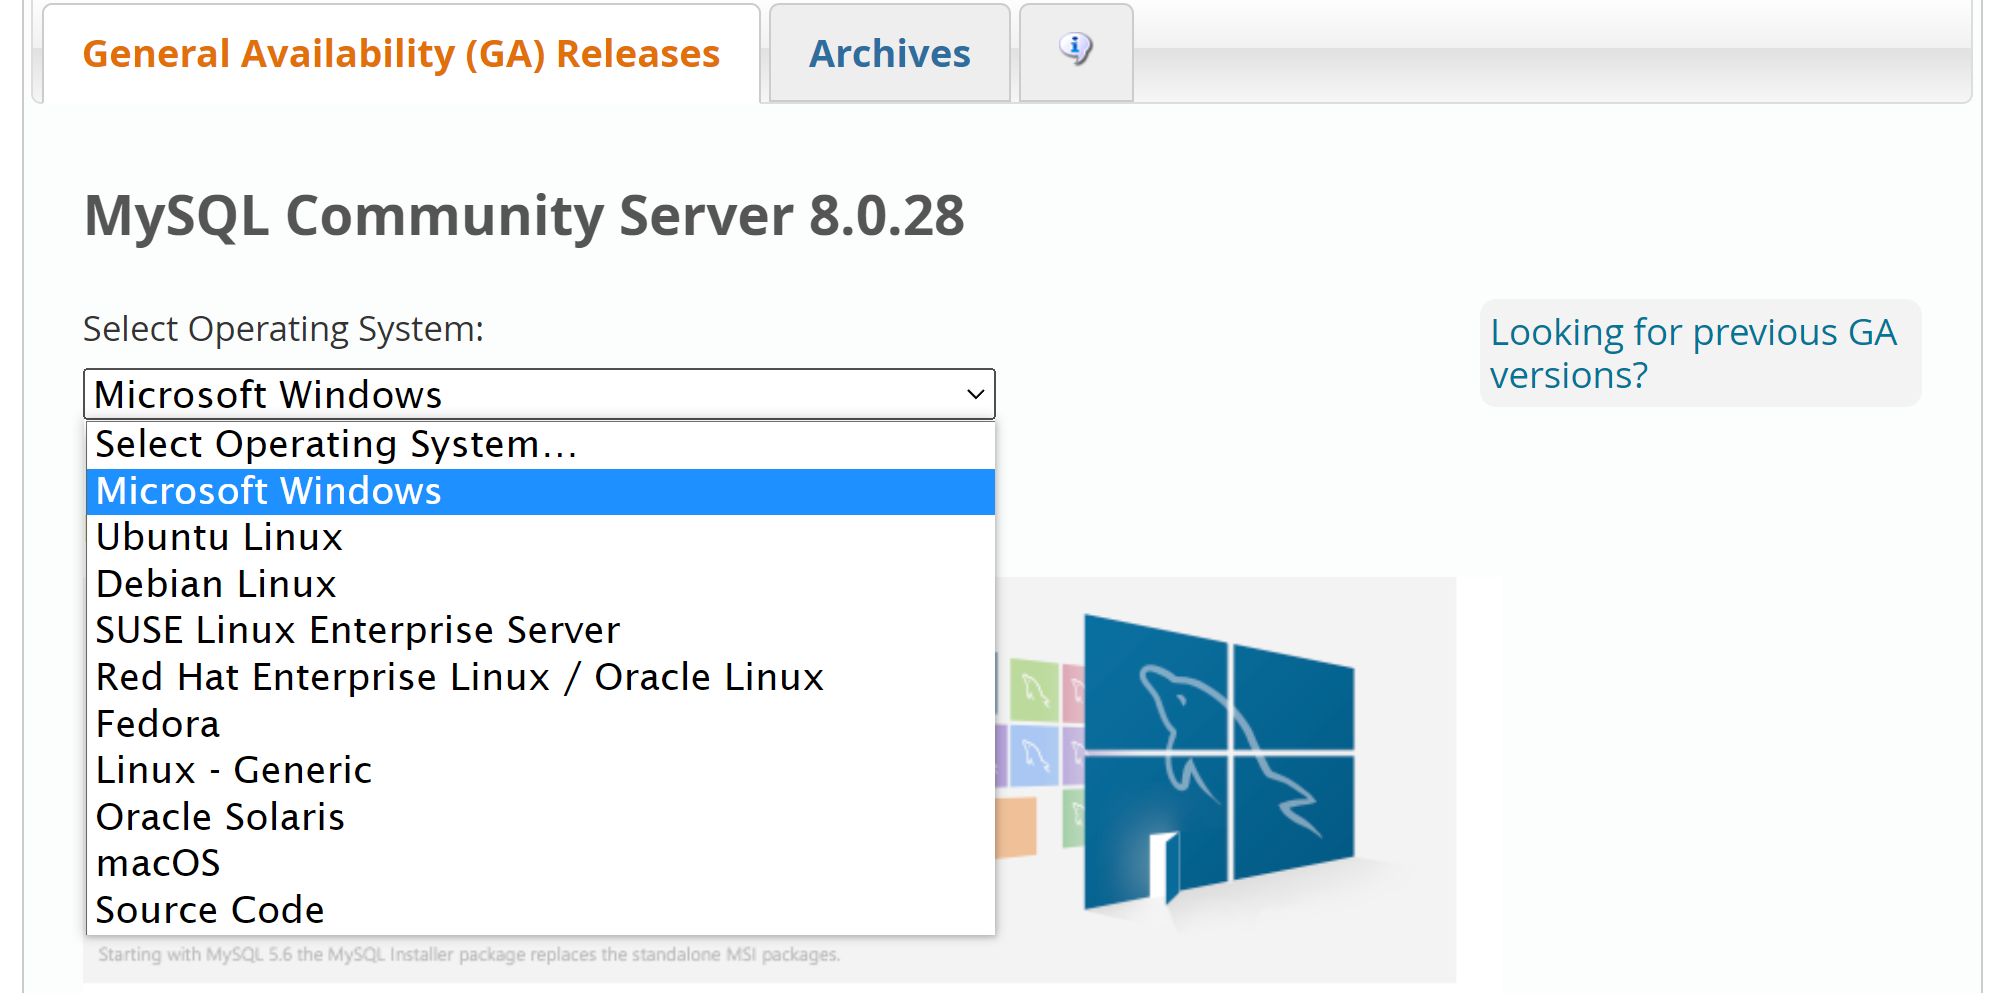
Upon clicking the link, it will prompt us to select the specific installer based on our operating system (OS).
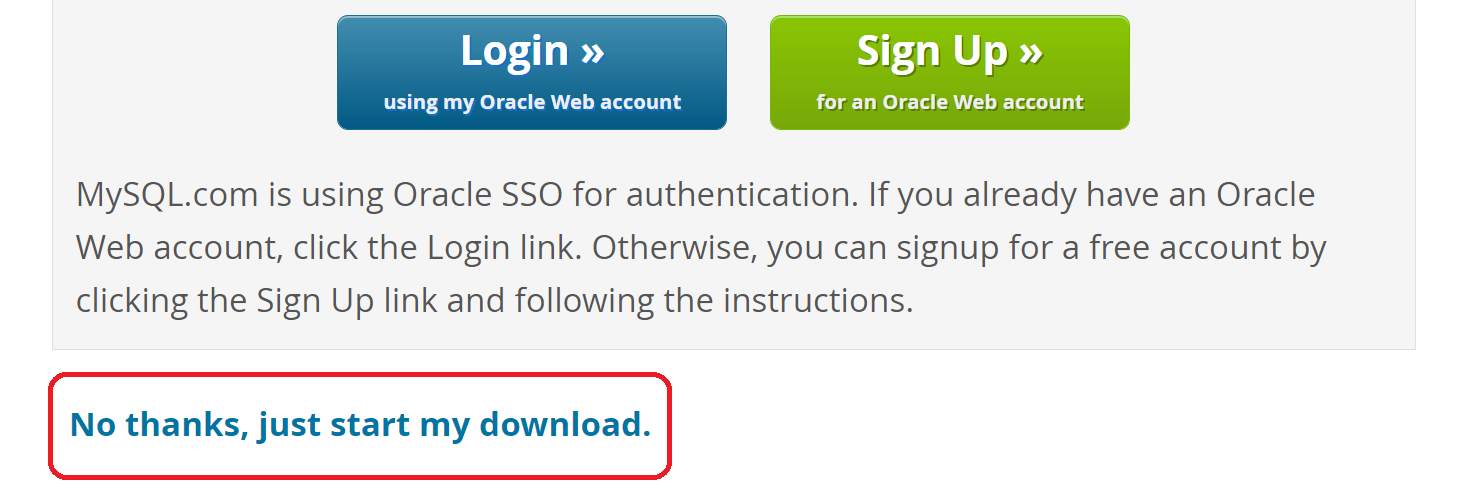
There is NO need to create an Oracle Web Account for the installations, so we can directly click ‘No thanks, just start my download.’
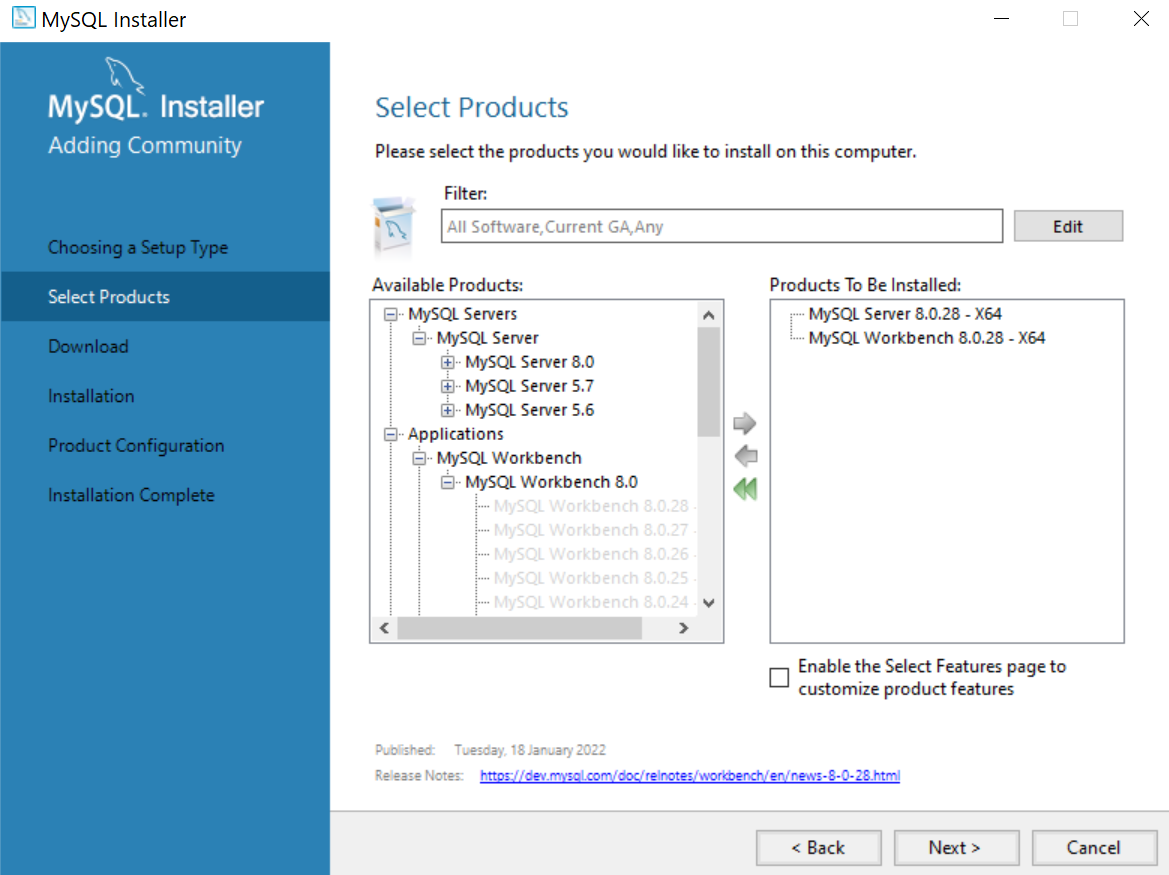
NOTE: If you use Windows OS, I highly recommend downloading MySQL Installer for Windows (as displayed in the banner under Recommended Download when you select Microsoft Windows). We can then use MySQL Installer to download MySQL Community Server and MySQL Workbench.
Step 2 -Run Installation
After downloading the installers, we run them and follow the subsequent installation steps.
While installing MySQL Server, we will come across multiple options for server configuration. The good news is that we can keep everything as the default values.
The critical configuration step is setting up (and remembering) a strong MySQL Root Password.
(4) Connect RDS Database Instance to MySQL Workbench
Great job with the successful installations so far! We are now ready to connect to the RDS database instance created in Section 3.
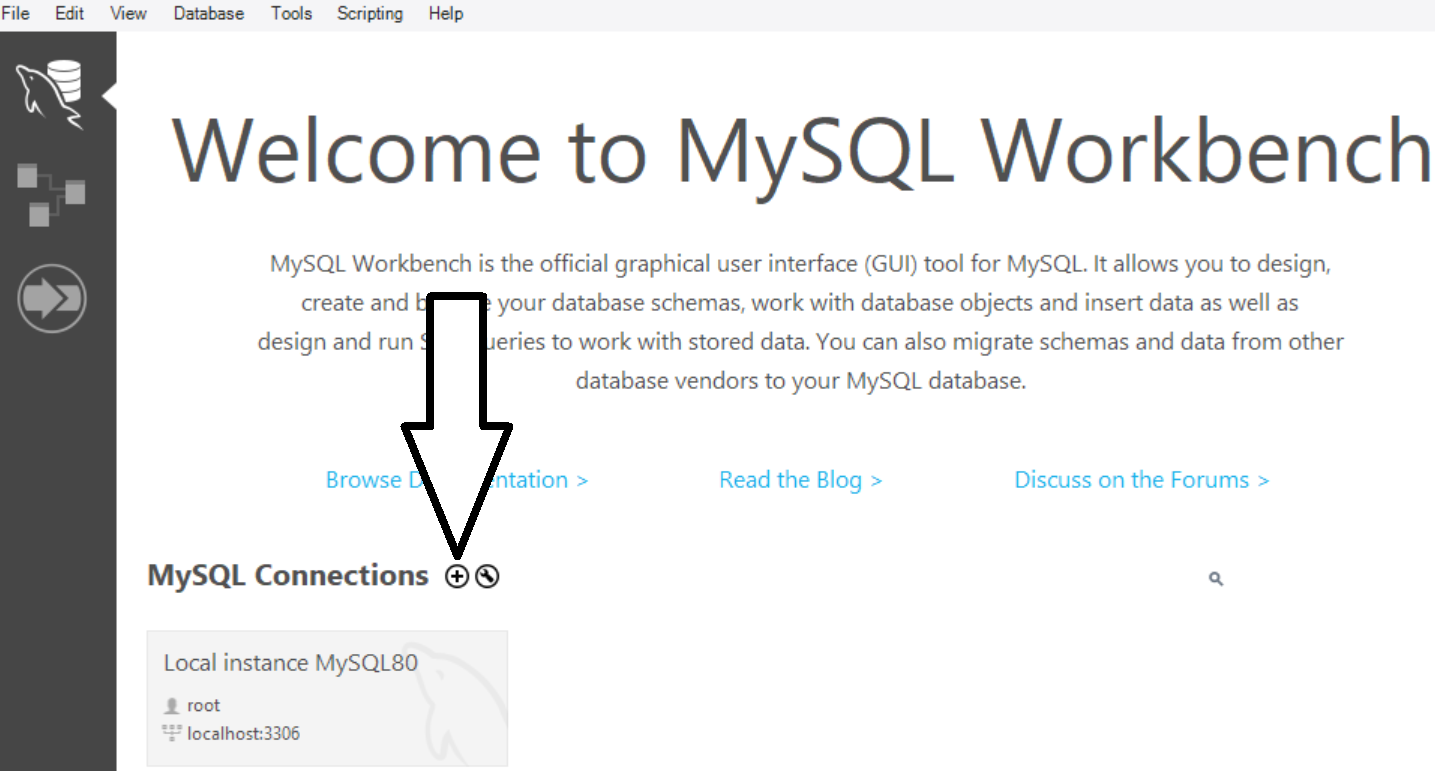
We first launch MySQL Workbench, where we will be greeted with the Welcome page. To set up a new MySQL connection, click the ⊕ button **** beside the MySQL Connections header.
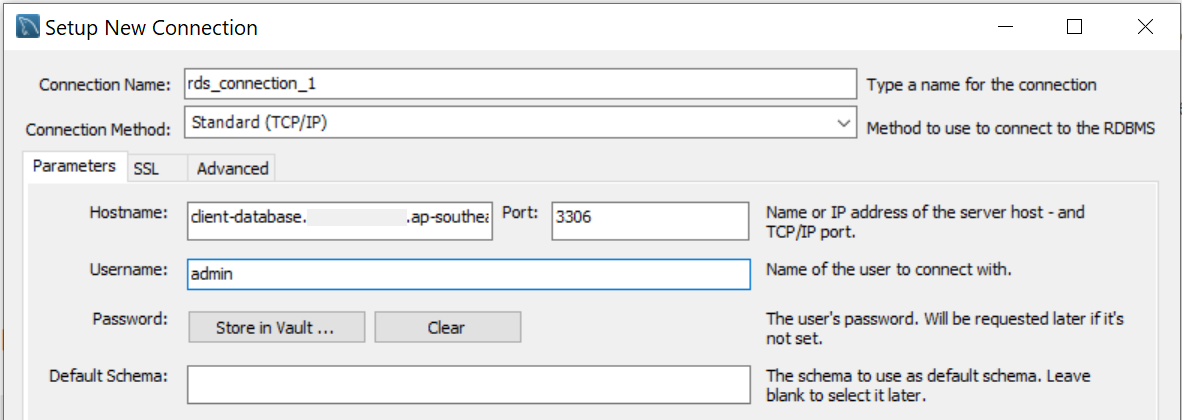
In the pop-up dialog box, we need to modify several connection parameters.
Note: Values for the following parameters can be found in our database instance (i.e., client-database) in the Databases section of the RDS console (See Section 3).
- Connection Name: Enter a custom name for the connection, e.g.,
rds_connection_1. - Hostname: Enter RDS Endpoint. This information is found in the Connectivity and Security tab.
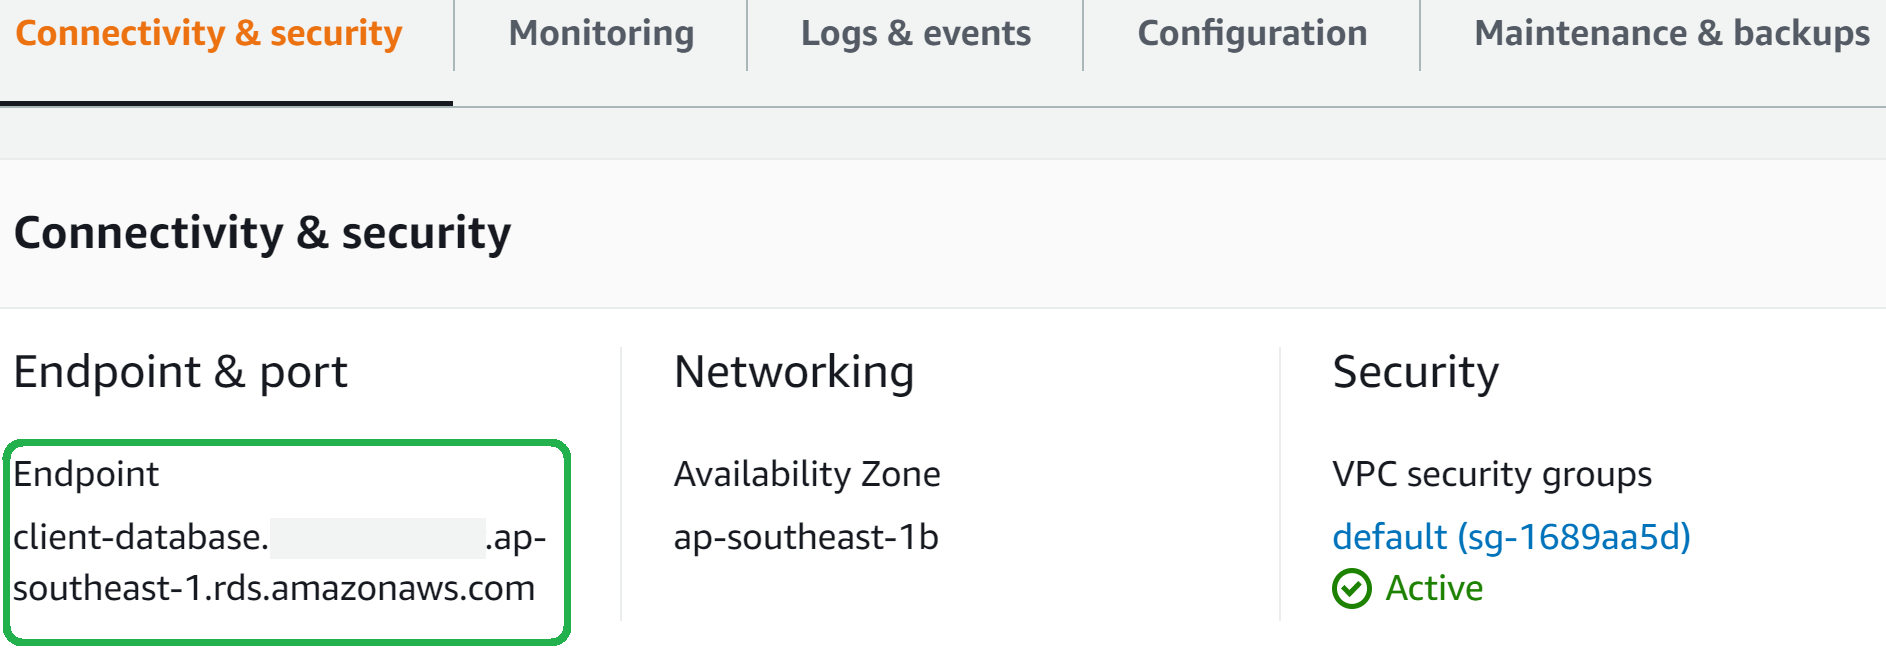
- Port: Enter the port number (default value should already be 3360). This information is found in the Connectivity and Security tab.
- Username: Enter the Master username. This information is found in the Configuration tab.
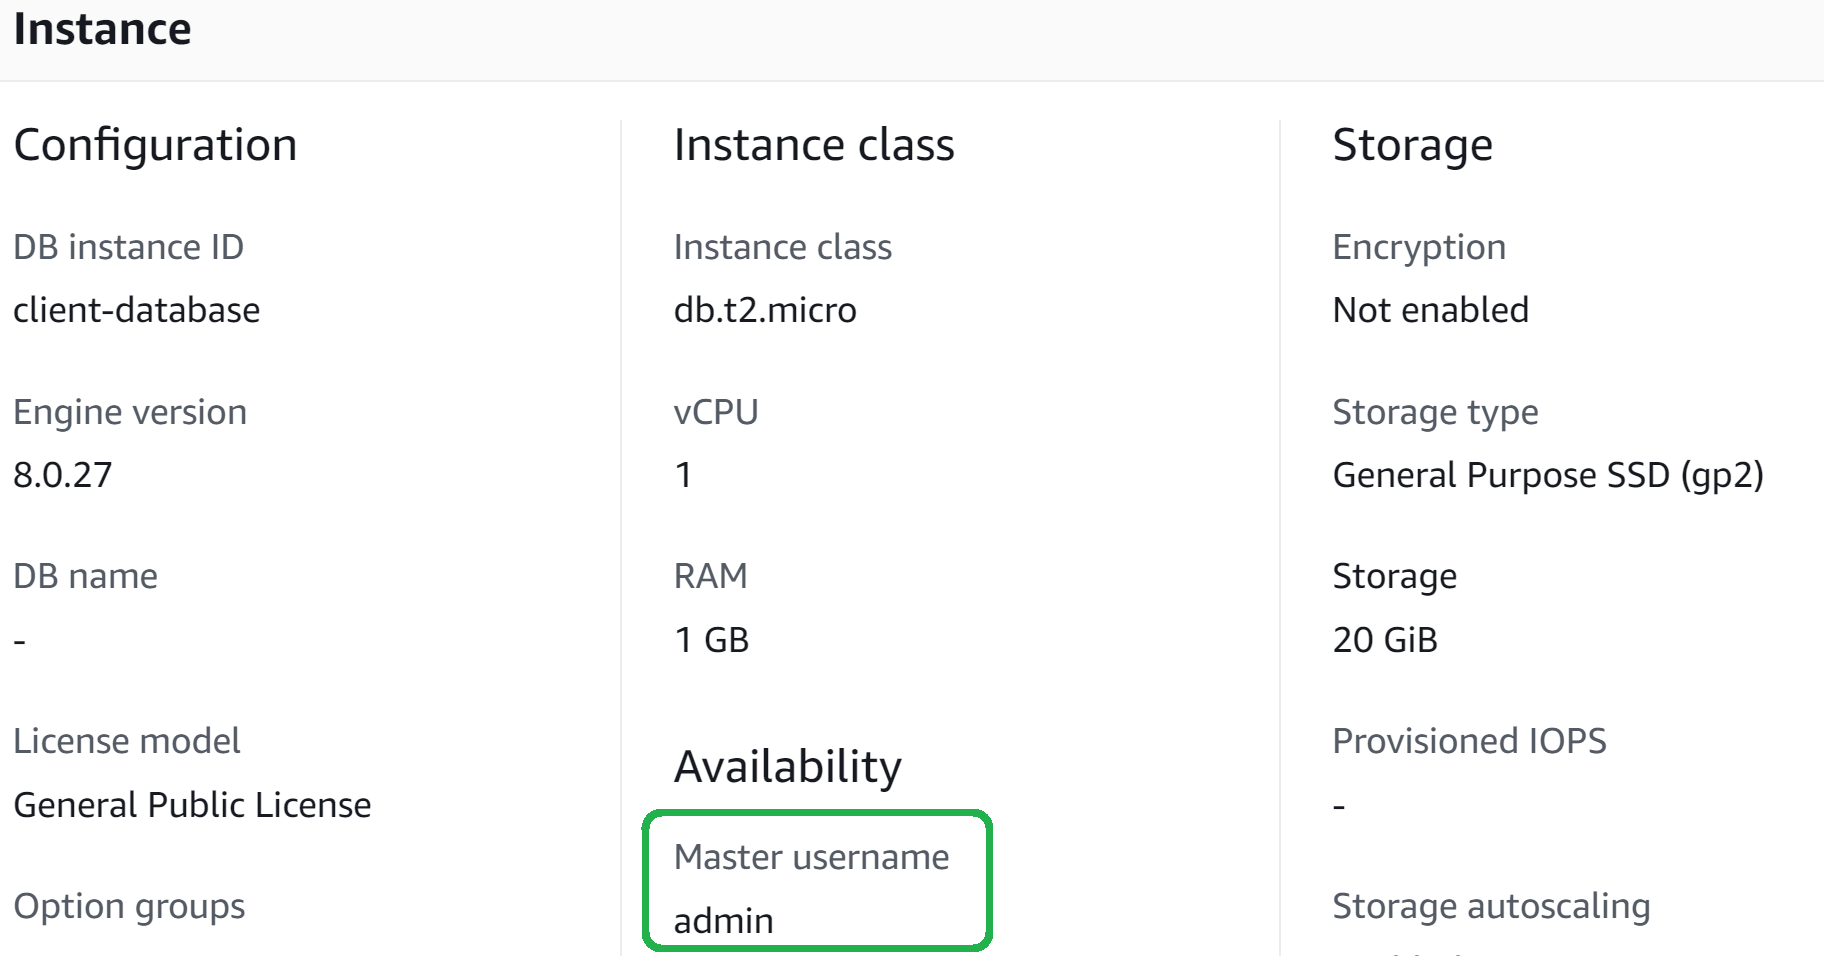
- Password: Click ‘Store in vault‘, and enter the password of the RDS instance credential settings (See Step 2 of Section 2).
Here is what the completed parameters look like:
Next, click ‘Test Connection’ to validate the configuration. If we have followed the steps correctly, we should see a pop-up that indicates a successful connection:
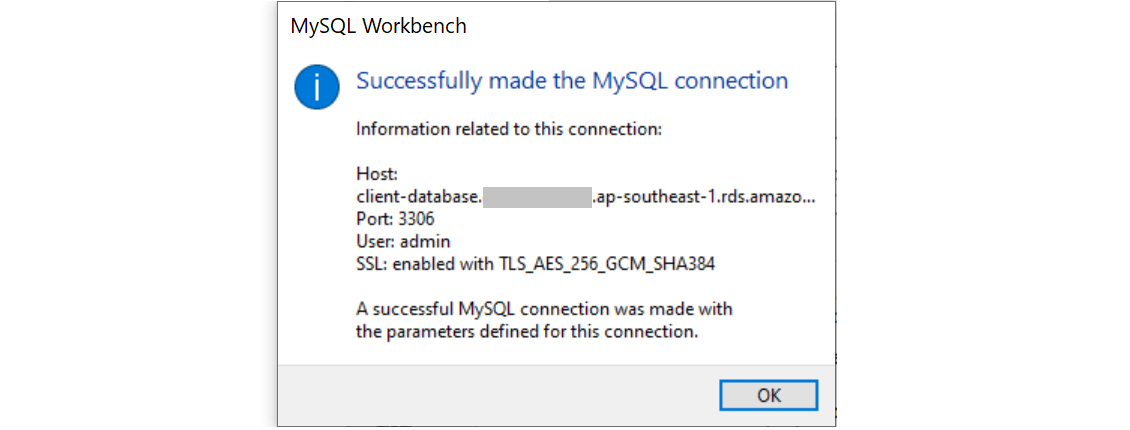
Finally, click ‘OK‘ from the Setup new connection window to save the connection.
(5) Create Database Schema and Table
Step 1 – Create Schema
After Section 4, we should see the new connection on our Workbench welcome page.
Click the new box (i.e., rds_connection_1) to open the connection and access the database.
Before creating a new table, we first define a schema. Click the ‘Create a new schema’ button at the top menu (circled in green below) and give the schema a name (e.g., schema1).
We then click the ‘Apply‘ buttons across the subsequent screens, and we will see our new schema appear in the SCHEMAS left menu.
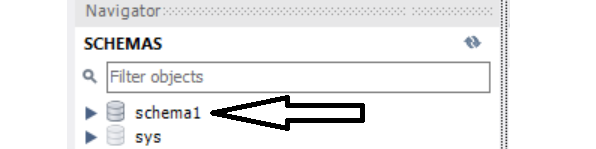
Step 2 – Create Table
To create a new table, click the arrow ► beside our new schema to expand the submenu, right-click on the Tables option, and select ‘Create Table‘.
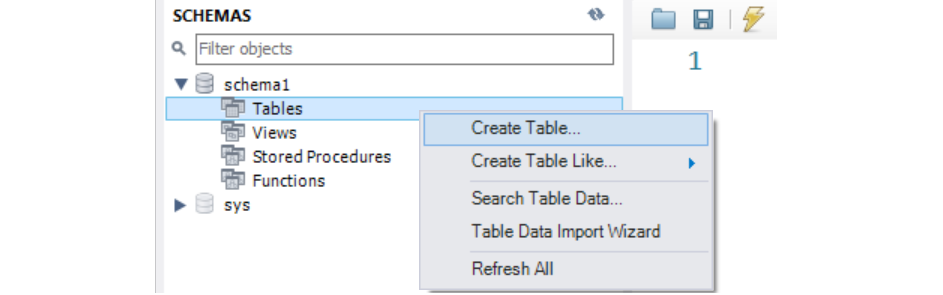
Let’s say we want to create a table to store site visit information in the following columns:
We can add the columns and set the corresponding options to build a new table (which we can name accordingly, e.g., tblClients).
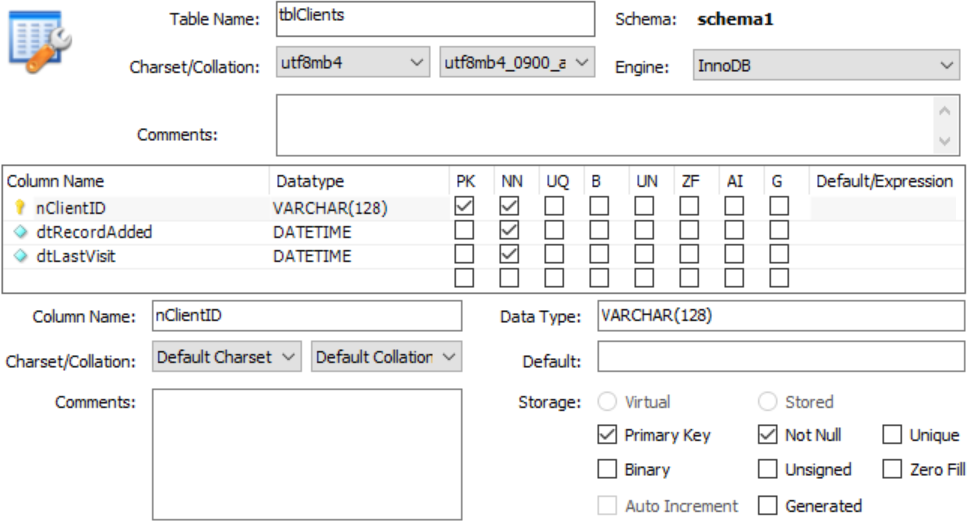
Click ‘Apply‘ in the following few screens to execute the SQL commands for table creation, and our new table will appear in the SCHEMAS menu.
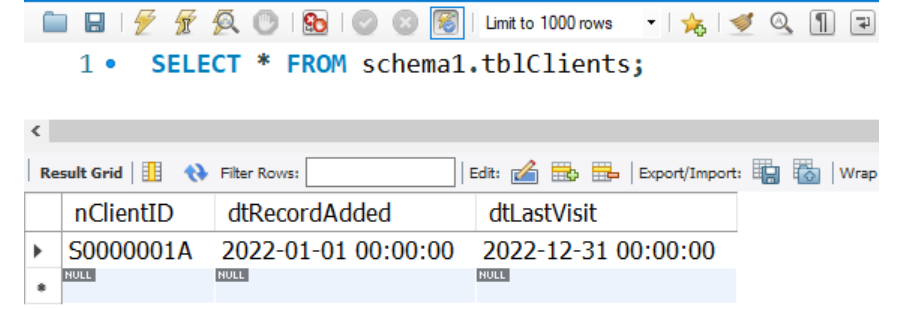
We can also run a simple SQL query to confirm the successful creation.
(6) Setup PyMySQL
To link our RDS MySQL instance to subsequent Python scripts, we can use PyMySQL. We can install it with pip:
pip install PyMySQL(7) Use PyMySQL to Read/Write to Database
We have reached the final stage, where we start using Python to access data in our MySQL database.
Step 1 – Download SSL Certificate Bundle
To encrypt the data that moves between the local client and RDS database instance, we need to implement a Secure Socket Layer (SSL) connection.
We can download the SSL certificates from: https://s3.amazonaws.com/rds-downloads/rds-combined-ca-bundle.pem, and then place the downloaded .pem bundle file in a designated project folder, e.g., `ssl/rds-combined-ca-bundle.pem`
Step 2 – Set connection parameters
We then create a config.py file to store the parameters for the database connection.
Most of the parameters can be found in the Amazon RDS Console and should be familiar to us by now.
The _SSLCA variable should point to the path of our SSL certificate bundle, and the CURSORCLASS variable should be set as pymysql.cursors.DictCursor.
IMPORTANT: Store password credentials securely and never leave them open in a public Python file.
Step 3— Initiate RDS Connection
We initiate the connection to the RDS database instance with Python code involving PyMySQL.
Step 4 – Run CRUD Operations
Once the connection is established, we can write functions to execute CRUD (i.e., Create, Read, Update, Delete) SQL operations.
For example, the following function inserts a single record into the table tblClients we created earlier.
Tip: We can even create tables directly via PyMySQL instead of MySQL Workbench. See this example for more info.
Step 5 – Validate Database Changes
There are two ways to check whether the executed SQL operations were successfully registered in the database.
(i) Run SQL query directly in MySQL Workbench
(ii) Run SQL query in Python via PyMySQL
The output will then display the record that we just inserted into our table:
Wrapping It Up
With the above, we have completed a walkthrough on creating a MySQL database in the cloud with AWS RDS and PyMySQL.
You can find the sample codes and configuration file in this GitHub repo.
Before You Go
I welcome you to join me on a data science learning journey! Follow this Medium page and check out my GitHub to stay in the loop of more exciting educational data science content. Meanwhile, have fun creating SQL databases on the cloud!
Share This Article
Towards Data Science is a community publication. Submit your insights to reach our global audience and earn through the TDS Author Payment Program.
Write for TDS