
Cursor AI Tutorial: Complete Guide to Building Apps 10x Faster in 2026
2026 Cursor AI guide: install + import VS Code, choose models, then use Tab, Cmd+K, Chat, Composer/Agent and .cursorrules to ship/refactor multi-file apps faster, with pricing + beginner pitfalls.
If you're looking for a comprehensive Cursor AI tutorial that takes you from installation to advanced workflows in 2026, you're in the right place. Cursor has become the fastest-growing AI code editor in history, reaching $1 billion in annual recurring revenue within three years of launch and amassing over 1 million users with 360,000 paying customers, achieved almost entirely through word-of-mouth adoption.
According to Stack Overflow's latest survey, 72% of professional developers either use or plan to use an AI assistant in their daily workflow. Companies like Coinbase report that every engineer now uses Cursor, with individual developers refactoring or building entire codebases in days instead of months. The productivity gains are real: AI-assisted developers are commonly up to 40% faster without sacrificing code quality.
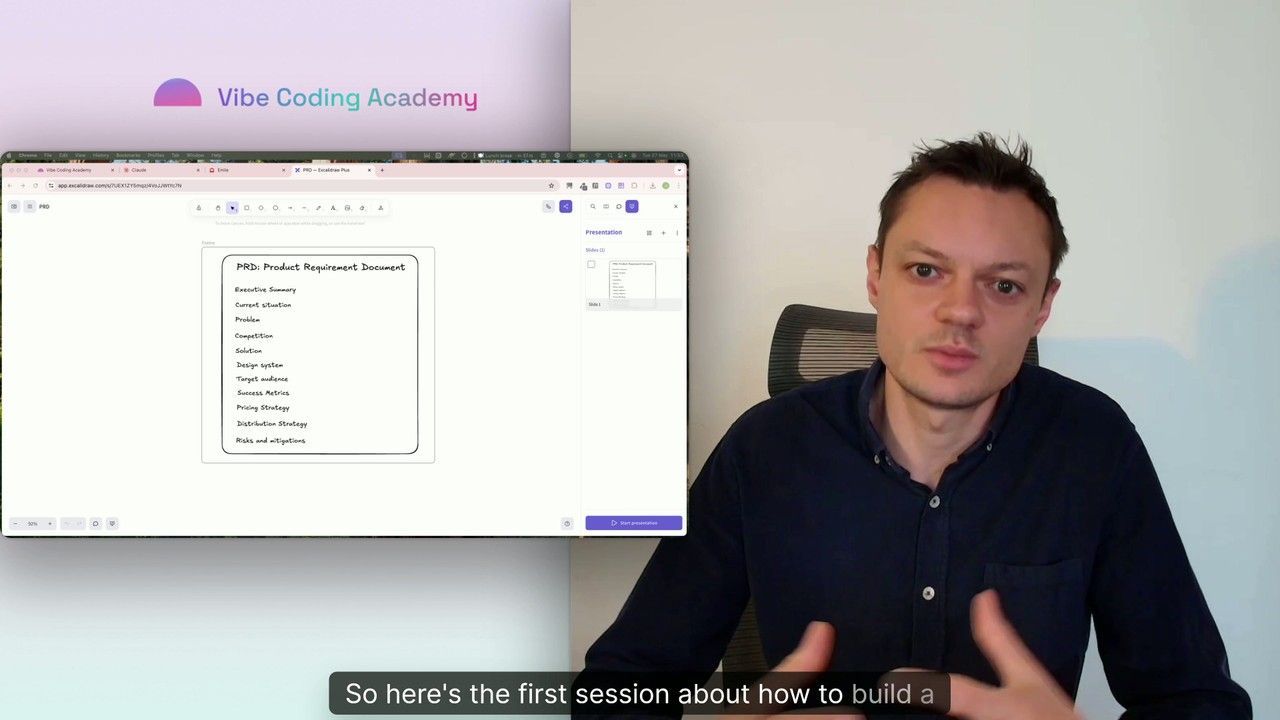
This Cursor tutorial for beginners will walk you through everything from basic setup to advanced agent workflows, with real prompts, practical examples, and proven techniques that work in 2026. For a video walkthrough of Cursor's interface and core features, watch our Introduction to Cursor lesson.
Key Takeaways
- Cursor AI reached $1 billion ARR in just 3 years with over 1 million users, making it the fastest-growing AI code editor in history.
- Developers using Cursor report 40% productivity gains without sacrificing code quality, with some building entire codebases in days instead of months.
- Composer mode enables multi-file editing across dozens of files simultaneously, providing a 3x efficiency boost for complex refactoring tasks.
- The .cursorrules file lets you define project-specific AI instructions, reducing PR review comments by 70% and TypeScript errors by 35%.
- Cursor offers four pricing tiers starting with a free Hobby plan (2,000 completions/month), but Pro tier ($20/month) provides unlimited completions and full access to Composer and Agent mode.
- Agent mode (Cmd+.) autonomously executes complex tasks using subagents, interactive Q&A, and domain-specific skills without constant supervision.
Learn this hands-on
Ready to ship a real production app, not just pick a model? Check out the Master Course: Build and Ship a Production-Ready App with Lovable and Cursor.
What is Cursor AI?
Cursor is an AI-first code editor built as a fork of Visual Studio Code. Founded in 2022 by Michael Truell, Sualeh Asif, Arvid Lunnemark, and Aman Sanger while they were students at MIT, Cursor reimagined the IDE with AI deeply integrated into every aspect of the development workflow rather than bolted on as a plugin.
Unlike GitHub Copilot (which functions as an extension to VS Code), and unlike Windsurf which takes a different AI-first approach, Cursor was designed from the ground up with AI as a core feature. This fundamental architectural difference means AI capabilities feel native and seamless throughout the entire editing experience.
How Cursor differs from alternatives:
- Native AI integration: AI isn't a plugin, it's embedded in autocomplete, editing, chat, and multi-file operations. Pair it with solid Git fundamentals for a rock-solid workflow
- Context awareness: Cursor understands your entire codebase, not just the current file
- Multi-file editing: Composer mode handles complex refactors across dozens of files simultaneously
- Agent capabilities: Autonomous task execution that goes beyond simple code completion
- VS Code compatibility: Import all your existing extensions, themes, and keybindings instantly
Related Lesson on Vibe Coding Academy
Git fundamentals: Basic terminal commands and pushing your code to Github
As Aman Sanger puts it, "Software engineering bandwidth and genius ideas are the bottlenecks to rapid AI progress. Cursor is our attempt at solving the former."
The company has raised over $2.3 billion at a $29.3 billion valuation as of late 2025, backed by Andreessen Horowitz, Thrive Capital, OpenAI, and prominent angels including former GitHub CEO Nat Friedman and Google Chief Scientist Jeff Dean.
Software engineering bandwidth and genius ideas are the bottlenecks to rapid AI progress. Cursor is our attempt at solving the former.
Getting Started: Installation & Setup (5 Minutes)
Setting up Cursor is straightforward, especially if you're already using VS Code.
Step 1: Download and Install
- Visit cursor.com and download the installer for your platform (macOS, Windows, or Linux)
- Run the installer, it takes about 30 seconds
- Launch Cursor for the first time
Step 2: Import Your VS Code Settings
When you first open Cursor, you'll see an import wizard:
- Click "Import from VS Code" to transfer your:
- Extensions (all compatible extensions work in Cursor)
- Settings and preferences
- Keybindings and custom shortcuts
- Color themes and UI configurations
- If you skip this step, you can import later via Settings → Extensions → Import VS Code Extensions
This seamless migration means you can start using Cursor immediately without reconfiguring your entire development environment.
Step 3: Choose Your AI Model
Cursor supports multiple AI models that power different features:
Available models in 2026:
- Claude 3.5 Sonnet: Best for complex reasoning and architectural decisions (recommended for most use cases)
- Claude Opus 4.6: Highest quality model for mission-critical code
- GPT-4o: Fast and reliable for general coding tasks
- GPT-5.2: Latest OpenAI model with improved context handling
- Gemini 3 Pro: Google's newest model with strong multi-modal capabilities
How to select your model:
- Open Settings (Cmd+, on Mac, Ctrl+, on Windows)
- Navigate to Features → Models
- Choose your default model for each feature:
- Tab completion: Fast model like GPT-4o
- Chat: Claude 3.5 Sonnet for best reasoning
- Composer: Claude Opus 4.6 for complex multi-file edits
Step 4: Understanding the Interface
Cursor's interface looks nearly identical to VS Code with a few key additions:
Key interface elements:
- Left sidebar: Standard VS Code file explorer, search, source control, and extensions
- Chat panel (Cmd+L): AI assistant for questions, debugging, and code explanations
- Composer (Cmd+I): Full-screen AI interface for complex multi-file edits
- Agent mode (Cmd+.): Autonomous task execution that runs commands and makes edits
- Inline editing (Cmd+K): Quick AI-powered edits directly in your code
You can switch between four default layouts using Cmd+Option+Tab:
- Agent layout: Optimized for autonomous coding tasks
- Editor layout: Traditional code-focused view
- Zen layout: Distraction-free writing
- Browser layout: Split view with preview panel
Core Features Walkthrough
Now let's dive into each of Cursor's main features with practical examples you can try immediately.
Tab Autocomplete: Intelligent Multi-Line Completions
Cursor's Tab completion is far more sophisticated than traditional autocomplete. It predicts entire code blocks based on your codebase context, coding patterns, and the surrounding code.
How it works:
As you type, Cursor displays gray "ghost text" showing its prediction. Press Tab to accept the suggestion, or keep typing to ignore it.
Example scenario: You're building a React component and type function UserCard, Cursor predicts:
function UserCard({ name, email, avatar }) {
 return (
 <div className="user-card">
 <img src={avatar} alt={name} />
 <div className="user-info">
 <h3>{name}</h3>
 <p>{email}</p>
 </div>
 </div>
 );
}
Pro tips for Tab completion:
- Write descriptive variable names:
fetchUserDataFromAPIgets better predictions thangetData - Add comments above functions: Cursor uses comments as context for better completions
- Be consistent: Cursor learns your coding style, the more you code, the better it predicts
- Partial accept: Press Cmd+→ to accept just one word at a time instead of the entire suggestion
According to recent data, GitHub Copilot generates 46% of code written by developers in 2026, with some Java developers seeing up to 61% AI-generated code. Cursor's custom autocomplete model reportedly performs even better in complex codebases.
Cmd+K: Inline Editing
Inline editing (Cmd+K) lets you modify code without leaving your file or opening a separate chat interface.
How to use it:
- Select the code you want to modify
- Press Cmd+K
- Describe the change you want in natural language
- Cursor edits the code directly in place
Real-world example:
You have this Python function:
def calculate_total(items):
 total = 0
 for item in items:
 total += item['price']
 return total
Select the function, press Cmd+K, and type: "add tax calculation at 8.5% and format the result to 2 decimal places"
Cursor transforms it to:
def calculate_total(items, tax_rate=0.085):
 subtotal = sum(item['price'] for item in items)
 total = subtotal * (1 + tax_rate)
 return round(total, 2)
Best use cases for Cmd+K:
- Refactoring functions to use different patterns (callbacks → promises → async/await)
- Adding error handling to existing code
- Converting between formats (JSON → TypeScript interfaces)
- Improving code readability or performance
- Adding type hints or documentation
Chat Panel: Your AI Coding Assistant
The Chat panel (Cmd+L) is where you ask questions, debug errors, and get explanations about your codebase.
Key features:
- Codebase awareness: Chat understands your entire project structure
- @ Mentions: Reference specific files, functions, or documentation
- Code execution: Chat can run terminal commands and see the output
- Error debugging: Paste error messages for instant troubleshooting
Example debugging workflow:
You encounter this error:
TypeError: Cannot read property 'map' of undefined
Open Chat (Cmd+L) and type:
I'm getting "Cannot read property 'map' of undefined" in UserList.tsx. @UserList.tsx Why is this happening?
Cursor analyzes the file and responds:
The error occurs because the `users` prop isn't defined when the component first renders.

Add a conditional check or default value:

{users?.map(user => ...)}

or

const users = props.users || [];
Advanced Chat techniques:
- @ mentions for precise context:
@filename.js: Include specific file@folder/: Include entire directory@web: Search the internet for documentation@codebase: Analyze your entire project
-
Multi-turn conversations: Chat maintains context across messages, you can iterate on solutions without re-explaining
-
Code generation: Ask Chat to scaffold entire features: "Create a user authentication system with email/password login and JWT tokens"
Composer (Agent Mode): Multi-File Editing
Composer is Cursor's most powerful feature, a full-screen AI interface that handles complex tasks spanning multiple files.
How to access Composer:
- Press Cmd+I (Mac) or Ctrl+I (Windows)
- Or use Cmd+. to launch Agent mode with autonomous capabilities
What Composer can do:
- Edit dozens of files simultaneously
- Create new files and folders automatically
- Refactor entire architectures
- Add features that require changes across components, routes, and APIs
- Maintain consistent code style and automatically add imports
Real-world tutorial: Build a landing page with Cursor Composer
Let's walk through building a complete landing page from scratch using Composer. This demonstrates the full workflow from initial prompt to final implementation.
Step 1: Launch Composer and describe your goal
Press Cmd+I and enter this prompt:
Create a modern landing page for a SaaS product called "TaskFlow"
that helps teams manage projects. Include:

- Hero section with headline, subheadline, and CTA button
- Features section with 3 key features (each with icon, title, description)
- Pricing section with 3 tiers (Starter, Pro, Enterprise)
- Footer with social links

Use Tailwind CSS for styling. Make it responsive and visually appealing.
Step 2: Review Composer's plan
Composer analyzes your request and shows its execution plan:
I'll create:
1. components/LandingPage.tsx - Main landing page component
2. components/Hero.tsx - Hero section
3. components/Features.tsx - Features grid
4. components/Pricing.tsx - Pricing cards
5. components/Footer.tsx - Footer
6. styles/globals.css - Updated Tailwind styles
Step 3: Let Composer execute
Click "Accept" or just wait, Composer automatically:
- Creates all component files
- Adds proper imports and exports
- Implements responsive Tailwind classes
- Maintains consistent component structure
Step 4: Iterate and refine
After the initial generation, you can refine specific parts. In the same Composer window, type:
Make the pricing cards have a subtle hover animation and
add a "Popular" badge to the Pro tier
Composer updates only the Pricing component without touching other files.
Step 5: Add functionality
Continue iterating:
Add a contact form section between pricing and footer.
Include fields for name, email, and message.
Use React Hook Form for validation.
Composer:
- Creates a new ContactForm component
- Installs react-hook-form dependency
- Adds validation logic
- Integrates the form into the landing page
What just happened?
In under 5 minutes, you went from zero to a fully functional, responsive landing page with multiple components, proper form validation, and professional styling. This is the power of Composer mode.
According to developer feedback, Composer provides a 3x efficiency boost compared to standard editing for complex multi-file tasks.
Advanced Cursor Techniques
Once you're comfortable with the core features, these advanced techniques will multiply your productivity.
.cursorrules: Project-Specific AI Instructions
.cursorrules files tell Cursor how to behave in your specific project. This ensures consistent code style, framework conventions, and architectural patterns.
How to create .cursorrules:
- Create a file named
.cursorrulesin your project root - Write instructions in natural language
Example .cursorrules for a Next.js project:
# Project Context
This is a Next.js 14 app using TypeScript, Tailwind CSS, and Prisma.

# Coding Standards
- Use functional components with TypeScript
- Prefer server components unless client interactivity is needed
- Use Tailwind for all styling (no inline styles)
- Follow the repository pattern for data access
- Always include error handling with try/catch

# File Organization
- Components go in /components with index.ts exports
- API routes follow RESTful conventions
- Database queries must use Prisma client
- Types/interfaces go in /types

# Testing
- Write Vitest unit tests for utility functions
- Use React Testing Library for component tests
According to 2026 data, developers using .cursorrules reduce PR review comments by 70% and TypeScript errors by 35%.
Context Management: Using @ Mentions Effectively
The @ mention system gives Cursor precise context about what to focus on.
Available @ mentions:
- @filename: Include a specific file
- @folder/: Include all files in a directory
- @codebase: Search across your entire project
- @web: Search the internet for documentation
- @docs: Reference framework/library documentation
- @git: Include git diff or recent commits
Example: Debugging with multiple file context
I'm getting a hydration error in my Next.js app.

@app/layout.tsx @app/page.tsx @components/Header.tsx

What's causing the mismatch between server and client rendering?
By explicitly mentioning the relevant files, Cursor can analyze all three files together and identify the issue faster than searching blindly.
Agent Mode: Autonomous Task Execution
Agent mode (Cmd+.) goes beyond Composer by autonomously executing tasks without constant supervision.
In 2026, Agent mode gained powerful new features:
- Subagents: Specialized agents that handle discrete parts of tasks in parallel
- Interactive Q&A: Agents ask clarifying questions while continuing work
- Agent Skills: Agents discover and apply domain-specific workflows from SKILL.md files
- Image generation: Generate images directly from prompts using AI models
How to use Agent mode effectively:
- Launch with Cmd+. or select "Agent" mode in Composer
- Describe a high-level goal (not step-by-step instructions)
- Let the Agent plan, execute, and iterate
- Review changes when it's done
Example Agent prompt:
Refactor this codebase to use a repository pattern instead of
direct database calls. Create repository classes for User, Post,
and Comment models. Update all controller methods to use the repositories.
The Agent will:
- Analyze your current code structure
- Create repository classes
- Refactor all database calls
- Run tests to verify nothing broke
- Ask questions if it encounters ambiguity
When to use Agent vs Composer:
- Use Composer for: Controlled, iterative development where you want to review each step
- Use Agent for: Autonomous batch refactors, repetitive tasks, exploratory changes
Terminal Integration
Cursor's AI can interact with your terminal to run commands, debug errors, and execute workflows.
Example workflow:
In Chat, type:
Run the test suite and fix any failing tests
Cursor will:
- Execute
npm testin the terminal - Read the error output
- Identify failing tests
- Edit the code to fix issues
- Re-run tests to verify fixes
This closes the feedback loop between coding and testing without manual intervention.
Image Input: Visual Design to Code
One of Cursor's newest capabilities in 2026 is accepting images as input.
How it works:
- Drag and drop a screenshot or design mockup into Chat or Composer
- Describe what you want: "Implement this design using React and Tailwind"
- Cursor analyzes the image and generates matching code
Example use cases:
- Convert Figma screenshots to functional components
- Recreate UI designs from inspiration images
- Build dashboards based on sketches or wireframes
- Implement designs from other websites (for learning purposes)
According to Cursor's 2026 feature announcement, images are generated using Google Nano Banana Pro and saved to your project's assets/ folder by default.
Common Mistakes Beginners Make
After analyzing thousands of Cursor tutorials and developer feedback, these are the most common pitfalls to avoid.
1. Giving Vague Prompts
Bad prompt:
Make this better
Good prompt:
Refactor this function to use async/await instead of callbacks,
add TypeScript types, and include error handling for network failures
Be specific about what "better" means. AI is powerful but not telepathic.
2. Not Providing Enough Context
Cursor performs best when it understands the full picture. Use @ mentions to include relevant files.
Bad approach:
Why isn't this working?
Good approach:
@UserService.ts @UserController.ts @database/schema.prisma

The user creation endpoint returns 500 errors. What's the issue?
3. Accepting Code Without Reviewing
Cursor generates high-quality code, but it's not perfect. Always review before accepting changes, especially for:
- Security-sensitive operations (authentication, payments, data validation)
- Complex business logic
- Database migrations
- API integrations
4. Not Using .cursorrules for Project Consistency
Without .cursorrules, every new file might use different patterns, conventions, or styles. Create project-specific rules early and save hours of refactoring later.
5. Ignoring Tab Completion
Many beginners rely entirely on Chat and Composer while ignoring Tab completion. Tab is often the fastest way to write boilerplate, especially for:
- Import statements
- Function signatures
- Common patterns (map, filter, reduce operations)
- Test scaffolding
Combine all features: use Tab for speed, Cmd+K for quick edits, Chat for questions, and Composer for complex changes.
Cursor Pricing: Is It Worth It in 2026?
Understanding Cursor's pricing helps you choose the right tier and budget appropriately.
Free (Hobby) Tier
What you get:
- 2,000 completions per month
- 50 slow premium requests
- Basic features (Tab, Chat, Cmd+K)
Limitations:
- No Composer access
- No Agent mode
- Limited to GPT-3.5 and basic models
Best for: Trying Cursor, hobby projects, occasional AI assistance
Pro ($20/month)
What you get:
- Unlimited Tab completions
- 500 fast premium requests
- Full Composer access
- Agent mode
- All AI models (Claude, GPT-4, Gemini)
- Privacy mode (your code doesn't train models)
Important note: Cursor changed pricing in June 2025 to a credit-based system. Some users report actual costs 2-3x higher than the base $20/month due to heavy model usage.
Best for: Professional developers who code daily
Teams ($40/user/month)
What you get:
- Everything in Pro
- Centralized billing
- Team usage analytics
- Admin controls
- Shared .cursorrules
Best for: Development teams wanting unified tooling
Ultra ($200/month)
What you get:
- Everything in Teams
- 10x higher usage limits
- Priority support
- Advanced features early access
Best for: Power users who hit Pro tier limits
Is Cursor Worth the Cost?
The math: If Cursor makes you 40% faster (the industry average), you save roughly 16 hours per 40-hour work week. At a conservative $50/hour freelance rate, that's $800/week in value from a $20/month tool.
For professional developers, Cursor pays for itself many times over. For hobbyists or students, the free tier is surprisingly capable.
Honest assessment: The variable pricing model means costs can surprise you. Monitor your usage dashboard and consider the value relative to your productivity gains.
Cursor vs Alternatives: When to Choose Cursor
Cursor isn't the only AI code editor. Here's when to choose Cursor over alternatives.
Cursor vs VS Code + GitHub Copilot
Choose Cursor if:
- You want AI deeply integrated rather than a plugin experience
- Multi-file editing is critical to your workflow
- You prefer a unified AI experience across completion, chat, and editing
Choose VS Code + Copilot if:
- You're heavily invested in VS Code's ecosystem
- You want the free tier (2,000 completions/month)
- You prefer Microsoft's privacy and security policies
For a detailed breakdown, see our AI coding tools comparison guide.
Cursor vs Windsurf
Choose Cursor if:
- You prefer iterative, controlled development workflows
- You want maximum customization via .cursorrules
- You're comfortable with variable usage-based pricing
Choose Windsurf if:
- You prefer autonomous AI workflows with Cascade
- You want predictable pricing ($15/month Pro tier)
- You work with large codebases (Windsurf's automatic context indexing is superior)
For an in-depth comparison, read our Windsurf vs Cursor guide.
Cursor vs Claude Code
Choose Cursor if:
- You want a visual editor with GUI
- You're building web applications with complex file structures
- You prefer inline editing and visual feedback
Choose Claude Code if:
- You're comfortable with CLI-based workflows
- You want "plan mode" for multi-step autonomous tasks
- You primarily work in terminal-based environments
Cursor vs Lovable
Choose Cursor if:
- You want full control over your codebase
- You're a developer who wants to learn and understand the code
- You need to integrate with existing projects
Choose Lovable if:
- You're a non-technical founder who needs a working prototype fast
- You prioritize speed over customization
- You don't need to deeply understand the implementation
See our Lovable vs Cursor comparison for more details.
Frequently Asked Questions
Is Cursor AI free?
Yes, Cursor offers a free Hobby tier with 2,000 completions per month and access to basic features like Tab completion and Chat. However, advanced features like Composer and Agent mode require a Pro subscription ($20/month).
Is Cursor better than VS Code with Copilot?
Cursor provides deeper AI integration since it's built with AI as a core feature rather than a plugin. Features like Composer (multi-file editing) and Agent mode (autonomous task execution) aren't available in standard VS Code + Copilot. However, VS Code has a larger extension ecosystem and more mature enterprise support.
The answer depends on your priorities: Choose Cursor for cutting-edge AI capabilities, or stick with VS Code + Copilot for a more conservative, established toolchain.
Can non-developers use Cursor?
Yes, but with caveats. Cursor makes coding more accessible by letting you describe what you want in natural language, but you still need to:
- Understand basic programming concepts
- Review and test generated code
- Debug issues when they arise
- Understand your project structure
Non-technical founders often succeed with Cursor for prototyping or learning, but building production applications still requires some technical knowledge. For completely no-code solutions (see our vibe coding platforms comparison), tools like Lovable or Bubble might be more appropriate.
What AI models does Cursor support?
As of 2026, Cursor supports:
- Claude 3.5 Sonnet and Claude Opus 4.6
- GPT-4o, GPT-5.2, and GPT-3.5
- Google Gemini 3 Pro
- Proprietary Cursor models optimized for code completion
You can select different models for different features (Tab completion, Chat, Composer) based on your needs.
Is Cursor safe for private code?
Yes. Cursor offers Privacy Mode (available on paid plans) which ensures:
- Your code is not stored on Cursor's servers
- Your code is not used to train AI models
- All processing happens with end-to-end encryption
For enterprise customers, Cursor also offers self-hosted options for maximum data control.
Next Steps: Level Up Your Vibe Coding
You now have a comprehensive foundation in Cursor AI. Here's how to continue improving:
- Practice with a real project: Build something practical using the landing page tutorial as a template
- Create .cursorrules: Set up project-specific rules for your main codebase
- Explore Agent Skills: Create custom SKILL.md files for repetitive workflows
- Join the community: Connect with other Cursor users on Discord and Reddit
- Read best practices: Check out our Cursor AI best practices guide for advanced techniques
- Understand vibe coding: Learn the philosophy behind AI-assisted development in our What is vibe coding guide
The AI coding revolution is here, and Cursor is at the forefront. Whether you're a seasoned developer looking to 10x your productivity or a beginner just starting your coding journey, Cursor provides the tools to build faster, learn quicker, and focus on solving problems rather than writing boilerplate.
Start with the basics, experiment with Composer, and explore our full course catalog, and gradually incorporate advanced features like Agent mode and .cursorrules. Within weeks, you'll wonder how you ever coded without AI assistance. When you're ready for a comprehensive hands-on project, our Master Course takes you from setup to deployment.
Related Course on Vibe Coding Academy
Master Course: Build and Ship a Production-Ready App with Lovable and CursorWelcome to the future of software development.