
1. Overview
The purpose of this intro tutorial is to explore the Play Framework and figure out how we can create a web application with it.
Play is a high-productivity web application framework for programming languages whose code is compiled and run on the JVM, mainly Java and Scala. It integrates the components and APIs we need for modern web application development.
2. Play Framework Setup
Let’s head over to the Play framework’s official page and download the latest version of the distribution. At the time of this tutorial, the latest is version 2.7.
We’ll download the Play Java Hello World tutorial zip folder and unzip the file into a convenient location. At the root of this folder, we’ll find an sbt executable that we can use to run the application. Alternatively, we can install sbt from their official page.
To use sbt from the downloaded folder, let’s do the following:
cd /path/to/folder/
./sbt run
Note that we are running a script in the current directory, hence the use of the ./ syntax.
If we install sbt, then we can use it instead:
cd /path/to/folder/
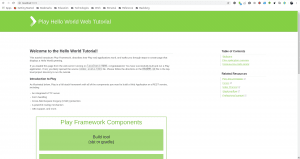
sbt runAfter running this command, we’ll see a statement that says “(Server started, use Enter to stop and go back to the console…)”. This means that our application is ready, therefore we can now head over to http://localhost:9000 where we’ll be presented with a Play Welcome page:
👁 play1
3. Anatomy of Play Applications
In this section, we’ll get a better understanding of how a Play application is structured and what each file and directory in that structure is used for.
If you would like to challenge yourself to a simple example right away, then skip to the next section.
These are the files and folders we find in a typical Play Framework application:
├── app → Application sources
│   ├── assets → Compiled Asset sources
│   │   ├── javascripts → Typically Coffee Script sources
│   │   └── stylesheets → Typically LESS CSS sources
│   ├── controllers → Application controllers
│   ├── models → Application business layer
│   └── views → Templates
├── build.sbt → Application build script
├── conf → Configurations files and other non-compiled resources (on classpath)
│   ├── application.conf → Main configuration file
│   └── routes → Routes definition
├── dist → Arbitrary files to be included in your projects distribution
├── lib → Unmanaged libraries dependencies
├── logs → Logs folder
│   └── application.log → Default log file
├── project → sbt configuration files
│   ├── build.properties → Marker for sbt project
│   └── plugins.sbt → sbt plugins including the declaration for Play itself
├── public → Public assets
│   ├── images → Image files
│   ├── javascripts → Javascript files
│   └── stylesheets → CSS files
├── target → Generated files
│   ├── resolution-cache → Information about dependencies
│   ├── scala-2.11
│   │   ├── api → Generated API docs
│   │   ├── classes → Compiled class files
│   │   ├── routes → Sources generated from routes
│   │   └── twirl → Sources generated from templates
│   ├── universal → Application packaging
│   └── web → Compiled web assets
└── test → source folder for unit or functional tests
3.1. The app Directory
This directory contains Java source code, web templates, and compiled assets’ sources — basically, all sources and all executable resources.
The app directory contains some important subdirectories, each of which packages one part of the MVC architectural pattern:
- models – this is the application business layer, the files in this package will probably model our database tables and enable us to access the persistence layer
- views – all HTML templates that can be rendered to the browser are contained this folder
- controllers – a subdirectory in which we have our controllers. Controllers are Java source files that contain actions to be executed for each API call. Actions are public methods that process HTTP requests and return results of the same as HTTP responses
- assets– a subdirectory that contains compiled assets such as CSS and javascript. The above naming conventions are flexible, we can create our packages e.g. an app/utils package. We can also customize the package naming app/com/baeldung/controllers
It also contains optional files and directories as needed by the particular application.
3.2. The public Directory
Resources stored in the public directory are static assets that are served directly by the Web server.
This directory usually has three subdirectories for images, CSS, and JavaScript files. It’s recommended that we organize the asset files like this for consistency in all Play applications.
3.3. The conf Directory
The conf directory contains application configuration files. The application.conf is where we’ll put most of the configuration properties for the Play application. We’ll define endpoints for the app in routes.
If the application needs any extra configuration files, they should be put in this directory.
3.4. The lib Directory
The lib directory is optional and contains unmanaged library dependencies. If we have any jars that are not specified in the build system, we put them in this directory. They’ll be added automatically to the application classpath.
3.5. The build.sbt File
The build.sbt file is the application build script. This is where we list dependencies necessary to run the application, such as test and persistence libraries.
3.6. The project Directory
All the files that configure the build process based on SBT are found in the project directory.
3.7. The target Directory
This directory contains all files generated by the build system — for example, all .class files.
Having seen and explored the directory structure for the Play Framework Hello World example we just downloaded, we can now go through the fundamentals of the framework using an example.
4. Simple Example
In this section, we’ll create a very basic example of a web application. We’ll use this application familiarize ourselves with the fundamentals of the Play framework.
Instead of downloading an example project and building up from it, let’s see another way we can create a Play Framework application, using the sbt new command.
Let’s open a command prompt, navigate to our location of choice, and execute the following command:
sbt new playframework/play-java-seed.g8For this one, we’ll need to have installed sbt already as explained in Section 2.
The above command will prompt us for a name for the project first. Next, it will ask for the domain (in reverse, as is the package naming convention in Java) that will be used for the packages. We press Enter without typing a name if we want to keep the defaults which are given in square brackets.
The application generated with this command has the same structure as the one generated earlier. We can, therefore, proceed to run the application as we did previously:
cd /path/to/folder/
sbt run
The above command, after completion of execution, will spawn a server on port number 9000 to expose our API, which we can access through http://localhost:9000. We should see the message “Welcome to Play” in the browser.
Our new API has two endpoints that we can now try out in turn from the browser. The first one – which we have just loaded – is the root endpoint, which loads an index page with the “Welcome to Play!” message.
The second one, at http://localhost:9000/assets, is meant for downloading files from the server by adding a file name to the path. We can test this endpoint by getting the favicon.png file, which was downloaded with the application, at http://localhost:9000/assets/images/favicon.png.
5. Actions and Controllers
A Java method inside a controller class that processes request parameters and produces a result to be sent to the client is called an action.
A controller is a Java class that extends play.mvc.Controller that logically groups together actions that may be related to results they produce for the client.
Let’s now head over to app-parent-dir/app/controllers and pay attention to HomeController.java.
The HomeController‘s index action returns a web page with a simple welcome message:
public Result index() {
 return ok(views.html.index.render());
}
This web page is the default index template in the views package:
@main("Welcome to Play") {
 <h1>Welcome to Play!</h1>
}
As shown above, the index page calls the main template. The main template then handles the rendering of the page header and body tags. It takes two arguments: a String for the title of the page and an Html object to insert into the body of the page.
@(title: String)(content: Html)

<!DOCTYPE html>
<html lang="en">
 <head>
 @* Here's where we render the page title `String`. *@
 <title>@title</title>
 <link rel="stylesheet" media="screen" href="@routes.Assets.versioned("stylesheets/main.css")">
 <link rel="shortcut icon" type="image/png" href="@routes.Assets.versioned("images/favicon.png")">
 </head>
 <body>
 @* And here's where we render the `Html` object containing
 * the page content. *@
 @content

 <script src="@routes.Assets.versioned("javascripts/main.js")" type="text/javascript"></script>
 </body>
</html>
Let’s change the text in the index file a little:
@main("Welcome to Baeldung") {
 <h1>Welcome to Play Framework Tutorial on Baeldung!</h1>
}
Reloading the browser will give us a bold heading:
Welcome to Play Framework Tutorial on Baeldung!We can do away with the template completely by removing the render directive in the index() method of the HomeController so that we can return plain text or HTML text directly:
public Result index() {
 return ok("REST API with Play by Baeldung");
}
After editing the code, as shown above, we’ll have only the text in the browser. This will just be plain text without any HTML or styling:
REST API with Play by BaeldungWe could just as well output HTML by wrapping the text in the header <h1></h1> tags and then passing the HTML text to the Html.apply method. Feel free to play around with it.
Let’s add a /baeldung/html endpoint in routes:
GET /baeldung/html controllers.HomeController.applyHtmlNow let’s create the controller that handles requests on this endpoint:
public Result applyHtml() {
 return ok(Html.apply("<h1>This text will appear as a heading 1</h1>"));
}
When we visit http://localhost:9000/baeldung/html we’ll see the above text formatted in HTML.
We’ve manipulated our response by customizing the response type. We’ll look into this feature in more detail in a later section.
We have also seen two other important features of the Play Framework.
First, reloading the browser reflects the most recent version of our code; that’s because our code changes are compiled on the fly.
Secondly, Play provides us with helper methods for standard HTTP responses in the play.mvc.Results class. An example is the ok() method, which returns an OK HTTP 200 response alongside the response body we pass to it as a parameter. We’ve already used the method displaying text in the browser.
There are more helper methods such as notFound() and badRequest() in the Results class.
6. Manipulating Results
We have been benefiting from Play’s content negotiation feature without even realizing it. Play automatically infers response content type from the response body. This is why we have been able to return the text in the ok method:
return ok("text to display");And then Play would automatically set the Content-Type header to text/plain. Although this works in most cases, we can take over control and customize the content type header.
Let’s customize the response for HomeController.customContentType action to text/html:
public Result customContentType() {
 return ok("This is some text content").as("text/html");
}
This pattern cuts across all kinds of content types. Depending on the format of the data we pass to the ok helper method, we can replace text/html by text/plain or application/json.
We can do something similar to set headers:
public Result setHeaders() {
 return ok("This is some text content")
 .as("text/html")
 .withHeader("Header-Key", "Some value");
}
7. Conclusion
In this article, we have explored the basics of the Play Framework. We’ve also been able to create a basic Java web application using Play.