
1. Overview
Nowadays, front-end and back-end components often separate a web application. Usually, we expose APIs as a back-end component for the front-end component or third-party app integrations.
In such a scenario, it is essential to have proper specifications for the back-end APIs. At the same time, the API documentation should be informative, readable, and easy to follow.
Moreover, reference documentation should simultaneously describe every change in the API. Accomplishing this manually is a tedious exercise, so automation of the process was inevitable.
In this tutorial, we’ll look at Swagger 2 for a Spring REST web service, using the Springfox implementation of the Swagger 2 specification. If you are not familiar with Swagger, visit its web page to learn more before continuing with this tutorial.
It’s important to mention that the latest version of Swagger specification, now known as OpenAPI 3.0, is better supported by the Springdoc project and should be used for documenting Spring REST API. Moreover, Spring Boot 3 doesn’t support this library.
Further reading:
Generate Spring Boot REST Client with Swagger
Introduction to Spring REST Docs
2. Target Project
The creation of the REST service we will use is not within the scope of this article. If you already have a suitable project, use it. If not, these links are a good place to start:
3. Adding the Maven Dependency
As mentioned above, we will use the Springfox implementation of the Swagger specification. The latest version can be found on Maven Central.
To add it to our Maven project, we need a dependency in the pom.xml file:
<dependency>
 <groupId>io.springfox</groupId>
 <artifactId>springfox-swagger2</artifactId>
 <version>3.0.0</version>
</dependency>
3.1. Spring Boot Dependency
For the Spring Boot based projects, it’s enough to add a single springfox-boot-starter dependency:
<dependency>
 <groupId>io.springfox</groupId>
 <artifactId>springfox-boot-starter</artifactId>
 <version>3.0.0</version>
</dependency>
We can add any other starters we need, with a version managed by the Spring Boot parent:
<dependency>
 <groupId>org.springframework.boot</groupId>
 <artifactId>spring-boot-starter-parent</artifactId>
 <version>3.3.2</version>
</dependency>
4. Integrating Swagger 2 Into the Project
4.1. Java Configuration
The configuration of Swagger mainly centers around the Docket bean:
@Configuration
public class SpringFoxConfig {
 @Bean
 public Docket api() {
 return new Docket(DocumentationType.SWAGGER_2)
 .select()
 .apis(RequestHandlerSelectors.any())
 .paths(PathSelectors.any())
 .build();
 }
}
After defining the Docket bean, its select() method returns an instance of ApiSelectorBuilder, which provides a way to control the endpoints exposed by Swagger.
We can configure predicates for selecting RequestHandlers with the help of RequestHandlerSelectors and PathSelectors. Using any() for both will make documentation for our entire API available through Swagger.
4.2. Configuration Without Spring Boot
In plain Spring projects, we need to enable Swagger 2 explicitly. To do so, we have to use the @EnableSwagger2 on our configuration class:
@Configuration
@EnableSwagger2
public class SpringFoxConfig {
}
Additionally, without Spring Boot, we don’t have the luxury of auto-configuration of our resource handlers.
Swagger UI adds a set of resources that we must configure as part of a class that extends WebMvcConfigurerAdapter and is annotated with @EnableWebMvc:
@Override
public void addResourceHandlers(ResourceHandlerRegistry registry) {
 registry.addResourceHandler("swagger-ui.html")
 .addResourceLocations("classpath:/META-INF/resources/");

 registry.addResourceHandler("/webjars/**")
 .addResourceLocations("classpath:/META-INF/resources/webjars/");
}
4.3. Verification
To verify that Springfox is working, we can visit this URL in our browser:
http://localhost:8080/v2/api-docs
The result is a JSON response with a large number of key-value pairs, which is not very human readable. Fortunately, Swagger provides Swagger UI for this purpose.
5. Swagger UI
Swagger UI is a built-in solution that makes user interaction with the Swagger-generated API documentation much easier.
5.1. Enabling Springfox’s Swagger UI
To use Swagger UI, we need to add an additional Maven dependency:
<dependency>
 <groupId>io.springfox</groupId>
 <artifactId>springfox-swagger-ui</artifactId>
 <version>3.0.0</version>
</dependency>
Now we can test it in our browser by visiting:
http://localhost:8080/swagger-ui/
The result should look something like this:
👁 Screenshot_1
5.2. Exploring Swagger Documentation
Within Swagger’s response is a list of all controllers defined in our application. Clicking on any of them will list the valid HTTP methods (DELETE, GET, HEAD, OPTIONS, PATCH, POST, PUT).
Expanding each method provides additional useful data, such as response status, content-type, and a list of parameters. It is also possible to try each method using the UI.
Swagger’s ability to be synchronized with our code base is crucial. To demonstrate this, we can add a new controller to our application:
@RestController
public class CustomController {

 @RequestMapping(value = "/custom", method = RequestMethod.POST)
 public String custom() {
 return "custom";
 }
}
Now if we refresh the Swagger documentation, we see custom-controller in the list of controllers. As we know, there is only one method (POST) shown in Swagger’s response.
6. Spring Data REST
Springfox provides support for Spring Data REST through its springfox-data-rest library.
Spring Boot will take care of the auto-configuration if it discovers the spring-boot-starter-data-rest on the classpath.
Now let’s create an entity named User:
@Entity
public class User {
 @Id
 private Long id;
 private String firstName;
 private int age;
 private String email;

 // getters and setters
}
Then we’ll create the UserRepository to add CRUD operations on the User entity:
@Repository
public interface UserRepository extends CrudRepository<User, Long> {
}
Last, we’ll import the SpringDataRestConfiguration class to the SpringFoxConfig class:
@EnableSwagger2
@Import(SpringDataRestConfiguration.class)
public class SpringFoxConfig {
 //...
}
Note: We’ll use the @EnableSwagger2 annotation to enable Swagger since @EnableSwagger2WebMvc is deprecated in version 3 of the libraries.
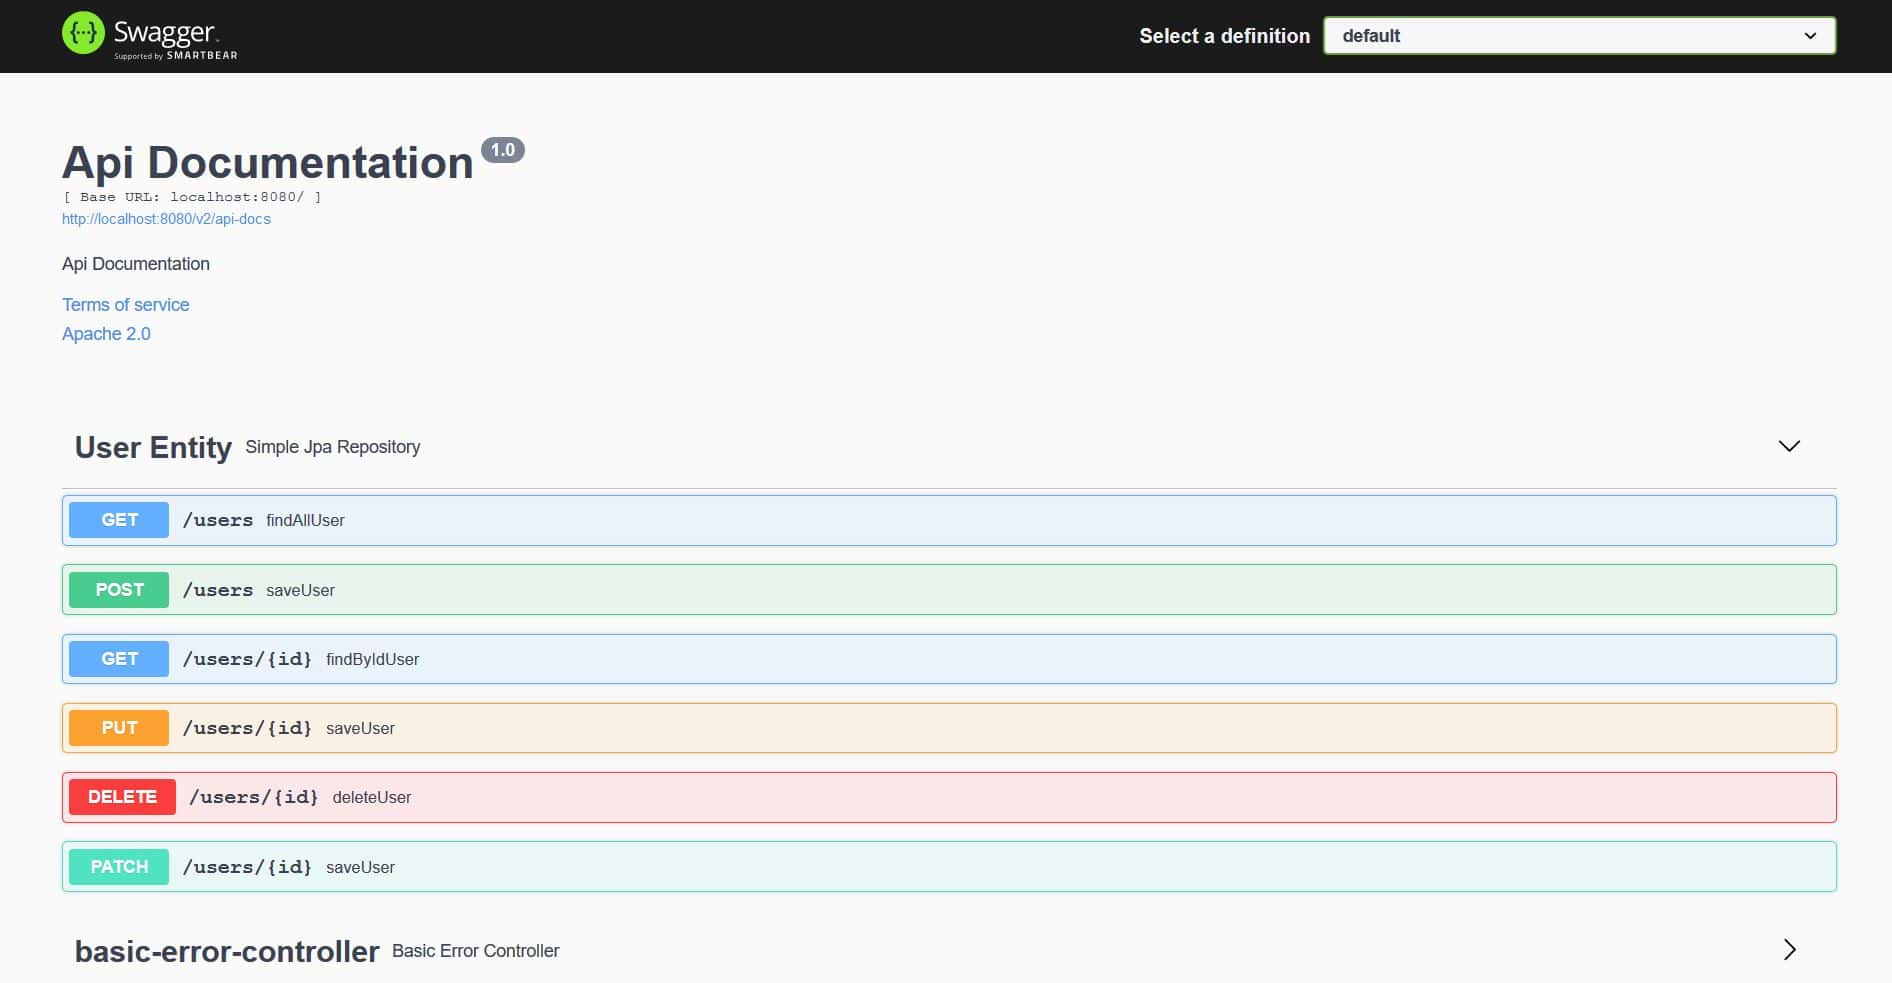
Let’s restart the application to generate the specifications for the Spring Data REST APIs:
👁 swagger_user_1
We can see that Springfox has generated the specifications for the User entity with HTTP methods like GET, POST, PUT, PATCH, and DELETE.
7. Bean Validations
Springfox also supports the bean validation annotations through its springfox-bean-validators library.
First, we’ll add the Maven dependency to our pom.xml:
<dependency>
 <groupId>io.springfox</groupId>
 <artifactId>springfox-bean-validators</artifactId>
 <version>3.0.0</version>
</dependency>
Again, if we use Spring Boot, we don’t have to provide the above dependency explicitly.
Next, let’s add a few validation annotations like @NotNull and @Min to the User entity:
@Entity
public class User {
 //...

 @NotNull(message = "First Name cannot be null")
 private String firstName;

 @Min(value = 15, message = "Age should not be less than 15")
 @Max(value = 65, message = "Age should not be greater than 65")
 private int age;
}
Finally, we’ll import the BeanValidatorPluginsConfiguration class to the SpringFoxConfig class:
@EnableSwagger2
@Import(BeanValidatorPluginsConfiguration.class)
public class SpringFoxConfig {
//...
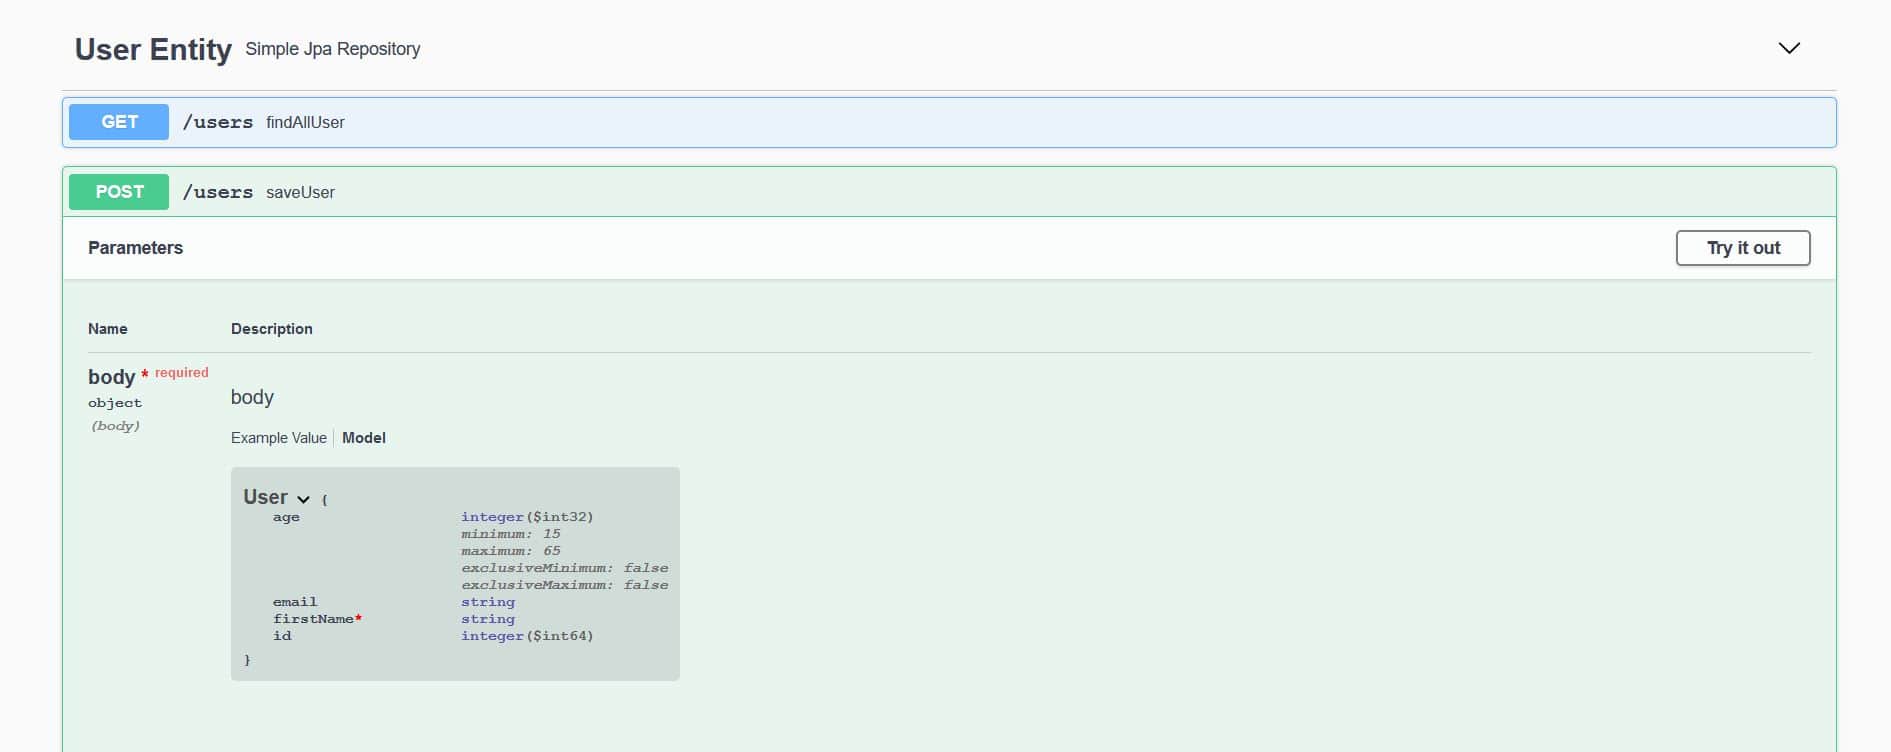
}Let’s take a look at the changes in the API specifications:
👁 swagger_user_2
Here, we can observe that the User model has * required on the firstName. Also, the minimum and maximum values are defined for the age.
8. Plugin
In order to add specific features to the API specifications, we can create a Springfox plugin. A plugin can offer various features, from enriching the models and properties to the custom API listings and defaults.
Springfox supports the plugin creation through its spi module. The spi module provides a few interfaces like the ModelBuilderPlugin, ModelPropertyBuilderPlugin, and ApiListingBuilderPlugin that act as an extensibility hook to implement a custom plugin.
To demonstrate the capabilities, let’s create a plugin to enrich the email property of the User model. We’ll use the ModelPropertyBuilderPlugin interface and set the values of the pattern and example.
First, let’s create the EmailAnnotationPlugin class and override the supports method to allow any documentation type, such as Swagger 1.2 and Swagger 2:
@Component
@Order(Validators.BEAN_VALIDATOR_PLUGIN_ORDER)
public class EmailAnnotationPlugin implements ModelPropertyBuilderPlugin {
 @Override
 public boolean supports(DocumentationType delimiter) {
 return true;
 }
}
Then we’ll override the apply method of the ModelPropertyBuilderPlugin to set the values of the builder properties:
@Override
public void apply(ModelPropertyContext context) {
 Optional<Email> email = annotationFromBean(context, Email.class);
 if (email.isPresent()) {
 context.getSpecificationBuilder().facetBuilder(StringElementFacetBuilder.class)
 .pattern(email.get().regexp());
 context.getSpecificationBuilder().example("[email protected]");
 }
}
So, the API specifications will show the pattern and example values of the property annotated with the @Email annotation.
Next, we’ll add the @Email annotation to the User entity:
@Entity
public class User {
 //...

 @Email(regexp=".*@.*\\..*", message = "Email should be valid")
 private String email;
}
Last, we’ll enable the EmailAnnotationPlugin in the SpringFoxConfig class by registering as a bean:
@Import({BeanValidatorPluginsConfiguration.class})
public class SpringFoxConfig {
//...
@Bean
public EmailAnnotationPlugin emailPlugin() {
return new EmailAnnotationPlugin();
}
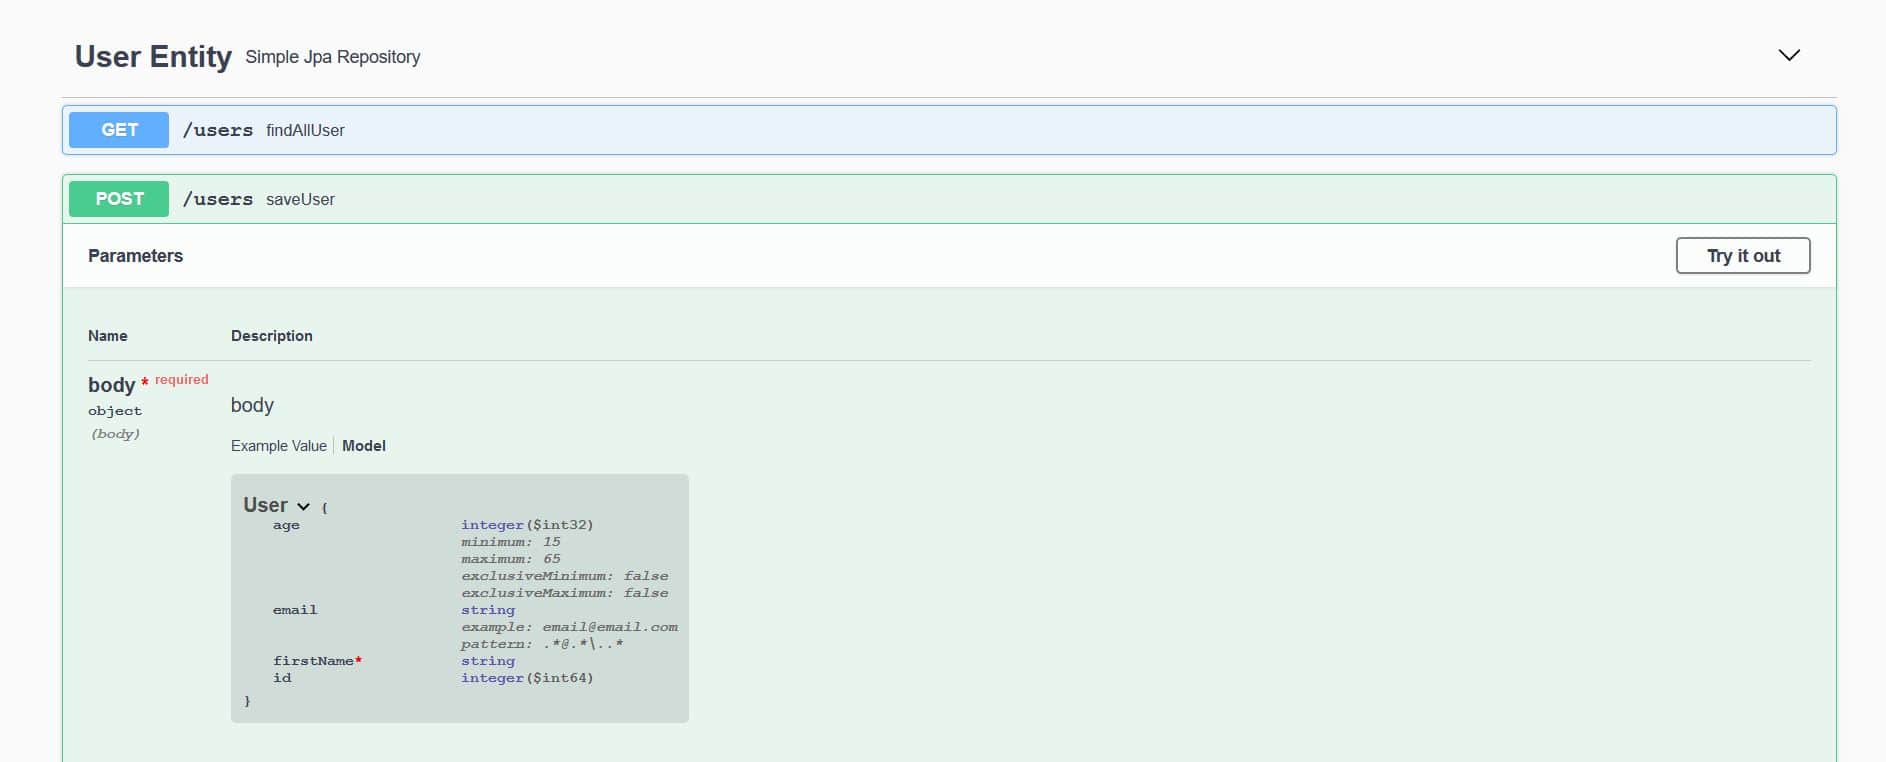
}Let’s check out the EmailAnnotationPlugin in action:
👁 swagger_user_3
We can see the value of the pattern is the same regex (.*@.*\\..*) from the email property of the User entity.
Similarly, the value of the example ([email protected]) is the same, as defined in the apply method of the EmailAnnotationPlugin.
9. Advanced Configuration
The Docket bean of our application can be configured to give us more control over the API documentation generation process.
9.1. Filtering API for Swagger’s Response
It is not always desirable to expose the documentation for the entire API. We can restrict Swagger’s response by passing parameters to the apis() and paths() methods of the Docket class.
As seen above, RequestHandlerSelectors allows using the any or none predicates but can also be used to filter the API according to the base package, class annotation, and method annotations.
PathSelectors provides additional filtering with predicates, which scan the request paths of our application. We can use any(), none(), regex(), or ant().
In the example below, we will instruct Swagger to include only controllers from a particular package, with specific paths, using the ant() predicate:
@Bean
public Docket api() {
 return new Docket(DocumentationType.SWAGGER_2)
 .select()
 .apis(RequestHandlerSelectors.basePackage("com.baeldung.web.controller"))
 .paths(PathSelectors.ant("/foos/*"))
 .build();
}
9.2. Custom Information
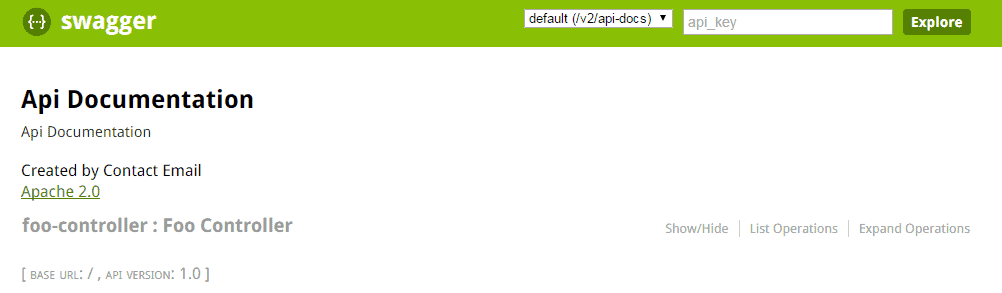
Swagger also provides some default values in its response, which we can customize, such as “Api Documentation”, “Created by Contact Email”, and “Apache 2.0”.
To change these values, we can use the apiInfo(ApiInfo apiInfo) method — the ApiInfo class that contains custom information about the API:
@Bean
public Docket api() {
 return new Docket(DocumentationType.SWAGGER_2)
 .select()
 .apis(RequestHandlerSelectors.basePackage("com.example.controller"))
 .paths(PathSelectors.ant("/foos/*"))
 .build()
 .apiInfo(apiInfo());
}

private ApiInfo apiInfo() {
 return new ApiInfo(
 "My REST API",
 "Some custom description of API.",
 "API TOS",
 "Terms of service",
 new Contact("John Doe", "www.example.com", "[email protected]"),
 "License of API", "API license URL", Collections.emptyList());
}
9.3. Custom Methods Response Messages
Swagger allows globally overriding response messages of HTTP methods through Docket’s globalResponses() method.
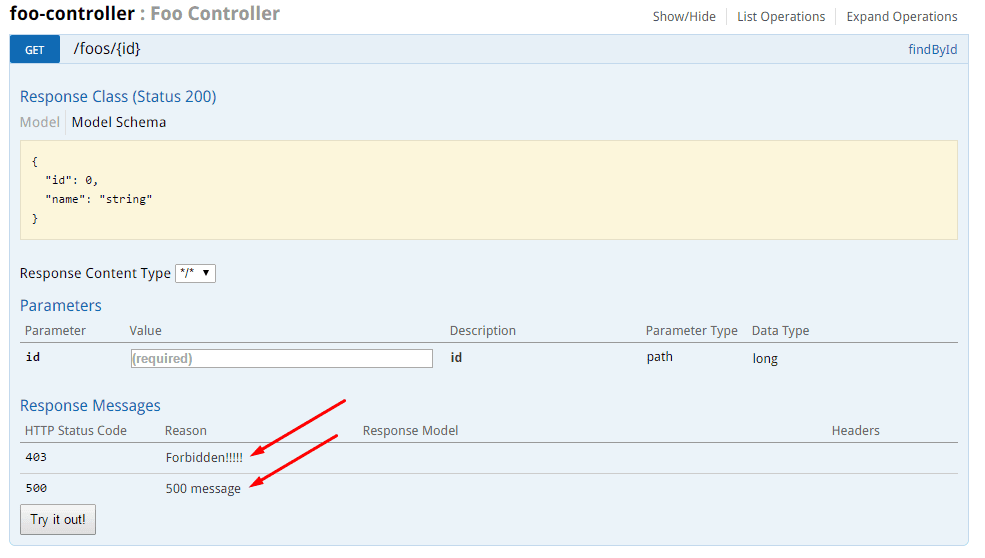
First, we need to instruct Swagger not to use default response messages. Suppose we want to override 500 and 403 response messages for all GET methods.
To achieve this, some code must be added to the Docket’s initialization block (original code is excluded for clarity):
.useDefaultResponseMessages(false)
.globalResponses(HttpMethod.GET, newArrayList(
 new ResponseBuilder().code("500")
 .description("500 message").build(),
 new ResponseBuilder().code("403")
 .description("Forbidden!!!!!").build()
));
10. Swagger UI With an OAuth-Secured API
The Swagger UI provides a number of very useful features that we’ve covered well so far here. But we can’t really use most of these if our API is secured and not accessible.
Let’s see how we can allow Swagger to access an OAuth-secured API using the Authorization Code grant type in this example.
We’ll configure Swagger to access our secured API using the SecurityScheme and SecurityContext support:
@Bean
public Docket api() {
 return new Docket(DocumentationType.SWAGGER_2).select()
 .apis(RequestHandlerSelectors.any())
 .paths(PathSelectors.any())
 .build()
 .securitySchemes(Arrays.asList(securityScheme()))
 .securityContexts(Arrays.asList(securityContext()));
}
10.1. The Security Configuration
We’ll define a SecurityConfiguration bean in our Swagger configuration and set some defaults:
@Bean
public SecurityConfiguration security() {
 return SecurityConfigurationBuilder.builder()
 .clientId(CLIENT_ID)
 .clientSecret(CLIENT_SECRET)
 .scopeSeparator(" ")
 .useBasicAuthenticationWithAccessCodeGrant(true)
 .build();
}
10.2. SecurityScheme
Next, we’ll define our SecurityScheme; this is used to describe how our API is secured (Basic Authentication, OAuth2, …).
In our case here, we’ll define an OAuth scheme used to secure our Resource Server:
private SecurityScheme securityScheme() {
 GrantType grantType = new AuthorizationCodeGrantBuilder()
 .tokenEndpoint(new TokenEndpoint(AUTH_SERVER + "/token", "oauthtoken"))
 .tokenRequestEndpoint(
 new TokenRequestEndpoint(AUTH_SERVER + "/authorize", CLIENT_ID, CLIENT_SECRET))
 .build();

 SecurityScheme oauth = new OAuthBuilder().name("spring_oauth")
 .grantTypes(Arrays.asList(grantType))
 .scopes(Arrays.asList(scopes()))
 .build();
 return oauth;
}
Note that we used the Authorization Code grant type, for which we need to provide a token endpoint and the authorization URL of our OAuth2 Authorization Server.
And here are the scopes we need to have defined:
private AuthorizationScope[] scopes() {
 AuthorizationScope[] scopes = {
 new AuthorizationScope("read", "for read operations"),
 new AuthorizationScope("write", "for write operations"),
 new AuthorizationScope("foo", "Access foo API") };
 return scopes;
}
These sync up with the scopes we actually have defined in our application, for the /foos API.
10.3. SecurityContext
Finally, we need to define a SecurityContext for our example API:
private SecurityContext securityContext() {
 return SecurityContext.builder()
 .securityReferences(
 Arrays.asList(new SecurityReference("spring_oauth", scopes())))
 .forPaths(PathSelectors.regex("/foos.*"))
 .build();
}
Note how the name we used here in the reference — spring_oauth — syncs up with the name we used previously in the SecurityScheme.
10.4. Test
Now that we have everything set up and ready to go, let’s take a look at our Swagger UI and try access the Foo API.
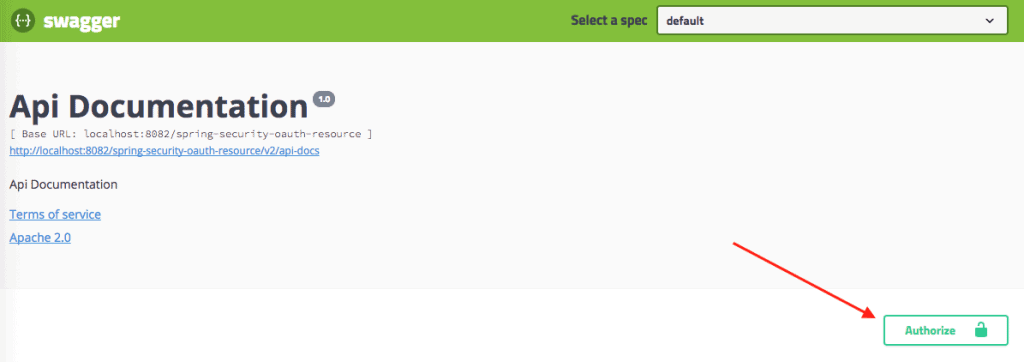
We can access the Swagger UI locally:
http://localhost:8082/spring-security-oauth-resource/swagger-ui.htmlAs we can see, a new Authorize button now exists due to our security configurations:
👁 swagger_1
When we click the Authorize button, we can see the following pop-up to authorize our Swagger UI to access the secured API:
👁 swagger_2
Note that:
- We can already see the CLIENT_ID and CLIENT_SECRET, as we’ve pre-configured them earlier (but we can still change them).
- We can now select the scopes we need.
Here’s how the secured API is marked:
👁 swagger_3
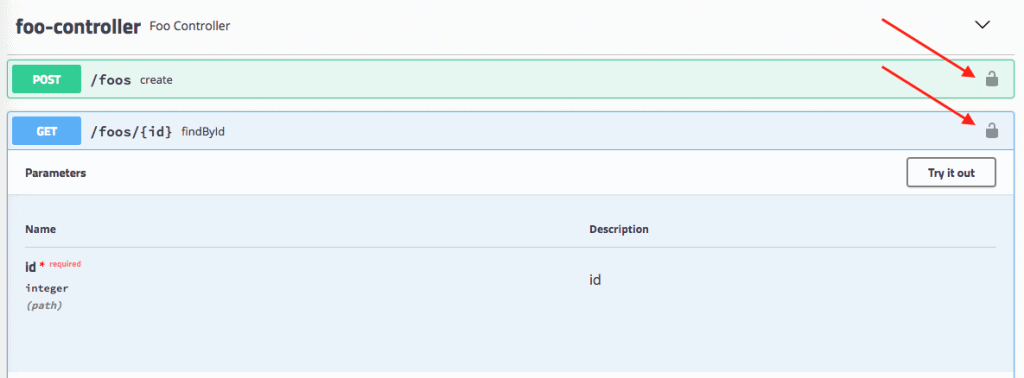
And now, finally, we can hit our API!
Of course, it almost goes without saying that we need to be careful how we expose Swagger UI externally, now that this security configuration is active.
11. Conclusion
In this article, we set up Swagger 2 to generate documentation for a Spring REST API. We also explored ways to visualize and customize Swagger’s output. And finally, we looked at a simple OAuth configuration for Swagger.
And if you’re a student of REST With Spring, go to Lesson 1 from Module 7 for a deep dive into setting up Swagger with Spring and Spring Boot.