
1. Overview
Simply put, Apache Tomcat is a web server and servlet container that’s used to deploy and serve Java web applications.
In this quick article, we’ll see how to install Tomcat, how to configure a user for the Tomcat Manager, and create an SSL certificate to allow Tomcat to serve HTTPS content.
2. Install Tomcat on Windows
In this section, we will install and start the Tomcat server on Windows.
2.1. Download and Prepare
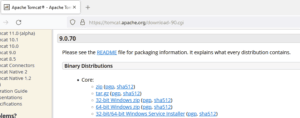
First, we need to download Tomcat.
Let’s download the server as a zip file for Windows:
👁 Tomcat installation
Next, we’ll simply uncompress Tomcat into its directory.
2.3. Install
On Windows, a quick additional installation is necessary. Let’s open the Windows terminal and from the Tomcat installation bin directory:
C:\Java\Apache Tomcat 9.0.70\bin>
Next, let’s install the service:
C:\Java\Apache Tomcat 9.0.70\bin>service install
The output should be similar to this:
Installing the service 'Tomcat9' ...
Using CATALINA_HOME: "C:\Java\Apache Tomcat 9.0.70"
Using CATALINA_BASE: "C:\Java\Apache Tomcat 9.0.70"
Using JAVA_HOME: "C:\Java\jdk1.8.0_40"
Using JRE_HOME: "C:\Java\jre1.8.0_40"
Using JVM: "C:\Java\jre1.8.0_40\bin\client\jvm.dll"
The service 'Tomcat9' has been installed.
2.4. Start the Tomcat Service
Let’s run the command to start the service:
C:\Java\Apache Tomcat 9.0.70\bin>sc start Tomcat9
We should get the following output:
SERVICE_NAME: Tomcat9
 TYPE : 10 WIN32_OWN_PROCESS
 STATUS : 2 START_PENDING
 (NOT_STOPPABLE, NOT_PAUSABLE, IGNORES_SHUTDOWN)
 WIN32_OUTPUT_CODE : 0 (0x0)
 SERVICE_OUTPUT_CODE: 0 (0x0)
 CHECK-POINT : 0x0
 START-INDICATOR : 0x7d0
 PID : 5552
 MARKS :
Let’s open the URL http://localhost:8080 in the browser. We should see the Tomcat Welcome screen:
👁 TomcatWelcome
3. Installing Tomcat on Linux (Debian)
We’ll install Tomcat on Ubuntu Linux 16.06, but this procedure should work well on any Debian-based Linux distribution.
3.1. Download and Uncompress
Let’s download and uncompress Tomcat:
$ sudo mkdir /opt/tomcat
$ sudo tar xvf apache-tomcat-9.0.70.tar.gz -C /opt/tomcat --strip-components=1
3.2. Ensure That Java Is Installed
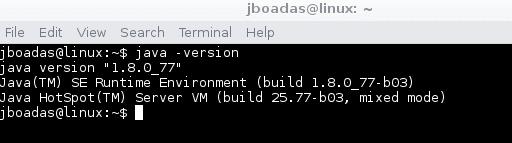
Let’s also make sure that we have Java installed and its’s available on the system:
$ java -versionWe should get the following output:
👁 Java version
3.3. Create a User and a Group
We’ll run the server under a separate group and user. Let’s create a group for it first:
$ sudo groupadd tomcatAnd let’s create a Tomcat user to avoid using the root user:
$ sudo useradd -s /bin/false -g tomcat -d /opt/tomcat tomcatLet’s also update the permissions of the server – to use them with the new user and group:
$ cd /opt/tomcat
$ sudo chgrp -R tomcat conf
$ sudo chmod g+rwx conf
$ sudo chmod g+r conf/*
$ sudo chown -R tomcat work/ temp/ logs/
Finally, let’s make sure that Tomcat starts automatically with a simple Upstart script:
$ vi /etc/init/tomcat.confThe tomcat.conf script is used by the operative system to start the Tomcat service at boot time.
This script is used to start and stop the service when needed:
description "Tomcat Server"
 start on runlevel [2345]
 stop on runlevel [!2345]
 setuid tomcat
 setgid tomcat
 env JAVA_HOME=/opt/jdk1.8.0_77/jre/
 env CATALINA_HOME=/opt/tomcat
 exec $CATALINA_HOME/bin/catalina.sh run
3.4. Start and Stop
Let’s go to the opt/tomcat/bin directory and execute the start command:
$ ./catalina.sh startWe should see the following output:
Using CATALINA_BASE: /opt/tomcat
Using CATALINA_HOME: /opt/tomcat
Using CATALINA_TMPDIR: /opt/tomcat/temp
Using JRE_HOME: /usr
Using CLASSPATH: /opt/tomcat/bin/bootstrap.jar:/opt/tomcat/bin/tomcat-juli.jar
Tomcat started.
root@linux:/opt/tomcat/bin#
Also, we can start the server using the following command:
$ ./startup.shNow it’s time to test our server. For this, let’s open the URL http://localhost:8080 in the browser.
We can stop the running server using the stop command:
$ ./catalina.sh stopWhen we stop the server, we can see the following output in the terminal:
Using CATALINA_BASE: /opt/tomcat
Using CATALINA_HOME: /opt/tomcat
Using CATALINA_TMPDIR: /opt/tomcat/temp
Using JRE_HOME: /usr
Using CLASSPATH: /opt/tomcat/bin/bootstrap.jar:/opt/tomcat/bin/tomcat-juli.jar
Using CATALINA_OPTS:
NOTE: Picked up JDK_JAVA_OPTIONS: --add-opens=java.base/java.lang=ALL-UNNAMED ...
In addition, we can stop the server using the shutdown command:
$ ./shutdown.sh3.5. Installing Tomcat Using Linux Repository
Another option for installing Tomcat is using the official Linux repositories. To install it, we run the following commands:
$ sudo apt update
$ sudo apt install tomcat9
After the installation is complete, let’s start the server:
$ sudo service tomcat9 startAlso, we can stop and restart the server using the following commands:
$ sudo service tomcat9 stop
$ sudo service tomcat9 restart
4. Tomcat Manager
To access the Tomcat manager, we need to create a user with the privileges to do that.
On Windows:
C:\Java\Apache Tomcat 9.0.70\conf\tomcat-users.xmlOn Linux:
/opt/tomcat/conf/tomcat-users.xmlIn this file, we’ll define the users to access the tomcat manager.
<?xml version='1.0' encoding='utf-8'?>
<tomcat-users xmlns="http://tomcat.apache.org/xml"
 xmlns:xsi="http://www.w3.org/2001/XMLSchema-instance"
 xsi:schemaLocation="http://tomcat.apache.org/xml tomcat-users.xsd"
 version="1.0">
 <user username="admin" password="admin" roles="manager-gui,admin-gui"/>
</tomcat-users>
In the <user> tag, we are defining a user admin with the password admin with the roles manager-gui and admin-gui.
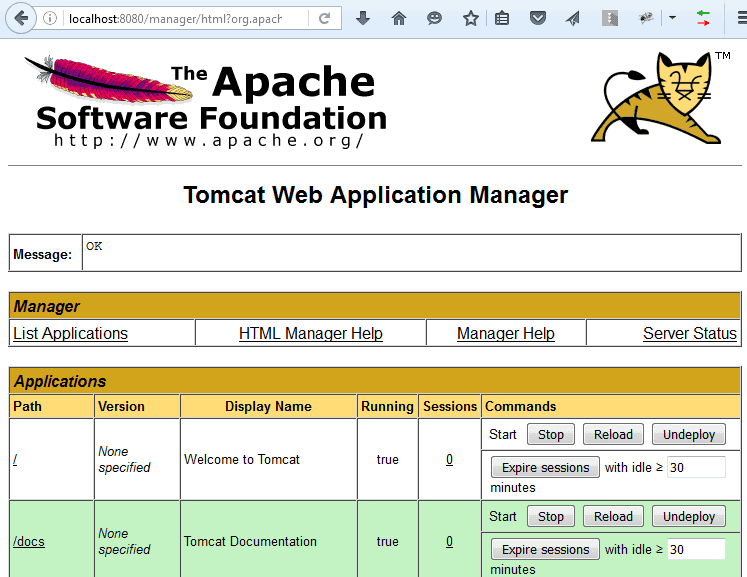
Now, we restart the server and open the URL http://localhost:8080 again. This time we click on the Manager App button and the server asks for credentials. After entering the provided credentials, we should see the following screen:
👁 Tomcat Manager
5. SSL Certificate
We can use keytool to generate the certificates from the command line.
On Windows:
keytool -genkey -alias tomcat -keyalg RSA -keystore C:\Java\apache-tomcat-9.0.70\keystore\tomcatOn Linux:
$ keytool -genkey -alias tomcat -keyalg RSA -keystore /opt/tomcat/keystore/tomcatThe tool is going to ask some questions to feed the certificate. The certificate is going to be in the folder and the name of the certificate is “tomcat”.
Let’s find how to check a certificate in our keystores using the keytool command.
On Windows:
keytool -list -keystore C:\Java\apache-tomcat-9.0.70\keystore\tomcatOn Linux:
$ keytool -list -keystore /opt/tomcat/keystore/tomcat5.1. Use the Certificate
We can now configure the certificate in our server.xml file.
On Windows:
C:\Java\Apache Tomcat 9.0.70\conf\server.xmlOn Linux:
/opt/tomcat/conf/server.xmlIn the server.xml file, we add an SSL connector:
<Connector port="8443" protocol="org.apache.coyote.http11.Http11NioProtocol"
 maxThreads="150" SSLEnabled="true" scheme="https" secure="true"
 clientAuth="false" sslProtocol="TLS"
 keystoreFile="C:\Java\apache-tomcat-9.0.70\keystore\tomcat"
 keystorePass="changeit" />
Finally, we need to restart the Tomcat server to bring the changes into effect. Now, we can run our Applications under HTTPS in Tomcat.
6. Conclusion
At the end of this quick tutorial, we now have a working Tomcat in Linux and Windows to use during development.
To use Tomcat in production, we, of course, need to configure and tune the server accordingly.