
Internet of Things: Setting Up Your DragonBoard™ Development Platform
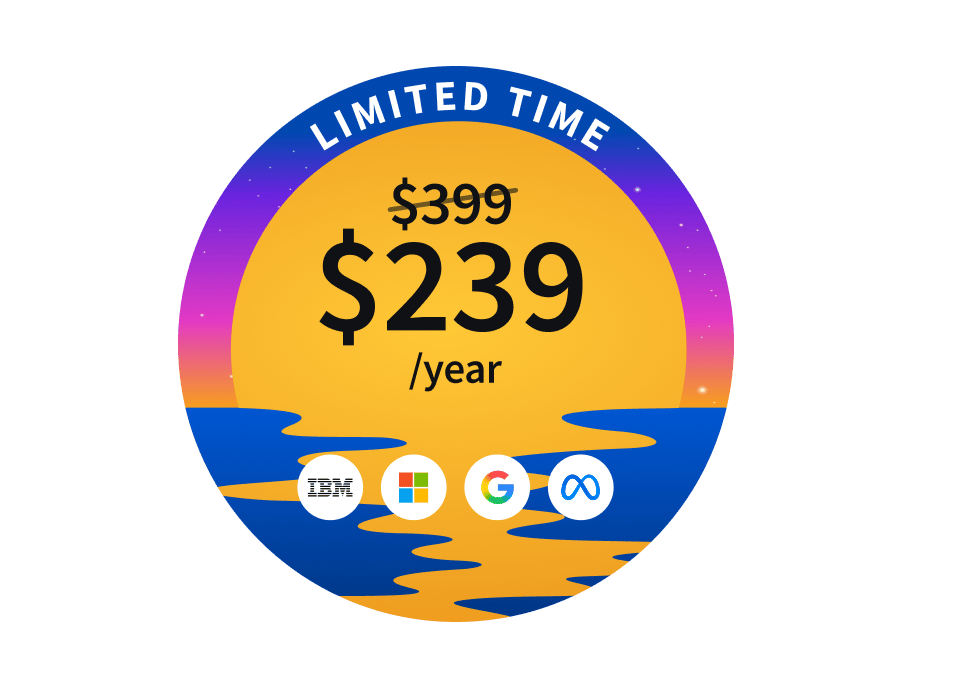
Keep adding new skills with 10,000+ programs for $239 (usually $399). Save now.
Internet of Things: Setting Up Your DragonBoard™ Development Platform
15,172 already enrolled
Included with
Ask Coursera
160 reviews
160 reviews
Skills you'll gain
Details to know
See how employees at top companies are mastering in-demand skills
Build your subject-matter expertise
- Learn new concepts from industry experts
- Gain a foundational understanding of a subject or tool
- Develop job-relevant skills with hands-on projects
- Earn a shareable career certificate
There are 10 modules in this course
Do you want to develop skills to prototype mobile-enabled products using state-of-the-art technologies? In this course you will build a hardware and software development environment to guide your journey through the Internet of Things specialization courses. We will use the DragonBoard™ 410c single board computer (SBC).
This is the first in a series of courses where you will learn both the theory and get the hands-on development practice needed to prototype Internet of Things products. This course is suitable for a broad range of learners. This course is for you if: • You want to develop hands-on experience with mobile technologies and the Internet • You want to pivot your career towards the design and development of Internet of Things enabled products • You are an entrepreneur, innovator or member of a DIY community Learning Goals: After completing this course, you will be able to: 1. Configure at least one integrated development environment (IDE) for developing software. 2. Make use of git, adb and fastboot to flash multiple OS and repair bricked boards. 3. Install Android 5.1 (Lollipop) and Linux based on Ubuntu. 4. Create, compile and run a Hello World program. 5. Describe the DragonBoard™ 410c peripherals, I/O expansion capabilities, Compute (CPU and Graphics) capabilities, and Connectivity capabilities.
Welcome to the Internet of Things! Before diving into this course give us a chance to let you know what it is all about! We will walk you through a module by module outline that will give you highlights on the interesting aspects of the course.
What's included
2 videos2 readings
2 videos•Total 9 minutes
- Specialization Trailer•4 minutes
- Let's take a look at all our Modules!•4 minutes
2 readings•Total 20 minutes
- Get your resources in order!•10 minutes
- Course 2 Slides•10 minutes
In this course, you will see a lot of new words and acronyms you might not be familiar with. If you feel comfortable with your knowledge of tech terminology, feel free to skip these lessons since they will not affect the overall integrity of the course. If you see something that you want to know a little more about, feel free to watch the video to gain insight on some basic concepts. We do expect you to know the majority of this material before going into the next module, we would recommend going through the lessons as a quick brush up.
What's included
19 videos3 readings1 assignment1 peer review
19 videos•Total 31 minutes
- Getting Ready for Module 1•0 minutes
- Introduction to Lesson 1•1 minute
- Acronyms (DragonBoard™ 410c)•2 minutes
- Acronyms (General)•2 minutes
- Frequently used Terminology•2 minutes
- A look back at Lesson 1•1 minute
- Introduction to Lesson 2•1 minute
- High and Low level programming•3 minutes
- Object oriented programming•4 minutes
- C-programming (Systems/applications)•2 minutes
- Root/Superuser•2 minutes
- Levels of Abstraction•2 minutes
- A look back at Lesson 2•2 minutes
- Introduction to Lesson 3•1 minute
- UNIX•2 minutes
- MS-DOS•1 minute
- DragonBoard™ 410c•2 minutes
- A look back at Lesson 3•1 minute
- Video Challenge!•2 minutes
3 readings•Total 30 minutes
- Module 1 Procedure document (supplemental doc)•10 minutes
- The C-Programming language (Optional book)•10 minutes
- More commands!•10 minutes
1 assignment•Total 30 minutes
- Module 1•30 minutes
1 peer review•Total 120 minutes
- Cheat Sheet Peer Review•120 minutes
The new and exciting DragonBoard™ 410c is now available! In this module you will get introduced to the new all-in-one board, get an overview of all its amazing features and find out how you can get one yourself. We will then walk you through the registration process, and how to get your board started up for the first time! By the end of this module you will know enough about the DragonBoard™ 410c to begin using it for the fun projects that are to come later in this course and in the rest of the courses in the Internet of Things specialization.
What's included
20 videos5 readings1 assignment
20 videos•Total 55 minutes
- Getting Ready for Module 2!•1 minute
- Introduction to Lesson 1•1 minute
- About the Dragonboard™ 410c•4 minutes
- Important Board Components•7 minutes
- Technical Specifications•7 minutes
- A look back at Lesson 1•1 minute
- Introduction to Lesson 2•2 minutes
- Choosing an operating system•4 minutes
- Purchasing your Dragonboard™ 410c•2 minutes
- Registering with 96boards•1 minute
- Registering with Qualcomm® Developer Network•3 minutes
- A look back at Lesson 2•1 minute
- Introduction to Lesson 3•2 minutes
- Boot Configuration•3 minutes
- Booting up your Dragonboard™ 410c•2 minutes
- Android Developer Mode (Android Only)•3 minutes
- Testing your Dragonboard™ 410c•3 minutes
- Shutting down your Dragonboard™ 410c•2 minutes
- Caring for your Dragonboard™ 410c•5 minutes
- A look back at Lesson 3•1 minute
5 readings•Total 50 minutes
- Module 2 Procedure document (supplemental doc)•10 minutes
- Qualcomm® introduces the DragonBoard™ 410c! (YouTube video)•10 minutes
- DragonBoard™ 410c Feature Highlights•10 minutes
- While you're waiting!•10 minutes
- Optional Reading about the SoC•10 minutes
1 assignment•Total 30 minutes
- Module 2•30 minutes
In order to easily communicate with your DragonBoard™ 410c it is essential to set up a developing environment. In this lesson we will talk about Android Studio as our preferred IDE (Integrated Development Environment), we will show you how and where to download it as well as walk you through the installation process on both Mac/Linux and Windows. As an Android developer you will need a variety of tools, these tools come bundled with the Android Studio download and are referred to as the SDK (Software Developer Kit). This lesson will cover accessing the SDK and utilizing the various tools it has to offer. ADB (Android Debug Bridge) and Fastboot are among the tools we will be using most throughout this course. It is with these tools that you will be able to access your board at all levels and make crucial changes needed for development.
What's included
35 videos8 readings1 assignment
35 videos•Total 76 minutes
- Getting Ready for Module 3!•1 minute
- Introduction to Lesson 1•1 minute
- Android Development•3 minutes
- Introduction to Android Studio•1 minute
- Android Studio vs. Eclipse•2 minutes
- A look back at Lesson 1•2 minutes
- Introduction to Lesson 2a•1 minute
- Installing Java•1 minute
- Downloading Android Studio/Android SDK Bundle•1 minute
- Installing Android Studio•4 minutes
- A look back at Lesson 2a•1 minute
- Introduction to Lesson 2b•1 minute
- Installing Java•1 minute
- Downloading Android Studio/Android SDK•1 minute
- Installing Android Studio•3 minutes
- A look back at Lesson 2b•1 minute
- Introduction to Lesson 3•0 minutes
- Introduction to Git•3 minutes
- Git Setup•3 minutes
- Git Commands•3 minutes
- Using Git with Android Studio•13 minutes
- A look back at Lesson 3•1 minute
- Introduction to Lesson 4•1 minute
- Introduction to ADB•1 minute
- Update USB Drivers (Windows) -Please see reading•6 minutes
- ADB Protocol•2 minutes
- Using the ADB Protocol•5 minutes
- ADB over WIFI•6 minutes
- A look back at Lesson 4•1 minute
- Introduction to Lesson 5•0 minutes
- Fastboot•1 minute
- Booting into Fastboot•3 minutes
- Fastboot Protocol•1 minute
- Using the Fastboot Protocol•2 minutes
- A look back at Lesson 5•1 minute
8 readings•Total 80 minutes
- Module 3 Procedure document (supplemental doc)•10 minutes
- A little more (if needed)•10 minutes
- A little more (if needed)•10 minutes
- Git Cheat sheet•10 minutes
- Update USB Drivers (Windows)•10 minutes
- ADB Shell Commands•10 minutes
- Fastboot Commands•10 minutes
- Time for a video break (another video!)•10 minutes
1 assignment•Total 30 minutes
- Module 3•30 minutes
The DragonBoard™ 410c is capable of running a variety of different operating systems, that being said you are free to chose the operating system that you find is best fit for you. Now, we understand that there is a diverse user base for this board and would like to cover as much as possible in this lesson so everyone can enjoy it! Whether you are a Windows user or a Mac user, or prefer Android over Ubuntu, there is a video or two here for you! In this lesson we will help you choose an operating system to best fit for your needs, we will then cover the download, flashing and installation process for all currently available operating systems. Because of the diverse nature of this board we will teach you multiple ways to flash your new operating system and provide a pro's and con's list for the different methods. By the end of this lesson switching between operating system will be easy and exciting for users of all skill levels.
What's included
50 videos2 readings1 assignment
50 videos•Total 101 minutes
- Getting Ready for Module 4!•1 minute
- Introduction to Lesson 1•1 minute
- Android for DragonBoard™ 410c•2 minutes
- Ubuntu for DragonBoard™ 410c•2 minutes
- Methods of Installation•2 minutes
- A look back at Lesson 1•2 minutes
- Introduction to Lesson 2a•1 minute
- Download Android Image•1 minute
- Create Path Variable to Android Image•2 minutes
- Flash microSD Card with Image•4 minutes
- Install Android on your DragonBoard™ 410c•3 minutes
- A look back at Lesson 2a•1 minute
- Introduction to Lesson 2b•1 minute
- Download Ubuntu Image•1 minute
- Create Path Variable to Ubuntu Image•2 minutes
- Flash microSD Card with Image•4 minutes
- Install Ubuntu on DragonBoard™ 410c•2 minutes
- A look back at Lesson 2b•1 minute
- Introduction to Lesson 2c•1 minute
- Download Android binaries/bootloader•2 minutes
- Altering the bootloader script•7 minutes
- Fastboot Flash onto eMMC•4 minutes
- A look back at Lesson 2c•1 minute
- Introduction to Lesson 2d•1 minute
- Download Ubuntu binaries/bootloader•3 minutes
- Alter bootloader Script•4 minutes
- Fastboot Flash onto eMMC•4 minutes
- A look back at Lesson 2d•1 minute
- Introduction to Lesson 3a•1 minute
- Download Android Image•1 minute
- Download win32diskmager•1 minute
- Flash microSD Card with Image•1 minute
- Install Android on DragonBoard™ 410c•3 minutes
- A look back at Lesson 3a•1 minute
- Introduction to Lesson 3b•1 minute
- Download Ubuntu Image•1 minute
- Download win32diskimager•1 minute
- Flash microSD Card with Image•1 minute
- Install Ubuntu on DragonBoard™ 410c•3 minutes
- A look back at Lesson 3b•1 minute
- Introduction to Lesson 3c•1 minute
- Download Android binaries and boot loader•2 minutes
- Create Path Variable to binaries and bootloader•4 minutes
- Fastboot Flash onto eMMC•5 minutes
- A look back at Lesson 3c•2 minutes
- Introduction to Lesson 3d•1 minute
- Download Ubuntu binaries and bootloader•3 minutes
- Create Path Variable to binaries and bootloader•4 minutes
- Fastboot Flash onto eMMC•6 minutes
- A look back at Lesson 3d•1 minute
2 readings•Total 20 minutes
- Module 4 Procedure document (supplemental doc)•10 minutes
- Module approach•10 minutes
1 assignment•Total 30 minutes
- Module 4•30 minutes
No one expects to damage their new DragonBoard™ 410c, but sometimes accidents happen. This module is dedicated to helping you not only prevent these accidents from happening, but also to fixing any problems should your board become damaged in any way. Here we will go over the difference between a soft brick and a hard brick and why they are two things you want to avoid.
What's included
17 videos1 reading1 assignment
17 videos•Total 29 minutes
- Getting Ready for Module 5!•1 minute
- Introduction to Lesson 1•0 minutes
- Defining a Bricked board•1 minute
- What to do if your board does not turn on•2 minutes
- Possible quick fixes•1 minute
- A look back at Lesson 1•1 minute
- Introduction to Lesson 2•1 minute
- Download Recovery Image•2 minutes
- Flash SD Card•5 minutes
- Re-flash Operating System•2 minutes
- A look back at Lesson 2•1 minute
- Introduction to Lesson 3•1 minute
- Shorting your DragonBoard™ 410c•2 minutes
- Disconnecting DC without Proper Shutdown•1 minute
- Precautionary Steps for GPIO Pins•3 minutes
- Deleting Partition Tables and Flashing•3 minutes
- A look back at Lesson 3•2 minutes
1 reading•Total 10 minutes
- Module 5 Procedure document (supplemental doc)•10 minutes
1 assignment•Total 30 minutes
- Module 5•30 minutes
Welcome to Module 6! In this module we will be creating your first Android App to port to the DragonBoard™ 410c. This “Network Test” App will give you a teaser for the programmatic feats you will be able to accomplish with the DragonBoard™! You will learn about the different GPS and Location Services available on Android and how to access Bluetooth and Wi-fi Data. This module will briefly go over the importance of the Android Manifest and asking the Users for the proper permissions. Lastly, we’ll spice up our application by playing around with Intents and enabling the application to facilitate the above connectivity and network tests. This may sound like a lot, but don’t worry! We will help you get on your feet and by the end of this module, you’ll have coded a neat little application.
What's included
16 videos1 reading1 assignment
16 videos•Total 51 minutes
- Getting Ready for Module 6!•1 minute
- Introduction to Lesson 1•1 minute
- Quick Notes about Android Development•1 minute
- GPS/Location, Bluetooth, WIFI (Overview)•3 minutes
- GPS / Location (Code)•10 minutes
- WiFi (Code)•4 minutes
- Bluetooth (Code)•2 minutes
- Manifest•4 minutes
- Intents (Overview)•2 minutes
- Intents (Code)•9 minutes
- Finished Code•4 minutes
- A look back at Lesson 1•1 minute
- Introduction to Lesson 2•0 minutes
- The Android Virtual Device (AVD) and the Android Device Monitor (ADM)•6 minutes
- Deploying to your Board•3 minutes
- A look back at Lesson 2•1 minute
1 reading•Total 10 minutes
- Module 6 Procedure document (supplemental doc)•10 minutes
1 assignment•Total 30 minutes
- Module 6•30 minutes
In Module 7, will give you a general introduction and brief overview of Android Studio’s Native Development Kit (NDK). The NDK allows us users to program Android applications using C/C++. The NDK utilizes the Java Native Interface (JNI) to facilitate code and interaction between Java and C/C++. This tool was created for users who either have existing C/C++ libraries or plan to use libraries only available in C/C++. Android Studio has a specific build and compilation process catered specifically for NDK Applications that we will explain and cover in this Module. Once we have a better understanding of the NDK, we will create a straightforward “Hello World!” application.
What's included
20 videos1 reading1 assignment
20 videos•Total 34 minutes
- Getting Ready for Module 7!•1 minute
- Introduction to Lesson 1•1 minute
- What is the NDK?•1 minute
- When to Use the NDK•2 minutes
- NDK Compilation Process•2 minutes
- Downloading NDK into Android Studio•1 minute
- Configuring your Gradle files•3 minutes
- A look back at Lesson 1•1 minute
- Introduction to Lesson 2•1 minute
- Create a New Android Project•5 minutes
- Create Classes and Native Method•2 minutes
- Create Header Files with javah•3 minutes
- Write C code•3 minutes
- A look back at Lesson 2•1 minute
- Introduction to Lesson 3•1 minute
- Load C Library•3 minutes
- Test Application with AVD•1 minute
- Deploy to the DragonBoard™ 410c•1 minute
- A look back at Lesson 3•1 minute
- Video Challenge!•1 minute
1 reading•Total 10 minutes
- Module 7 Procedure document (Optional doc)•10 minutes
1 assignment•Total 30 minutes
- Module 7•30 minutes
Who doesn’t love a good game to pass time? In this Module, we will create a more advanced and interactive Android Application / Game! We will be creating our version of FlappyBird--CalliBird or Calit2Bird, as we like to call it. We will cover the basics of the game by defining certain parameters. First, we have what we call our “Actors”. You can think of “Actors” as any part of the game that appears on the screen (the obstacles and the bird). In the game, we also define our own Location system and a Map class that will handle the different movements in the game. Next we define our game processor which is the backbone of the game. Game Processor ensures your score is constantly updated, delegates the movements to the Map class, and detects collisions, to name a few. Lastly, we will cover the importance of interfaces and its application to this Android App. Interfaces will enable us to 1. play CalliBird / Calit2Bird using any form of input we want (using touch, a sensor, a controller, etc.) and 2. render the game in any display we have (a screen, an led block, etc.). There is a lot of freedom with this game so you will be able to spice it up and make it your own!
What's included
14 videos2 readings1 assignment
14 videos•Total 42 minutes
- Getting Ready for Module 8!•1 minute
- Introduction to Lesson 1•1 minute
- MainActivity (Code - Explain the game)•2 minutes
- Location and Actors (Code)•5 minutes
- Map and Collisions (Code)•7 minutes
- Game Processor (Code)•6 minutes
- A look back at Lesson 1•1 minute
- Introduction to Lesson 2•1 minute
- Programming to Interfaces•3 minutes
- Inputtable Interface (Code)•3 minutes
- Renderable Interface (Code)•8 minutes
- CALIT2 Bird Demo•1 minute
- A look back at Lesson 2•2 minutes
- Video Challenge!•2 minutes
2 readings•Total 20 minutes
- Module 8 Procedure document (supplemental doc)•10 minutes
- Getting ready for Course 3!•10 minutes
1 assignment•Total 30 minutes
- Module 8•30 minutes
Congratulations! You’ve made it to the last module of Course 2! In this Module we will cover a more advanced NDK Application. This application is a bit more challenging than prior applications because it is coded in both Java and C. Regardless of the rigour, we know you’ll be able to accomplish this feat! As for the application, we will be turning our DragonBoard™ 410c into a web server! This web server will detail information regarding the DragonBoard™ 410c’s connectivity, GPIOs, and any other statuses you may want to add. We will pull the information from the DragonBoard™ and encode it in a JSON format using Java, then use C to establish a server connection and send the data out. We will walk you through our code and thought processes so that you can gain a better understanding of how to use the NDK to run Android Applications as well as a taste of what the Internet of Things is all about.
What's included
14 videos2 readings1 assignment
14 videos•Total 43 minutes
- Getting Ready for Module 9!•1 minute
- Introduction to Lesson 1•1 minute
- TCP / IP•3 minutes
- HTTP•4 minutes
- Ports•2 minutes
- Redirect Traffic•4 minutes
- A look back at Lesson 1•1 minute
- Introduction to Lesson 2•1 minute
- Create your Server•6 minutes
- Retrieving Information About Your DragonBoard™ 410c•6 minutes
- Send Information on JSON•8 minutes
- Demo•4 minutes
- A look back at Lesson 2•2 minutes
- Course 2 End•0 minutes
2 readings•Total 20 minutes
- Module 9 Procedure document (supplemental doc)•10 minutes
- Getting ready for Course 3!•10 minutes
1 assignment•Total 30 minutes
- Module 9•30 minutes
Earn a career certificate
Add this credential to your LinkedIn profile, resume, or CV. Share it on social media and in your performance review.
Instructors
Explore more from Electrical Engineering
- Status: Free TrialU
University of California San Diego
Course
- Status: Free Trial
Course
- U
University of California San Diego
Course
- Status: Free TrialU
University of California San Diego
Course
Why people choose Coursera for their career
Learner reviews
- 5 stars
55.62%
- 4 stars
22.50%
- 3 stars
10.62%
- 2 stars
6.87%
- 1 star
4.37%
Showing 3 of 160
Reviewed on Oct 19, 2017
Excelente curso para aprender sobre la DragonBoard y su programación.
Reviewed on Dec 18, 2017
course will give you lots of information about dragonboard from basics ,also introduce to android studio and application .which is interesting to learn
Reviewed on Feb 14, 2016
very helpful to learn this course and ahead this will more help
Frequently asked questions
To access the course materials, assignments and to earn a Certificate, you will need to purchase the Certificate experience when you enroll in a course. You can try a Free Trial instead, or apply for Financial Aid. The course may offer 'Full Course, No Certificate' instead. This option lets you see all course materials, submit required assessments, and get a final grade. This also means that you will not be able to purchase a Certificate experience.
When you enroll in the course, you get access to all of the courses in the Specialization, and you earn a certificate when you complete the work. Your electronic Certificate will be added to your Accomplishments page - from there, you can print your Certificate or add it to your LinkedIn profile.
Yes. In select learning programs, you can apply for financial aid or a scholarship if you can’t afford the enrollment fee. If fin aid or scholarship is available for your learning program selection, you’ll find a link to apply on the description page.
More questions
Financial aid available,
¹ Some assignments in this course are AI-graded. For these assignments, your data will be used in accordance with Coursera's Privacy Notice.