
Learn Bits and Bytes of Raspberry Pi & IoT using Node-RED
Keep adding new skills with 10,000+ programs for $239 (usually $399). Save now.
Learn Bits and Bytes of Raspberry Pi & IoT using Node-RED
Included with
Ask Coursera
Recommended experience
Recommended experience
What you'll learn
Learn to install and configure Node-RED and Raspberry Pi for IoT projects
Understand the basics of GPIO interfacing with sensors and relays using Node-RED
Explore cloud platforms like ThingSpeak and MQTT for remote IoT data management
Build real-time IoT solutions with hands-on projects using the SenseHAT and other sensors
Skills you'll gain
Details to know
February 2026
11 assignments
See how employees at top companies are mastering in-demand skills
There are 10 modules in this course
This course features Coursera Coach!
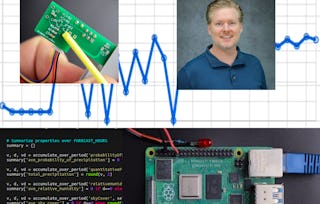
A smarter way to learn with interactive, real-time conversations that help you test your knowledge, challenge assumptions, and deepen your understanding as you progress through the course. In this comprehensive course, you’ll dive into the world of Raspberry Pi and IoT, learning to leverage Node-RED for building and deploying IoT solutions. You’ll gain hands-on experience in interfacing sensors, controlling relays, and creating interactive flows that integrate hardware and software seamlessly. By understanding Raspberry Pi fundamentals and learning to work with Node-RED, you’ll be able to design robust IoT systems that can collect and analyze real-time data. The journey begins with the installation and setup of Node-RED on Windows, followed by an introduction to the Raspberry Pi hardware and software. You’ll explore how to interface with LEDs, relays, and sensors such as SenseHAT and DHT11/DHT22, using Node-RED for processing and managing data. Additionally, you’ll gain insights into cloud platforms like ThingSpeak and MQTT to transmit data remotely. This course also covers the essentials of automating and monitoring devices using real-world tools like Adafruit IO. This course is ideal for beginners interested in IoT and Raspberry Pi. No prior experience in programming or electronics is required. If you’re curious about creating interactive hardware projects or automating IoT systems, this course will give you the foundational knowledge to build your own smart devices. By the end of the course, you will be able to set up and configure Raspberry Pi hardware, integrate various sensors using Node-RED, and build IoT solutions that connect to cloud services and MQTT brokers for remote monitoring and control.
In this module, we will introduce you to Node-RED, an intuitive tool for IoT solutions. You will learn how to install Node-RED on a Windows system and begin creating your first IoT flows. By the end of this section, you'll have hands-on experience with the core concepts of Node-RED and be ready to start building your own IoT applications.
What's included
4 videos1 assignment
4 videos•Total 34 minutes
- Introduction to Nodered•10 minutes
- Installation of Nodered on Windows•8 minutes
- Creating Your First Program in Nodered (Flow)•12 minutes
- Creating Your Second Flow•5 minutes
1 assignment•Total 15 minutes
- Introduction - Assessment•15 minutes
In this module, we will explore the fundamental aspects of the Raspberry Pi, from understanding its components to setting it up for use. You will learn how to install the Raspberry Pi OS, both with and without an external monitor, and discover how to control your device remotely using VNC and SSH. By the end of this section, you'll be ready to start using your Raspberry Pi for IoT and general computing projects.
What's included
13 videos1 assignment
13 videos•Total 101 minutes
- What is Raspberry Pi•9 minutes
- What is Raspberry Pi – 2•6 minutes
- Install OS to Raspberry Pi•6 minutes
- Downloading OS for Raspberry Pi Computer•7 minutes
- Install Raspbian OS using NOOBs installer•11 minutes
- Remote Control Raspberry Pi using VNC Viewer•5 minutes
- (Optional) Second Method of OS Installation, using raspbian Image – 1•6 minutes
- (Optional) Second Method of OS Installation, using raspbian Image - 2•2 minutes
- Installation of Raspberry PI 5 OS without using Monitor [2024]•16 minutes
- Simplest way to Install OS on Raspberry Pi without External Monitor (2023)•8 minutes
- Get to know about Raspberry Pi – 1•10 minutes
- Get to know about Raspberry Pi - 2•8 minutes
- Get to know about Raspberry Pi - 3•6 minutes
1 assignment•Total 15 minutes
- Raspberry Pi Fundamentals and Getting Your Raspberry Pi Turned On - Assessment•15 minutes
In this module, we will teach you how to use Node-RED to interface your Raspberry Pi with external hardware like LEDs and relays. You’ll learn to set up the hardware, create the necessary Node-RED flows, and control the devices, including using protection circuits for safe operation. By the end of this section, you'll have hands-on experience in automating hardware with your Raspberry Pi and Node-RED.
What's included
6 videos1 assignment
6 videos•Total 45 minutes
- Interfacing of LEDs with Raspberry Pi - 1•7 minutes
- Interfacing of LEDs with Raspberry Pi - 2•4 minutes
- Interfacing Relay with Raspberry Pi - 1•15 minutes
- Interfacing Relay with Raspberry Pi - 2•9 minutes
- Interfacing Relay with Raspberry Pi - 3•2 minutes
- Interfacing Relay with Raspberry Pi - 4•8 minutes
1 assignment•Total 15 minutes
- Raspberry Pi Interfacing with Hardware Using Node-RED - Assessment•15 minutes
In this module, we will guide you through the process of blinking an LED on your Raspberry Pi using Node-RED. You will learn to create a flow that toggles an output pin at regular intervals and how to use a physical switch to control the blinking. By the end of this section, you will have the skills to set up and control basic output functions with Node-RED and Raspberry Pi.
What's included
1 video1 assignment
1 video•Total 7 minutes
- Blink LED Using Switch Input•7 minutes
1 assignment•Total 15 minutes
- Blink Output Using Node-RED - Assessment•15 minutes
In this module, we will explore how to interface with various sensors using your Raspberry Pi and Node-RED. You’ll learn to connect the SenseHAT and DHT11/DHT22 sensors, and process the sensor data with Node-RED. Additionally, you’ll experiment with displaying sensor data and using conditional statements to control outputs based on sensor readings. By the end of this section, you will have practical experience with handling sensor data and visualizing it through different outputs.
What's included
8 videos1 assignment
8 videos•Total 51 minutes
- Using SenseHAT with Raspberry Pi•3 minutes
- Connect SenseHAT to Raspberry Pi and Writing Flow for It•9 minutes
- No SenseHAT? Use the Simulator•5 minutes
- Using Display of SenseHAT•3 minutes
- Write JavaScript Code to Parse Sensor Values•8 minutes
- Conditional Statements in Node-RED on SenseHAT Values•8 minutes
- Using DHT11/DHT22 Sensor with Raspberry Pi Using Node-RED - 1•10 minutes
- Using DHT11/DHT22 Sensor with Raspberry Pi Using Node-RED - 2•6 minutes
1 assignment•Total 15 minutes
- Raspberry Pi Interfacing with Sensors - Assessment•15 minutes
In this module, we will cover the foundational concepts of the Internet of Things (IoT) and introduce you to ThingSpeak, a cloud platform for managing IoT data. You’ll explore different IoT devices and communication methods, then learn how to send sensor data to ThingSpeak using Node-RED. By the end of this section, you will have hands-on experience in setting up an IoT project and leveraging cloud services for data analysis.
What's included
4 videos1 assignment
4 videos•Total 54 minutes
- Getting Started with IoT - 1•12 minutes
- What are the Hardware Devices Used for IoT•17 minutes
- Getting Started with IoT - ThingSpeak.com•9 minutes
- How to Use Node-RED to Send Values to ThingSpeak.com•16 minutes
1 assignment•Total 15 minutes
- Fundamentals of Internet of Things and Creating Project with ThingSpeak - Assessment•15 minutes
In this module, we will dive into the MQTT protocol, a lightweight messaging system for IoT applications, and explore how to use Node-RED to interact with an MQTT broker. You will learn how to send and receive data, configure MQTT communication, and transmit sensor readings efficiently. By the end of this section, you'll be able to implement MQTT in your IoT projects for seamless data exchange.
What's included
3 videos1 assignment
3 videos•Total 28 minutes
- What is MQTT•10 minutes
- Send Values to MQTT Broker Using Node-RED•11 minutes
- Send Sensor Values to MQTT Broker Using Node-RED•6 minutes
1 assignment•Total 15 minutes
- MQTT Using Node-RED - Assessment•15 minutes
In this module, we will guide you through building a simple home automation system using Node-RED and Adafruit IO. You’ll learn how to set up a DHT sensor for monitoring temperature and humidity, visualize the data on Adafruit IO, and control devices like LEDs. By the end of this section, you’ll have a fully functional IoT project that combines hardware, cloud-based visualization, and automation.
What's included
1 video1 assignment
1 video•Total 29 minutes
- Adafruit IO and Node-RED•29 minutes
1 assignment•Total 15 minutes
- Complete Project Using Adafruit IO - Assessment•15 minutes
In this module, we will show you how to export and import Node-RED flows, making it easier to save, share, and reuse your work in future projects. You’ll also learn how to set up your Raspberry Pi to automatically start Node-RED flows on boot, ensuring that your projects run seamlessly without manual intervention. By the end of this section, you'll be able to efficiently manage and deploy your Node-RED projects.
What's included
2 videos1 assignment
2 videos•Total 16 minutes
- How to Export and Import Flows•5 minutes
- Running Node-RED Flow on Boot•12 minutes
1 assignment•Total 15 minutes
- Exporting Flows and Starting Node-RED on Startup - Assessment•15 minutes
In this final module, we will review the key concepts covered throughout the course, from setting up Node-RED and interfacing with sensors, to deploying IoT projects with cloud platforms. The focus will be on encouraging you to continue experimenting with what you've learned and applying it to your own projects. By the end of this section, you’ll be ready to take the next steps in your IoT journey.
What's included
1 video2 assignments
1 video•Total 1 minute
- Conclusion•1 minute
2 assignments•Total 75 minutes
- Full Course Assessment•60 minutes
- Full Course Practice Assessment•15 minutes
Instructor
Explore more from Support and Operations
- Status: Free TrialJ
Johns Hopkins University
Course
- Status: Free Trial
Course
Why people choose Coursera for their career
Frequently asked questions
This course focuses on teaching you how to work with Raspberry Pi and Internet of Things (IoT) using Node-RED. It’s relevant because Node-RED simplifies the process of building and integrating IoT applications by using a visual programming interface. This course will help you get hands-on experience with interfacing sensors and devices, creating automation flows, and sending data to cloud services, making it an essential skill for anyone looking to enter the field of IoT.
After completing this course, you will be able to set up and configure Raspberry Pi, interface it with sensors and hardware, and create IoT applications using Node-RED. You will also gain the ability to send sensor data to cloud platforms like ThingSpeak and MQTT brokers, and automate processes using real-world hardware like LEDs, relays, and sensors.
This course is designed for beginners, so you don't need any prior experience with Raspberry Pi, Node-RED, or IoT. However, basic computer skills and an understanding of general electronics principles will be helpful. The course provides step-by-step guidance, so you can start from scratch and build your skills progressively.
More questions
Financial aid available,