
Pressure, Force, Motion, and Humidity Sensors
Ends soon! Keep adding new skills with 10,000+ programs for $239 (usually $399). Save now.
Pressure, Force, Motion, and Humidity Sensors
This course is part of Embedding Sensors and Motors Specialization
Instructors: James Zweighaft
19,194 already enrolled
Included with
258 reviews
258 reviews
What you'll learn
Choose the right pressure, force, strain, position, motion, acceleration, occupancy, and humidity sensor for an application.
Design these sensors into an embedded circuit.
Skills you'll gain
Tools you'll learn
Details to know
5 assignments
See how employees at top companies are mastering in-demand skills
Build your subject-matter expertise
- Learn new concepts from industry experts
- Gain a foundational understanding of a subject or tool
- Develop job-relevant skills with hands-on projects
- Earn a shareable career certificate
There are 5 modules in this course
"Pressure, Force, Motion, and Humidity Sensors" can also be taken for academic credit as ECEA 5342, part of CU Boulder’s Master of Science in Electrical Engineering degree.
This is our third course in our specialization on Embedding Sensor and Motors. To get the most out of this course, you should first take our first course entitled Sensors and Sensor Circuits. Our first course gives you a tutorial on how to use the hardware and software development kit we have chosen for the lab exercises. This third course assumes that you already know how to use the kit. After taking this course, you will be able to: ● Understand how to specify the proper pressure, force, strain, position, motion, acceleration, occupancy, and humidity sensors for taking real-time process data. ● Implement these sensors into an embedded system in both hardware and software. ● Add the sensor and sensor interface into a microprocessor based development kit. ● Create hardware and firmware to process sensor signals and feed data to a microprocessor for further evaluation. In this course you will build the circuit from Video 7 (Lab Exercise on strain gauges), Module 2 (Force and Strain Sensors and Touch Screens), and use it to make screen shots of the timing of the switch. If you haven't already wired up the system and written all the software per the instructions of Video 7, please do so now. This course includes specific hardware and software requirements. Please review the FAQ below for complete details.
In module 1 you will learn how to specify and use various types of pressure sensors for an embedded circuit. First, you will learn about piezoresistive, capacitive, and vacuum sensors. This includes a deep dive into the piezoresistive effect and how a Wheatstone bridge is used in these systems. This is followed by a discussion on pressure transmitters and how to calculate an error budget. Finally, we will give you examples of commercial pressure sensors and explain what you need to know to purchase them on a web site.
What's included
9 videos4 readings1 assignment1 discussion prompt
9 videos•Total 82 minutes
- 1: Course Introduction•2 minutes
- 2: Pressure Sensor Terminology•9 minutes
- 3: Piezoresistive Effect•12 minutes
- 4: Piezoresistive Pressure Sensors•9 minutes
- 5: Capacitive Pressure Sensors•7 minutes
- 6: Vacuum Sensors•12 minutes
- 7: Pressure Transmitters•10 minutes
- 8: Calculating A Sensor Error Budget•13 minutes
- 9: Pressure Sensor Applications•9 minutes
4 readings•Total 191 minutes
- Course Updates and Accessibility Support•1 minute
- Non-Credit Students: Welcome and Where to Find Help•10 minutes
- Reading Assignments•120 minutes
- Video Assignments•60 minutes
1 assignment•Total 60 minutes
- Week 1 Quiz•60 minutes
1 discussion prompt•Total 10 minutes
- Introduce Yourself•10 minutes
In module 2 you will learn how to specify and use various types of force and strain sensors for an embedded circuit. First, you will learn about how strain gauges use the piezoresistive effect and Wheatstone bridges to output a strain signal. Then you will learn how load cells use strain gauges to output a force signal. We have a video on a teardown of a weight scale for you to watch, where we teach you how the strain gauges are arranged in an unusual bridge circuit. Finally, we teach you about how touch screens used in kiosks, PC's and smart phones work. We have a lab exercise for you to perform on strain gauges, where you will get hands-on experience wiring the gauges into the PSoC system, and writing code to read the gauges.
What's included
7 videos3 readings1 assignment
7 videos•Total 89 minutes
- 1: Module 2 Introduction•1 minute
- 2: Strain Gauges•23 minutes
- 3: Load Cells•7 minutes
- 4: Teardown Of Weighing Scale•22 minutes
- 5: Resistive Touch Screens•10 minutes
- 6: Capacitive Touch Screens•12 minutes
- 7: Lab Exercise On Strain Gauges•13 minutes
3 readings•Total 180 minutes
- Hardware & Software Requirements•0 minutes
- Reading Assignments•120 minutes
- Video Assignments•60 minutes
1 assignment•Total 60 minutes
- Week 2 Quiz•60 minutes
In module 3 you will first learn how magnetic detection sensors such as Hall sensors and LVDT's work, as well as how capacitive detection sensors. Then you will learn how to specify and use accelerometers in an embedded circuit. We will discuss how the first accelerometers used the piezoelectric effect to output a sinusoidal signal. We will review the key principles and equations involved in vibrational measurement. Then you will learn later accelerometers used the piezoresistive effect and internal strain gauges to output a sinusoidal signal representative of force, as opposed to acceleration. Then we will explain how accelerometers are now using MEMS technology and changes in capacitive to output the signal. We teach you about gyroscopes, both traditional mechanical ones, still used in aircraft for angular position sensing, and modern MEMS ones used to determine angular velocity.
What's included
8 videos4 readings1 assignment
8 videos•Total 82 minutes
- 1: Module 3 Introduction•3 minutes
- 2: Capacitive Detection Sensors•11 minutes
- 3: Magnetic Position Sensors•16 minutes
- 4: Principles Of Acceleration Sensors•21 minutes
- 5: Piezoelectric Accelerometers•11 minutes
- 6: Piezoresistive Accelerometers•6 minutes
- 7: Capacitive Accelerometers•5 minutes
- 8: Gyroscopes•8 minutes
4 readings•Total 240 minutes
- Reading Assignments•60 minutes
- Video Assignments•60 minutes
- Reading Assignments•60 minutes
- Video Assignments•60 minutes
1 assignment•Total 60 minutes
- Week 3 Quiz•60 minutes
In module 4 you will learn how to specify and use position and motion detectors in an embedded circuit. First, you will learn about the pyroelectric effect. Then you will learn how Passive Infrared motion detectors use the pyroelectric effect in commercial burglar alarms. Then you will learn how ultrasonic distance detection is accomplished, the same principles that whales, dolphins and bats use to navigate their worlds. We tackle microwave detection sensors last, as these are the most complex sensors that we cover in the course. They are used in long range position detection sensors and commercial security sensors for outdoors use.
What's included
6 videos4 readings1 assignment
6 videos•Total 72 minutes
- 1: Module 4 Introduction•2 minutes
- 2: Pyroelectric Effect•10 minutes
- 3: Passive Infrared (PIR) Motion Detector•13 minutes
- 4: Ultrasonic Distance Sensor•12 minutes
- 5: Microwave Motion Detectors•21 minutes
- 6: Humidity Sensors•13 minutes
4 readings•Total 170 minutes
- Reading Assignments•120 minutes
- Video Assignments•10 minutes
- Reading Assignments•10 minutes
- Video Assignments•30 minutes
1 assignment•Total 60 minutes
- Week 4 Quiz•60 minutes
This module contains the materials you need to complete the Strain Gauge lab assignment.
What's included
1 reading1 assignment
1 reading•Total 10 minutes
- Strain Gauge Lab•10 minutes
1 assignment•Total 60 minutes
- Course Project Quiz•60 minutes
Earn a career certificate
Add this credential to your LinkedIn profile, resume, or CV. Share it on social media and in your performance review.
Build toward a degree
This course is part of the following degree program(s) offered by University of Colorado Boulder. If you are admitted and enroll, your completed coursework may count toward your degree learning and your progress can transfer with you.¹
Instructors
Offered by
Explore more from Electrical Engineering
- Status: Free TrialU
University of Colorado Boulder
Course
- Status: Free TrialU
University of Colorado Boulder
Course
- U
University of California San Diego
Course
- Status: Free TrialU
University of Colorado Boulder
Course
Why people choose Coursera for their career
Learner reviews
- 5 stars
79.06%
- 4 stars
17.44%
- 3 stars
2.71%
- 2 stars
0.38%
- 1 star
0.38%
Showing 3 of 258
Reviewed on Sep 20, 2022
Full course is relevant to my work and very useful for me.
Reviewed on Apr 30, 2020
Overall, the materials explained can be well understood.
Reviewed on Aug 27, 2020
This course is very interesting. I completed this course.But I can not get my certificate.Please help me to earn my certificate.
Frequently asked questions
Hardware Requirements
You will need to buy the following components in order to complete the labs in this course. These parts may be purchased off the DigiKey website, www.Digikey.com. Or, you may obtain the specs from the site, and purchase them elsewhere.
You need one of each of these parts, except for the AA batteries (N107-ND), for which you will need three:
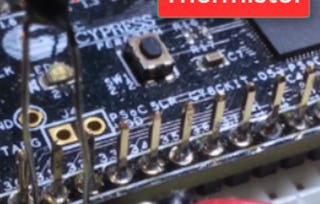
● 428-3390-ND (PSOC 5LP Prototyping kit)
● CF14JT22K0CT-ND
● CF14JT100KCT-ND
This part is purchased from the Sparkfun website, www.sparkfun.com, and you need one:
● TAL221
Additional Hardware Used in this Specialization
● Breadboard
● Wire (various gauges and lengths)
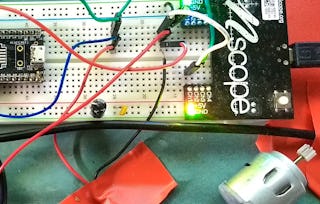
● Oscilloscope
The courses will also invite you to use a USB-connected oscilloscope. If you do not already have one, faculty have suggested the following model:
Other models recommended include:
To access the course materials, assignments and to earn a Certificate, you will need to purchase the Certificate experience when you enroll in a course. You can try a Free Trial instead, or apply for Financial Aid. The course may offer 'Full Course, No Certificate' instead. This option lets you see all course materials, submit required assessments, and get a final grade. This also means that you will not be able to purchase a Certificate experience.
When you enroll in the course, you get access to all of the courses in the Specialization, and you earn a certificate when you complete the work. Your electronic Certificate will be added to your Accomplishments page - from there, you can print your Certificate or add it to your LinkedIn profile.
More questions
Financial aid available,