 |
VOOZH | about |
|
VOOZH | about |
DHCP is an Internet control protocol used to assign an IP address to any appliance, or node, on an internet network so they can transmit data using IP. DHCP automatically handles these configurations rather than requiring network administrators to manually set IP addresses to all network devices. DHCP can be executed on small local networks, as well as large company networks.
To know more about DHCP you may refer to the article Dynamic Host Configuration Protocol (DHCP).
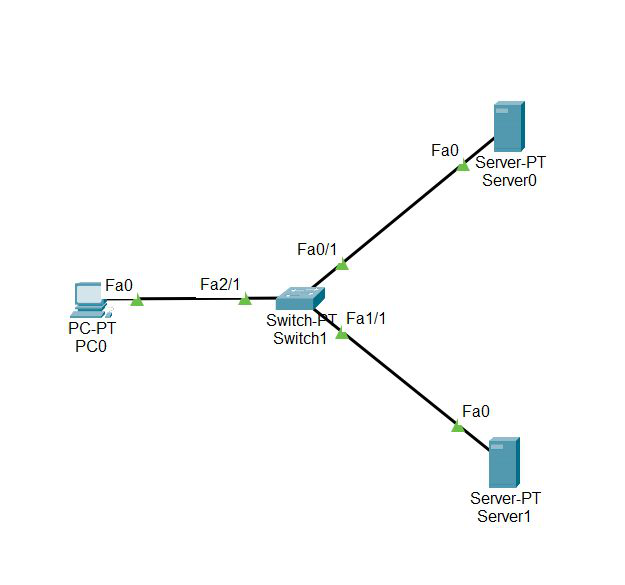
Step 1: First, open the cisco packet tracer desktop and select the devices given below:
| S.NO | Device | Model Name | Qty. |
|---|---|---|---|
| 1. | PC | PC | 1 |
| 2. | switch | PT-switch | 1 |
| 3. | server | Server-PT | 2 |
IP Addressing Table
| S.NO | Device | IPv4 Address | Subnet Mask | Default Gateway | DNS |
|---|---|---|---|---|---|
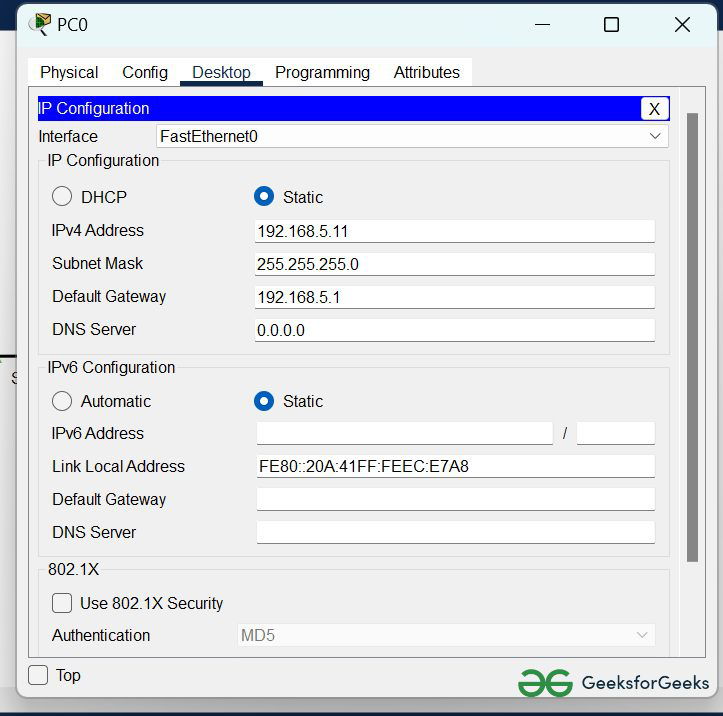
| 1. | PC0 | 192.168.5.11 | 255.255.255.0 | 192.168.5.1 | nil |
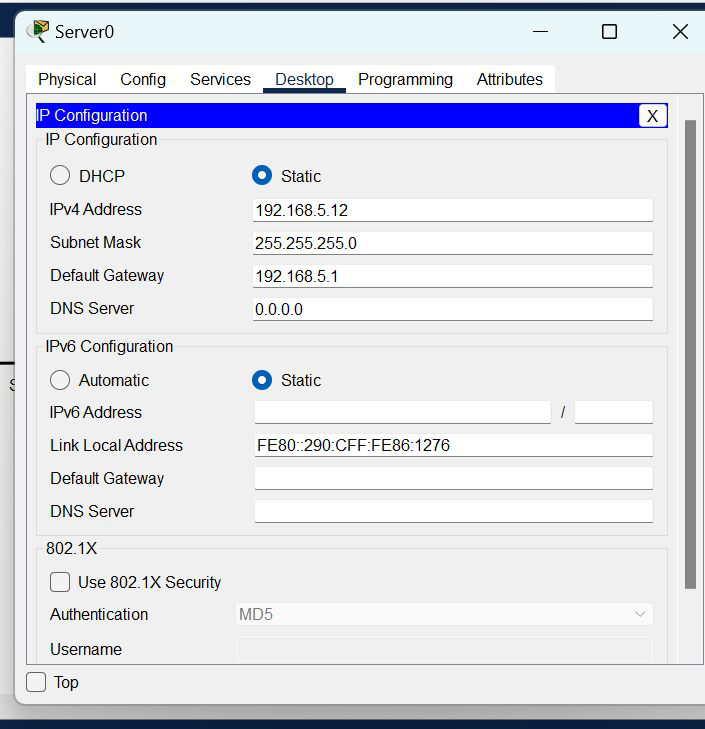
| 2. | server0 | 192.168.5.12 | 255.255.255.0 | 192.168.5.1 | nil |
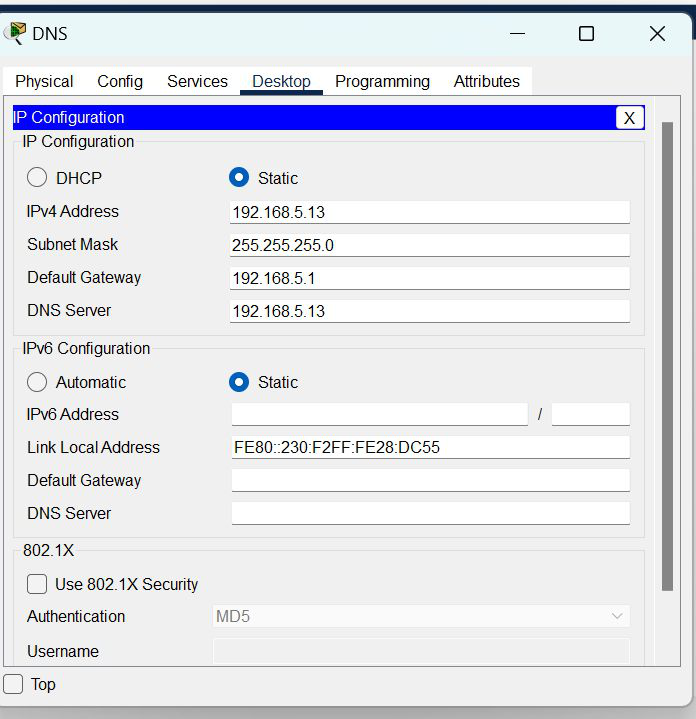
| 3. | DNS | 192.168.5.13 | 255.255.255.0 | 192.168.5.1 | 192.168.5.13 |
Step 2: Configure the PCs (hosts) Server0 and DNS with IPv4 address and Subnet Mask according to the IP addressing table given above.
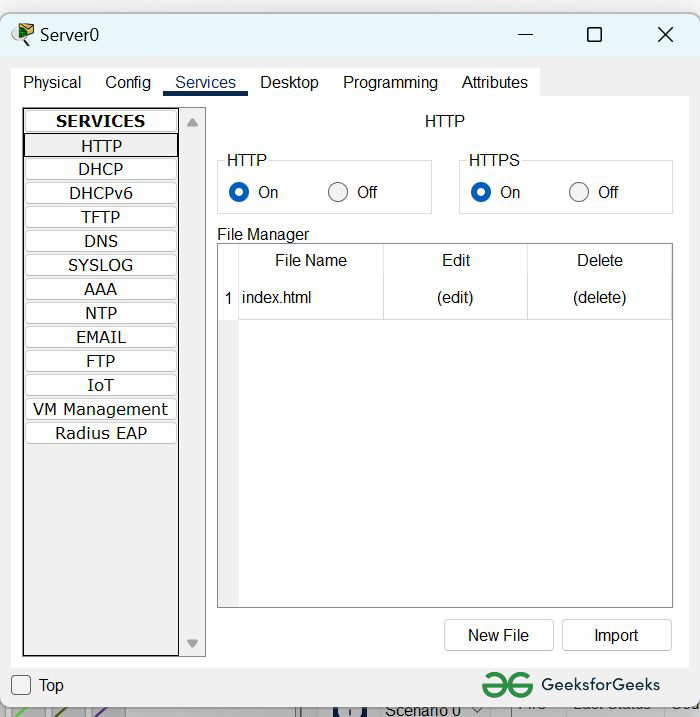
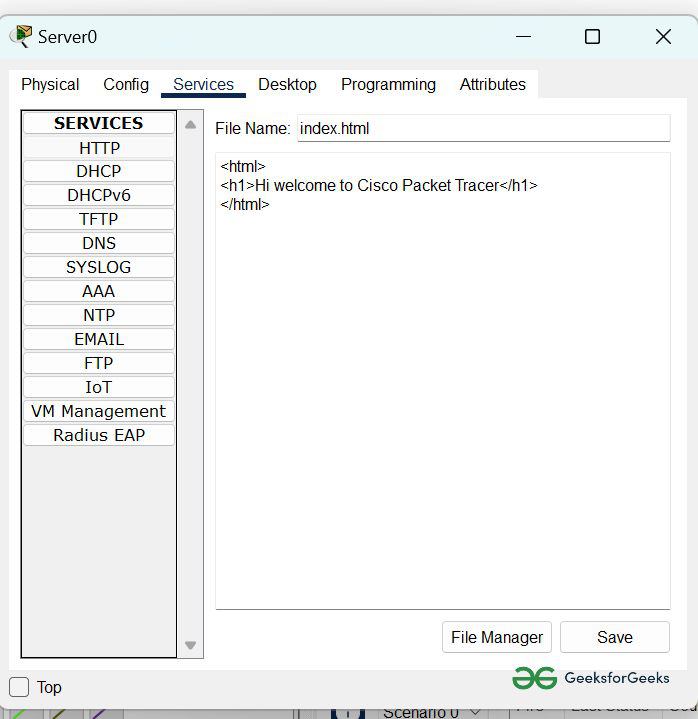
Step 3: Configure the HTTP sever0
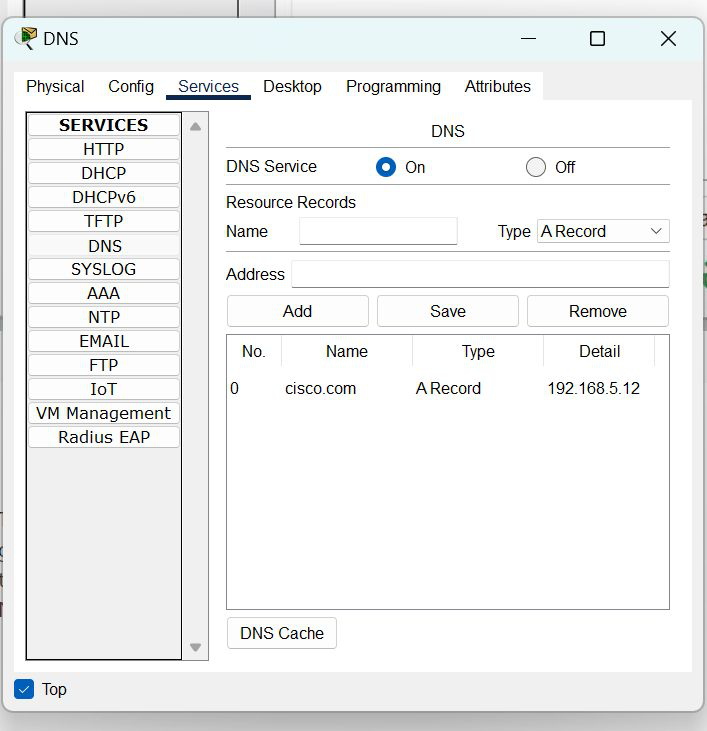
Step 4: Configure the DNS server
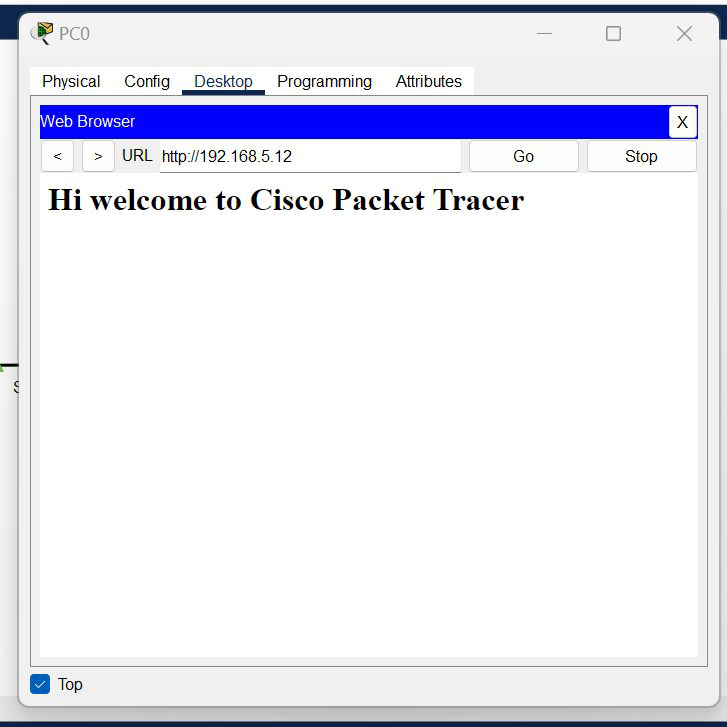
Step 5: Verify the server by using the web browser in the Host.