 |
VOOZH | about |
|
VOOZH | about |
Setting up an IP address using the ipconfig command is a simple process that can be performed from any computer with an internet connection. This article aims to provide a step-by-step guide on setting up an IP address using the default gateway and the DNS server. This can be useful if you cannot access the internet or need to change your IP address. It is also useful if you are unsure of what your current IP address is.
Step 1: Open the Cisco packet tracer desktop and create a network topology peer-to-peer connection between two PCs as shown below:
| S.NO | Device | IPv4 address | Subnet Mask | Default Gateway |
|---|---|---|---|---|
| 1. | PC0 | 192.168.0.2 | 255.255.255.0 | 192.168.0.1 |
| 2. | PC1 | 192.168.0.3 | 255.255.255.0 | 192.168.0.1 |
Step 2: Configure PC0 and PC1 using the ipconfig command:
command : ipconfig <ip address> <subnet mask> <default gateway>
Command: ipconfig 192.168.0.2 255.255.255.0 192.168.0.1
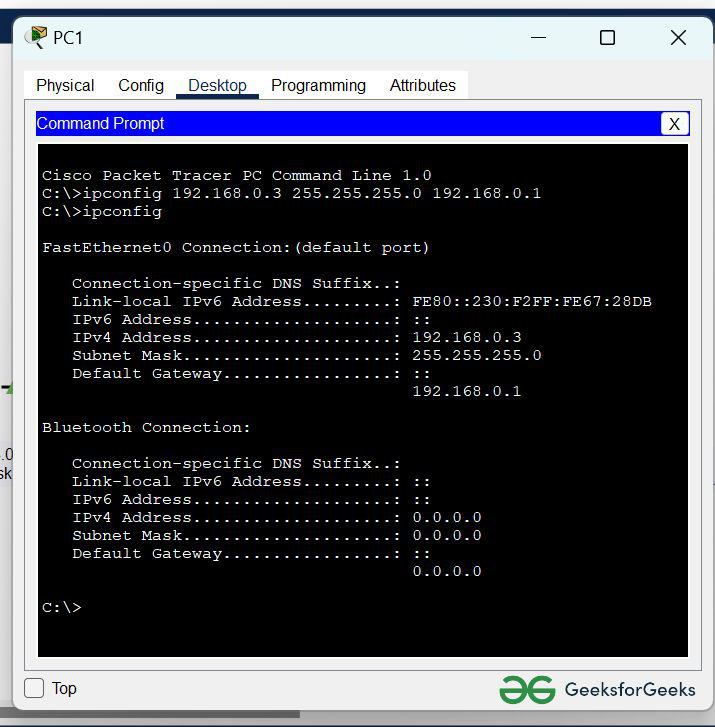
Similarly with PC1:
Command: ipconfig 192.168.0.3 255.255.255.0 192.168.0.1
Step 3: Verifying connection by pinging the IP address of PC1 in the PC0 terminal:
command : ping 192.168.0.3
Output: