 |
VOOZH | about |
|
VOOZH | about |
Roblox is a popular online gaming platform where users can create, share, and play games with others in a virtual world. With millions of active users, it has become one of the biggest gaming platforms in the world.
One of the best things about Roblox is that anyone can create their own games using its built-in game development tools. Making a game on Roblox can be a fun and rewarding experience, but it takes time and some knowledge of how the platform works.
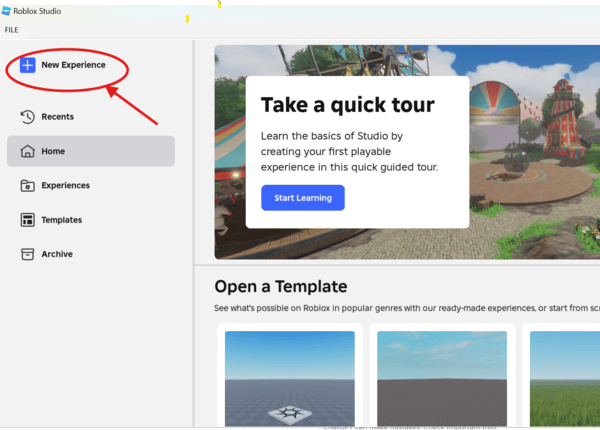
Roblox Studio is a powerful yet easy-to-use tool for creating games. It allows you to design environments, add characters, write scripts, and test your game. Follow these steps to get started:
Once Roblox Studio is open, click on the “New Experience” option to begin your first project.
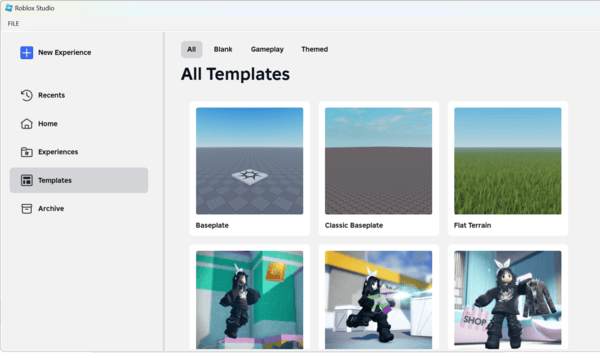
Roblox provides several game templates, such as obstacle courses, tycoons, and simulators. To choose a template:
Using a pre-made template can simplify the development process, allowing you to focus on customization.
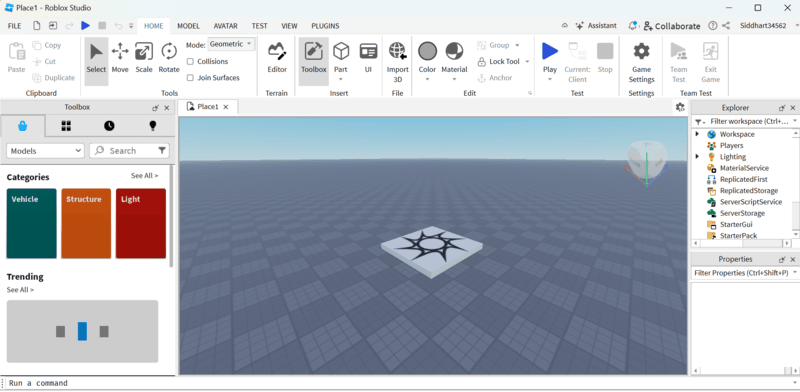
Once you've selected a template, you can modify the game to make it unique:
Now that you’ve chosen a template, it’s time to make it your own! You can customize your game by adding unique graphics, sounds, and scripts to create exciting gameplay. Roblox Studio provides helpful tools like the Asset Library, Terrain Editor, and Code Editor to make customization easy. With these tools and your creative ideas, you can build a fun and engaging game that players will enjoy!
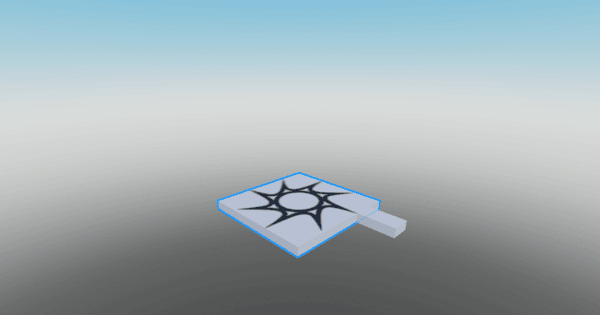
If you’re creating an obstacle course (obby), you might want to remove the baseplate:
Now, your spawn point will be floating, making the obby more challenging. If you lose track of any part, find it in Explorer, click on it, and press F to focus on it.
TTo create platforms or obstacles:
Click on the top half of the Part button to add a new block to your game. The block will appear near your spawn point, either on it or close by. You can then move it to any spot you like!
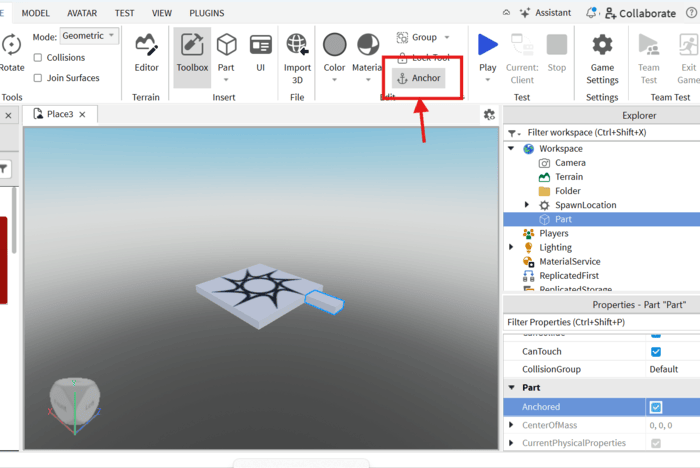
Ensure parts remain stationary and visually appealing:
Now it is time to adjust how your part looks, and where you want to place it in the obby. The three tools that make this possible are known as Move, Scale, and Rotate. They are found along the top toolbar and will become a few of the tools you will use the most when making an obby.
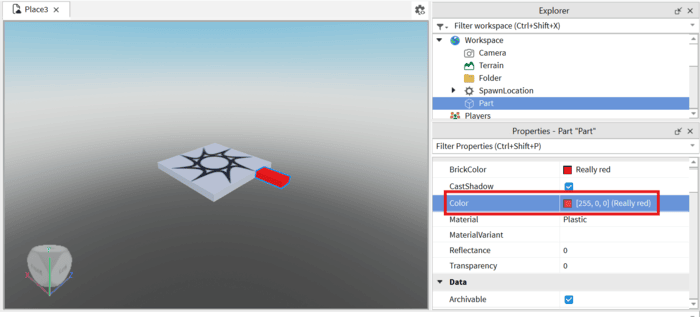
Make your part visually appealing:
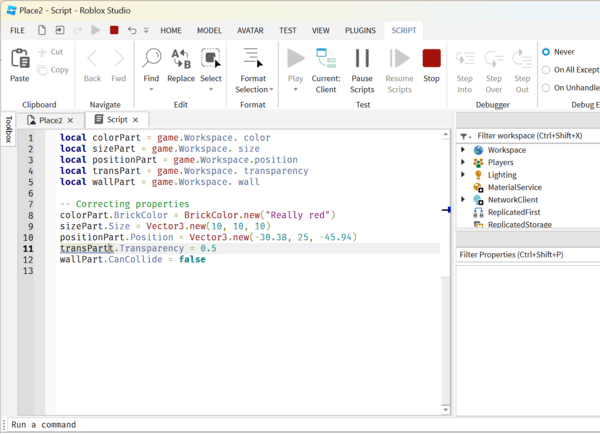
Add interactivity to your game with simple scripts. For example, to make a block disappear when touched:
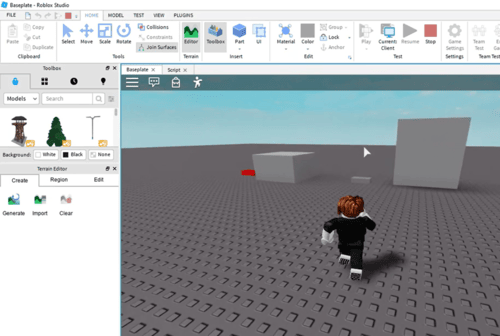
Before publishing, test your game to ensure everything works:
Creating your first Roblox game is a fun and rewarding experience! By following these steps, you’ve learned how to set up Roblox Studio, customize your game, and add interactivity. Keep experimenting and practicing to create even more advanced games. Happy coding!