 |
VOOZH | about |
|
VOOZH | about |
Automating repetitive tasks in Excel can save you significant time and effort, even if you're unfamiliar with VBA macros. Excel offers built-in tools and features that allow users to streamline workflows and reduce manual work without any coding knowledge. From using Power Query for data transformation to Excel formulas, Flash Fill, and built-in automation tools, this guide will show you how to simplify repetitive tasks and boost productivity, all without the complexity of macros.
Table of Content
Automation in Excel improves productivity, reduces human error, and allows you to focus on analysis rather than manual data entry. While VBA macros are powerful, Excel’s built-in tools provide alternatives that are accessible to everyone.
Excel provides several built-in features that can help automate tasks and enhance efficiency:
Below are some Excel's Built in Features to Automate Repetitive Tasks in Excel Without VBA Macros
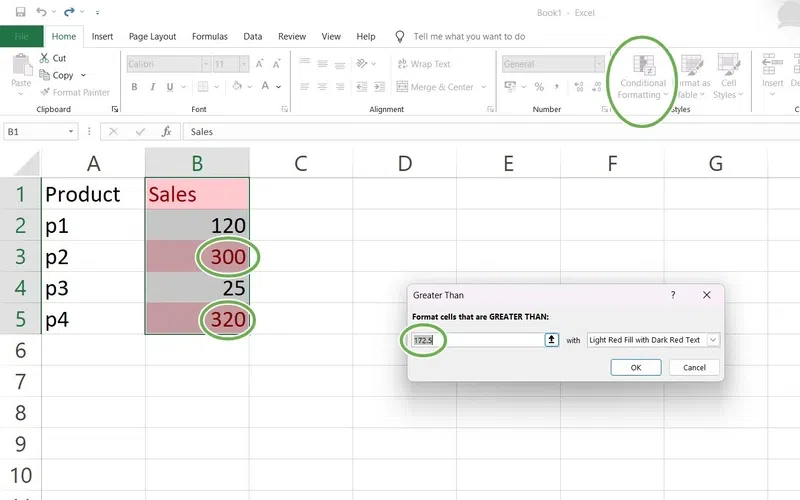
Determine which repetitive task you want to automate. For example, if you often need to format cells based on their values, conditional formatting might be the right choice.
Conditional Formatting enables you to highlight specific cells based on their values, making it easier to identify trends and outliers. This feature automatically applies color coding, icons, and data bars based on conditions you set.
Flash Fill is a handy feature that automatically fills in values by detecting patterns in your data. You can use it to format data consistently, such as splitting first and last names or formatting phone numbers.
How to Use Flash Fill
Enter the desired pattern in the cell next to your data (e.g., type “John Smith” if you want to combine first and last names).
- Start typing the next example in the cell below. Excel will detect the pattern and suggest autofill options.
- Press Enter to accept the suggestion, and Flash Fill will complete the series.
- Flash Fill is ideal for tasks like formatting names, standardizing dates, or extracting specific text elements from a string.
Data Validation allows you to restrict the type of data entered in a cell, reducing errors and ensuring consistency. It’s useful for creating dropdown lists, limiting inputs to specific numbers, or setting criteria for acceptable data.
How to Use Data Validation in Excel
- Select the range of cells where you want to apply data validation.
- Go to Data > Data Validation.
- Choose the criteria for your data (e.g., list of values, whole number, date range).
- Set any additional options, such as error messages for invalid entries..
Apply the chosen feature to your spreadsheet. For example, use conditional formatting to highlight cells with sales figures above a threshold.
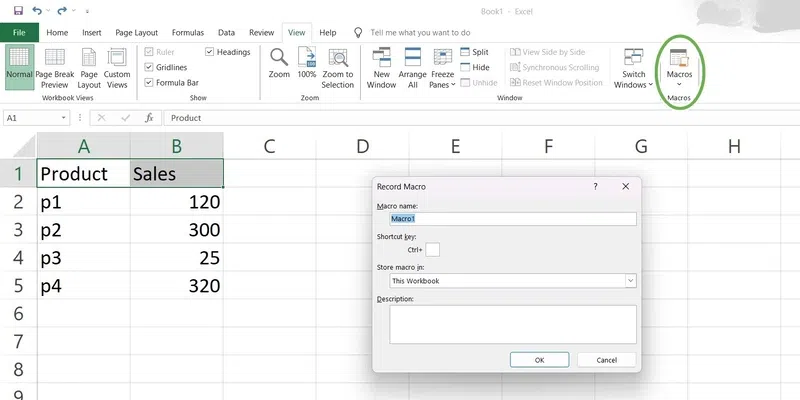
Using the Macro Recorder but the guide lays emphasis on solutions that are non VBA in nature for instance here is a user friendly manner of automating tasks without having to write any code.
The Macro Recorder enables one to record and make a repetitive macro for actions that require several stages to accomplish. Just in case you happen to have a task that consumes much time due to many steps involved in every operation such planning requires automation on your side, then you should consider using this facility.
Outline the steps you need to automate.
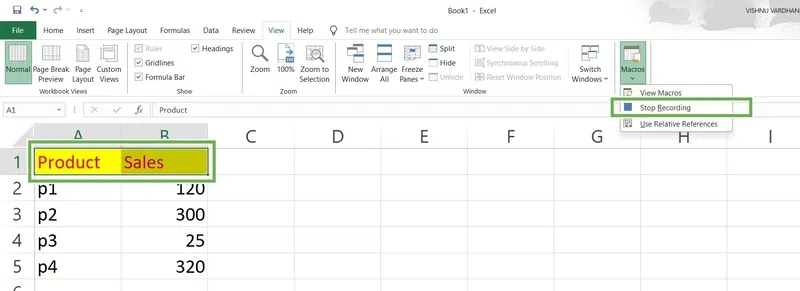
Each stage will be captured using the Macro Recorder.
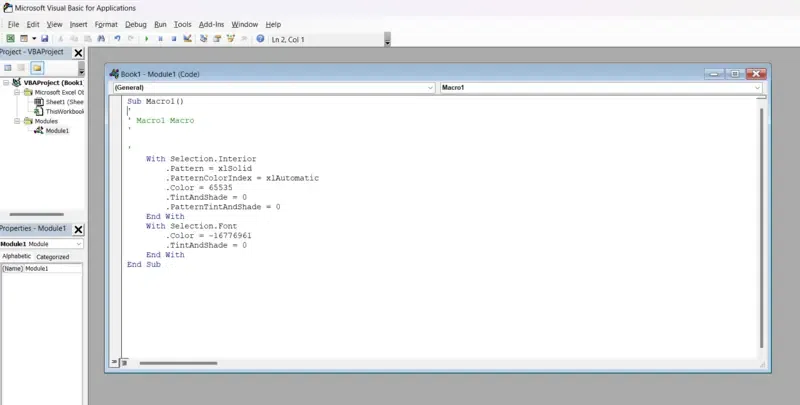
When necessary, the `View > Macros > View Macros > Edit` will be used to refine the macro.
Once you have completed making automations, testing them is necessary to guarantee they operate as anticipated.
Run your automation to ensure it performs the task correctly.
Verify the results and address any issues.
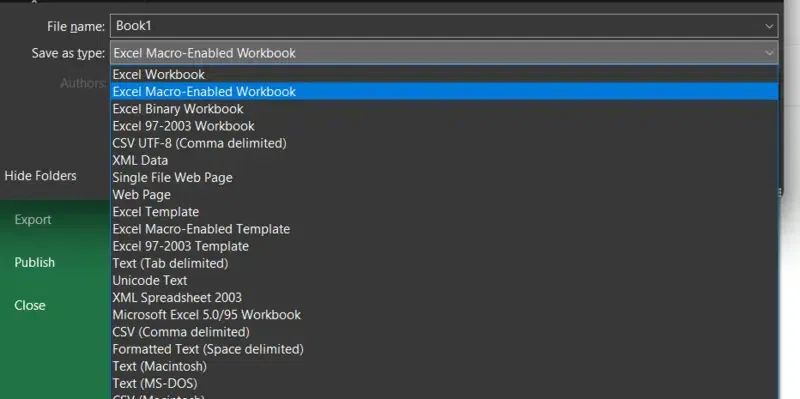
If you ever used a macro recorder, remember to store the workbook carrying out macros.
Go to File > Save As.
Select Excel Macro-Enabled Workbook (*.xlsm)..
Documenting your automations helps you and others understand how they work and how to use them.
Write a brief description of what each automation does and how to use it.
Add a new sheet or a section in the existing sheet for documentation.
Begin by making a basic macro. Here are the steps for the process.
Make sure you know how Excel handles call references while recording macros.
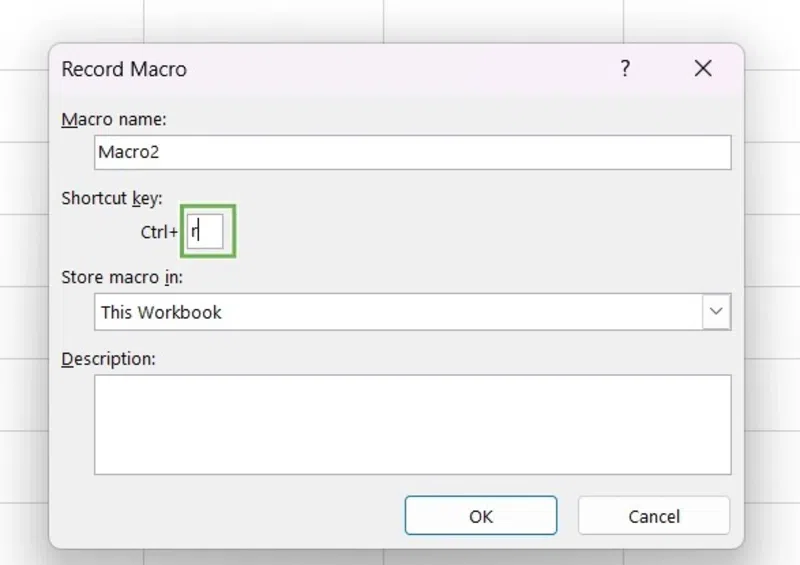
Assigning shortcut keys to your macros. This helps you run them faster and more efficiently.
Navigate `View > Macros > View Macros`.
Then choose the macro you want to assign a shortcut to and click `Options`.
Enter a key combination and click `OK`.
Here are some tips to make your Excel automations more efficient and user-friendly:
Automating repetitive tasks in Excel without VBA macros unlocks a world of efficiency, allowing you to streamline processes without needing to learn programming. With tools like Flash Fill, Power Query, and Excel formulas, you can eliminate manual work, reduce errors, and improve your productivity. By applying these techniques, you’ll spend less time on repetitive tasks and more time analyzing data and making informed decisions. Embrace these automation strategies, and transform Excel into a powerful ally that does the heavy lifting for you—no coding required!
Yes, you can automate many repetitive tasks in Excel using built-in features such as formulas, conditional formatting, data validation and the Macro Recorder.
You can use built-in features like Flash Fill, Power Query, and PivotTables to automate tasks without using VBA macros.
While VBA is powerful, other tools like Excel add-ins, Office Scripts and Power Query can be used to automate tasks.
Use the Macro Recorder to record the actions you want to repeat, then save and run the macro as need. You can also edit the macro to include loops for repeating actions.