 |
VOOZH | about |
|
VOOZH | about |
Using templates in Google Docs saves time, ensures consistency, and simplifies tasks like creating reports, invoices, or resumes. It helps streamline work, maintain consistency, and speed up document creation.
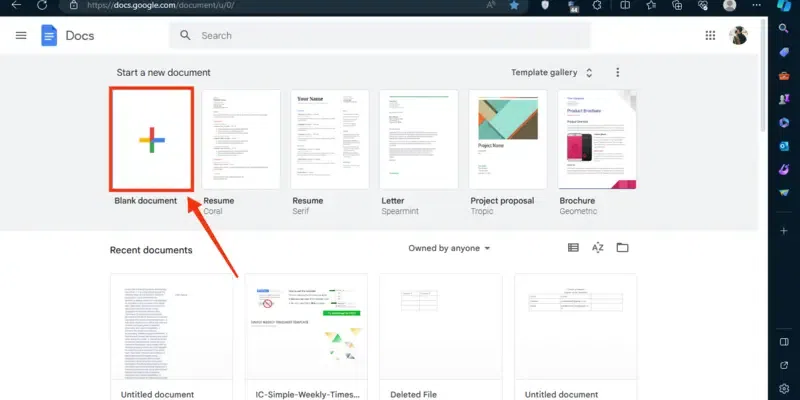
Google Docs offers a variety of Google document templates that can help you get started quickly. Here’s how to use them:
Go to Google Docs and open the Template Gallery. Here, you'll find a range of options, including Google Sheets budget templates, CV templates in Google Docs, Google Docs cover letter templates, and even schedule templates for Google Docs.
Select a template based on your needs. For example, you can choose an invoice template in Google Docs or a Google Docs resume template free.
Once you’ve selected a template, edit it to suit your requirements and save it for future use.
If none of the Google templates fits your specific needs, you can create your own template on Google Docs by following these steps:
Go to Google Docs and select a document you want to create a template.
Customize the document's layout by accessing the Google Docs format options in the toolbar. Adjust margins, fonts, and text styles to your liking.
Now from the menu appeared dropdown, select the "Text" and choose your desired tool to format your text such as Bold, Italic, Underline, Strikethrough, Subscript, Superscript etc.
Use the Format menu to insert headers and footers or use the Insert menu to add tables. This is particularly useful when creating an invoice format on Google Docs or a schedule template on Google Docs.
Now specify the inches from up and bottom in order to make margins, you can also select the Page Layout. After specifying the inches and selecting the page layout click on the "Apply" button to apply it on your page.
To insert tables into your template, click on the "Insert" menu and select the "Table" option and after specifying the rows and columns your table will be inserted into the document.
When you are done with customizing the template now rename your template by clicking on the document name located on the top-left side of the interface. After clicking on the document name enter edit it by entering the template name to it.
By default, all the Google documents are stored in the drive but still you can change your template's location by clicking on the File icon located next to the template name. To store it in your desired location, navigate to it and click on the "Move" button.
In the case you want to use your template later or want to store it in your phone's location you can download the template. To do so, click on the "File" menu and select the "Download" option, also choose your download type and your template will be downloaded.
Follow the steps to create a Template in Google docs with a Personal Google Account:
If you have a personal Google account, then you can make a copy of a template. To do so click on the File" menu and select the "Make a Copy" button.
Enter your template name and click on the "Make a Copy" button.
Learn how to manage your templates in Google Docs to keep your documents organized and accessible.
Go to the Google Docs home screen and click on the "Template Gallery."
You can submit your custom template to the Template Gallery for others to use.
Organize your templates in Google Drive by creating folders and categorizing them.
Find out how to open and use Google Docs templates on the web for easy document creation.
First you have to upload the template into your Google Drive so that you can open it in Google Docs. To upload the template click on the "+" icon and click on "File Upload".
Now click on three dots located next to the template name.
When you will click on the three dots a drop-down menu will appear, from the menu select "Open With" >> Google Docs" and your template will be opened.