 |
VOOZH | about |
|
VOOZH | about |
Adjusting cell height and width in Google Sheets enhances data presentation for tasks like chart creation or collaborative projects. In 2025, Google Sheets cloud-based features, paired with Google Apps Script for automation (similar to Excel VBA), make resizing cells critical for readability and organization.
Learn how to resize rows in Google Sheets to make your data fit better:
Find the row you want to resize. Hover over the border of the row header until an arrowhead icon appears.
Click and drag the arrowhead up or down to adjust the height. The row size will change accordingly.
In order to change the size of a cell vertically, you must follow these steps-
Locate the row in which the cell whose size you want to change is present. Hover over to the border of the header of that row. You must see an arrowhead symbol.
When the cursor changes into an arrowhead, press and drag the arrowhead up or down. Note that you have to do this from the bottom side of the cell.
Follow these steps to resize columns in Google Sheets for better data presentation:
Find the column you want to adjust. Hover over the border of the column header until an arrowhead icon appears.
When the cursor changes into an arrowhead, press and drag the arrowhead up or down. Note that you have to do this from the right side of the cell.
Learn how to use built-in tools to resize multiple cells at once.
Note that in order to make changes in the vertical dimension, we must change the height of the cells.
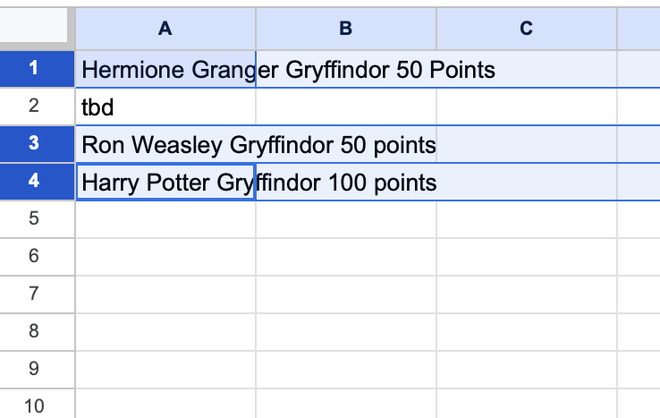
Locate and select the row/rows in which the cell whose size you want to change is present.
Note that in order to make such selections, you should use the Ctrl key(on Windows) or cmd key(on Mac) while selecting.
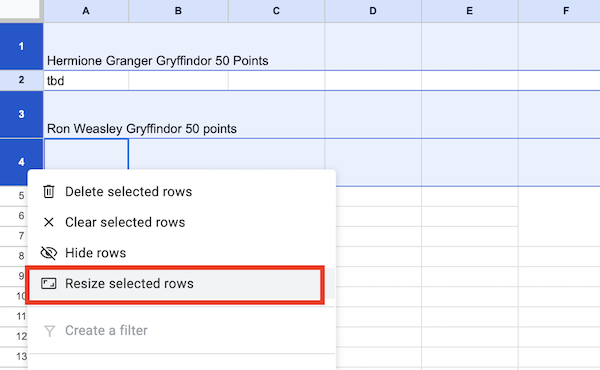
Right click the header of the last selected row and choose the Resize selected rows option.
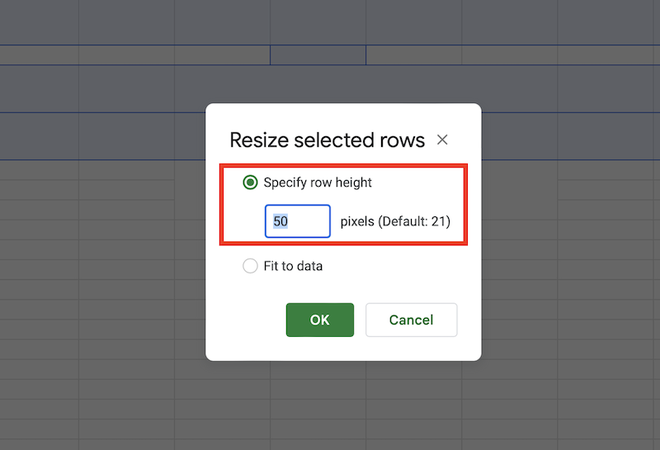
A box will open where you can set the desired size in pixels. When done, click ok.
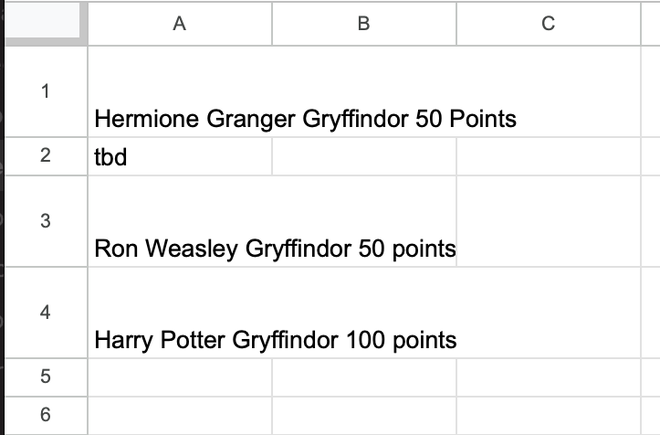
This is how the sheet looks like after this-
Note that you can also use the fit to data option to automatically adjust the size of the cells as per the data, but this does not always work as desired.
Note that in order to make changes in the horizontal dimension, we must change the width of the cells.
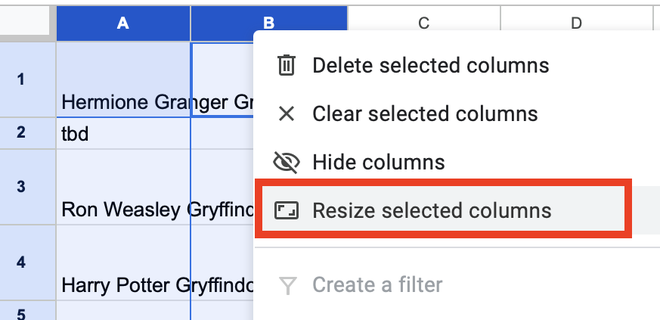
Locate and select the column/columns in which the cell whose size you want to change is present.
Note that in order to make such selections, you should use the Ctrl key(on Windows) or cmd key(on Mac) while selecting.
Right click the header of the last selected column and choose the resize selected columns option.
A box will open where you can set the desired size in pixels. When done, click ok.
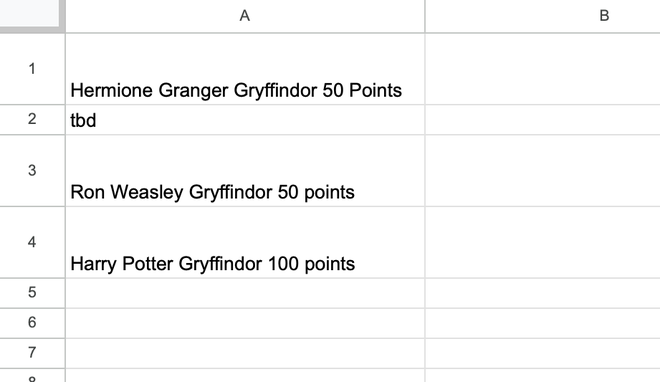
This is how the sheet looks like after this-
Note that you can also use the fit to data option to automatically adjust the size of the cells as per the data, but this does not always work as desired.
Google sheets also let you auto-resize the dimensions of a cell without having to worry about the exact size measures.
Follow these steps to auto-resize a cell horizontally:
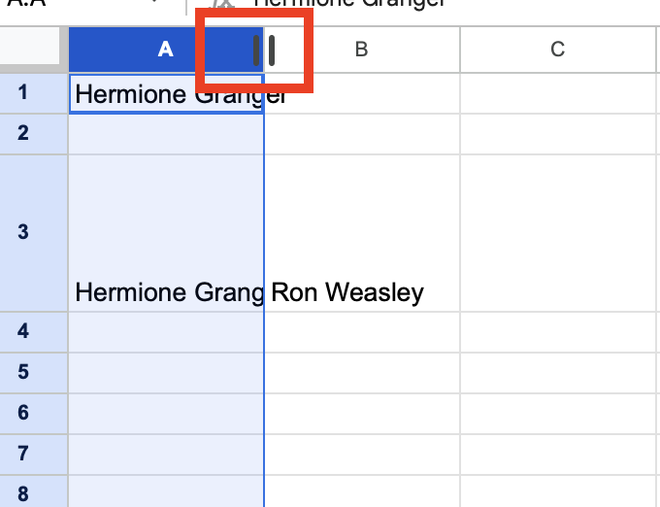
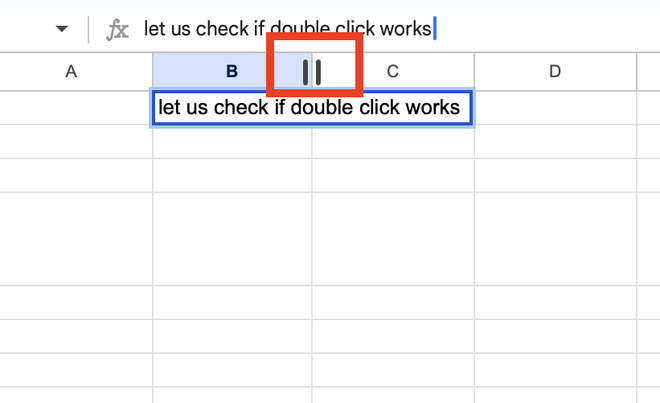
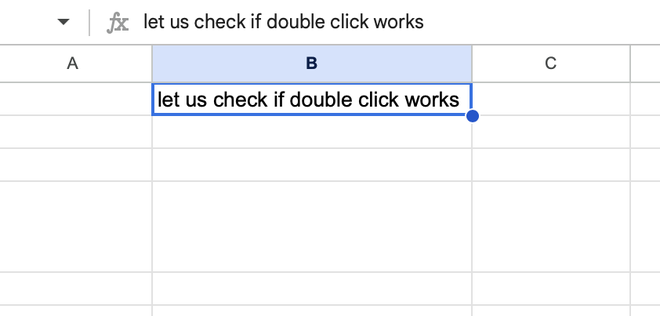
Hover over the right side border of the column header until you see an arrowhead.
Once you see the arrowhead, just double click and the cell size will automatically increase to fit the content.
Note that this method does not work for the rows. You can look at the below sections for an alternative.
If you are reading this post, then it might be possible that you are struggling with fitting data in the cells of your Google sheet. If fitting the data in the cells is your main goal, then you can use the below given methods.
Note that these methods are an indirect way of changing the cell size based on the data.
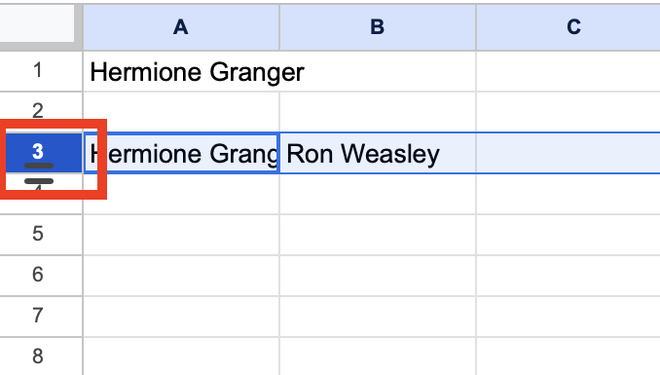
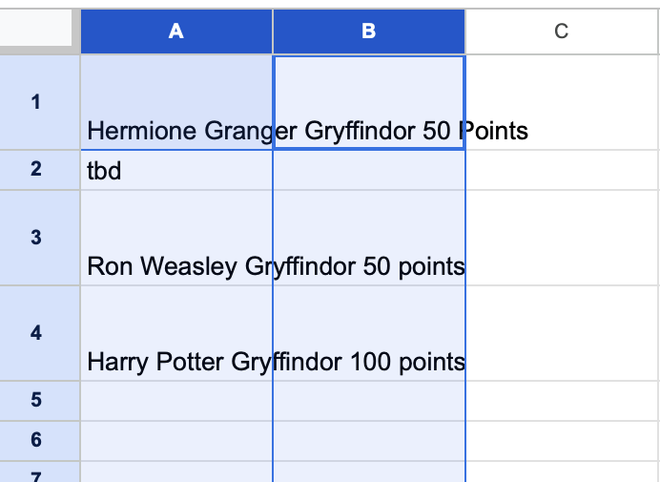
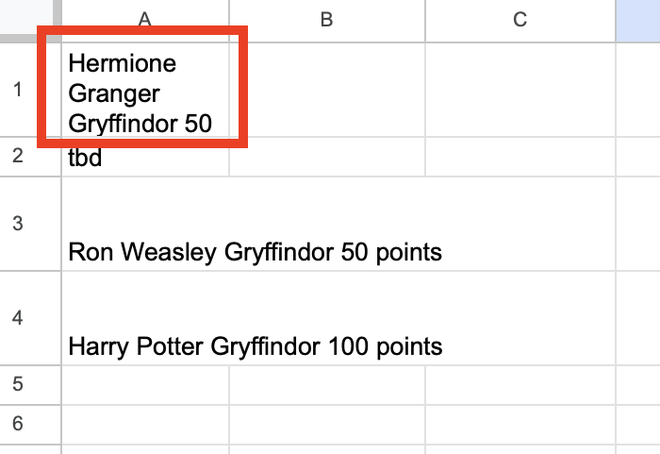
If you have ever tried entering multiple values in a single cell using the Enter key, you would know that the content goes to a new cell. Here is an example-
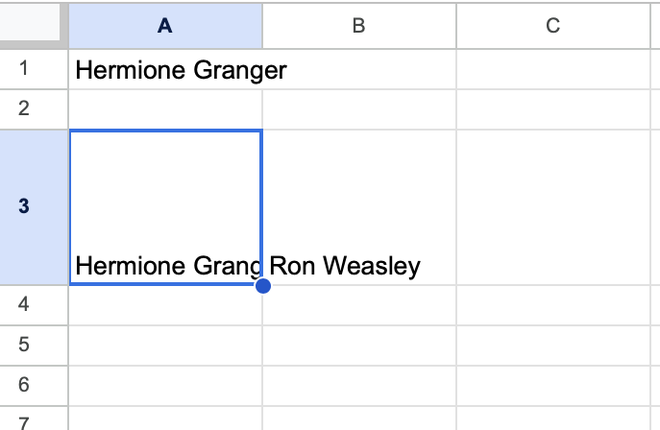
This is the result we want to achieve-
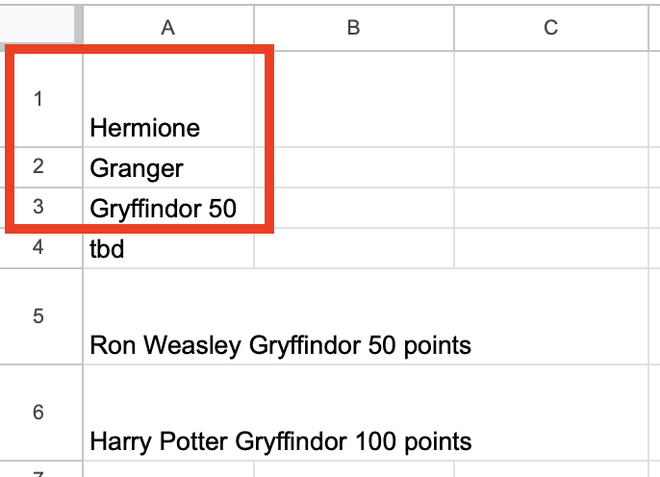
But this is what happens when you use the Enter key-
You can see that this time the content is moved to three rows which was not what we wanted. Thus, we can use the Wrap Text option to fix this problem.
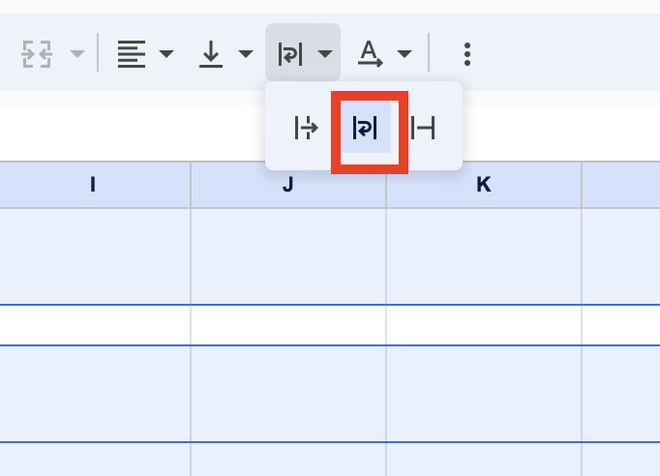
Select all such cells whose data you want to fit. To make multiple selections, use the enter key(on Windows) or Cmd key(on Mac) while making selection.
Go over to wrap text drop down in the ribbon and choose the wrap option present in the center.
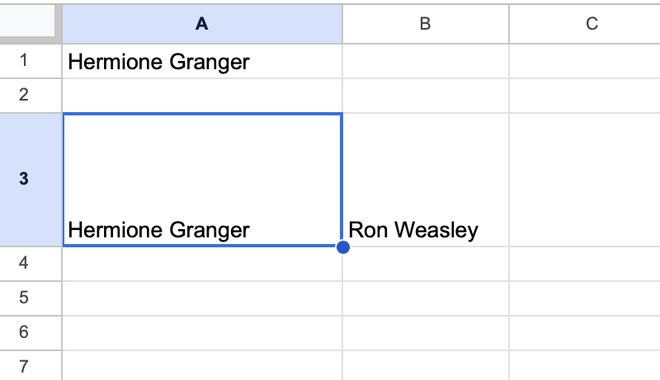
This is how the cell data would automatically be adjusted-
Until now, every time we have seen that changing the size of one cell alters the size of an entire column or row in which the cell is present.
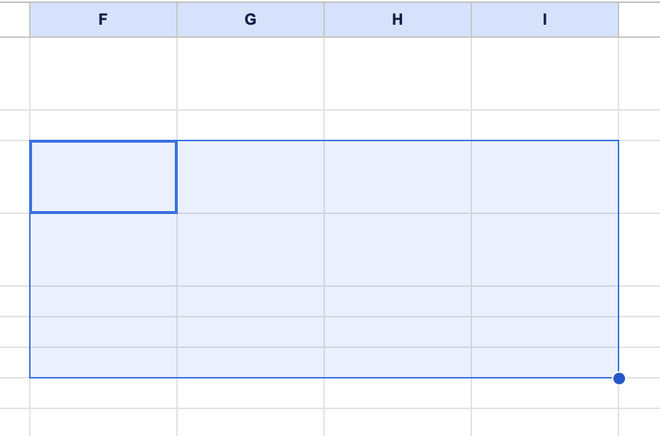
Although you cannot change the size of a single cell, you can merge various cells in Google sheets to obtain a block that is differently sized than the rest of the cells.
Here is how to do this:
Simply select a section of cells that you want to merge and make as one block.
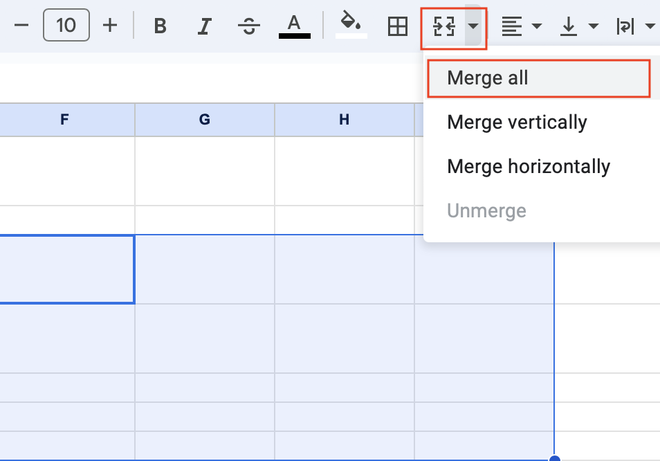
Go over to the merge cells dropdown and choose the desired option.
We are using the merge all option here because we have made selections across both rows and columns.
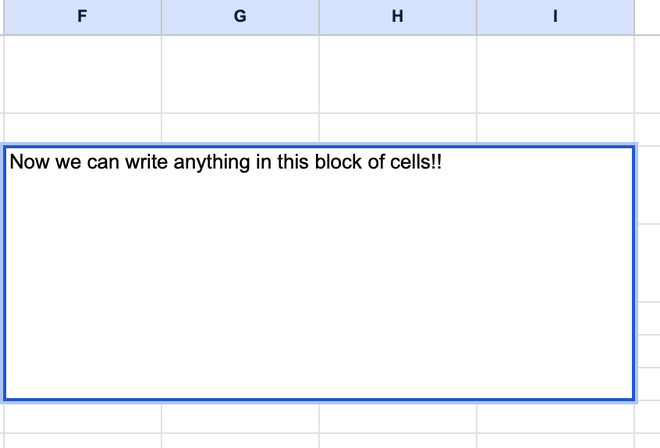
This is what the cells look like now:
Note that in this post, we are using the merge all option but you can choose whatever you need.