 |
VOOZH | about |
|
VOOZH | about |
JUnit is considered one of the best testing methods for regression. It is an open-source unit testing framework that is used to write and run repeated automated test cases without manual intervention in the Java programming language.
JUnit can be downloaded from its official website and can be installed with the help of the following steps:
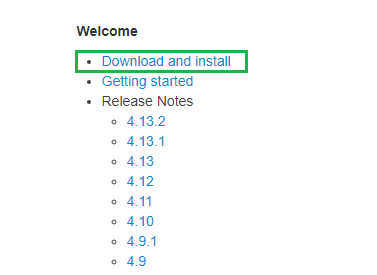
Step 1: Click on Download and Install option which will redirect to the GitHub link.
👁 ImageStep 2: Download both the jar files.
👁 ImageStep 3: Make a new Folder "Junit" and add both downloaded jar files into that folder as shown below :
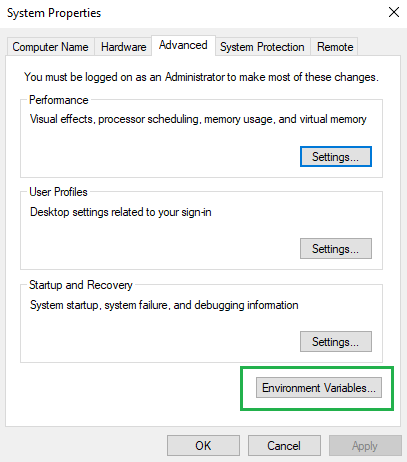
👁 ImageFollow the below steps to set the environment variable:
Step 1: Go to Environment variables.
👁 ImageStep 2: Click on the new button under System Variables.
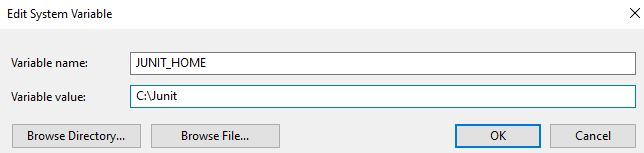
In the first text box enter variable name JUNIT_HOME, while in the second text field enter the path of Junit jar files.
👁 ImageStep 3: Click on OK after entering variable name and path.
Follow the below steps to configure JUnit in Eclipse:
Step 1: To configure and build JUnit in Eclipse, Open Eclipse, and Create New Project.
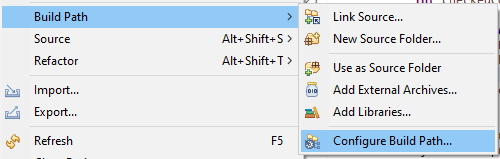
Right-click on “Build Path” and then “Configure Build Path”
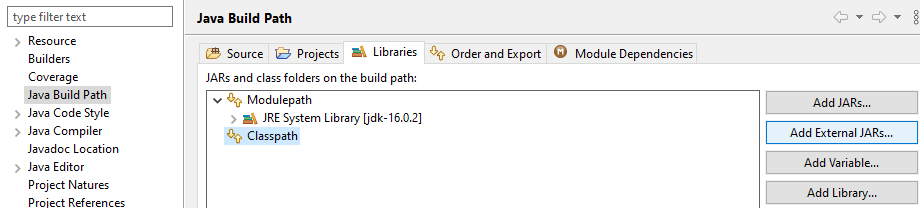
👁 ImageStep 2: Go to the Java Build Path category and Click on Add External JARs.
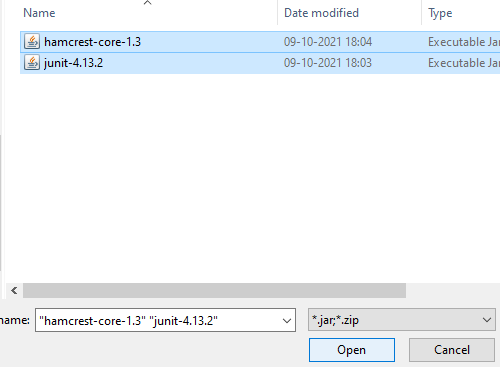
👁 ImageStep 3: Browse the jar files, select both and click on Open.
👁 ImageAfter adding jar files, Click on Apply and Close.
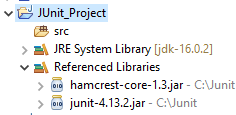
To verify JUnit file in eclipse, expand the Reference Libraries section as shown below:
👁 Image