 |
VOOZH | about |
|
VOOZH | about |
Red Hat Enterprise Linux (RHEL) is a Linux-based operating system from Red Hat designed for businesses. RHEL can work on desktops, on servers, in hypervisors, or in the cloud. Red Hat and its community-supported counterpart, Fedora, are among the most widely used Linux distributions in the world.
The best way to run two or more Operating Systems simultaneously in our devices by doing virtualization. Virtualization creates a simulated or virtual, computing environment as opposed to a physical environment.
After installing VirtualBox just double click on the icon to open and you will see a window as shown below
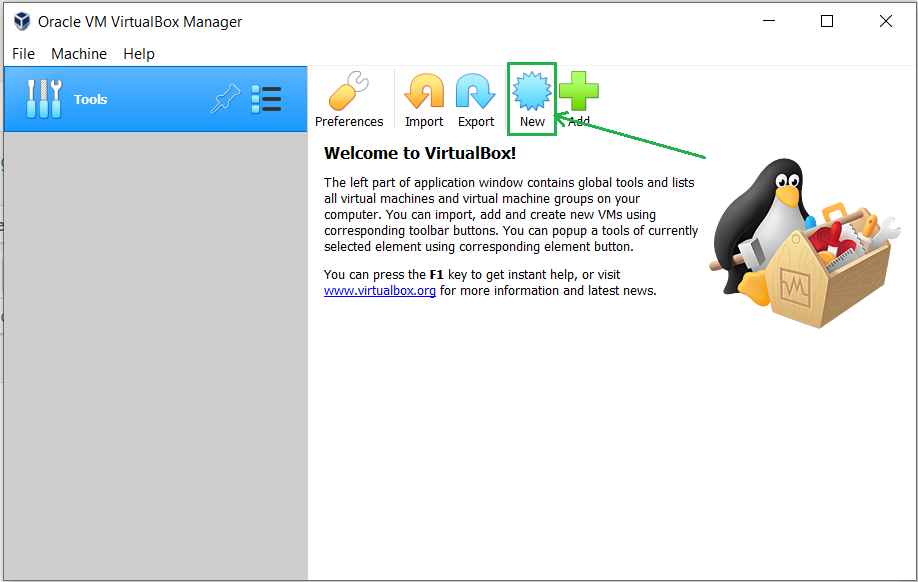
Step 1: Click on the New button.
👁 Installing RHEL 8 on VirtualBoxStep 2: Write the name of the virtual machine and select it to RHEL based 64bit Linux architecture.
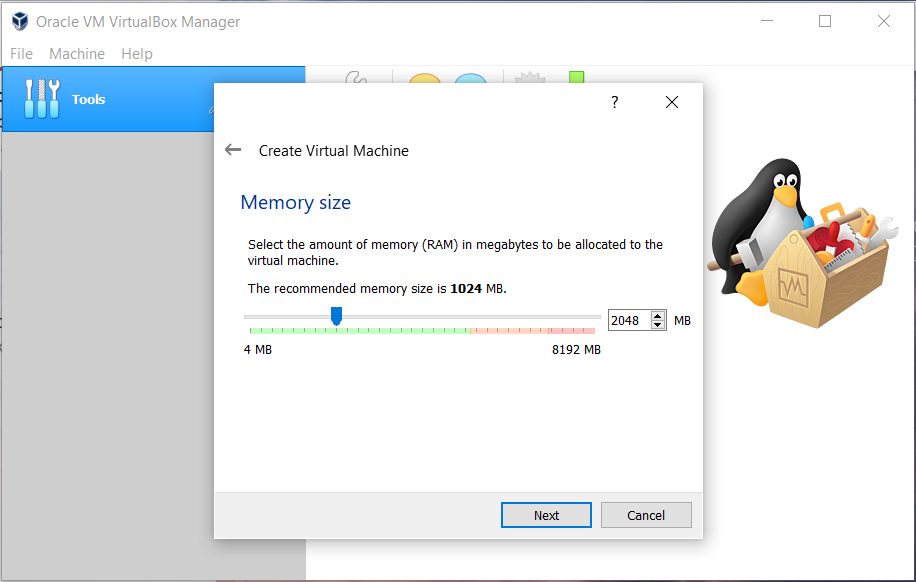
Step 3: Allot the size of RAM memory you want to allocate to the Virtual Machine of Kali Linux. (2048 MB is recommended for normal usage)
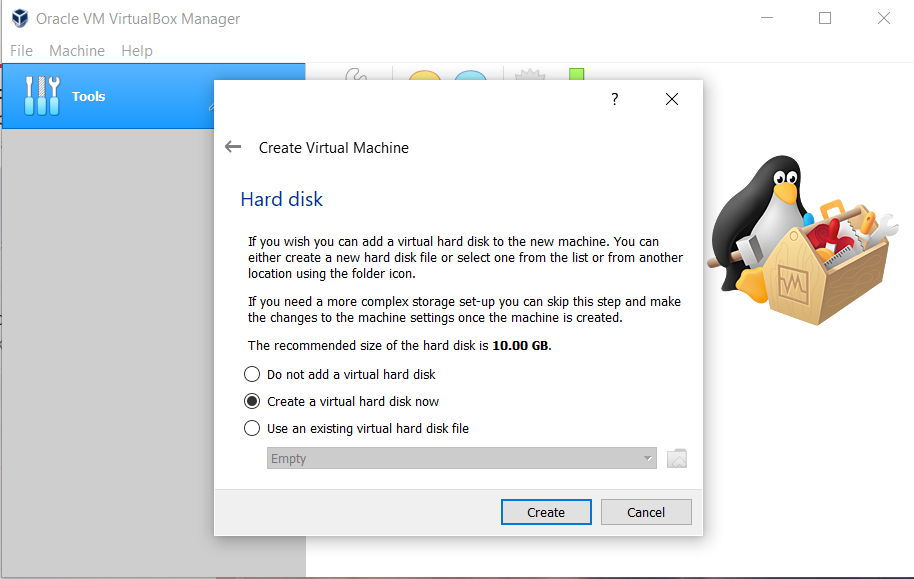
👁 ImageStep 4: Select the option to create a virtual hard disk now and then click on the create button.
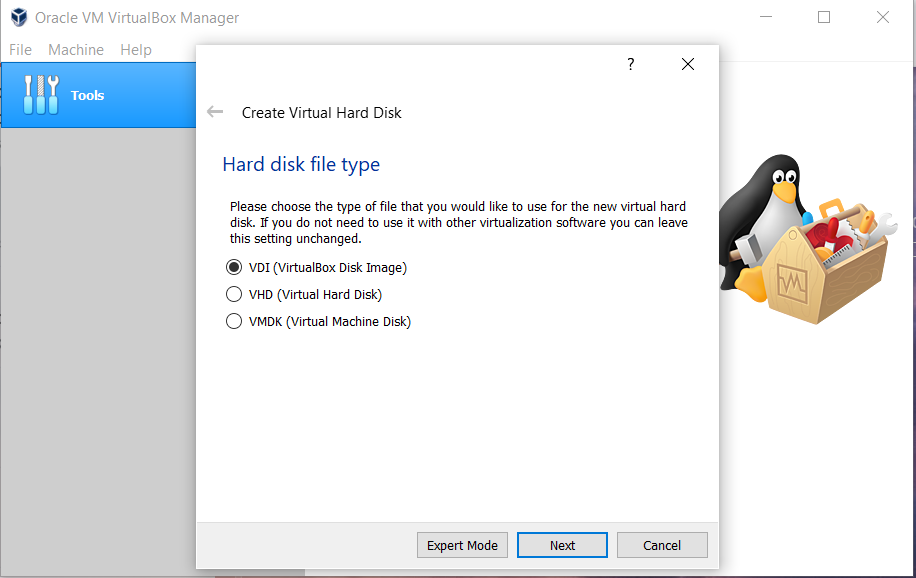
👁 Installing RHEL 8 on VirtualBoxStep 5: Now, select the Hard Disk File type for Virtual Hard Disk. ( VDI is recommended for daily purposes)
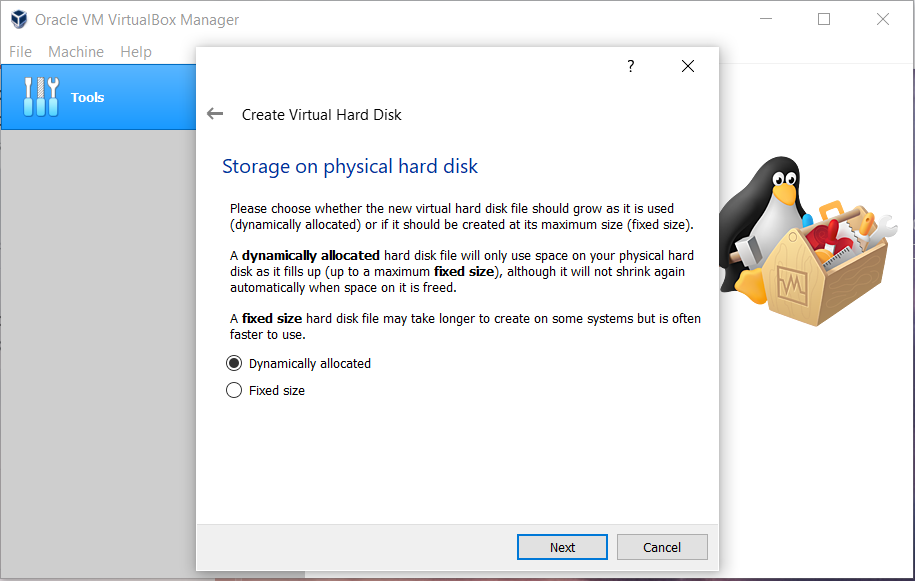
👁 ImageStep 6: Now select the type of Physical Hard Disk Storage. (Dynamically Allocated is recommended for general purposes)
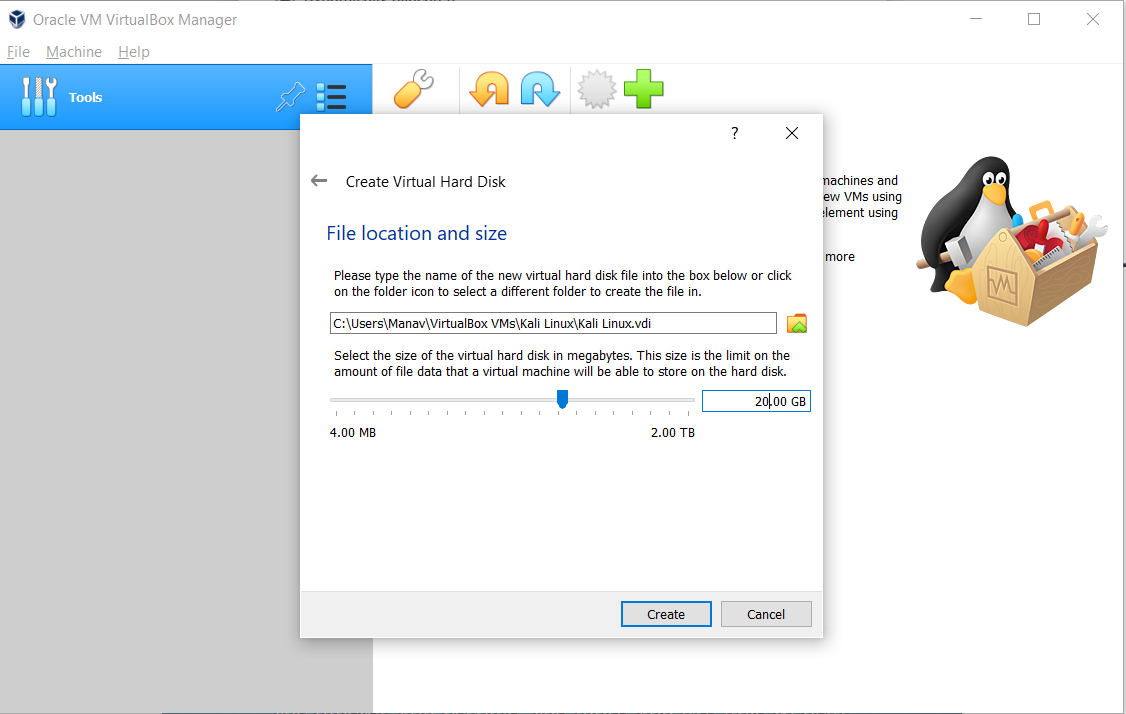
👁 ImageStep 7: Select the size of your virtual hard disk and also the location where you want to save your machine and its files.
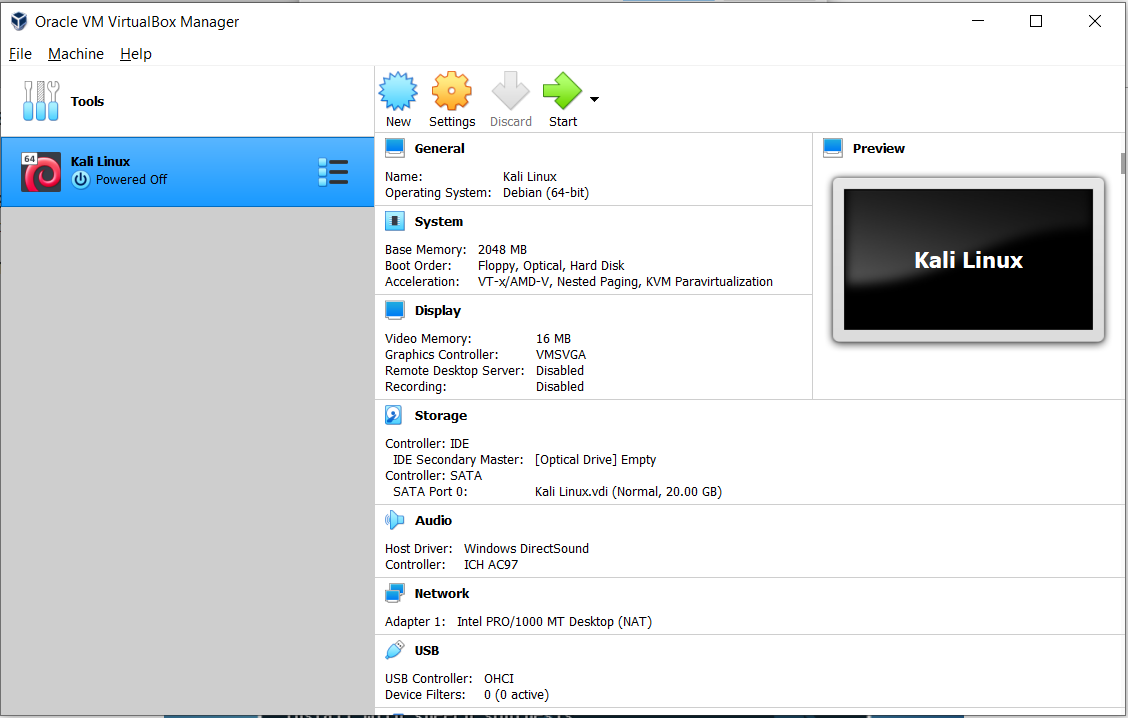
👁 Installing RHEL 8 on VirtualBoxStep 8: As soon as the processing is completed click on the Virtual machine name on the left panel and click on the Settings button from the top.
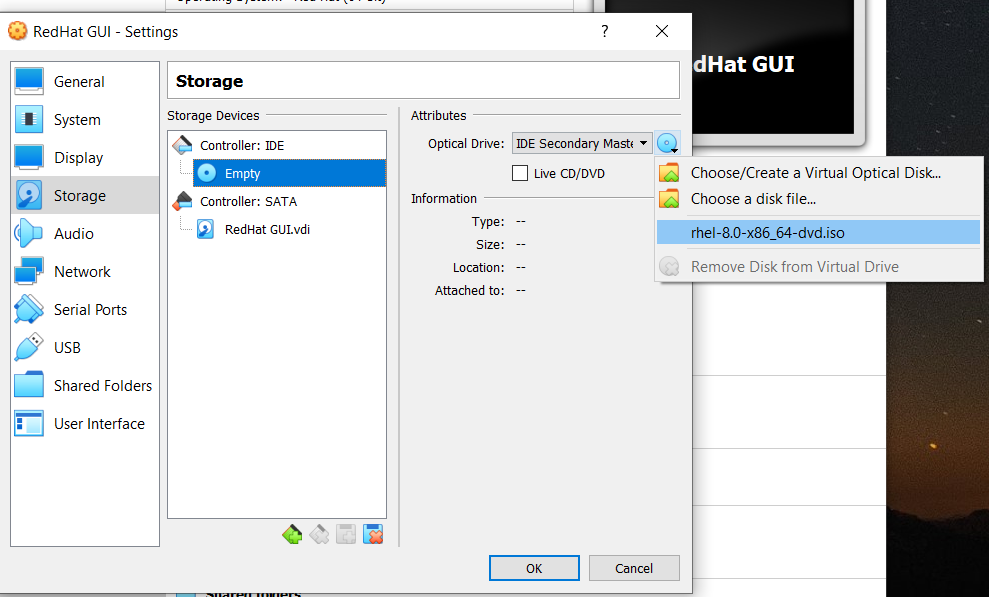
👁 ImageStep 9: After Clicking on the Storage, we will attach the ISO file to our Operating System
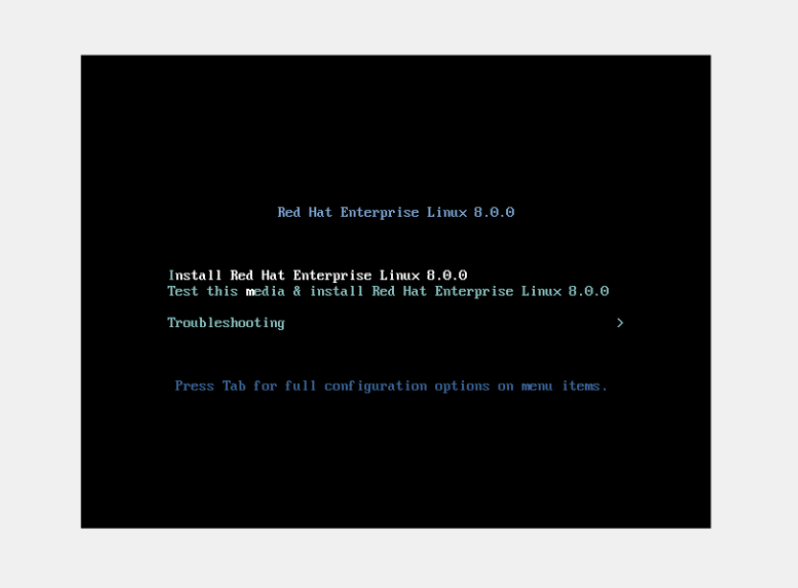
Step 10: Now click on the Virtual machine name on the left panel and click on the start button from the top.
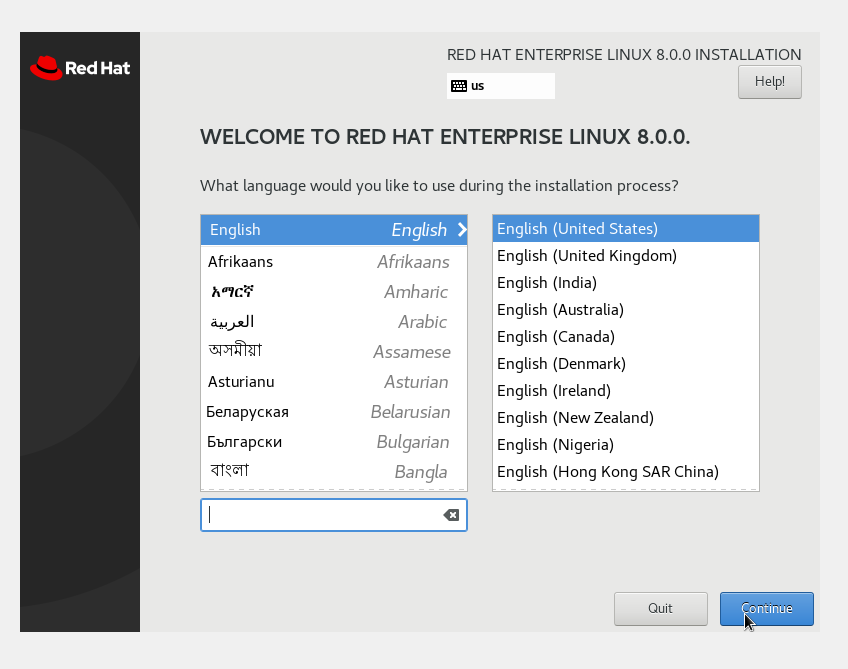
Step 11: Select your language and click on the continue button.
👁 ImageStep 12: Now click on Time & Date option and select your time zone and click on done.
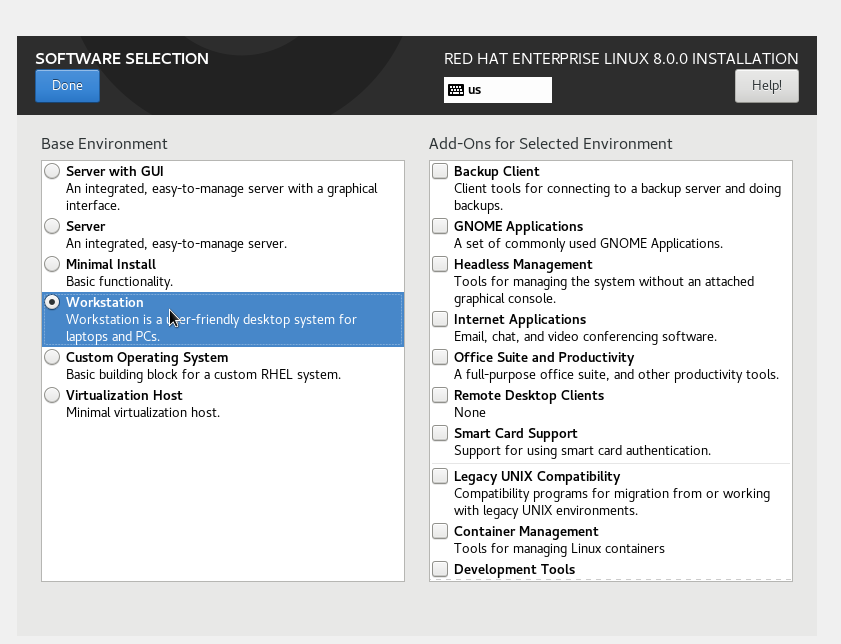
👁 ImageStep 13: Now click on software selection and select your software preference.
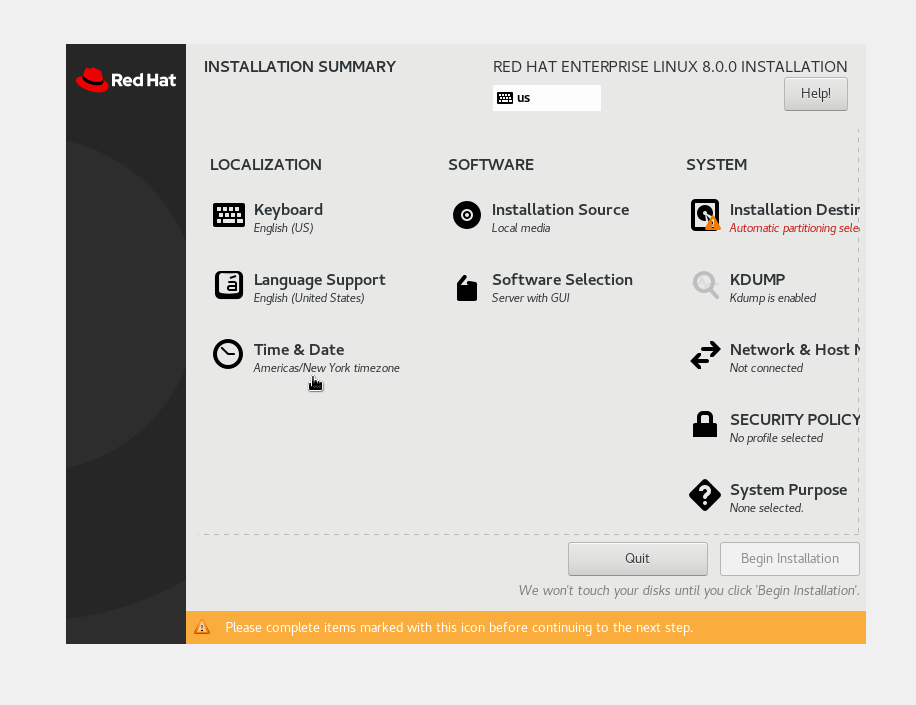
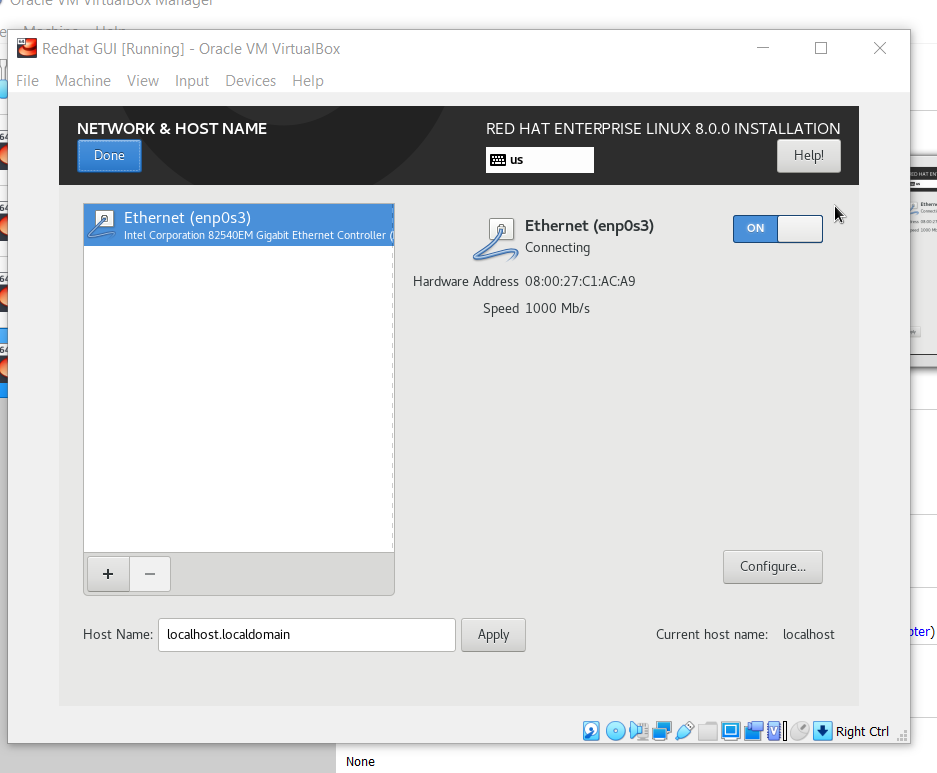
Step 14: After clicking on Network & Host Name, you’ll see a window where you’ll have to enable Ethernet to use the internet.
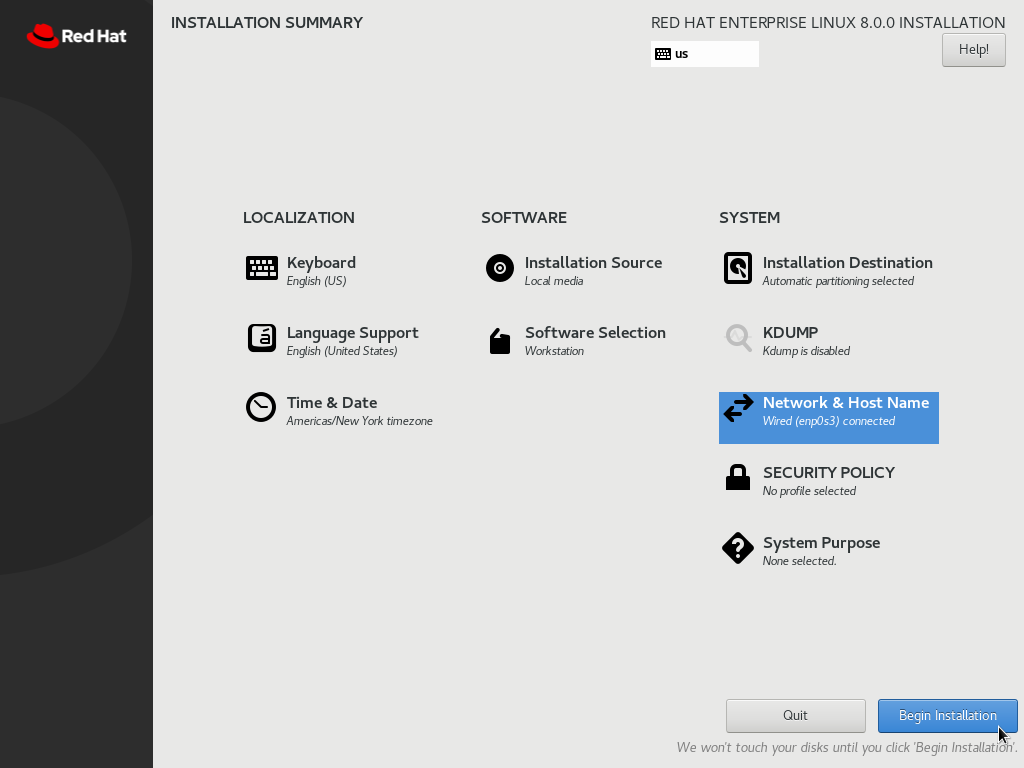
Step 15: After clicking on Done you’ll once again land into the Installation Summary window, the Begin Installation button will turn Blue, Now we’ll click on Begin Installation.
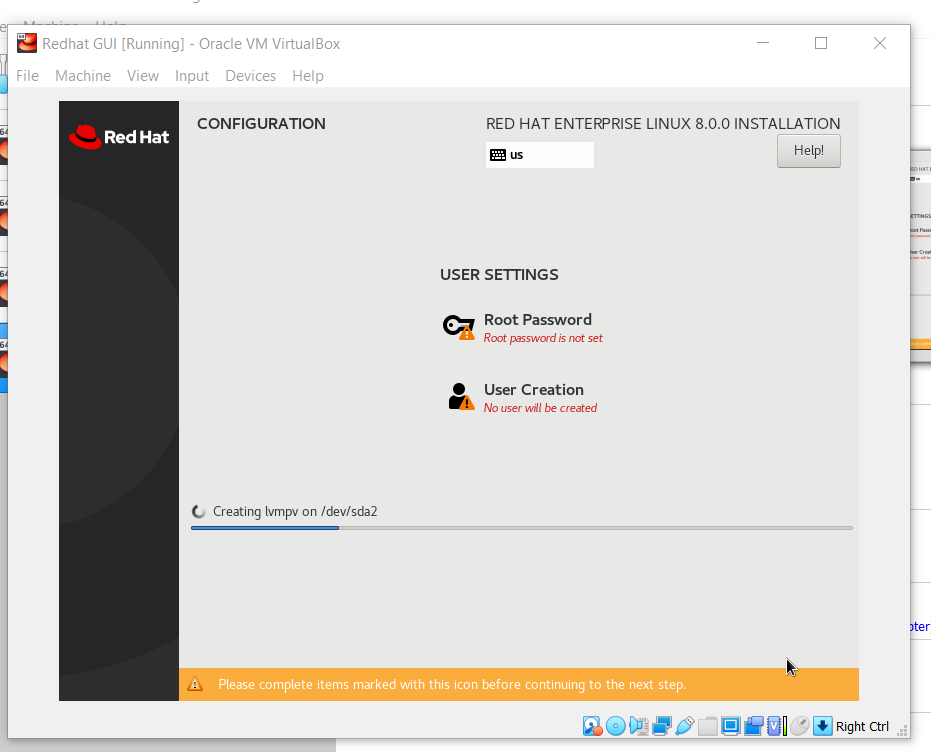
👁 ImageStep 16: The installation will begin, and you will have to setup an account and password. First setup password for the root user, Click on root password
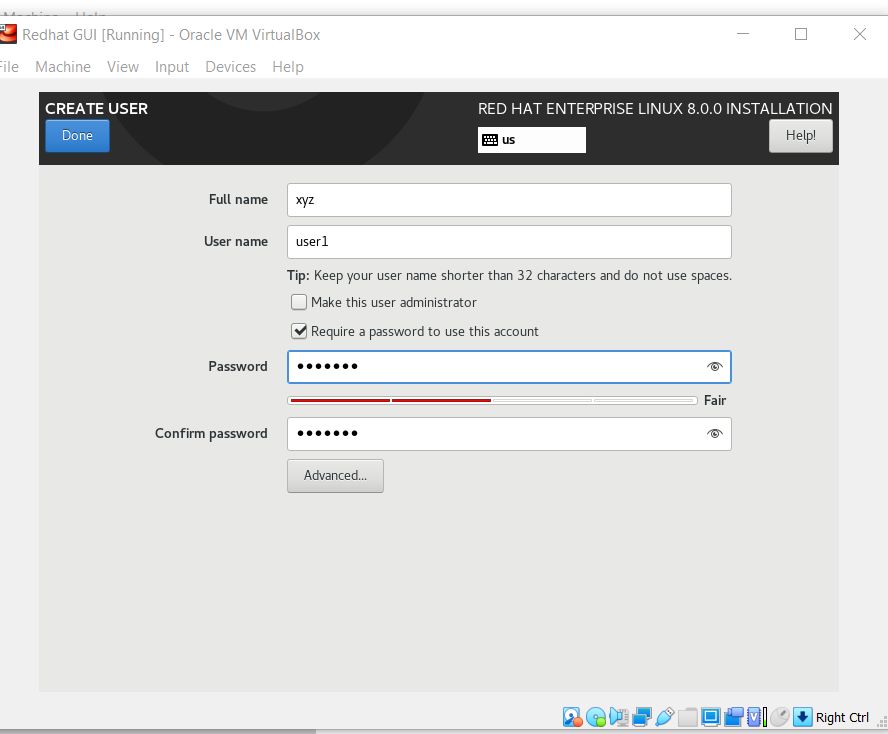
👁 ImageStep 17: Create a strong password for the root users and also you can create more users by clicking on the User Creation button add all details and click on done.
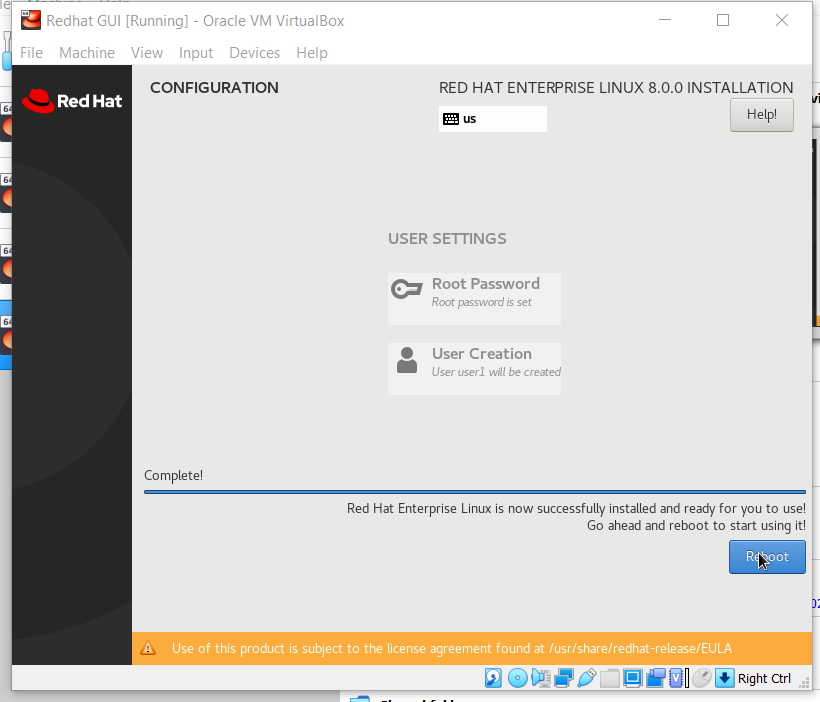
👁 ImageStep 18: After clicking on Done, wait for the installation to finish then click on Reboot.
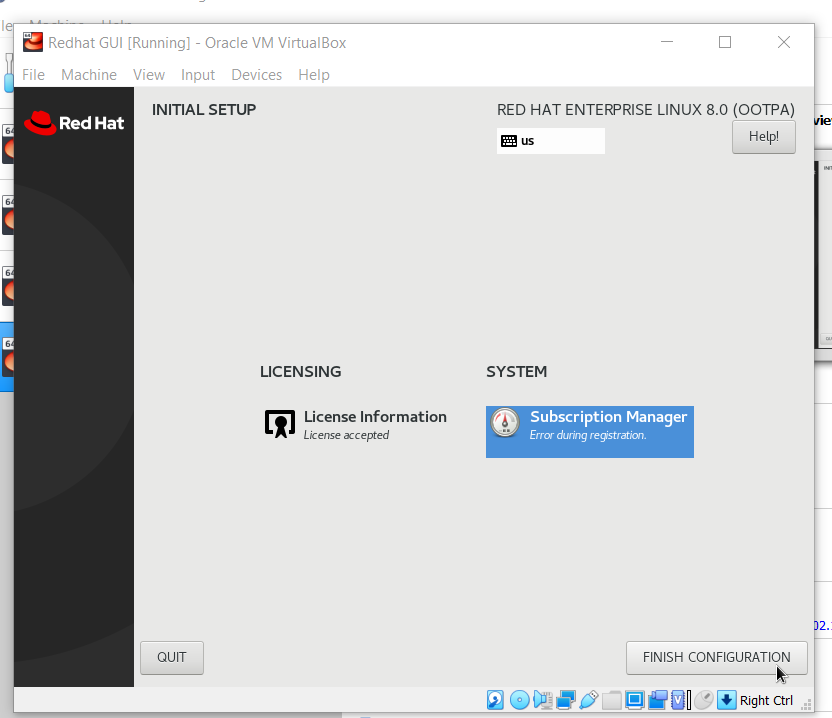
👁 ImageStep 19: Now after Reboot finishes Accept License Agreement by clicking on License information then checking the checkbox and then clicking on done.
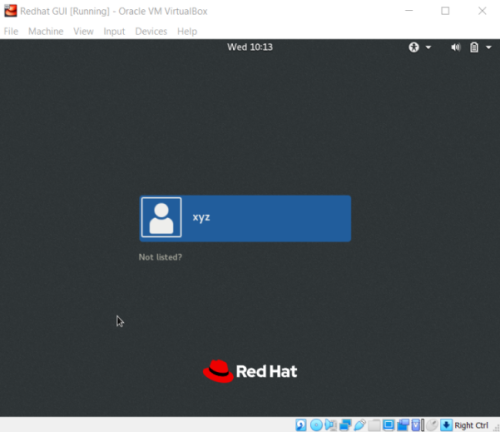
👁 ImageStep 20: Now click on Finish Configuration and your RHEL 8.0 is installed successfully, Just login to explore more.
👁 Image