 |
VOOZH | about |
|
VOOZH | about |
A custom document is a functionality that allows gives us access to setting up the metadata globally giving us an upper hand in search engine optimization, it can also be used to give styling globally as demonstrated in the later part.
In this article, we will learn how to create the _document.js; which helps the NextJs app greatly in SEO and also importing components and libraries globally.
Creating NextJs application:
Step 1: Create a new next project using the command below. (Make sure you have npm and node installed)
npx create-next-app gfg-doc-app-1
Step 2: After creating your project folder (i.e. gfg-doc-app-1), move to it by using the following command:
cd gfg-doc-app-1
Step 3: Create a _document.js file in the pages folder:
touch _document.js
Project Structure: The project structure should look like below:
Here as we want to create a custom _document we obviously overwrite the default Document using the concept of OOPs , for more information you can refer to this article.
You may have noticed that the _document.js has a structure similar to a static HTML file , hence you should also know that _document.js is only rendered on the server side and not on the client side, so event handlers like onClick are not going to work.
This functionality provides us the option to write metatags and import custom links globally, meaning each page can have its own metatag and title, if not provided, the _document covers this.
Example: Below is the example that will demonstrate the Next Js Custom Document.
_document.js: Write the below code in the _document.js file. index.js: Write the below code in the index.js file.Steps to run the application: Write the below code in the terminal to run the application:
npm run dev
Output:
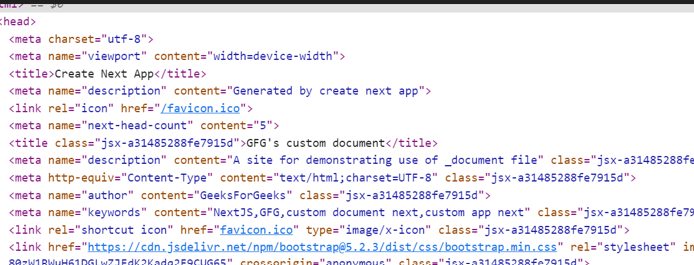
Now, right-click on your app and select inspect to access developer tools, which will allow you to see the website changes we did in detail:
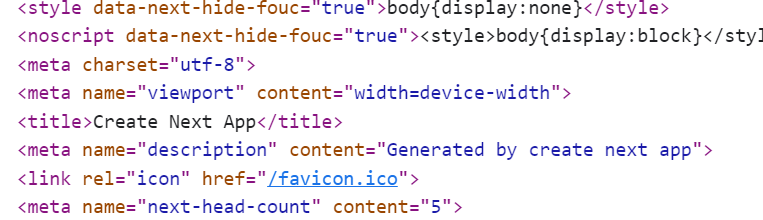
Whereas beforehand it was:
You can see that we: