CGroups is a Linux kernel feature used to limit, manage, and monitor system resources for processes. It helps ensure fair resource usage and prevents any single process from overloading the system.
Works for individual processes or grouped processes
Ensures stable and efficient system performance
Supports nested grouping through a hierarchical structure
Steps to Configure CGgroup in CentOS
Configuring CGroups in CentOS typically involves installing CGroup, creating a CGroups configuration file, and starting the cgconfig services. Follow the steps given below to configure CGroup in CentOS.
Step 1: Checking CGroups Support:
The very first thing we have to do is to confirm whether the kernel supports CGroups. Most of the modern kernels do support CGroup. To check whether the CGroup is supported or not type the command given below.
Command:
grep -i cgroup /proc/mounts
If the kernel supports it, we can see entries like cgroup on /sys/fs/cgroup in the output.
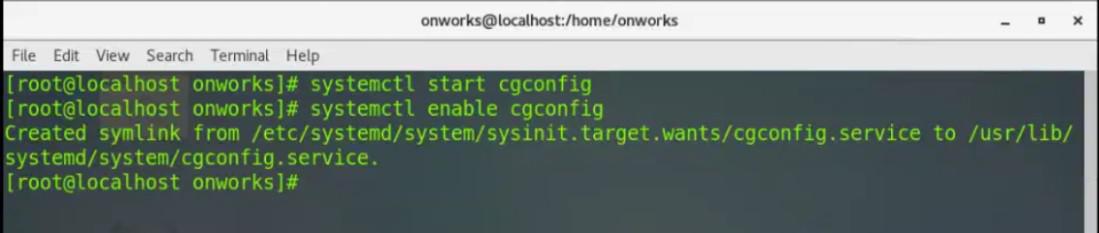
Now the next step is to start and enable the cgconfig service. It is the responsibility of cgconfig service, to read and implement the requested settings from the CGroups configuration file, which is typically found at /etc/cgconfig.conf.
To start the cgconfig service type the command given below.
Command:
sudo systemctl start cgconfig
The cgconfig service can be enabled to start automatically at boot time.
Systemd will launch the cgconfig service upon system startup, guaranteeing that the CGroups configuration is implemented consistently. To enable the service at boot, type the command given below.
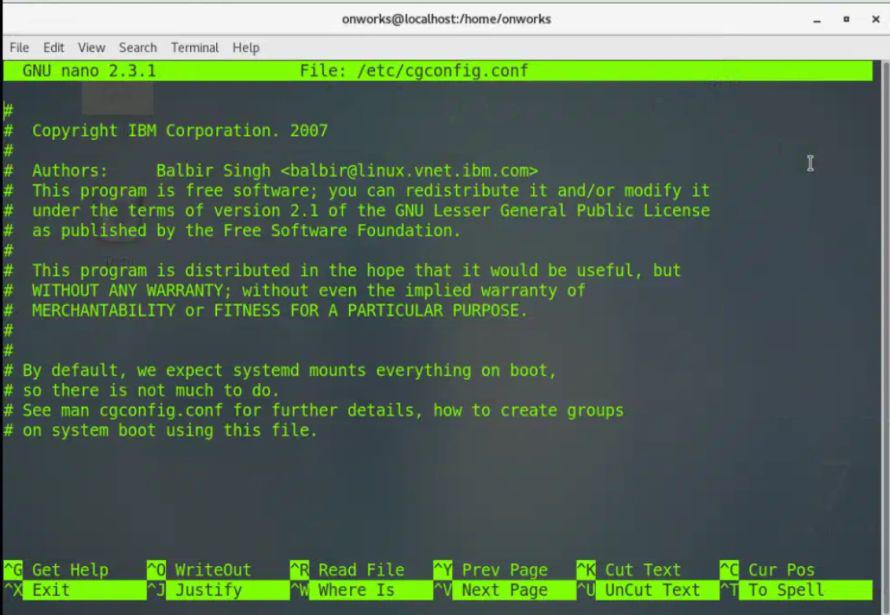
Step 4: Creating and Editing CGroup Configuration File:
Now we can also create a configuration file for CGroups. The default configuration file is usually located at /etc/cgconfig.conf. To open the default configuration file type the command given below.
Command:
sudo nano /etc/cgconfig.conf
This command will open the Nano text editor, allowing you to edit the cgconfig.conf file
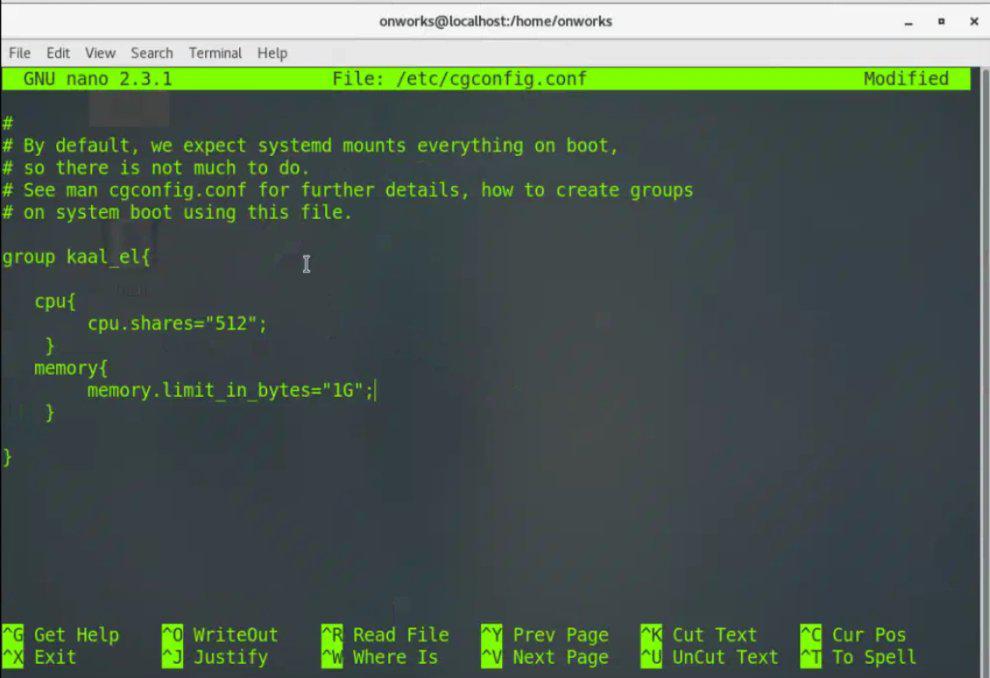
Now we can make the necessary changes to the configuration file. We can specify group names, limit resources to groups, and other settings as well. For example, we can write the following in the cgconfig.conf file.
group <group_name> {
 cpu {
 cpu.shares="512";
 }
 memory {
 memory.limit_in_bytes="4G";
 }
}
In this example, we are specifying CPU and memory resource constraints using the "cpu.shares" and "memory.limit_in_bytes" parameters respectively.
The amount of CPU time that a CGroup receives in relation to other CGroups on the system is determined by its CPU shares. The group will also be restricted from using more than the specified amount of memory.
Once the configuration has been modified, hit Ctrl + O to save the changes to the file then Enter to validate the filename, and then Ctrl + X to close the Nano editor.
Step 5: Restart the CGroups Service:
Once the modification of the configuration file is completed, restart the service. To restart the CGroup service type the command given below.
Command:
sudo systemctl restart cgconfig
Step 6: Verifying the CGroup:
To verify the CGroup service "cgexec" command can be used. The cgexec command is used to execute a command within a specified Control Group (CGroup) with specific resource constraints.
To run a process within a CGroup type the command given below.
Command:
cgexec -g cpu,memory:<group_name> <command>
Replace the <group_name> with the actual group name that we want to use and which must be present in cgconfig.conf file and also replace <command> with the actual command we want to run.
cgexec -g cpu,memory:kaal: Executes the command within the specified CGroup (here kaal) with CPU and memory constraints.
ls /: The command lists the contents of the root directory.
Step 7: Checking the Status:
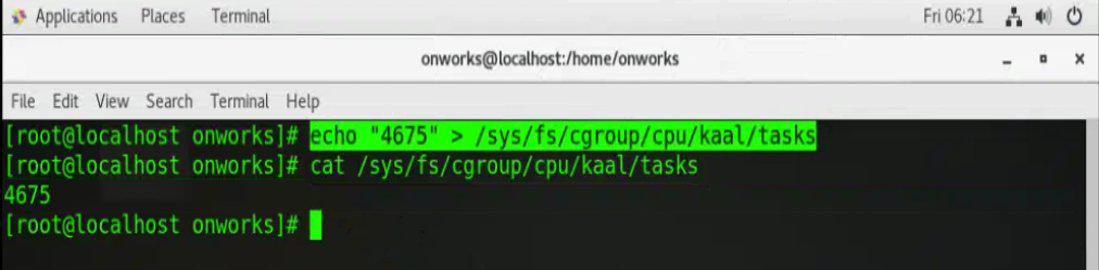
We can also check the status of CGroup. We can use the "cat" command to show the PIDs currently in the specified CGroup. To check the status type the command given below.
cat /sys/fs/cgroup/cpu/<group_name>/tasks
Just replace the <group_name> with the actual group name (here kaal) that we want to use and which must be present in cgconfig.conf file.
The above command is used to display the list of process IDs (PIDs) associated with a specific Control Group (CGroup).
