 |
VOOZH | about |
|
VOOZH | about |
Picture this: You sit down at your favorite cafe, ready to catch up on some work. You connect to the free Wi-Fi, unaware that in a matter of minutes, your data could be at risk. This is not just a hypothetical scenario. This article will delve into how such attacks on a WPA2-PSK (Passkey enabled) Wifi are carried out using an automated Python script, FLUXION.
WPA2-PSK (Wi-Fi Protected Access II - Pre-Shared Key) is a security protocol used to secure many home, small office, and SOHO Wi-Fi networks. The Wi-Fi Network is first configured with a strong pre-shared key/password (PSK). When a device attempts to connect to such a Wi-Fi, it must provide the correct PSK and go through several authentication steps, allowing the device and router to perform a key exchange for establishing a secure encrypted connection. The WPA2 algorithm makes use of an AES (Advanced Encryption Standard) symmetric encryption algorithm, supporting a 128-bit key size. This had been considered a robust means of security for decades.
Hackers have been breaking into these Wi-Fi networks to intercept and monitor network traffic, capture personal sensitive information, launch further attacks on devices connected to the network, and yes, even gain free internet access. This is known as a Man In The Middle Attack (MTIM) or an Evil Twin Attack!
Fluxion is the secret tool behind this. What started as an open-source remake penetration testing tool (meant to test the security of Wi-Fi networks that use WPA2-PSK), became fairly common for malicious actors. Fluxion works as a social engineering tool by creating a fake access point mimicking the target network, tricking users into connecting, and entering their passwords. First, Fluxion scans for available Wi-Fi networks secured with WPA2-PSK and captures the WPA2 handshake (the initial exchange of authentication information between the client device and the Wi-Fi router). Fluxion then performs a de-authentication attack, disconnecting clients from the original access point. Simultaneously, Fluxion launches a Captive Portal attack (ie: sets up a fake/rogue access point) that has the same SSID (network name) as the target network. Unknowingly, as clients try to reconnect, Fluxion's fake access point tricks users into connecting to it rather than the Wi-Fi. As users connect, Fluxion captures the password entered in the fake login UI, gaining access to the actual WPA2-PSK-secured network.
Explanation: To get started, we'll be leveraging the Kali Linux virtual machine. Kali Linux is a Debian-based OS, made for cybersecurity professionals and ethical hackers. Kali Linux supports various hardware, allows ISO customization, integrates essential security tools, and offers compatibility with Fluxion, with their latest version.
Here are some download steps (NOTE: Windows may detect a virus/malware or some sort of an unrecognized program, this is totally fine and normal for Kali...feel free to read more about it elsewhere to gain confidence). All tools installed are 100% free (we will install the Oracle Virtual Box hypervisor on a Host OS and a virtual machine, which runs inside a hypervisor).
1. Go into your OS task manager highlight your CPU, and ensure that you have virtualization "enabled"
2. Make sure your device meets the Kali System requirements - Check official documentation
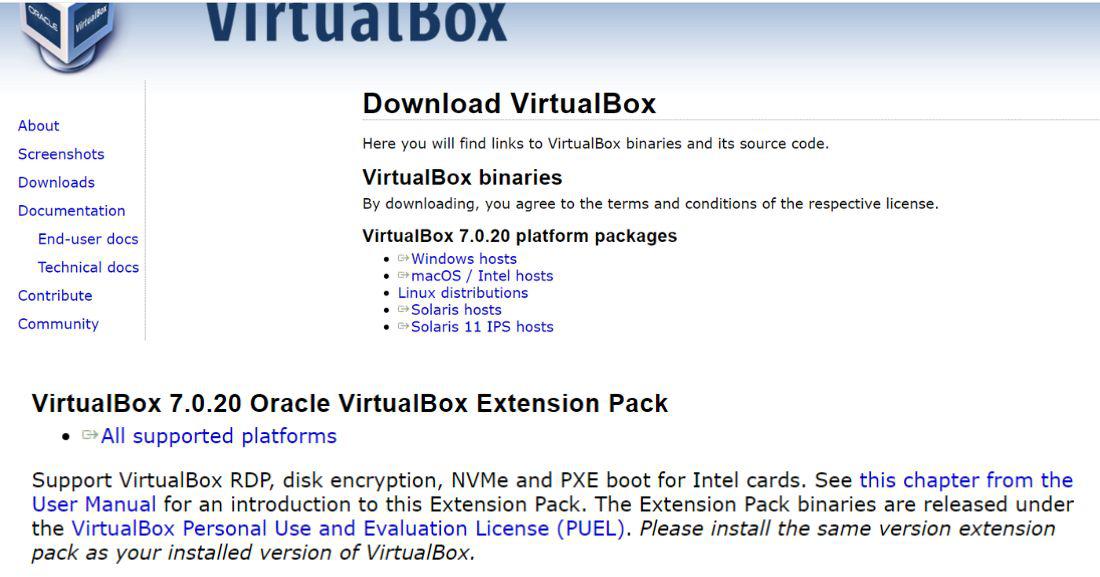
3. Download the Oracle VirtualBox tool based on your OS: https://www.virtualbox.org/
This is the link that comes up for me (For any people out there):
4. Go to kali.org and hit Download. From there, depending on how many bits your system is download the: "Virtual Box"
5. Next, find the Virtual Box downloaded from Oracle in your file system and go through the executable + install directions as follows. Then click "Finish" to start the Virtual Box.
6. Go back to: https://www.virtualbox.org/ --- Then download "All Supported Platforms" for the "VirtualBox [version number] Oracle VirtualBox Extension Pack". Once downloaded, click on the executable and go through default installation.
7. Now, click on the Kali 7-zip executable. Follow default installation instructions.
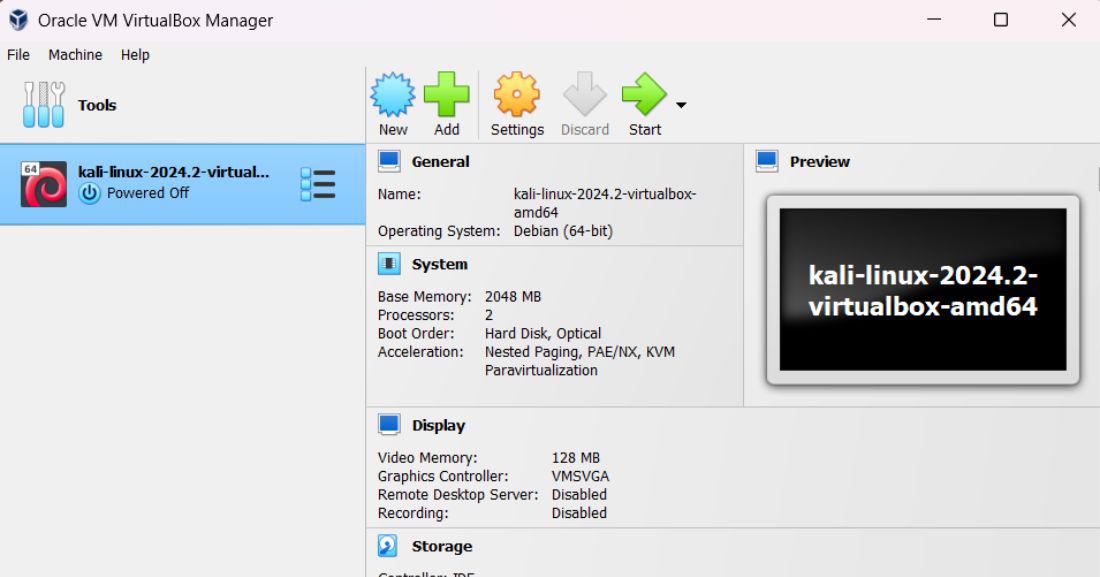
8. Then, click on the "kali-linux-amd" zip file and hit extract all. After extraction is complete, head over the virtual box application from before and hit the green plus button. Head inside your newly extracted folder and select the file inside.
9. Click start, and now your Kali Linux should be booted up! (The default username and password is: kali)
Explanation: This is the preconfiguration required to set up our Kali Machine to capture and recognize our wireless adapter. This will be necessary for detecting nearby Wifi access points and SSID's using the WPA2-PSK encyrption.
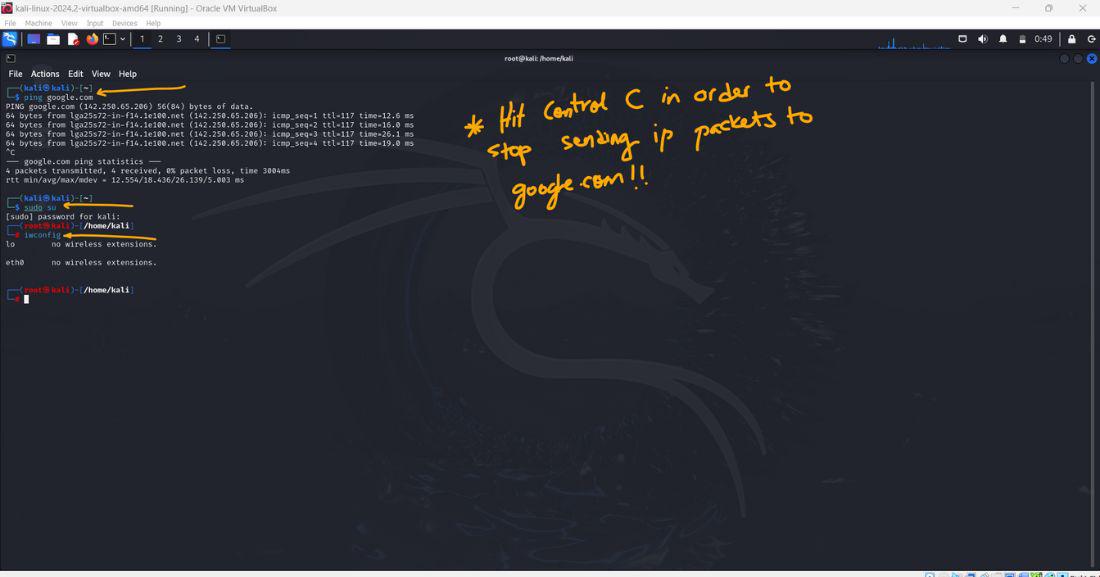
At this point your Kali Linux machine works just like any other computer and can be tested by pinging, let's say google.com (Hit Control C in order to stop execution when you're ready). Now, let's get Fluxion up and running on our Kali Linux machine.
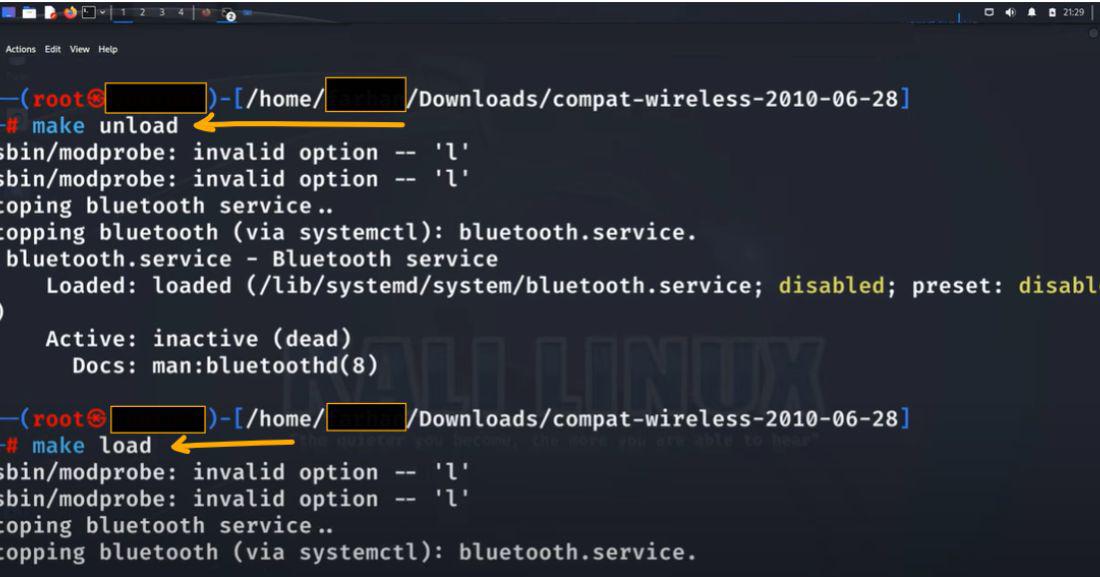
1. First, run the command "sudo su" for acting as a root user
Then, type "iwconfig" -- this is to check if you already have WLAN() set up on your Linux Machine (NOTE: If you just downloaded Kali, make sure you do these steps)
If it shows up as WLAN0 and Eth0 are not connected/found, then go into firefox on Kali and go to this link: "https://mirror2.openwrt.org/sources/"
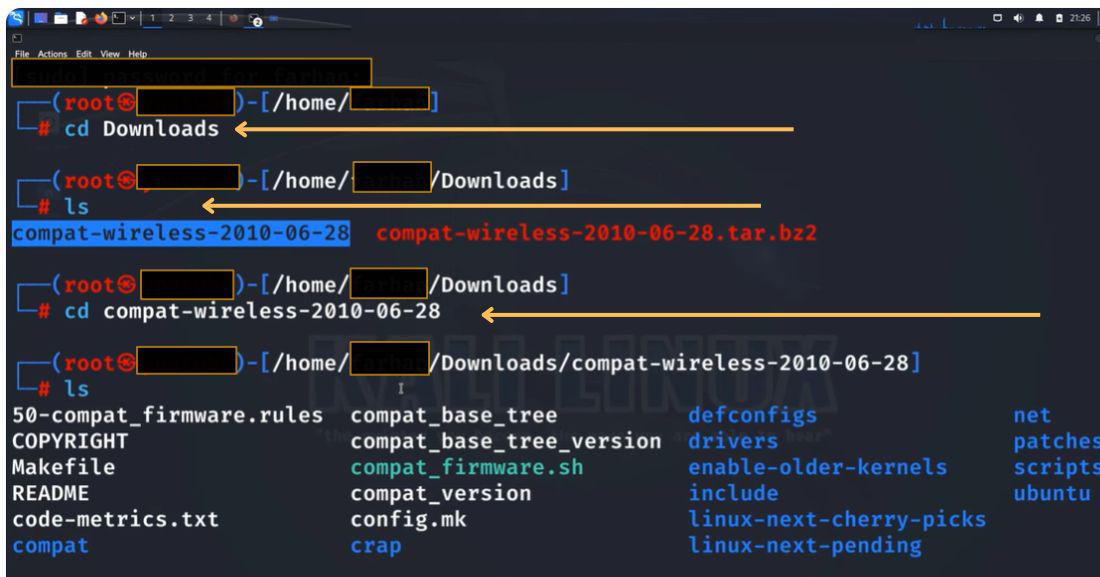
Then, use Ctrl F to look for: "compat-wireless-2010-06-28.tar.bz2". Hit download and then extract the file from the Zip.
Next, go back to your Kali terminal and run: "cd Downloads" -- This is where your downloaded compat-wireless will be stored (unless stored elsewhere, in which case, navigate to that directory).
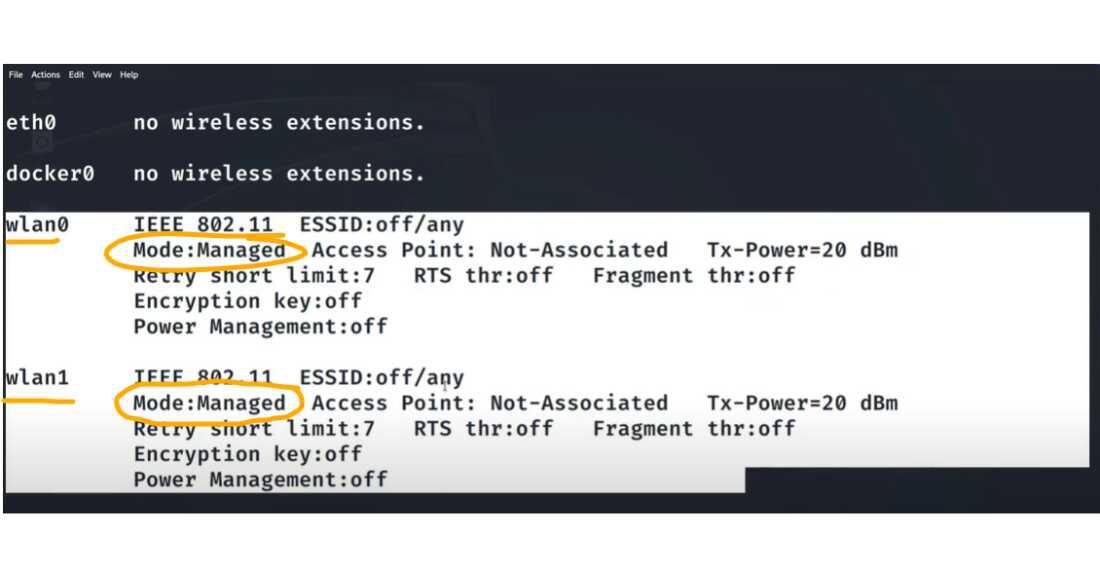
Now, if you type "iwconfig", you should be able to see your WLAN() connected!
2. Make sure you go back to your starting directory (ie: run the command: "cd ..").
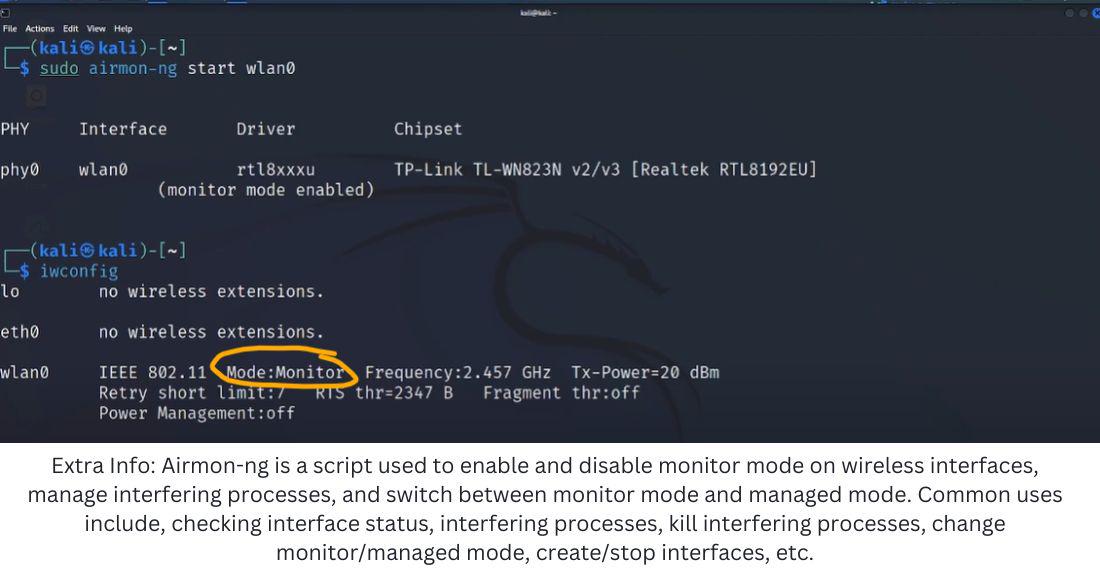
3. Next, type "iwconfig" again to check if wlan0 is on managed or monitor mode (you will require monitor mode in order to run Fluxion). If not on monitor mode, then follow these steps:
Explanation: This is the tool we'll be using to hack into the WPA2 passkey protected network. To do so, we first need to install it and have it running locally on our virtual machine.
4. Copy this command into the Kali terminal: "git clone https://github.com/FluxionNetwork/fluxion"
5. Run the command: "cd fluxion" --> This goes inside the locally 'installed' Fluxion tool directory
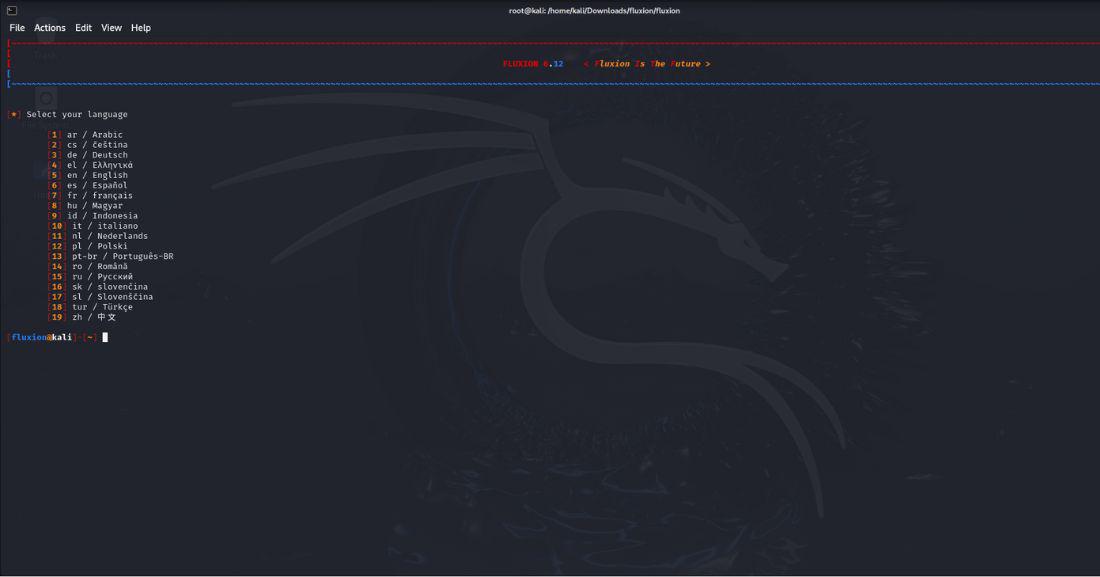
6. Then run: "./fluxion.sh" -- If you're missing the dependencies needed (shows in at the bottom in red, run the command: "./fluxion.sh -i" to install these dependencies
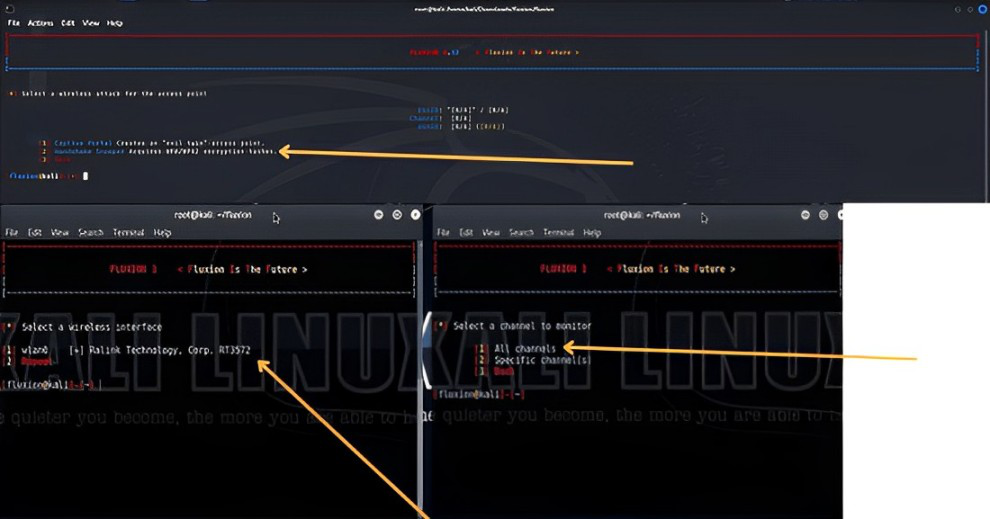
7. You will be then prompted to choose your language. After, you will be given a screen with a couple of options. Make sure you choose to use the "Handshake Snooper'. Then select the option that shows: "wlan0mon". Select the options to scan for "All channels for 2.4 GHz and 5 GHz".
8. After a couple of seconds, it should be picking up on WLAN networks near you. When you close out of that separate window, Fluxion will automatically print the SSID (network names) and their security level.
9. Select the one you want to hack into (You can do this by typing in the corresponding number of the network SSID). Then select "Handshake Snooper" (this will create the fake Access Point for gathering the credential which can then be used to later create a captive portal.
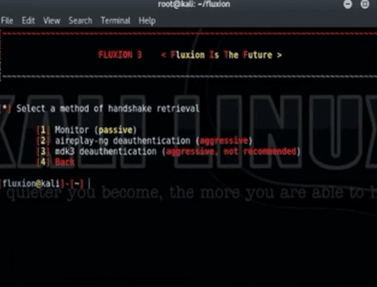
10. Next, you will see the options "agressive deauthentication" vs. a "passive" monitor. A passive monitor just waits for the client to disconnect and reconnect to the wifi whereas a agressive deauth kicks them off the wifi. There's no way to check if the deauth actually runs, but is a process worth trying (Runs around 90% of the time - Some routers however do have it patched).
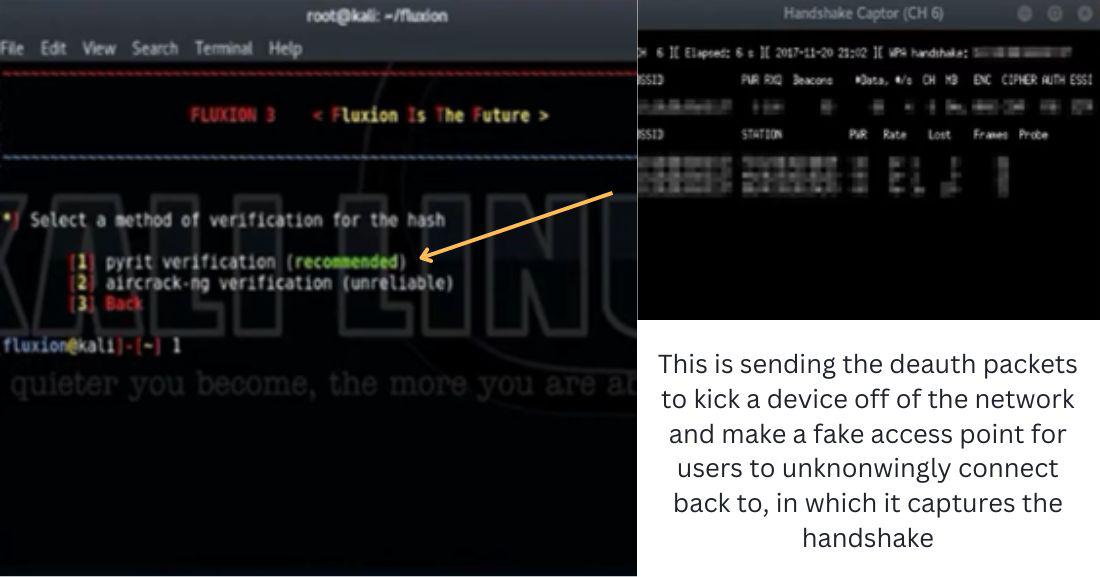
11. Then choose the "pyrit-verification" -- This will load up the windows that will send the deauth packets -- This kicks off the device from the router and reconnected, but now Fluxion has collected the handshake to the router
12. If you go into your file finder --> Fluxion --> attacks folder --> handshakes: You will see the handshake file. This is REALLY important and will be used for launching a Captive Portal.
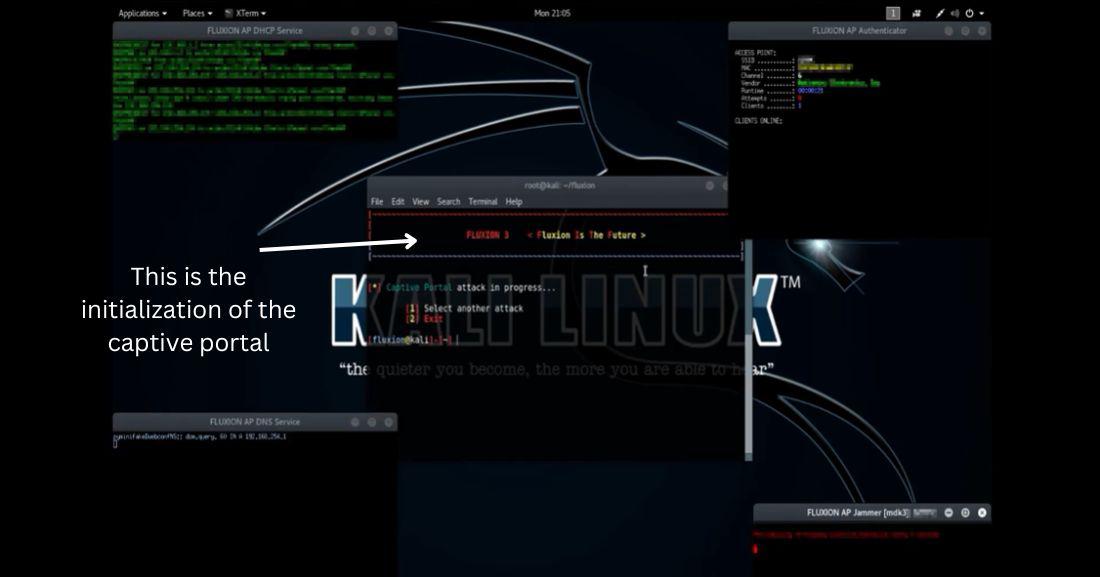
13. Head back to the terminal and select another attack: "Captive Portal". Now pick the option "wlan0". Select the "Rogue AP - hostapd". It will automatically load up the handshake file and hit: "pyrit-verification"
14. Now, you can detect or create an SSL certificate. I'm going to go with the option. This leads to many options. I'm going to use the "Generic - English" portal.
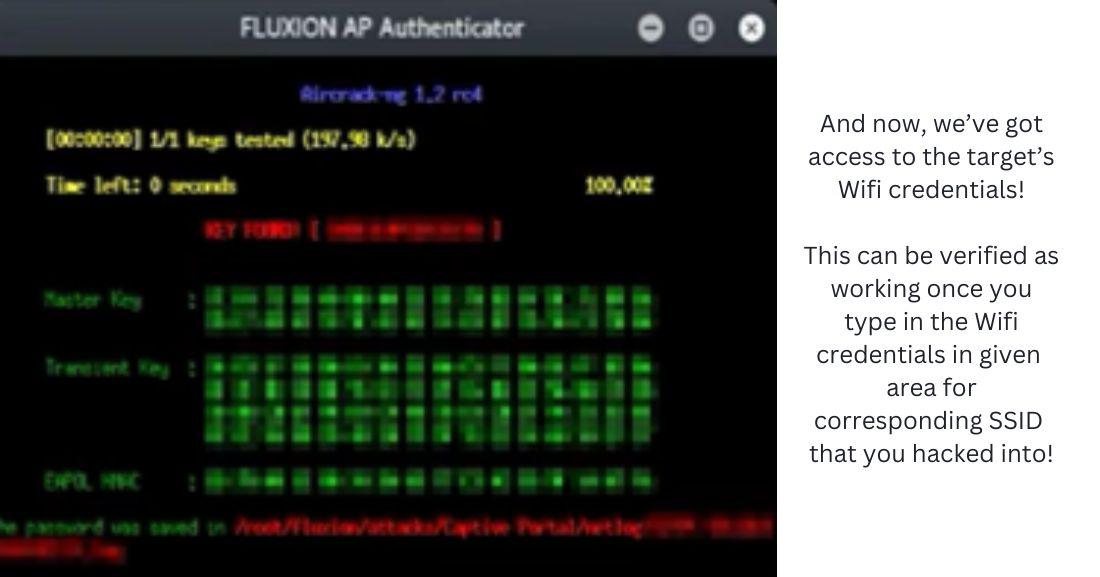
15. Now, Fluxion will have found the Wi-Fi password and kick the client device off of the Captive Portal and put it back to the original access point. With that, we've officially hacked into a WLAN network!
If you've made this far, congratulations! You've hacked a WLAN network. The ease with which public Wi-Fi networks and home networks can be compromised underscores the importance of awareness and robust security practices. The demonstration highlights potential vulnerabilities in WPA2-PSK networks. While ethical hacking tools like Fluxion are essential for identifying and mitigating security weaknesses, they must be used responsibly and within legal boundaries. Always ensure your networks are well-protected and be cautious when connecting to public Wi-Fi. Understanding these threats is the first step towards enhancing our digital security and safeguarding personal information.
Please leave a comment or question down below!
NOTE: The information provided in this article is intended solely for educational purposes and to raise awareness about Wi-Fi security vulnerabilities. Ethical hacking is about understanding and improving security systems, not exploiting them. Unauthorized access to networks is illegal and punishable by law. Always ensure you have explicit permission before attempting any security testing on networks or systems.