 |
VOOZH | about |
|
VOOZH | about |
In Ubuntu, when the user logs in, the system can be configured to automatically log in without requiring a password. This feature is convenient for single-user systems or in situations where security is not a primary concern. However, there are cases where you may want to disable auto-login to enhance system security or enforce user authentication. In this article, we will explore two different methods to Disable Auto Login in Ubuntu.
How to Disable Auto Login in Ubuntu
In the very first step, we need to have an active terminal, through which the entire profile of profiling will be done. In Ubuntu, we can open the terminal by navigating to the Applications Menu or by using the Keyboard shortcut "Ctrl + ALT + T" to open the terminal.
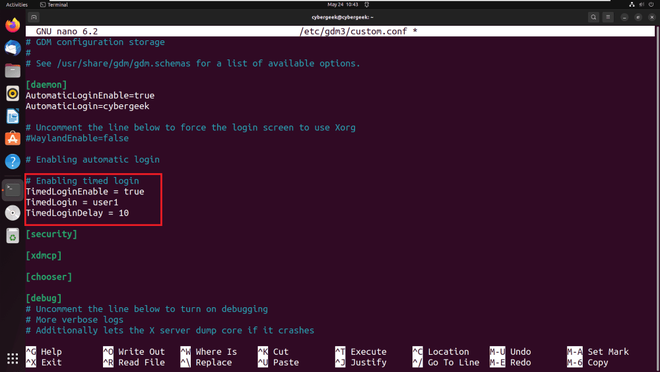
To open the configuration file for GNOME Display Manager (GDM) in Ubuntu, use the command sudo nano /etc/gdm3/custom.conf. This command opens the file in the Nano text editor with administrative privileges, allowing you to make changes to the auto-login settings.
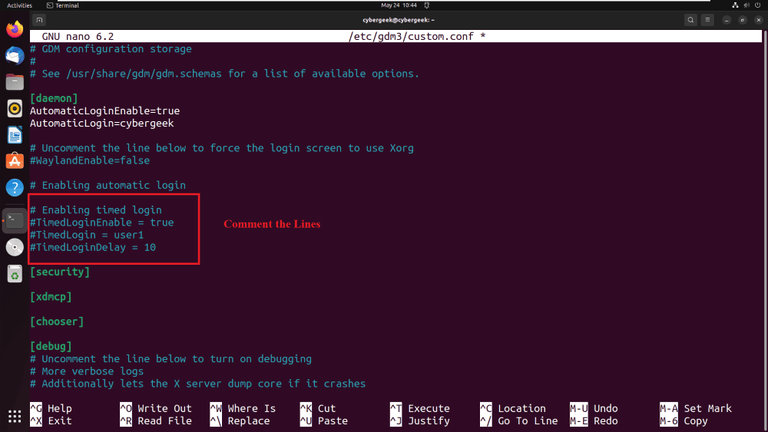
sudo nano /etc/gdm3/custom.conf In the opened /etc/gdm3/custom.conf file, locate the lines related to auto-login settings (usually under the [daemon] section) and comment them out by adding a # at the beginning of each line. This action disables the auto-login feature in Ubuntu's GNOME Display Manager.
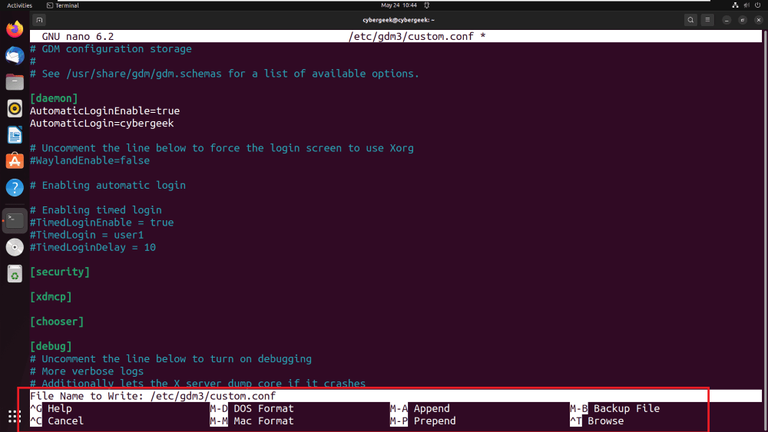
To save the changes made in the /etc/gdm3/custom.conf file using the Nano editor, press Ctrl + O to write the changes to the file, then press Enter. Next, press Ctrl + X to exit the editor. This ensures that the modified configuration file is saved and the editor is closed.
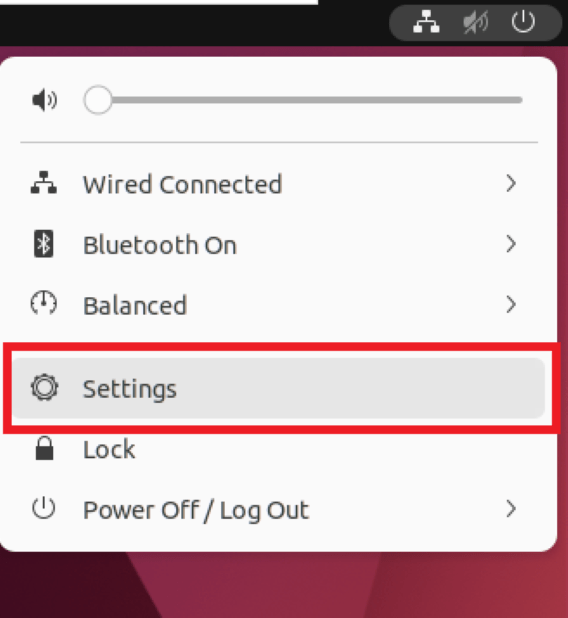
To open the Settings in Ubuntu using the graphical user interface (GUI), click on the Activities menu at the top-left corner of the screen or press the Super key (Windows key). Then, type "Settings" in the search bar and click on the "Settings" icon when it appears in the search results. This will open the Settings application, where you can configure various system settings.
After opening the Settings application, navigate to the "Users" section. You can usually find this section under the "Details," "Accounts," or "Users & Groups" category, depending on the Ubuntu version and desktop environment you are using. In the "Users" section, you can manage user accounts, passwords, and authentication settings.
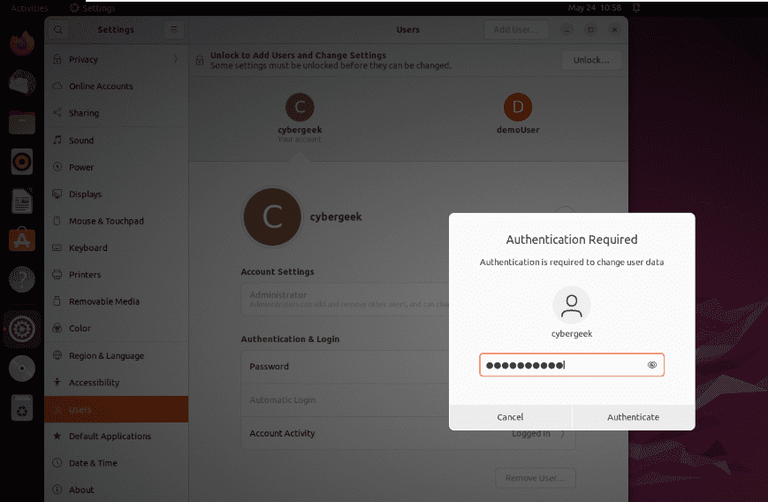
In the "Settings" application, go to the "Users" section and find the auto-login or authentication settings. If these settings are locked, click the lock icon, enter your password to unlock, and then disable auto-login to enforce user authentication on login.
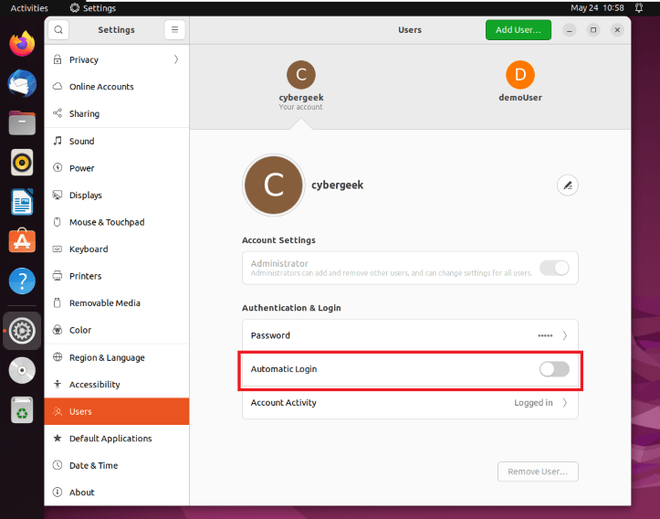
After unlocking the auto-login settings in the "Users" section of the "Settings" application, find the option related to auto-login or automatic login. Toggle the switch or checkbox to disable auto-login for your user account. This action ensures that your system will require manual authentication on login, enhancing security.
In conclusion, disabling auto-login in Ubuntu enhances security by requiring manual authentication on login, protecting against unauthorized access. This can be done either through the configuration file or the GUI settings, providing flexibility based on user preferences. Reverting to auto-login is also straightforward if needed, ensuring usability without compromising security measures.