 |
VOOZH | about |
|
VOOZH | about |
In this article, we will look into the process of setting up Apache Web Server in AWS EC2 Linux Instance.This tutorial has been done on a system running Windows 10 Home (Version 20H2).
The steps taken to complete this tutorial are being stated below:
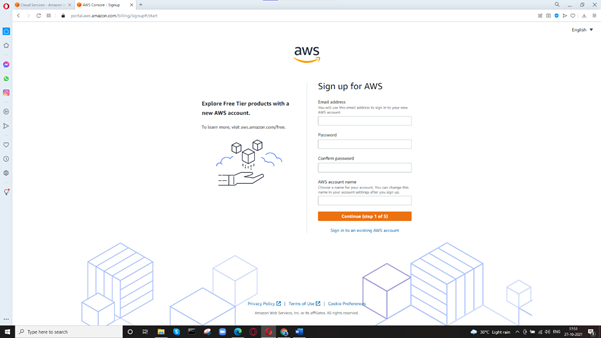
Step 1: Go to portal.aws.amazon.com to create a new AWS account. Provide email address and password. Click Continue.
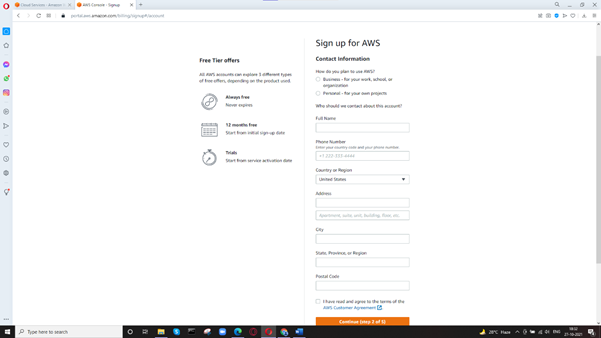
👁 ImageStep 2: Provide other details like Name, Phone Number, etc., and click Continue when done.
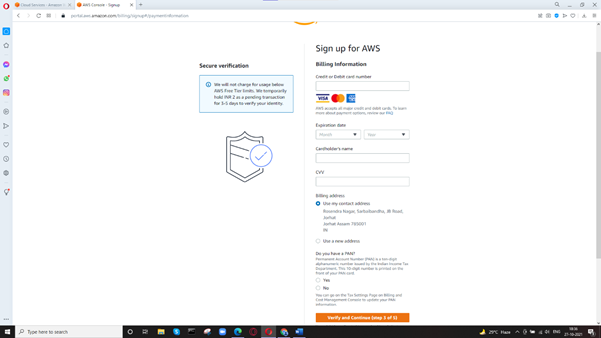
👁 ImageStep 3: Provide billing information and click ‘Verify and Continue’.
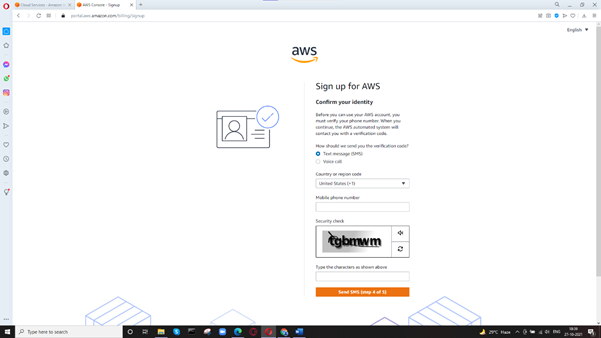
👁 ImageStep 4: Confirm your identity and click ‘Send SMS’. Confirm the OTP.
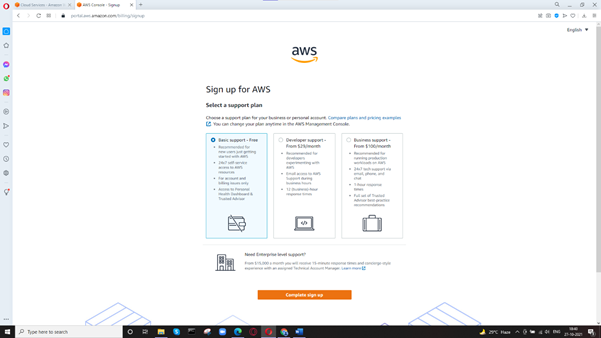
👁 ImageStep 5: Select a plan. Here, we choose ‘Basic support – Free’ and click on ‘Complete sign up’.
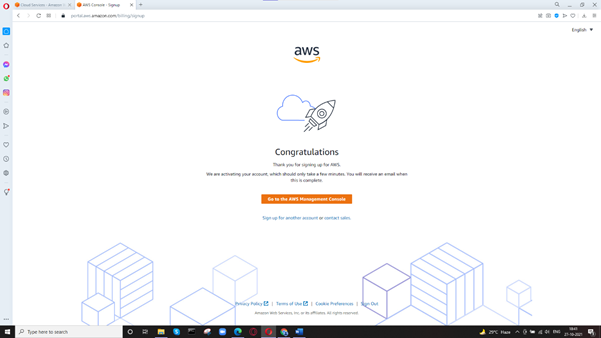
👁 ImageStep 6: AWS account has been successfully created. Click ‘Go to the AWS Management Console.
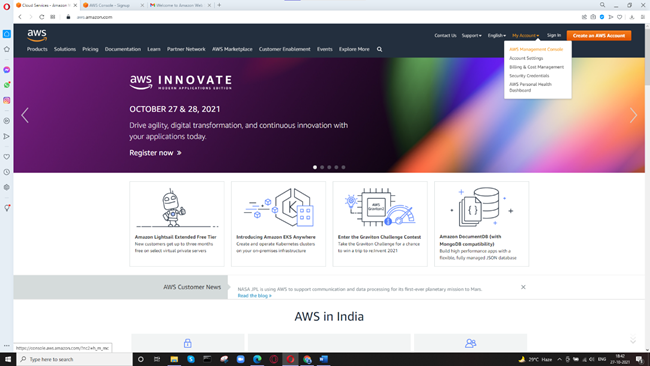
👁 ImageStep 7: Click on My Account > AWS Management Console.
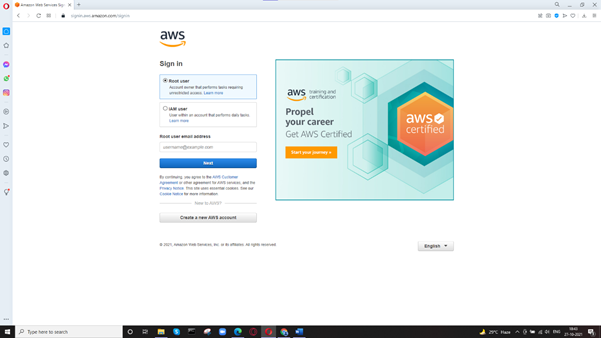
👁 ImageStep 8: Sign in as Root User.
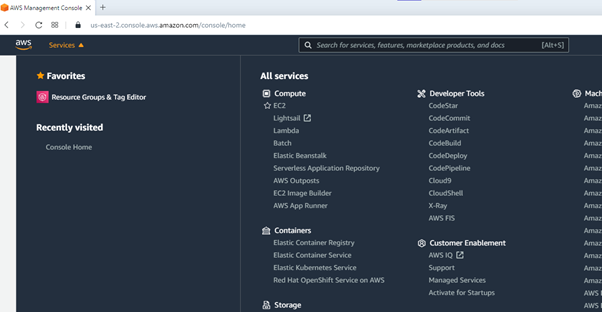
👁 ImageStep 9: Navigate to Services and select EC2 under Compute category.
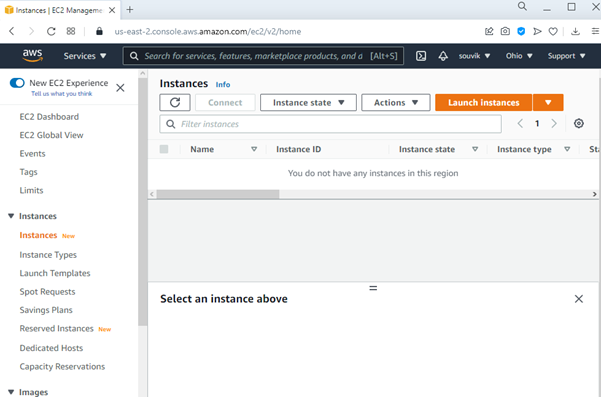
👁 ImageStep 10: On the left pane, click on Instances under the Instances section. Click ‘Launch instances’.
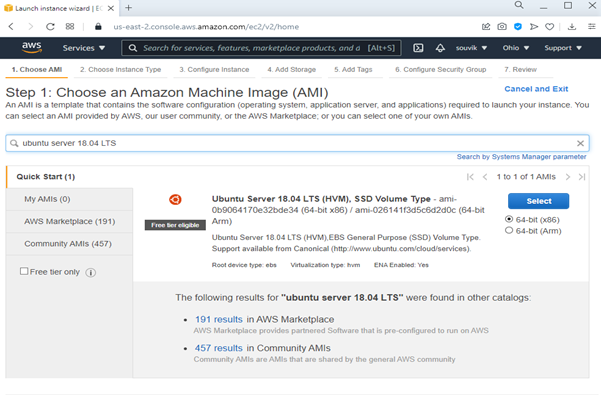
👁 ImageStep 11: Now, we choose an Amazon Machine Image (AMI). Search for ‘ubuntu server 18.04 LTS’ and click Select.
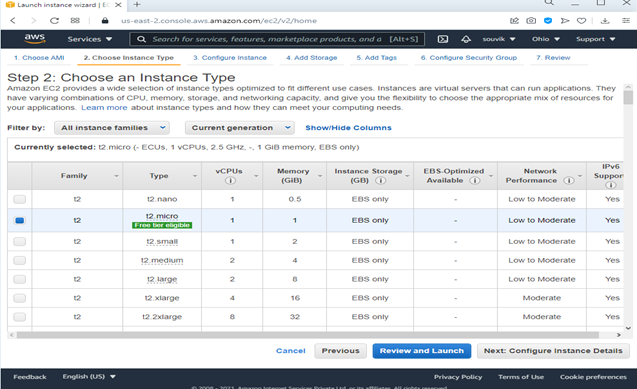
👁 ImageStep 12: Choose Instance Type. Here, we have chosen ‘t2.micro which’ is Free tier eligible. Click ‘Next: Configure Instance Details.
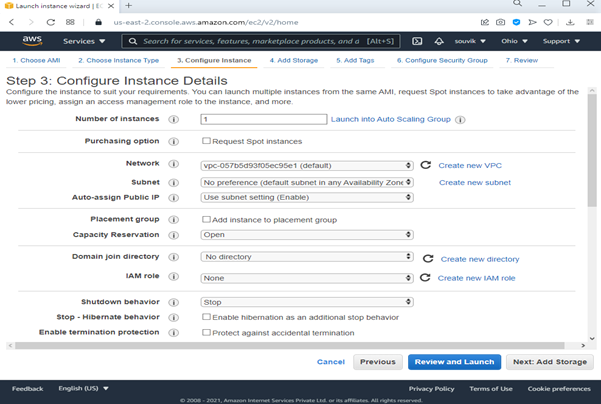
👁 ImageStep 13: Don’t change anything and click ‘Next: Add Storage.
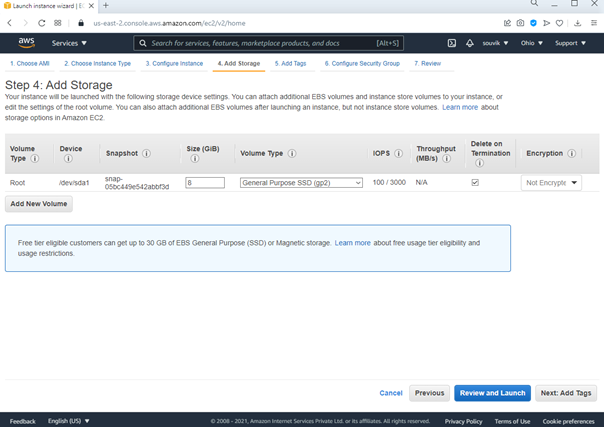
👁 ImageStep 14: Set the size as 8 GiB and click ‘Next: Add Tags’.
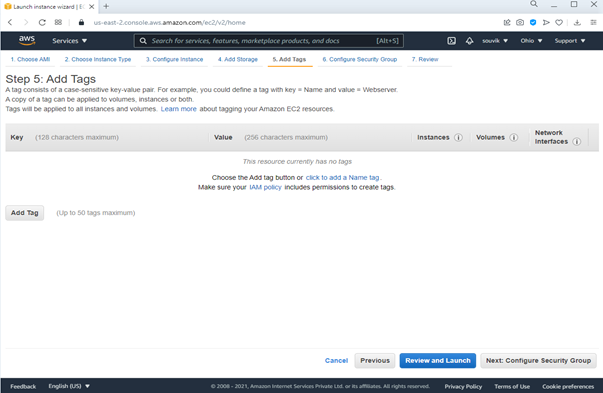
👁 ImageStep 15: Click ‘Next: Configure Security Group’.
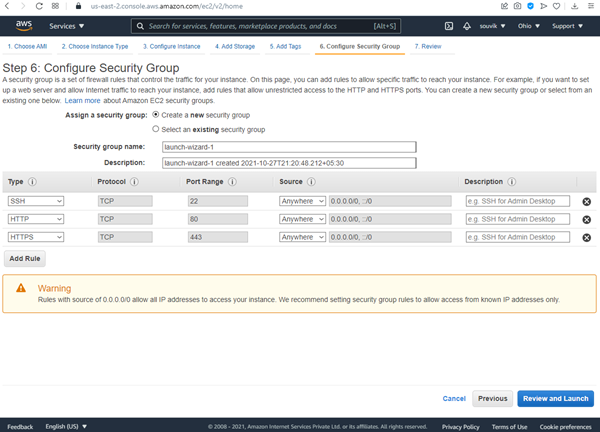
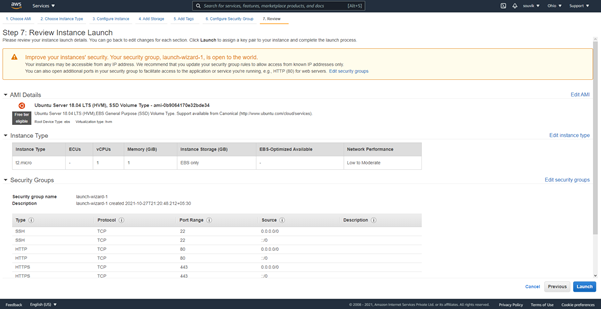
👁 ImageStep 16: Choose ‘Create a new security group’ and add SSH, HTTP, and HTTPS Types. Click ‘Review and Launch’ when done.
👁 ImageStep 17: Click Launch.
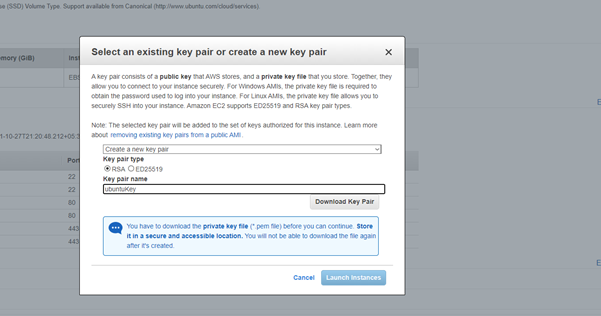
👁 ImageStep 18: Select ‘Create a new key pair’ and enter any key pair name in the given field. Leave the ‘Key pair type’ as RSA. Click ‘Download Key Pair’ to download the .pem file. Store it in a secure location as it will be used later. Click ‘Launch Instances’.
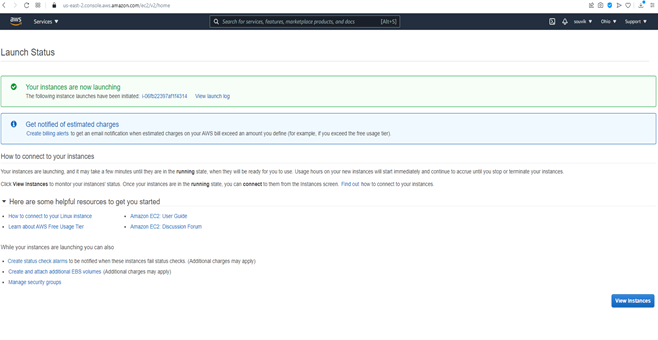
👁 ImageStep 19: Click ‘View Instances’.
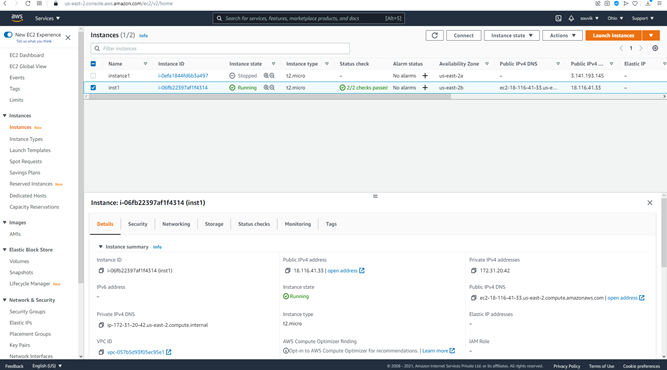
👁 ImageStep 20: We can now see our instance named ‘inst1’ running.
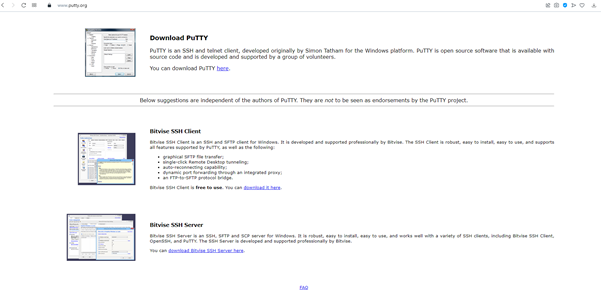
👁 ImageStep 21: Go to putty.org to download PuTTY. Click on ‘here’.
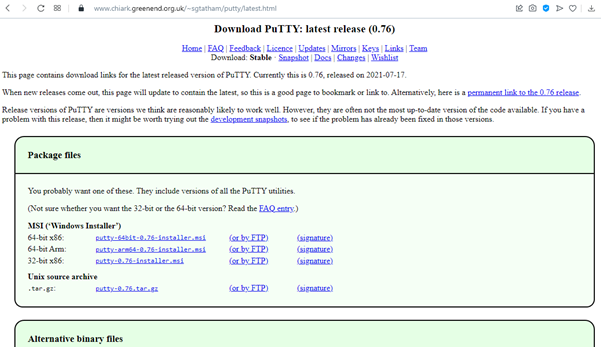
👁 ImageStep 22: Under MSI (‘Windows Installer’) click the first link (next to 64-bit x86) to download PuTTY.
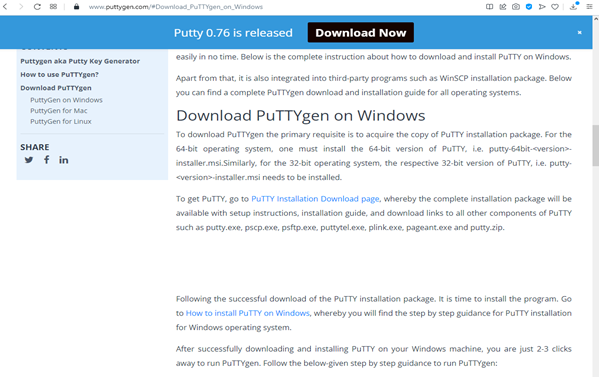
👁 ImageStep 23: Go to puttygen.com to download PuTTYgen. Click on ‘PuTTY Installation Download page’.
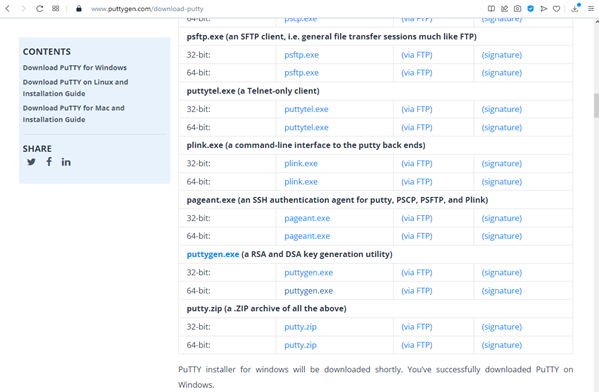
👁 ImageStep 24: Under ‘puttygen.exe’ section click the ‘puttygen.exe’ link next to 64-bit to download it.
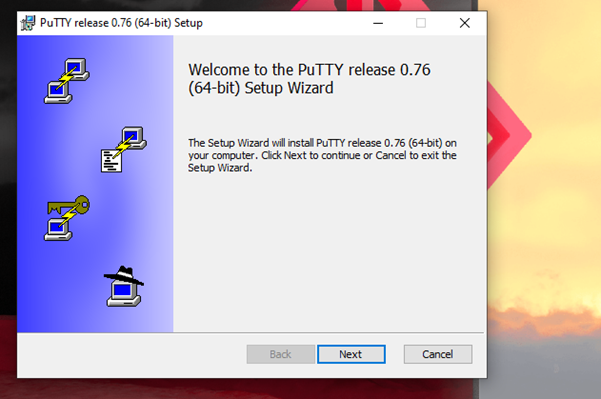
👁 ImageStep 25: Launch the setup to install PuTTY. Click Next.
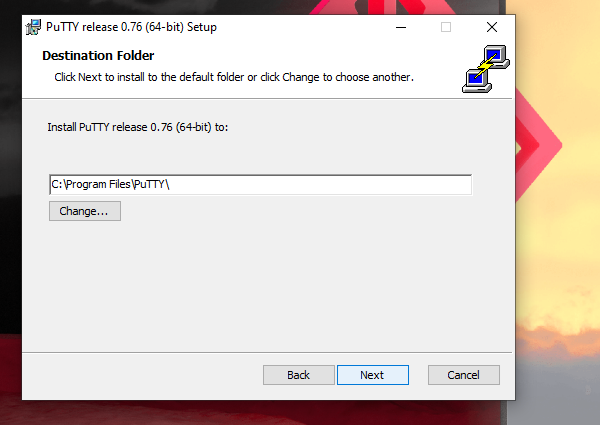
👁 ImageStep 26: Specify the install location for PuTTY. Click Next.
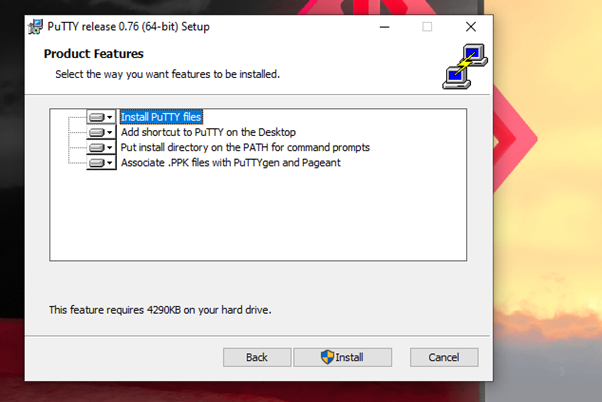
👁 ImageStep 27: Click Install.
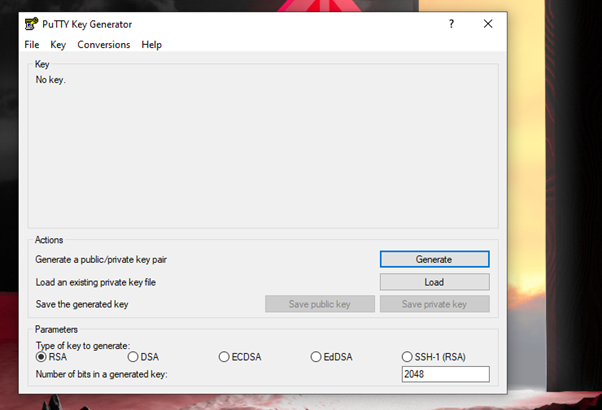
👁 ImageStep 28: After installing PuTTY, launch the PuTTYgen software. The following window appears.
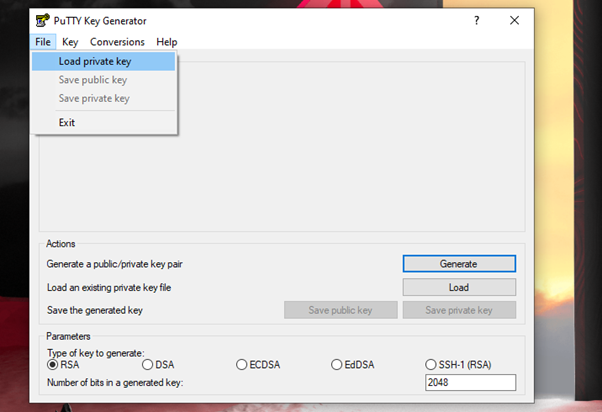
👁 ImageStep 29: Click File > Load private key.
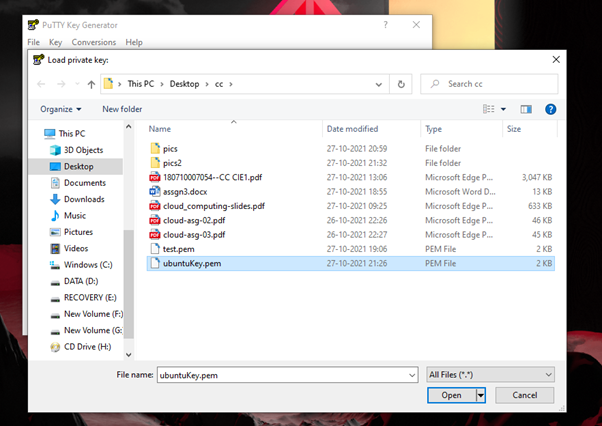
👁 ImageStep 30: Select the previously downloaded .pem file (ubuntuKey.pem) and click Open.
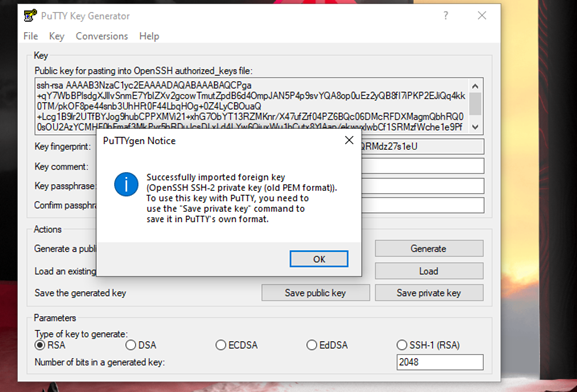
👁 ImageStep 31: Click Ok.
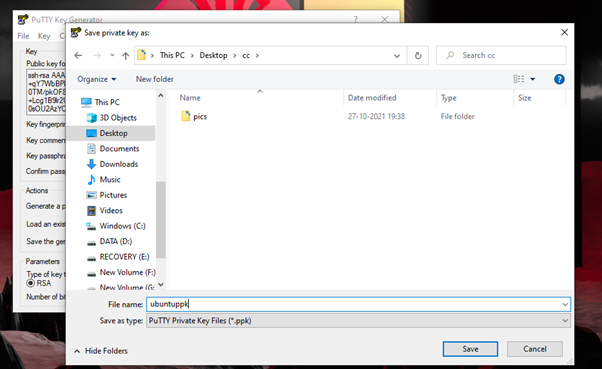
👁 ImageStep 32: Click ‘Save private key’.
👁 ImageStep 33: Enter a name for the generated .ppk file and click Save.
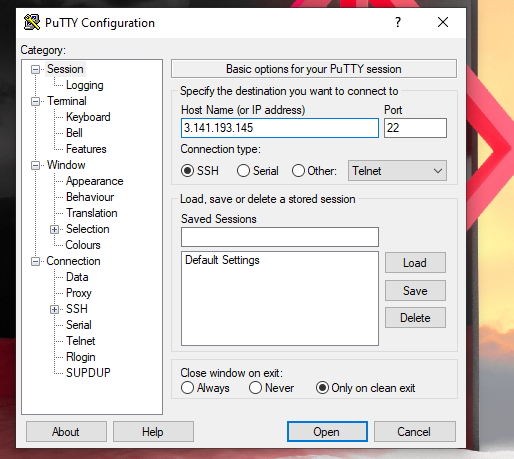
👁 ImageStep 34: Open PuTTY and enter the public IP of the instance in Host Name filed and keep Port as 22.
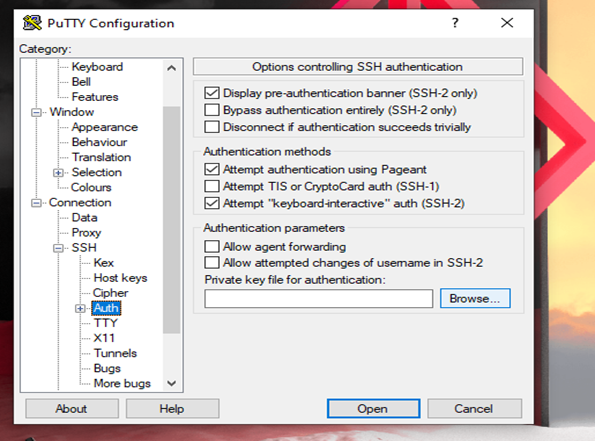
👁 ImageStep 35: Select Auth under SSH and click on Browse.
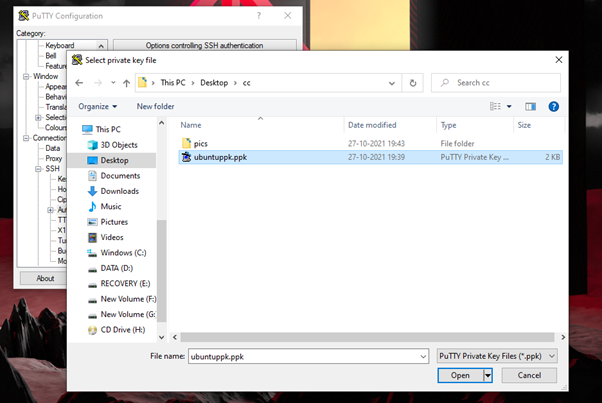
👁 ImageStep 36: Select the .ppk file (ubuntuppk.ppk) and click Open.
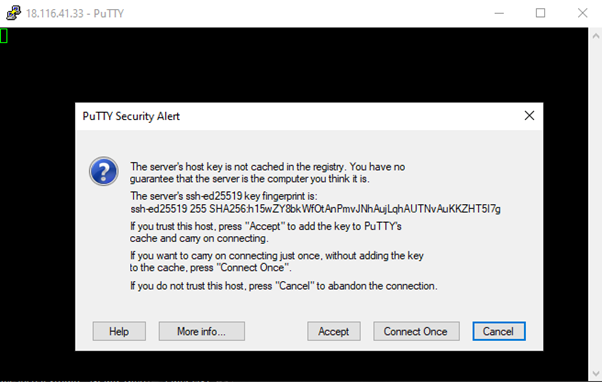
👁 ImageStep 37: Click Accept.
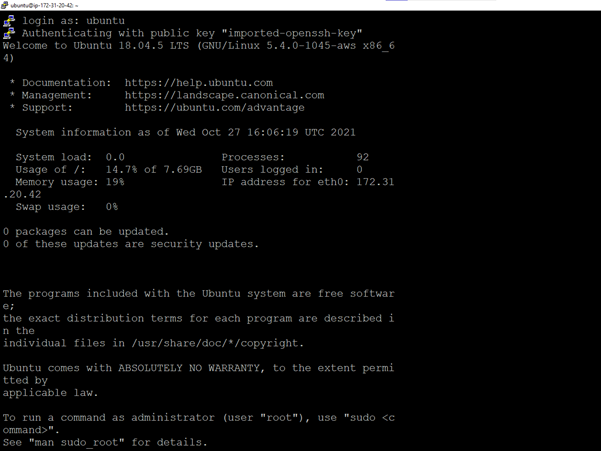
👁 ImageStep 38: Login as ‘ubuntu’.
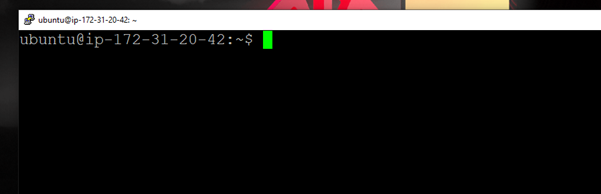
👁 ImageStep 39: Ubuntu has started as we can see below.
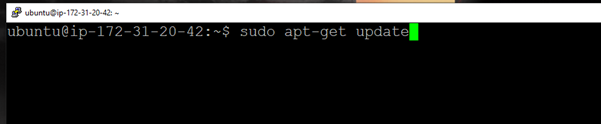
👁 ImageStep 40: Update packages with the command ‘sudo apt-get update'.
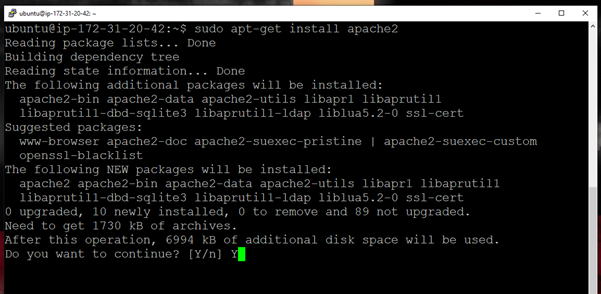
👁 ImageStep 41: Install Apache2 using ‘sudo apt-get install apache2’.
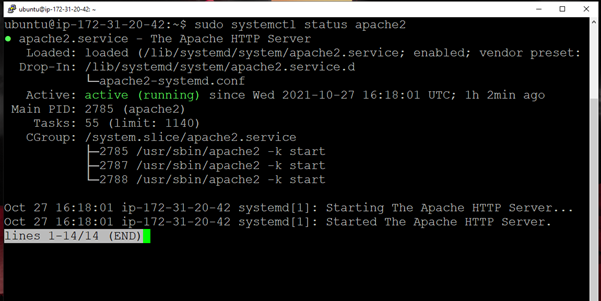
👁 ImageStep 42: Verify that Apache is running using the command ‘sudo systemctl status apache2’.
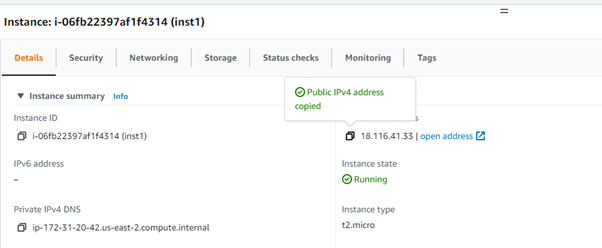
👁 ImageStep 43: Copy the public IP of the EC2 instance and paste it on a browser of the host OS.
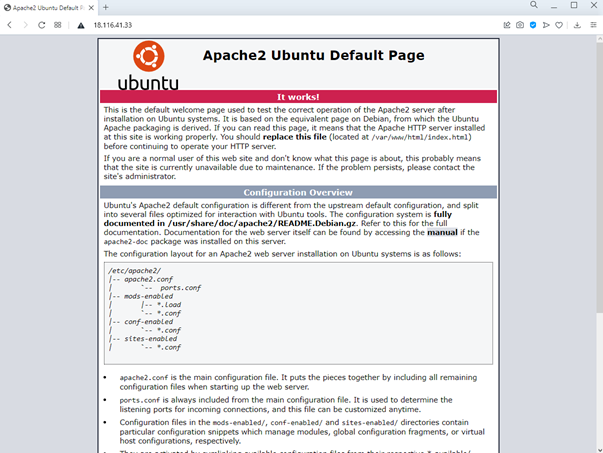
👁 ImageStep 44: The Apache2 Ubuntu Default Page appears.
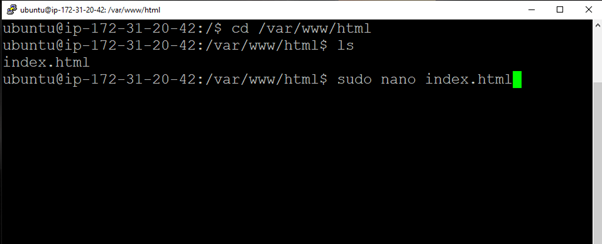
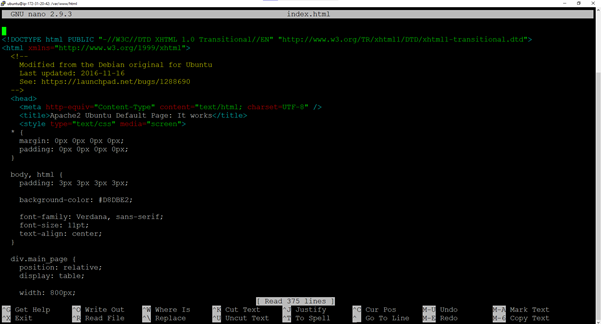
👁 ImageStep 45: cd into /var/www/html and open the index.html file in the nano editor.
👁 ImageStep 46: This is the default code. We need to replace this code with our own code for the sample webpage.
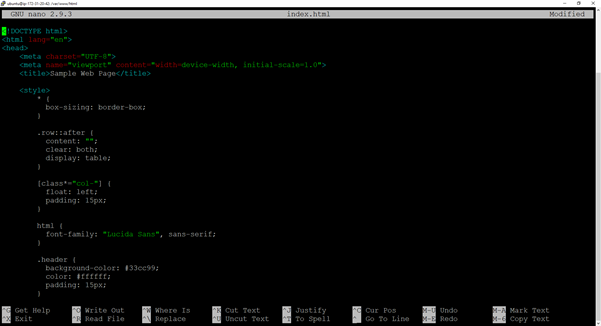
👁 ImageStep 47: The default code is replaced with our own code in index.html. Save and exit the editor.
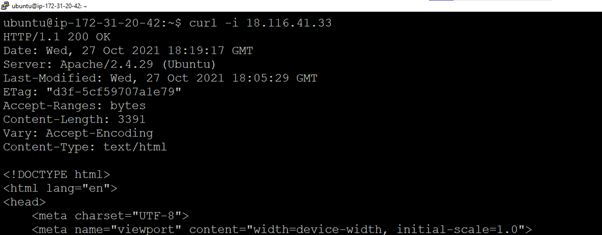
👁 ImageStep 48: We can verify that we are able to access the hosted webpage using ‘curl’ inside the instance.
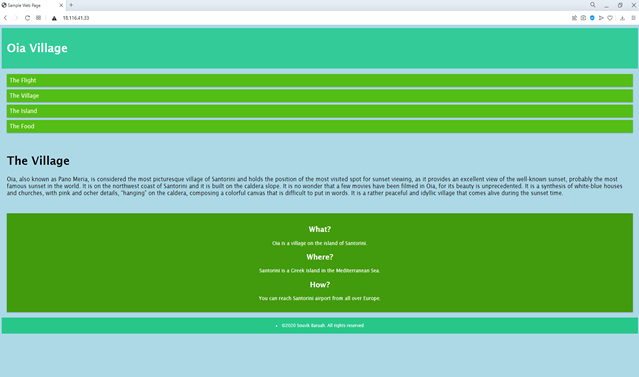
👁 ImageStep 49: The hosted web page can also be accessed from the host OS as shown.
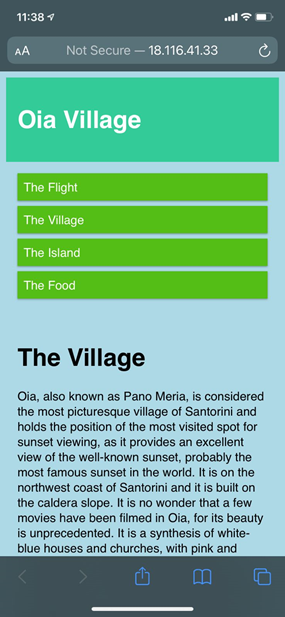
👁 ImageStep 50: The hosted web page can also be accessed by another system (a smartphone – iOS 14.7.1) as shown.
👁 Image