Morphology is known as the broad set of image processing operations that process images based on shapes. It is also known as a tool used for extracting image components that are useful in the representation and description of region shape.
The basic morphological operations are:
Erosion
Dilation
In this article, we will be discussing Erosion.
Erosion:
Erosion shrink-ens the image pixels i.e. it is used for shrinking of element A by using element B.
Erosion removes pixels on object boundaries.:
The value of the output pixel is the minimum value of all the pixels in the neighborhood. A pixel is set to 0 if any of the neighboring pixels have the value 0.
Approach:
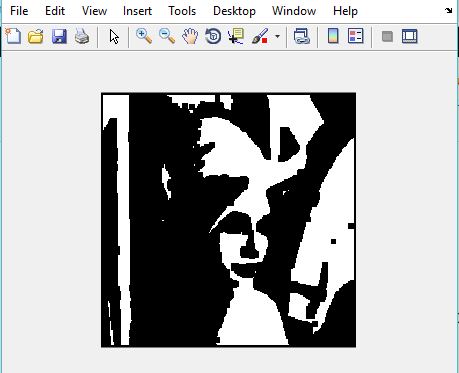
Read the RGB image.
Using function im2bw(), convert the RGB image to a binary image.
Create a structuring element or you can use any predefined mask eg. special('sobel').
Store the number of rows and columns in an array and loop through it.
Create a zero matrix of the size same as the size of our image.
Leaving the boundary pixels start moving the structuring element on the image and start comparing the pixel with the pixels present in the neighborhood.
If the value of the neighborhood pixel is 0, then change the value of that pixel to 0.
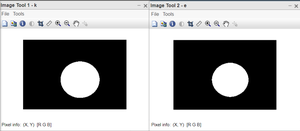
k=imread("erosion_exmp.png"); this line reads the image.
SE=strel('disk',5); this line defines the structuring element.
e=imerode(k,SE); this line applies the erosion operation.
imtool(k,[]); this line displays the original image.
imtool(e,[]); this line displays the eroded image.
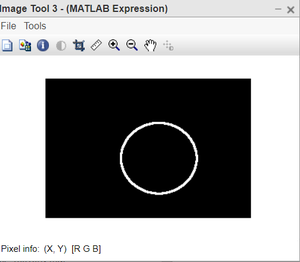
imtool(k-e,[]); this line shows the effective reduction in original image.
The last image shows the extent to which the original image got eroded. We have used the Structuring element of disk-shaped and the image we used is also circular in shape. This gives us the very desired output to understand erosion.
