This brief tutorial is a step-by-step guide on how to develop a REST API using PHP and MySQL. REST API will implement HTTP commands (Get, Post, Put, DELETE) and response will be in form of JSON. For development setup, we will be using the XAMPP while for testing of the API, we will use the Postman app.
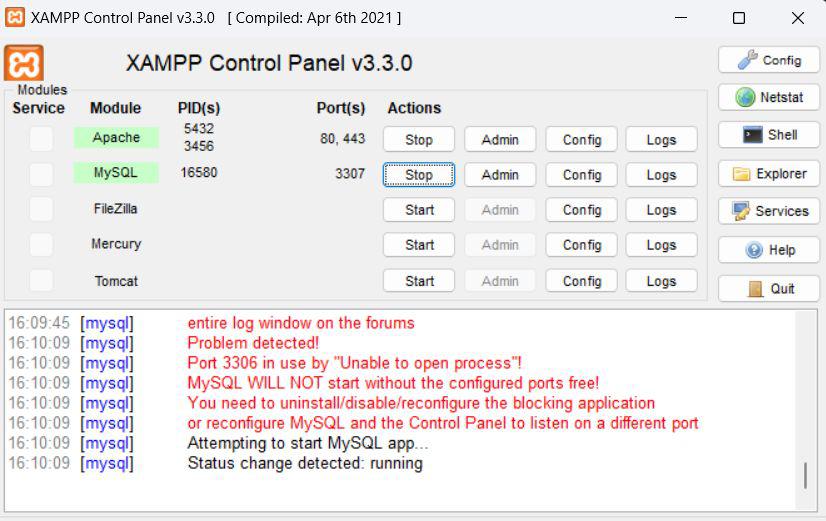
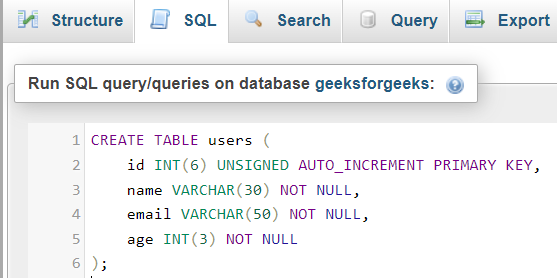
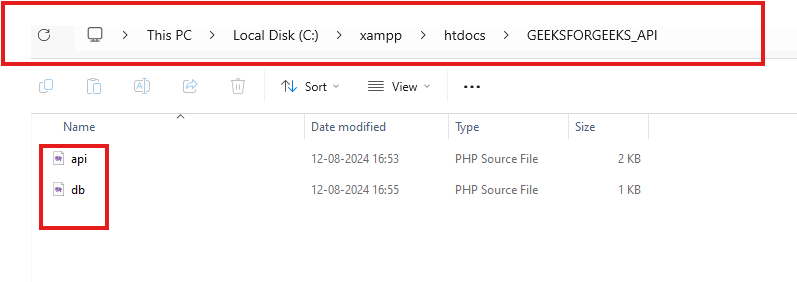
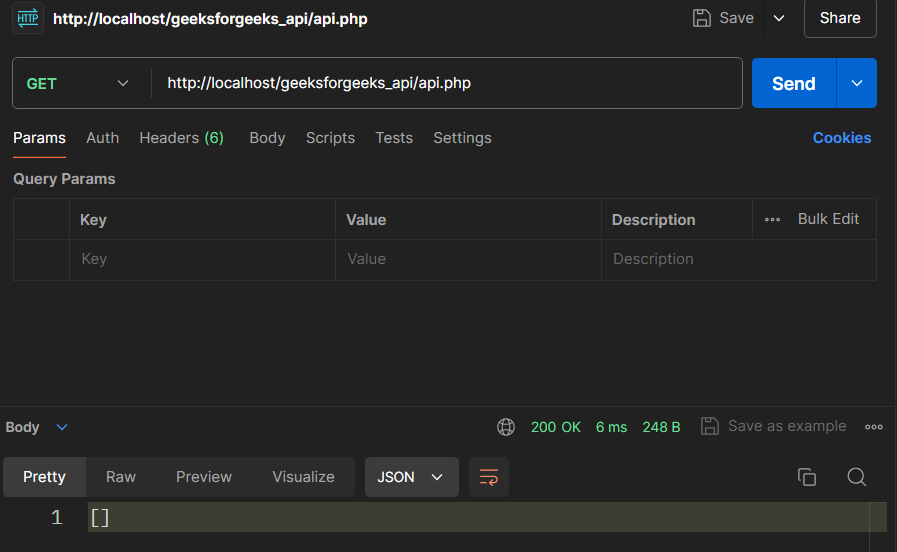
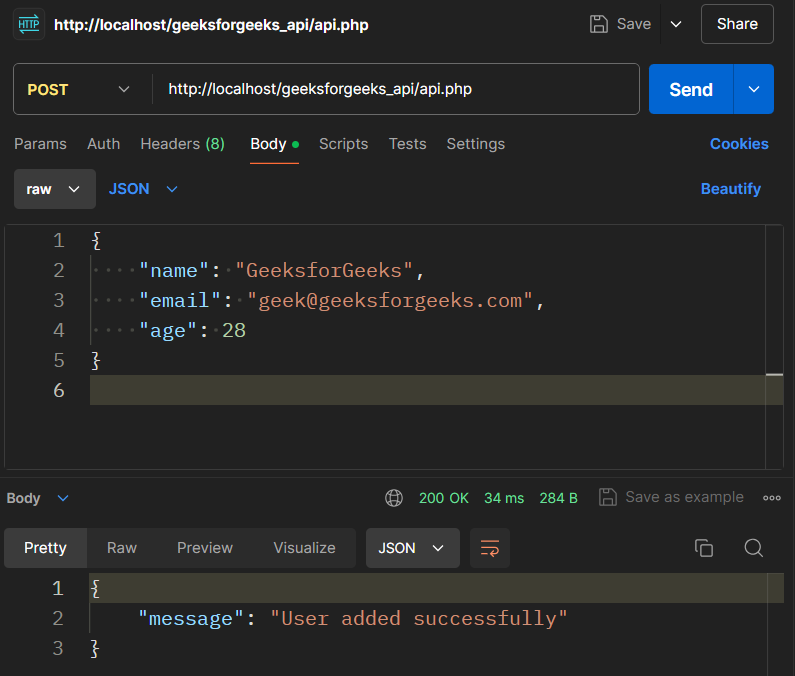
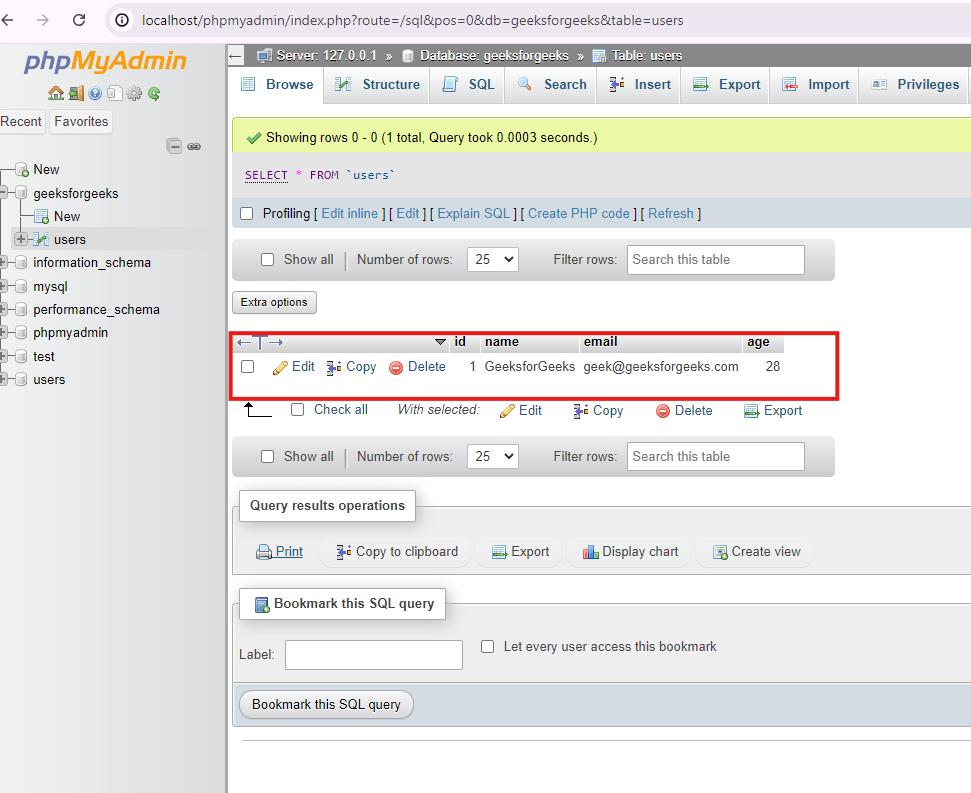
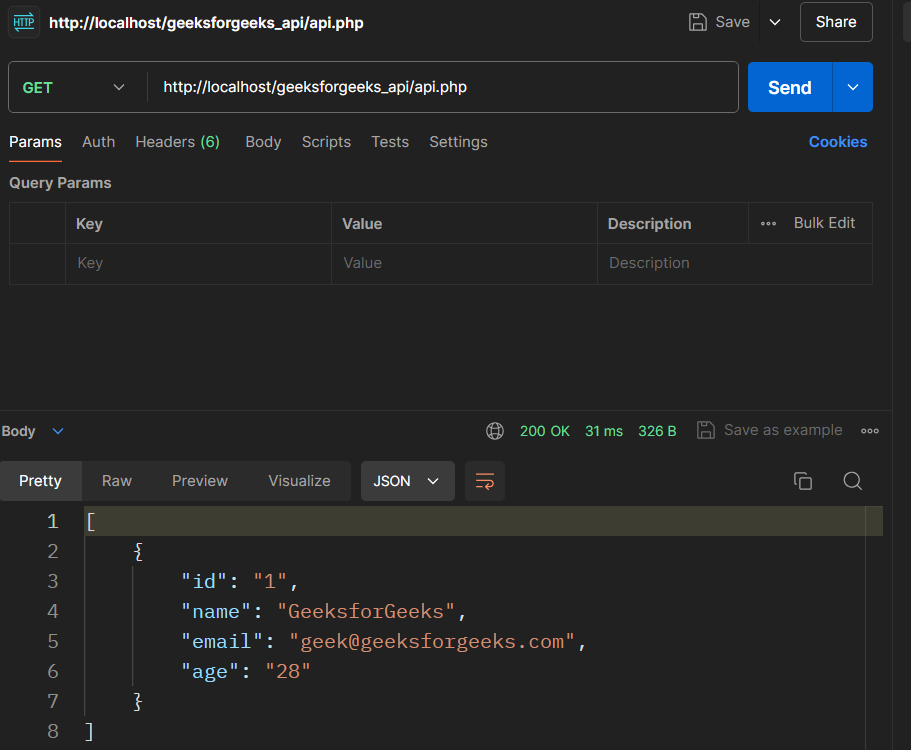
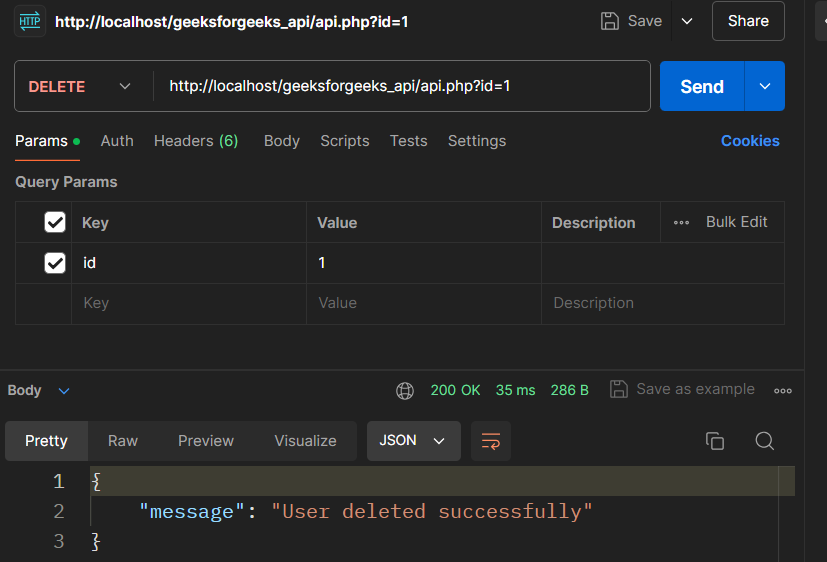
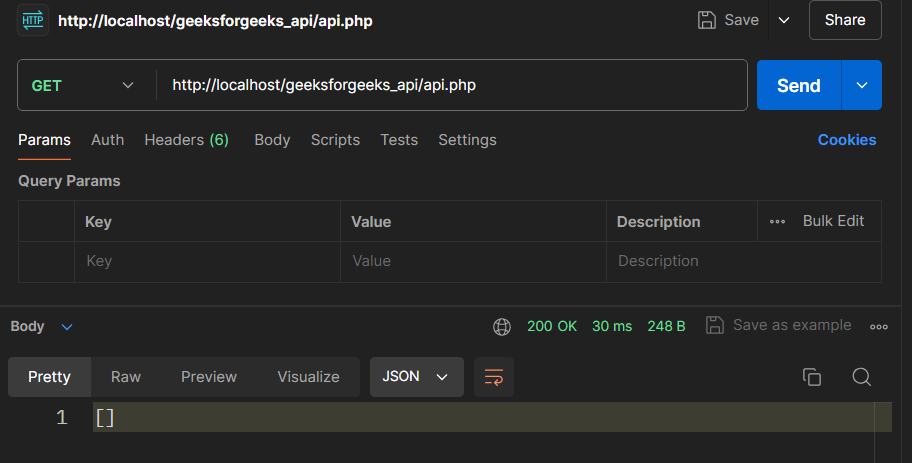
Steps to Build REST API with PHP and MySQL Step 1: Download and Install XAMPP Open the XAMPP official website for download. 👁 xampp Xampp Official Website Download and set up XAMPP; open the XAMPP control panel. 👁 xammpcontrol Xampp Control Panel That completes the installation process of PHP, MySQL, and Apache Server, now start the apache and mysql services. Open a browser and navigate to http://localhost/dashboard. You should see the XAMPP dashboard. Step 2: Create the Database To overcome this, you simply have to type the following address in the address bar of your browser http://localhost/phpmyadmin/ A new database is created on clicking the “New” button available in the sidebar. Type in the new name geeksforgeeks and then click on the “Create” button. 👁 Gfg-db Create geeksforgeeks database Step 3: Create a Table Select the geeksforgeeks database. Click on the "SQL" tab and execute the following SQL code to create a users table CREATE TABLE users ( id INT(6) UNSIGNED AUTO_INCREMENT PRIMARY KEY, name VARCHAR(30) NOT NULL, email VARCHAR(50) NOT NULL, age INT (3) NOT NULL); 👁 db_name Create users table Step 4: Create the Project Folder Navigate to the 'htdocs' directory in your XAMPP installation (usually 'C:\xampp\htdocs' ). Set up a new folder that will be labeled geeksforgeeks_api. 👁 xamppppppppp Go to the location and add files Step 5: Create a Database Connection File Navigate to the folder geeksforgeeks_api and in that make a new file called db. php. Add the following code to establish a connection to the MySQL database: 3. Create the API File In the root directory of the geeksforgeeks_api, open another file and name it api. php. Add the following code to handle various HTTP methods (GET, POST, PUT, DELETE): After running the installation, it is advised to take the API for a test using the Postman tool. Steps to Test the API using Postman 1. GET Request: Open Postman. Specify the request type to Get. Enter http://localhost/geeksforgeeks_api/api.php at the end of the request URL. Click "Send. " Looking at the JSON response, you should be able to get all the users currently in the database. Screenshots: 👁 get GET REQUEST 2. POST Request: Make the request type to POST instead of GET. Enter http://localhost/geeksforgeeks_api/api.php in the request URL. The “Body” tab can be selected, and under the “Data format”, choose “Raw” that can be “JSON”. Add the following JSON data: { "name": "GeeksforGeeks", "email": "geek@geeksforgeeks.com", "age": 28 } Click "Send. " Post this you should see a success message and the new user should be stored in the database. 👁 post POST REQUEST 👁 POST_DATA-min The data has been added into the darabase GET Request after POST Request: 👁 afterpost GET Request after POST request 3. PUT Request: Alters the request type to PUT. Enter http://localhost/geeksforgeeks_api/api.php?id=1 in the request URL if the user with id=1 is exist. In the "Body" tab, add the updated JSON data: { "name": "Write for GeeksforGeeks", "email": "geeksforgeeks@geeksforgeeks.com", "age": 26 } Click "Send. " There should be a success message and after that, the user information will be modified in the database. 👁 put PUT request in Postman GET Request after PUT Request: 4. DELETE Request: Modify the request type to delete. Enter http://localhost/geeksforgeeks_api/api.php?id=1 of the user with id = 1 added to the request URL (provided there is a user with such ID). Click "Send. " You should be seeing a success message and in the database, the user will be deleted. 👁 delete DELETE REQUEST 2. GET Request after DELETE Request: 👁 afterdelete GET REQUEST AFTER DELETE Conclusion But if you follow the measures that are pointed out in this guide, you can create a REST API yourself, using PHP and MySQL. This is the most flexible of the four methods as it gives the developer full control of the APIs and its instantiation to suit the project being developed. This implies that the API is tested with postman to ensure that all the functionalities are responding as required.
