 |
VOOZH | about |
|
VOOZH | about |
Tables in Google Docs help organize and present information clearly. You can use them to display data, create schedules, and structure content, with simple tools to insert, format, and customize tables.
To insert a Table in Google Docs with rows and columns according to your needs, follow the steps below:
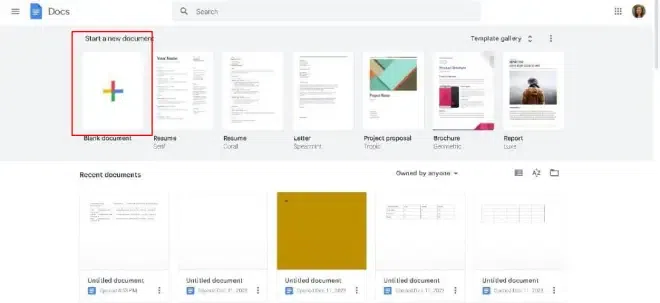
Open your Google Docs and click on Your Blank Page.
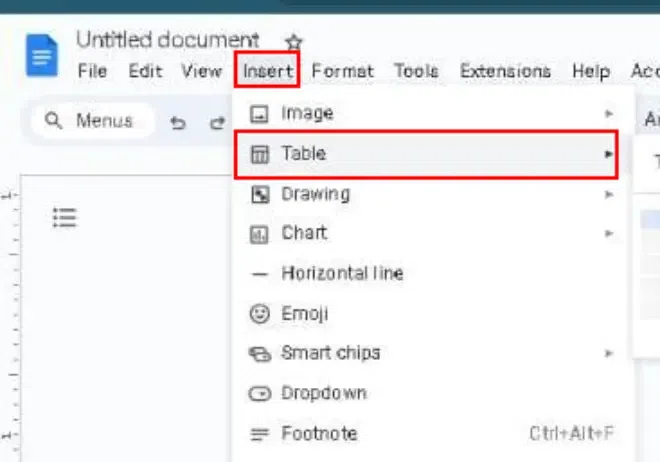
Navigate to the "Insert" menu at the top of the screen. And hover over "Table" in the dropdown menu.
Move your cursor over the grid to select the number of rows and columns for your table. and click Enter.
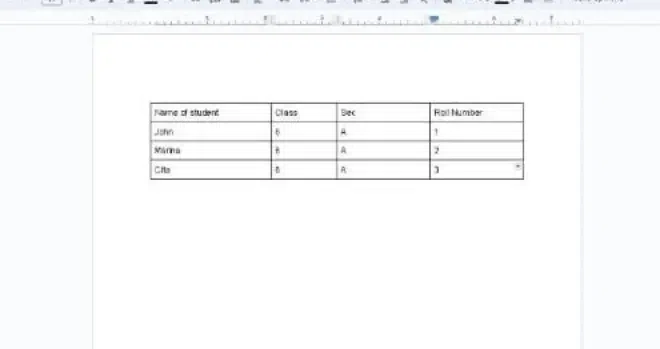
Once you select the row and column for the table and click on enter, the table will appear on Google Docs. Now you can customize it.
Editing tables in Google Docs is as easy as rearranging your furniture! Just like dragging a chair across the room, you can effortlessly tweak your tables to make your document look and feel just right.
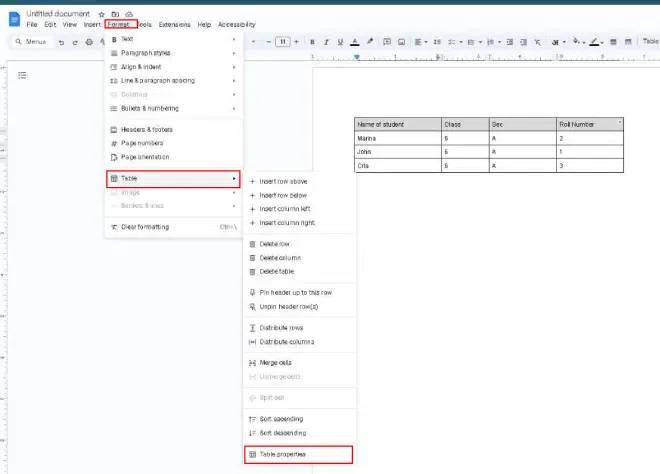
Here's the procedure given below for users reference to know the procedure of editing a table in Google document. Follow the steps to do the same,
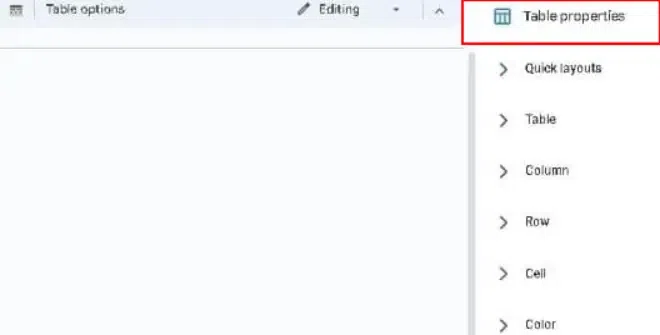
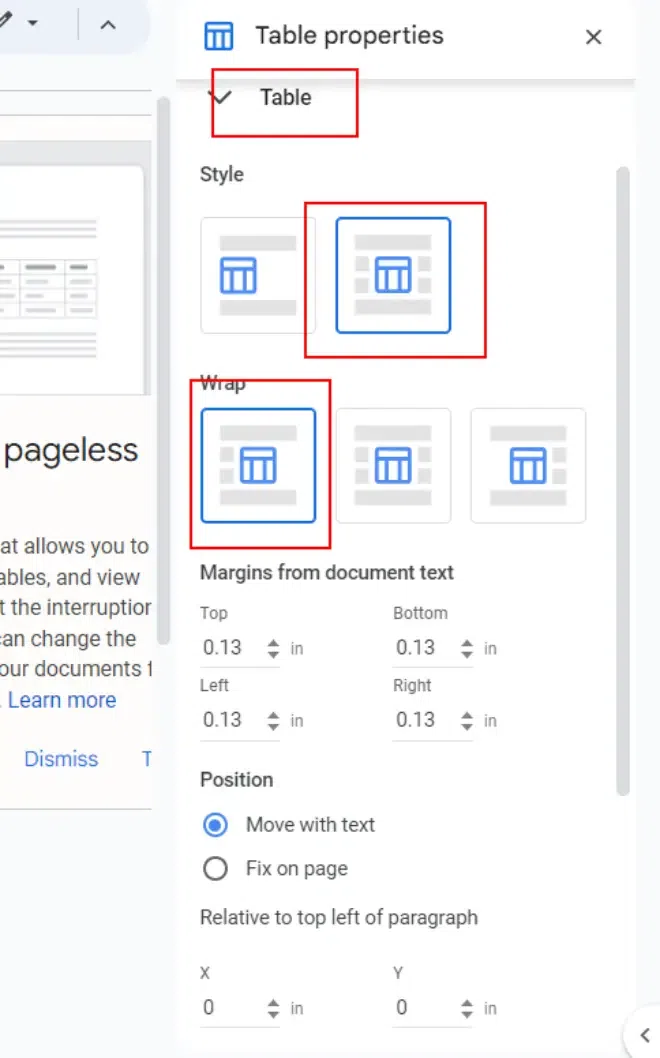
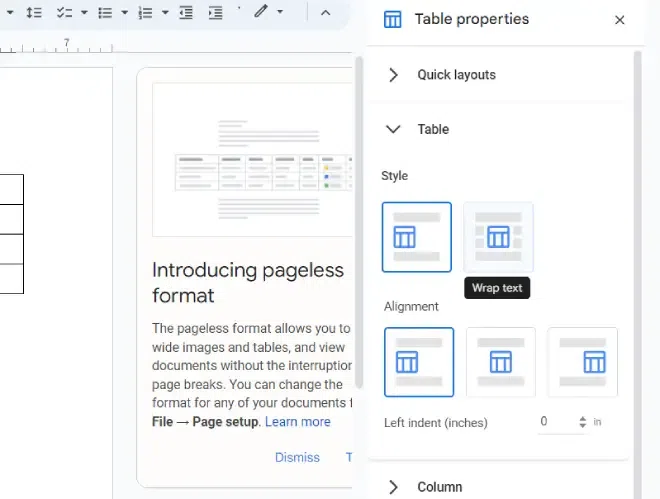
The Table Properties Box will appear in the sidebar, showcasing various editing options on the Table Properties Bar screen.
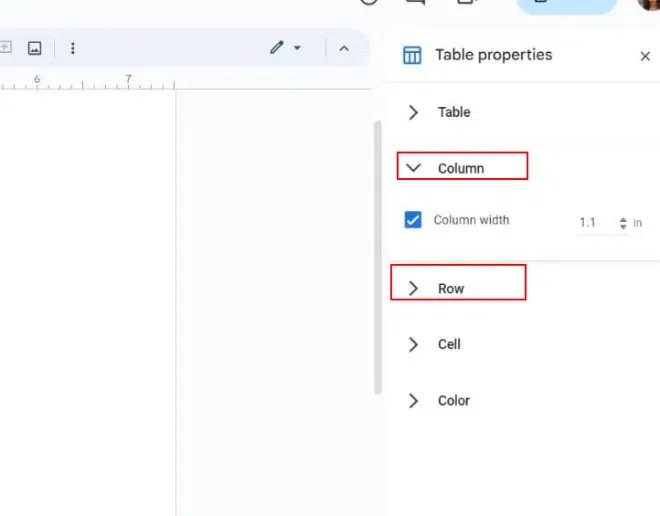
Click on the Column Section and Set the Column width. Similarly, Click on the Row Section and Set the Row Width.
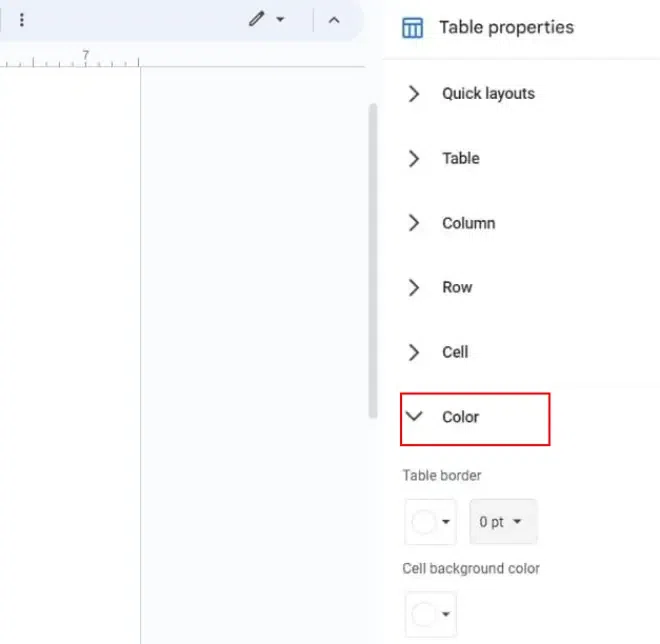
Click on the Color Section and Set the cell Color.
Click on Color. Set the Table border color white and 0pt. Now your Column Lines are removed.
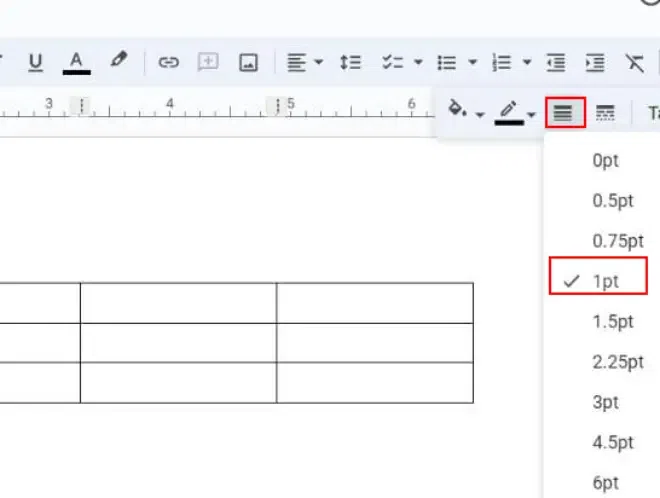
Click on the border icon in the menu bar. Set Table Border.
Select the Cell, click on the Top menu bar, and dimensions, and set the cell border.
Set the padding and dimensions under the table section.
Set the Table Alignment.
.webp)
.webp)