
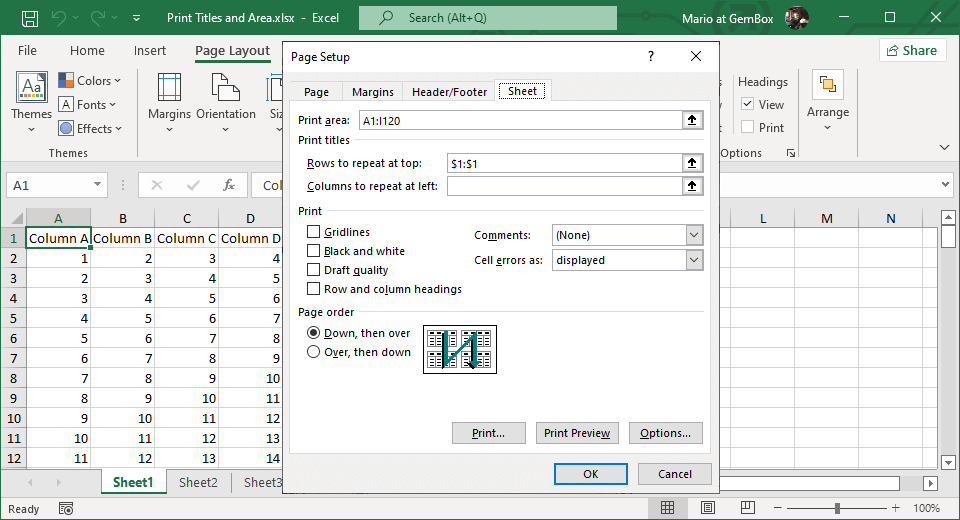
Set print titles and area in Excel files
With GemBox.Spreadsheet, you can set worksheet print titles and print area programmatically, as shown in the following example.
using GemBox.Spreadsheet;

class Program
{
 static void Main()
 {
 // If using the Professional version, put your serial key below.
 SpreadsheetInfo.SetLicense("FREE-LIMITED-KEY");

 var workbook = new ExcelFile();

 // Always print 1st row.
 var worksheet1 = workbook.Worksheets.Add("Sheet1");
 worksheet1.NamedRanges.SetPrintTitles(worksheet1.Rows[0], 1);

 // Set print area (from A1 to I120):
 worksheet1.NamedRanges.SetPrintArea(worksheet1.Cells.GetSubrange("A1", "I120"));

 // Always print columns from A to F.
 var worksheet2 = workbook.Worksheets.Add("Sheet2");
 worksheet2.NamedRanges.SetPrintTitles(worksheet2.Columns[0], 6);

 // Always print columns from A to F and first row.
 var worksheet3 = workbook.Worksheets.Add("Sheet3");
 worksheet3.NamedRanges.SetPrintTitles(worksheet3.Rows[0], 1, worksheet3.Columns[0], 6);

 // Fill Sheet1 with some data.
 for (int i = 0; i < 9; i++)
 worksheet1.Cells[0, i].Value = "Column " + ExcelColumnCollection.ColumnIndexToName(i);

 for (int i = 1; i < 120; i++)
 for (int j = 0; j < 9; j++)
 worksheet1.Cells[i, j].SetValue(i + j);

 workbook.Save("Print Titles and Area.%OutputFileType%");
 }
}
Imports GemBox.Spreadsheet

Module Program

 Sub Main()

 ' If using the Professional version, put your serial key below.
 SpreadsheetInfo.SetLicense("FREE-LIMITED-KEY")

 Dim workbook As New ExcelFile()

 ' Always print 1st row.
 Dim worksheet1 = workbook.Worksheets.Add("Sheet1")
 worksheet1.NamedRanges.SetPrintTitles(worksheet1.Rows(0), 1)

 ' Set print area (from A1 to I120):
 worksheet1.NamedRanges.SetPrintArea(worksheet1.Cells.GetSubrange("A1", "I120"))

 ' Always print columns from A to F.
 Dim worksheet2 = workbook.Worksheets.Add("Sheet2")
 worksheet2.NamedRanges.SetPrintTitles(worksheet2.Columns(0), 6)

 ' Always print columns from A to F and first row.
 Dim worksheet3 = workbook.Worksheets.Add("Sheet3")
 worksheet3.NamedRanges.SetPrintTitles(worksheet3.Rows(0), 1, worksheet3.Columns(0), 6)

 ' Fill Sheet1 with some data
 For i As Integer = 0 To 8
 worksheet1.Cells(0, i).Value = "Column " & ExcelColumnCollection.ColumnIndexToName(i)
 Next

 For i As Integer = 1 To 119
 For j As Integer = 0 To 8
 worksheet1.Cells(i, j).SetValue(i + j)
 Next
 Next

 workbook.Save("Print Titles and Area.%OutputFileType%")
 End Sub
End Module