
The Google Gemini integrationIntegrations connect and integrate Home Assistant with your devices, services, and more. [Learn more] adds a conversation agent, speech-to-text, and text-to-speech entities powered by Google Gemini to Home Assistant. The conversation agent can optionally be allowed to control Home Assistant.
Controlling Home Assistant is done by providing the AI access to the Assist API of Home Assistant. You can control what devices and entities it can access from the exposed entities page. The AI can provide you information about your devices and control them.
This integration does not integrate with sentence triggers.
This integration requires an API key to use, which you can generate here, and to be in one of the available regions.
Configuration
To add the Google Gemini service to your Home Assistant instance, use this My button:
Generate an API Key
The API key is used to authenticate requests to the Google Gemini API. To generate an API key take the following steps:
- Visit the API Keys page to retrieve the API key you’ll use to configure the integration.
On the same page, you can see your plan: free of charge if the associated Google Cloud project doesn’t have billing, or pay-as-you-go if the associated Google Cloud project has billing enabled. Comparison of the plans is available at this pricing page. The major differences include: the free of charge plan is rate limited, and free prompts/responses are used for product improvement.
Options
To define options for Google Gemini, follow these steps:
-
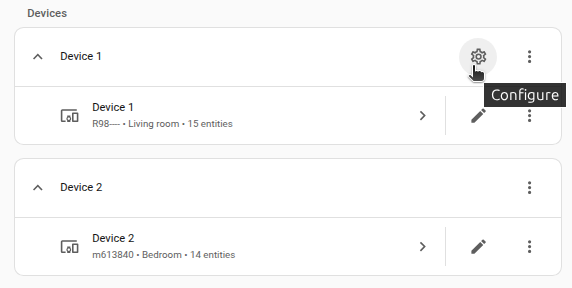
In Home Assistant, go to Settings > Devices & services.
-
If multiple instances of Google Gemini are configured, choose the instance you want to configure.
-
On the card, select the cogwheel .
- If the card does not have a cogwheel, the integration does not support options for this device.
-
Edit the options, then select Submit to save the changes.
Instructions for the AI on how it should respond to your requests. It is written using Home Assistant Templating.
If the model is allowed to interact with Home Assistant. It can only control or provide information about entities that are exposed to it.
If enabled, the recommended model and settings are chosen.
If you choose to not use the recommended settings, you can configure the following options:
Model used to generate response.
Creativity allowed in the responses. Higher values produce a more random and varied response. A temperature of zero will be deterministic.
Probability threshold for top-p sampling.
Number of top-scored tokens to consider during generation.
The maximum number of words or “tokens” that the AI model should generate.
Thresholds for different harmful categories.
Enables the model to query Google Search. This can only be enabled when the “Control Home Assistant” setting is set to “No control”. See below for a workaround using it with “Assist”.
Google Search
Due to an API limitation we cannot have the Google Search tool together with other tools. Request fails with 400 INVALID_ARGUMENT. {'error': {'code': 400, 'message': 'Tool use with function calling is unsupported', 'status': 'INVALID_ARGUMENT'}}.
But you can do the following workaround that exposes a script to voice assistants. The script calls a Google Gemini Conversation that only has the Google Search tool enabled.
Talking to Super Mario
You can use this integration to talk to Super Mario and, if you want, have him control devices in your home.
The tutorial is using OpenAI, but this could also be done with the Google Gemini integration.
Actions
Speak
The tts.speak action is the modern way to use TTS. Add the speak action, select the Google Gemini TTS entity, select the media player entity or group to send the TTS audio to, and enter the message to speak.
Text-to-speech (TTS) generation is controllable, meaning you can use natural language to structure interactions and guide the style, accent, pace, and tone of the audio. You can change the way the text is spoken directly in the message by, e.g. entering “Say cheerfully: Have a wonderful day” instead of just “Have a wonderful day”.
For more options about speak, see the Speak section on the main TTS building block page.
In YAML, your action will look like this:
action: tts.speak
target:
 entity_id: tts.google_generative_ai_tts
data:
 media_player_entity_id: media_player.tv
 message: Say cheerfully: Have a wonderful day!
 options:
 voice: <voice-name>
You can configure the following options:
| Option attribute | Optional | Description | Example |
|---|---|---|---|
voice |
yes | The voice name to be used for the generated speech. The default is zephyr. |
achernar |
The input language is detected automatically. Check the Google AI documentation for the supported languages.
Video tutorial
This video tutorial explains how Google Gemini can be set up, how you can send an AI-generated message to your smart speaker when you arrive home, and how you can analyze an image taken from your doorbell camera as soon as someone rings the doorbell.
Troubleshooting
- To aid in diagnosing issues it may help to turn up verbose logging by adding these to your
configuration.yamlThe configuration.yaml file is the main configuration file for Home Assistant. It lists the integrations to be loaded and their specific configurations. In some cases, the configuration needs to be edited manually directly in the configuration.yaml file. Most integrations can be configured in the UI. [Learn more]:
logger:
 logs:
 homeassistant.components.conversation: debug
 homeassistant.components.conversation.chat_log: debug
 homeassistant.components.google_generative_ai_conversation: debug
Removing the integration
To remove an integration instance from Home Assistant
- Go to Settings > Devices & services and select the integration card.
- From the list of devices, select the integration instance you want to remove.
- Next to the entry, select the three dots menu. Then, select Delete.