
- How to Run a Local LLM in 6GB of RAM
- Table of Contents
- Why Local LLMs Matter Now
- Prerequisites
- What Is Quantization-Aware Training (QAT)?
- Setting Up Your Local LLM Server
- Building a Node.js Client for Local LLM Inference
- Integrating with a React Frontend
- Performance Tips and Troubleshooting
- Implementation Checklist
- End Result
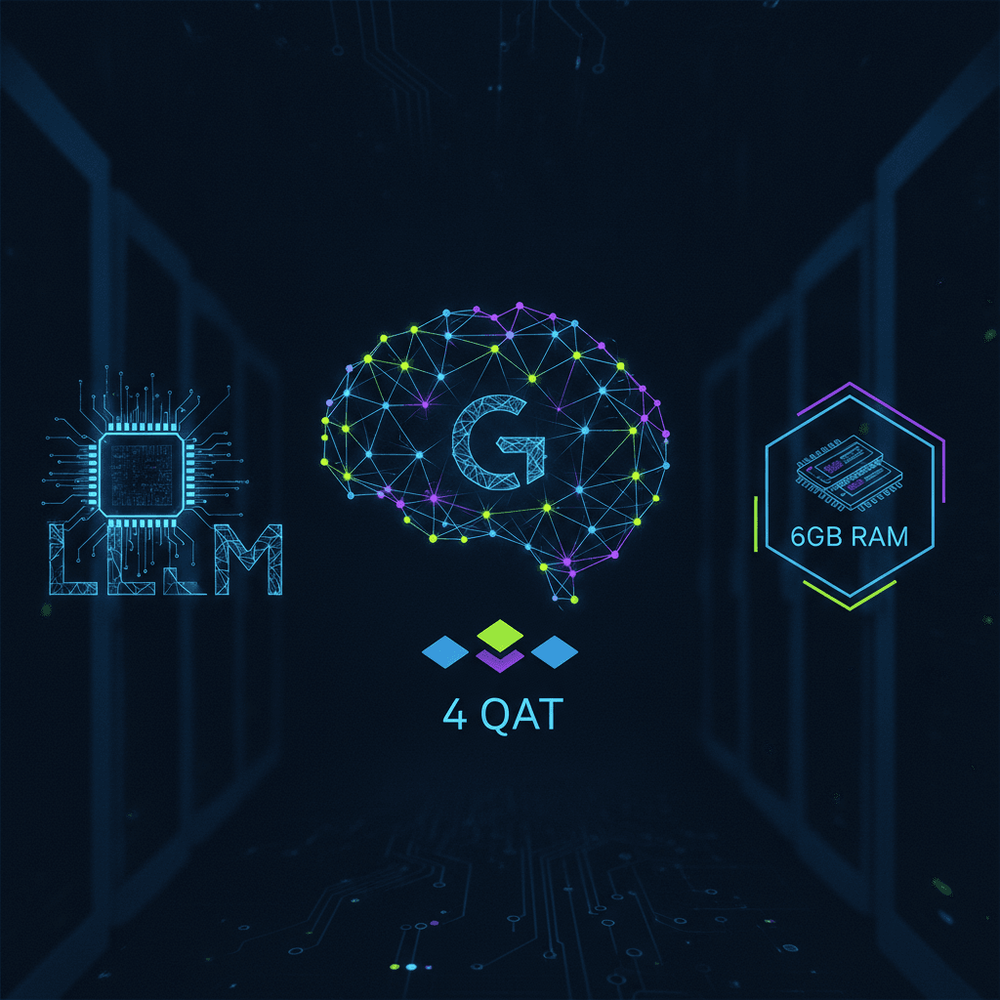
Gemma 4 QAT: Running Local LLMs in 6GB RAM
Share this article
- Premium Results
- Publish articles on SitePoint
- Daily curated jobs
- Learning Paths
- Discounts to dev tools
7 Day Free Trial. Cancel Anytime.
Running large language models through cloud-hosted APIs introduces recurring costs that scale with usage, and every prompt sent to a remote endpoint carries data privacy implications that matter in regulated industries and user-facing applications. Google's Gemma QAT models, built using quantization-aware training, make it possible to run a multi-billion-parameter LLM locally in under 7GB of VRAM.
How to Run a Local LLM in 6GB of RAM
- Verify your hardware meets minimum requirements: 6GB discrete VRAM (e.g., RTX 3060) or 16GB unified RAM on Apple Silicon.
- Install Node.js 18 LTS or later and confirm with
node --version. - Install Ollama via the official install script (macOS/Linux) or the Windows installer.
- Pull the Gemma QAT int4 model by confirming the exact tag at
ollama.com/libraryand runningollama pull <model-tag>. - Test the local model by sending a curl request to the OpenAI-compatible endpoint at
localhost:11434. - Create a Node.js service module wrapping the Ollama API with retry logic, timeouts, and response validation.
- Build an Express proxy server with CORS and input validation to sit between your frontend and the model.
- Wire a React chat component to the Express proxy using Vite's dev server proxy configuration.
Table of Contents
- Why Local LLMs Matter Now
- Prerequisites
- What Is Quantization-Aware Training (QAT)?
- Setting Up Your Local LLM Server
- Building a Node.js Client for Local LLM Inference
- Integrating with a React Frontend
- Performance Tips and Troubleshooting
- Implementation Checklist
- End Result
Why Local LLMs Matter Now
Running large language models through cloud-hosted APIs introduces recurring costs that scale with usage, and every prompt sent to a remote endpoint carries data privacy implications that matter in regulated industries and user-facing applications. For JavaScript developers building AI features into Node.js backends or React frontends, the appeal of a local alternative has always been clear. The barrier has been hardware: running a capable model typically demanded 24GB or more of VRAM, putting it out of reach for most developer workstations.
That barrier has dropped. Google's Gemma QAT models, built using quantization-aware training, make it possible to run a multi-billion-parameter LLM locally in under 7GB of VRAM (check the exact size via ollama list after pulling the model). This tutorial walks through the full process: downloading the model, serving it through a local API, building a Node.js client module, and wiring it into a React frontend for an end-to-end local AI stack.
Important: This tutorial references a Gemma QAT model tag. Before following any steps, confirm the exact model name and tag available for your use at https://ollama.com/library and https://huggingface.co/google. Model names and tags change between releases; using an incorrect tag will cause the
ollama pullstep to fail.
Prerequisites
Before starting, ensure you have the following:
- You need Node.js 18 LTS or later (
node --version). All files in this tutorial use ES module syntax (.mjsor"type": "module"inpackage.json). Node.js 18+ is required for nativefetchand top-levelawaitsupport. - OS: macOS or Linux for the Ollama install script. Windows users should download the installer from https://ollama.com/download/windows.
- A discrete NVIDIA GPU with at least 6GB VRAM (such as an RTX 3060 or RTX 4060) will work, as will an Apple Silicon Mac with 16GB of unified RAM (see hardware notes below).
- Disk space: Approximately 7GB free for the model download.
- Ports
localhost:11434(Ollama) andlocalhost:3001(Express proxy) must be available and not blocked by a firewall.
What Is Quantization-Aware Training (QAT)?
Post-Training Quantization vs. QAT
Standard quantization approaches like GPTQ and GGUF compress a fully trained model's weights after the fact, converting 16-bit or 32-bit floating point values down to 4-bit or 8-bit integers. This reduces memory footprint dramatically, but no training step taught the model to operate with those lower-precision weights. The result is measurable quality degradation, particularly on tasks requiring nuanced reasoning, longer context handling, or domain-specific accuracy.
Unlike post-training methods, quantization-aware training embeds the quantization constraints directly into the training loop. During training, the model simulates the effects of reduced precision on its weights (and optionally activations, depending on the variant), learning to compensate for the information loss that quantization introduces. The model effectively trains itself to perform well under the exact constraints it will face at inference time.
This is why a QAT model at 4-bit precision can rival the quality of its full-precision BF16 counterpart on benchmarks like MMLU and HumanEval per Google's technical report.
This is why a QAT model at 4-bit precision can rival the quality of its full-precision BF16 counterpart on benchmarks like MMLU and HumanEval per Google's technical report. Post-training quantization at the same bit width cannot reliably match that result.
QAT Model Variants and Hardware Requirements
Google publishes QAT models at multiple quantization levels. The int4 (4-bit) variant is the most aggressively compressed, targeting a VRAM footprint under 7GB. An int8 (8-bit) variant may also be available for developers who can allocate more memory and want to stay closer to full-precision quality, though the gap between int4 QAT and full precision is already narrow given the training-time compensation.
Minimum hardware requirements for the int4 variant: a discrete GPU with 6GB VRAM (such as an NVIDIA RTX 3060 or RTX 4060), or an Apple Silicon Mac with 16GB of unified RAM. On Apple Silicon, unified memory is shared with the OS and all running applications. On an 8GB device, available memory for the model may be as low as 4-5GB after system overhead, which is insufficient for a model of this size. 16GB unified RAM is the practical minimum for interactive use (typically >10 tok/s). For discrete GPUs, 8GB of VRAM is the recommended target to maintain interactive latency with reasonable context lengths. Developers working on machines below these thresholds will encounter either out-of-memory errors or inference speeds too slow for interactive use.
Setting Up Your Local LLM Server
Installing Ollama and Pulling the Model
Ollama provides the simplest path from zero to a running local LLM server. It handles model downloading, GGUF format management, and exposes an OpenAI-compatible REST API out of the box, which means existing tooling and client libraries built for the OpenAI API work against it with minimal changes.
Security note: The
curl | shpattern below executes a script directly from the network. If you prefer to verify the script before running it, download it first withcurl -fsSL https://ollama.com/install.sh -o install.sh, inspect its contents, then runsh install.sh.
The setup sequence is straightforward:
# Install Ollama (macOS/Linux — see https://ollama.com/download/windows for the Windows installer)
curl -fsSL https://ollama.com/install.sh | sh
# Confirm Ollama is installed
ollama --version
# Start the Ollama service if it is not already running.
# On macOS, launching the Ollama app starts the service.
# On Linux, use: ollama serve &
# Confirm it is listening on port 11434 before proceeding.
# Pull the model — REPLACE <model-tag> with the exact tag from https://ollama.com/library
ollama pull <model-tag> # Confirm the exact tag at https://ollama.com/library before running
# Verify the model is available
ollama list
# Run a quick test prompt to confirm the server is functional
ollama run <model-tag> "Explain quantization-aware training in two sentences."
# Verify via the OpenAI-compatible API endpoint using curl
curl http://localhost:11434/v1/chat/completions \
 -H "Content-Type: application/json" \
 -d '{
 "model": "<model-tag>",
 "messages": [
 {"role": "user", "content": "What is QAT?"}
 ],
 "temperature": 0.7
 }'
After pulling the model, ollama list should show your model with its size. VRAM usage can be checked with nvidia-smi on NVIDIA GPUs or ollama ps to see active model memory allocation. The model should load within the 6 to 7GB range for the int4 variant.
Alternative: Using LM Studio or llama.cpp
LM Studio offers a GUI-based alternative for developers who prefer a visual interface for model management, parameter tuning, and prompt testing. It supports the same GGUF model formats and provides its own local API server. For developers who need fine-grained control over inference parameters, batch sizes, or custom builds with specific hardware optimizations, llama.cpp is the lower-level option, compiled directly from source. Both are viable, but this tutorial uses Ollama as the primary path because it requires the least configuration and provides the OpenAI-compatible endpoint that simplifies downstream integration.
Building a Node.js Client for Local LLM Inference
Project Setup
Create a project directory and initialize it:
mkdir llm-app && cd llm-app
npm init -y
npm install express cors
Add "type": "module" to your package.json so Node.js treats .mjs and .js files as ES modules:
{
 "type": "module"
}
Calling the Local API with Fetch
The Ollama server exposes an OpenAI-compatible endpoint at http://localhost:11434/v1/chat/completions. This means the request format follows the same structure as OpenAI's Chat Completions API: an array of message objects with role and content fields, plus optional parameters like temperature and max_tokens.
// test-local-llm.mjs
const response = await fetch("http://localhost:11434/v1/chat/completions", {
 method: "POST",
 headers: { "Content-Type": "application/json" },
 body: JSON.stringify({
 model: "<model-tag>", // Replace with confirmed tag from `ollama list`
 messages: [
 { role: "system", content: "You are a helpful coding assistant." },
 { role: "user", content: "Write a JavaScript function to debounce an input handler." }
 ],
 temperature: 0.7,
 max_tokens: 512,
 stream: false
 })
});
if (!response.ok) {
 const errorText = await response.text();
 console.error(`LLM request failed (${response.status}): ${errorText}`);
 process.exit(1);
}
const data = await response.json();
const content = data?.choices?.[0]?.message?.content;
if (typeof content !== "string") {
 console.error("Unexpected response shape:", JSON.stringify(data).slice(0, 300));
 process.exit(1);
}
console.log(content);
Run this with node test-local-llm.mjs (requires Node.js 18+). The stream: false setting returns the complete response as a single JSON payload. Setting stream: true returns server-sent events, which is useful for real-time UI updates but requires parsing the event stream incrementally (streaming implementation is out of scope for this tutorial). For initial testing and non-interactive use cases, non-streaming is simpler.
Creating a Reusable LLM Service Module
Wrapping the API call in a dedicated module keeps connection details, default parameters, and error handling in one place, reusable across CLI scripts, Express routes, and any other Node.js entry point.
// llm-service.mjs
const OLLAMA_BASE_URL = (process.env.OLLAMA_URL || "http://localhost:11434").replace(/\/$/, "");
const DEFAULT_MODEL = process.env.LLM_MODEL || "<model-tag>";
const BASE_BACKOFF_MS = 1000;
const MAX_BACKOFF_MS = 8000;
const REQUEST_TIMEOUT_MS = 60_000; // 60 s — adjust to your hardware's p99 inference latency
if (DEFAULT_MODEL.includes("<") || DEFAULT_MODEL.includes(">")) {
 throw new Error(
 "LLM_MODEL environment variable is not set. " +
 "Set it to the exact model tag shown in `ollama list`."
 );
}
export async function queryLocal(prompt, options = {}) {
 const {
 model = DEFAULT_MODEL,
 systemPrompt = "You are a helpful assistant.",
 temperature = 0.7,
 maxTokens = 512,
 retries = 2
 } = options;
 const body = {
 model,
 messages: [
 { role: "system", content: systemPrompt },
 { role: "user", content: prompt }
 ],
 temperature,
 max_tokens: maxTokens,
 stream: false
 };
 let lastError;
 for (let attempt = 0; attempt <= retries; attempt++) {
 const controller = new AbortController();
 const timeoutId = setTimeout(() => controller.abort(), REQUEST_TIMEOUT_MS);
 try {
 const res = await fetch(`${OLLAMA_BASE_URL}/v1/chat/completions`, {
 method: "POST",
 headers: { "Content-Type": "application/json" },
 body: JSON.stringify(body),
 signal: controller.signal
 });
 // Do not retry permanent client errors
 if (res.status >= 400 && res.status < 500) {
 const text = await res.text();
 throw new Error(`HTTP ${res.status} (permanent): ${text}`);
 }
 if (!res.ok) {
 const text = await res.text();
 throw new Error(`HTTP ${res.status}: ${text}`);
 }
 const text = await res.text();
 let data;
 try {
 data = JSON.parse(text);
 } catch {
 throw new Error(`Non-JSON response from Ollama: ${text.slice(0, 200)}`);
 }
 const content = data?.choices?.[0]?.message?.content;
 if (typeof content !== "string") {
 throw new Error(`Unexpected response shape: ${JSON.stringify(data).slice(0, 200)}`);
 }
 return content;
 } catch (err) {
 lastError = err;
 // Do not retry 4xx or AbortError caused by our own timeout on last attempt
 const isPermanent = err.message.includes("(permanent)");
 if (isPermanent || attempt >= retries) break;
 const delay = Math.min(BASE_BACKOFF_MS * Math.pow(2, attempt), MAX_BACKOFF_MS);
 await new Promise((r) => setTimeout(r, delay));
 } finally {
 clearTimeout(timeoutId);
 }
 }
 throw new Error(`LLM query failed after ${retries + 1} attempt(s): ${lastError.message}`);
}
This module exports a single async function with configurable system prompt injection, token limits, and exponential-backoff retry logic with a capped delay (1 s, 2 s, 4 s, up to a maximum of 8 s between attempts). Each request has a 60-second timeout via AbortController to prevent a stalled Ollama process from blocking the server indefinitely. The module validates the model tag at load time and distinguishes permanent client errors (4xx) from transient server errors, only retrying the latter. You can override the base URL with an environment variable, which supports deployment scenarios where the Ollama instance runs on a different host.
Integrating with a React Frontend
Express API Route as a Proxy
The React frontend should not call the Ollama endpoint directly. Proxying through an Express backend allows CORS to be configured centrally, and the cors middleware shown below enforces allowed origins. The proxy also provides a centralized point to implement input validation and length limits before input reaches the model. The backend acts as a gatekeeper between the browser and the local model.
// server.mjs
import express from "express";
import cors from "cors";
import { queryLocal } from "./llm-service.mjs";
const app = express();
const PORT = Number(process.env.PORT) || 3001;
const FRONTEND_ORIGIN = process.env.FRONTEND_ORIGIN || "http://localhost:5173";
app.use(cors({ origin: FRONTEND_ORIGIN }));
app.use(express.json());
const MAX_MESSAGE_LENGTH = 2000; // character limit (UTF-16 code units); adjust if byte budget matters
app.post("/api/chat", async (req, res) => {
 const { message } = req.body;
 if (!message || typeof message !== "string" || message.trim().length === 0) {
 return res.status(400).json({ error: "Message is required." });
 }
 if (message.length > MAX_MESSAGE_LENGTH) {
 return res
 .status(400)
 .json({ error: `Message too long. Maximum length is ${MAX_MESSAGE_LENGTH} characters.` });
 }
 try {
 const reply = await queryLocal(message.trim(), {
 systemPrompt: "You are a concise coding assistant. Answer in plain text.",
 maxTokens: 256
 });
 res.json({ reply });
 } catch (err) {
 console.error(JSON.stringify({
 ts: new Date().toISOString(),
 path: req.path,
 error: err.message
 }));
 res.status(502).json({ error: "Failed to get response from local LLM." });
 }
});
app.listen(PORT, () =>
 console.log(`API proxy running on http://localhost:${PORT} (CORS origin: ${FRONTEND_ORIGIN})`)
);
This route validates the incoming message and enforces a length limit, delegates to the llm-service module, and returns a clean JSON response. A 502 on failure tells the frontend the upstream LLM is down, distinct from a 4xx application error. The CORS origin and port are configurable via environment variables (FRONTEND_ORIGIN and PORT) so the server works correctly when Vite selects an alternate port.
React Project Setup
Create a React project using Vite:
npm create vite@latest frontend -- --template react
cd frontend
npm install
Configure the Vite dev server to proxy /api requests to the Express backend. Add the following to vite.config.js:
// frontend/vite.config.js
import { defineConfig } from 'vite';
import react from '@vitejs/plugin-react';
export default defineConfig({
 plugins: [react()],
 server: {
 proxy: {
 '/api': 'http://localhost:3001'
 }
 }
});
This proxy configuration ensures that fetch('/api/chat') in the React component routes to the Express server on port 3001 during development, rather than hitting the Vite dev server itself.
React Chat Component
A minimal chat component sends user input to the Express proxy and renders the response. The component manages state with useState for the input, reply, loading status, and error display. An AbortController cancels in-flight requests when the component unmounts, preventing state updates on unmounted components. Place this file at frontend/src/Chat.jsx.
// Chat.jsx
import { useState, useEffect, useRef } from "react";
export default function Chat() {
 const [input, setInput] = useState("");
 const [reply, setReply] = useState("");
 const [loading, setLoading] = useState(false);
 const [error, setError] = useState(null);
 const abortRef = useRef(null);
 // Abort in-flight request on unmount
 useEffect(() => {
 return () => {
 if (abortRef.current) abortRef.current.abort();
 };
 }, []);
 const handleSubmit = async (e) => {
 e.preventDefault();
 const trimmed = input.trim();
 if (!trimmed) return;
 if (abortRef.current) abortRef.current.abort();
 abortRef.current = new AbortController();
 setLoading(true);
 setError(null);
 setReply("");
 try {
 const res = await fetch("/api/chat", {
 method: "POST",
 headers: { "Content-Type": "application/json" },
 body: JSON.stringify({ message: trimmed }),
 signal: abortRef.current.signal
 });
 if (!res.ok) {
 const friendly =
 res.status === 400 ? "Invalid request. Please shorten your message." :
 res.status === 502 ? "The local model is unavailable. Is Ollama running?" :
 `Unexpected error (${res.status}). Please try again.`;
 throw new Error(friendly);
 }
 const data = await res.json();
 setReply(data.reply);
 } catch (err) {
 if (err.name === "AbortError") return;
 setError(err.message);
 } finally {
 setLoading(false);
 }
 };
 return (
 <div style={{ maxWidth: 600, margin: "2rem auto", fontFamily: "sans-serif" }}><form onSubmit={handleSubmit}><textarea
 value={input}
 onChange={(e) => setInput(e.target.value)}
 rows={3}
 style={{ width: "100%", padding: 8 }}
 placeholder="Ask the local LLM something..."
 /><button type="submit" disabled={loading} style={{ marginTop: 8 }}>{loading ? "Thinking..." : "Send"}</button></form>{error && <p style={{ color: "red" }}>Error: {error}</p>}{reply && (
 <div style={{ marginTop: 16, padding: 12, background: "#f4f4f4", borderRadius: 4 }}>{reply}</div>
 )}</div>
 );
}
This component covers the end-to-end flow: user types a prompt, the form submission hits the Express proxy, and the LLM's response appears below. Loading state disables the button to prevent duplicate requests. The component surfaces errors as user-friendly messages in the UI. The trimmed input value is sent in the request body, and navigating away mid-request cleanly aborts the fetch.
Performance Tips and Troubleshooting
The num_ctx parameter controls the context window length and directly impacts VRAM consumption. Lowering it from the model's default (check with ollama show <model-tag> --modelfile | grep num_ctx) reduces memory pressure, which can be necessary on cards with exactly 6GB. Monitor real-time VRAM usage with nvidia-smi or check model-level allocation with ollama ps.
Common issues: if inference is too slow, reduce context length and close other GPU-accelerating applications (browsers with hardware acceleration, video players). Out-of-memory errors typically require either reducing num_ctx or switching to a smaller quant variant. Throughput varies significantly by GPU model, driver, and context length. Expect 15 to 30 tok/s on RTX 3060/4060-class hardware; measure your actual baseline with ollama run <model-tag> --verbose.
Implementation Checklist
Setup
- Verify hardware meets minimum requirements (6GB discrete VRAM or 16GB unified RAM on Apple Silicon).
- Install Node.js 18 LTS or later (
node --version). - Install Ollama via the official install script (macOS/Linux) or installer (Windows).
Model
- Confirm the exact model tag at https://ollama.com/library and pull it with
ollama pull <model-tag>. - Verify the model loads and responds via
curlagainstlocalhost:11434. - Set the
LLM_MODELenvironment variable to your confirmed model tag (e.g.,export LLM_MODEL=your-model-tag).
Backend
- Initialize the Node.js project (
npm init -y, add"type": "module",npm install express cors). - Create
llm-service.mjswith retry logic, request timeouts, and response validation. - Set up the Express proxy route at
/api/chatwith CORS and input validation.
Frontend and Tuning
- Create the React frontend with Vite and configure the proxy in
vite.config.js. - Build the React chat component with loading and error states.
- Test the end-to-end flow from browser to local model.
- Tune
num_ctxandtemperaturefor your target use case. Lowernum_ctxif you are running near VRAM limits; raisetemperaturefor more creative output or drop it toward 0 for deterministic responses. - Monitor VRAM usage under load with
nvidia-smiorollama ps.
End Result
A full-stack JavaScript application backed by a local multi-billion-parameter LLM, running in under 7GB of VRAM, with zero API costs and no data leaving the machine. Offline-capable, privacy-preserving AI features are now within reach for developers with Node.js and React experience and a GPU meeting the requirements above. QAT models provide a practical baseline for building local agents, retrieval-augmented generation pipelines, and coding assistants without cloud dependencies.
- Premium Results
- Publish articles on SitePoint
- Daily curated jobs
- Learning Paths
- Discounts to dev tools
7 Day Free Trial. Cancel Anytime.