
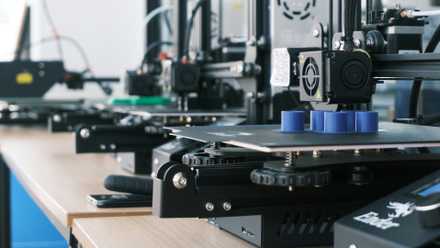
3D printers are deceptively complex mechatronic gadgets. We like to think of them as set and forget appliances, quite like their 2D counterparts, especially with modern machines from Bambu Labs or Prusa. However, under the hood, they are a delicate ballet of gantry kinematics, thermodynamics, and fluid extrusion. Everything from the volumetric flow rate in your slicer to the trueness of the frame and the tension of the belts has a direct, unforgiving impact on print quality. You are essentially melting plastic through a tiny nozzle and stacking it 0.2mm at a time while moving at breakneck speed, and it's quite miraculous such tech is accessible to home lab enthusiasts and hobbyists at all.
Most of us who have been in the hobby for a while develop a mental or physical checklist that's run through before every print. Level the bed, check the Z-offset, dry the filament, slice with the right profile, choose suitable infill patterns and density, etc. Yet, despite our best efforts, prints fail. Often, it's because of sheer oversight or physics we decide to conveniently ignore. I’ve had my fair share of spaghetti monsters and plastic blobs of death, but the most painful failures are the ones that look fine initially but fail functionally or aesthetically due to a tiny detail I missed. Here are four exaggerated examples of what could go wrong, but are easily avoidable if you're adding that one extra step to the pre-print checklist.
5 reasons your 3D prints keep failing (and how to fix them)
If you're bothered by 3D print failures, these are some of the most common issues to look for
TV wall mounts
A lesson in failure by creep
Print enough functional stuff, and before you know it, you'll stop asking yourself whether something is worth printing at all. Take, for instance, wall mounts for TVs. I've seen my fair share of these on r/3Dprinting survive years of light, sustained load from a small 32-inch TV in the yard. Sometimes, though, you're better off with a store-bought mount stamped out of sheet metal because it won't fail as fast. This is true for most load-bearing prints, because even if you designed it with chunky walls, high infill, and generative design optimization, ominous white stress lines will eventually appear near the corners of a PLA print. This is a classic sign of crazing, where the polymer chains are stretching and micro-voids are forming just before sudden and immediate failure.
The failure here is twofold: using standard PLA, and not chamfering sharp corners. The former is plenty stiff for functional prints, but suffers from cold flow-state deformation called creep when under sustained load. Eventually, PLA deforms until the model fails from shear strain on the load-bearing design elements. With PLA carrying a heavy TV, you cannot avoid this even with fancy print orientations, multi-part prints, and other cautionary measures. If you absolutely must print a load-bearing bracket, use a better material with creep resistance and toughness, like PLA+ or PETG.
Additionally, sharp interior corners become points where stress concentrates, and cracks start to form. A similar logic applies to concrete structures, and you're better off throwing in a fillet or chamfer to avoid these corners. In this case, stamped steel mounts are cheaper, infinitely stronger, and won't drop your expensive screen.
Printing with shiny filament
Watch for a botched first layer
Even the simplest faceted items look gorgeous when printed with Silk PLA and dual-color co-extruded filaments. However, my first few prints with them had terrible first layers. The flow rate seemed off, and the adhesion was spotty. I blamed the bed, the nozzle, and even the humidity. It took me a while to realize the culprit was the shine of the filament itself.
Modern printers like the Bambu Lab X1C use LiDAR or optical sensors to inspect the first layer and calibrate flow dynamics. The highly reflective surface of silk or shiny PLA scatters the laser light unpredictably, causing the calibration algorithms to hallucinate settings simply unsuitable for the material at hand. The printer thinks it’s under-extruding when it’s not, or vice versa, leading to a mess. This typically won't happen on a lower-end printer where you spend a few grams printing calibration cubes and other test prints to dial in the settings, but you can't rely on automatic or dynamic calibration of smarter, pricier machines for such filaments.
On such a printer, you'll need to load a standard, non-shiny PLA of the same brand/type, run the full calibration sequence to save the flow dynamics and pressure advance values, and then swap back to the shiny filament without re-calibrating. It’s a manual step that feels archaic, but it solves the issue instantly.
Sudden layer shift mid-print
Printing takes time
Desktop 3D printers of the bed-slinging variety are already quite fast with prints, if you're optimizing the slicer settings and Gcode. To print faster, we've all pushed acceleration parameters, only for the print to fail until we dial it back down. Failure here looks like zebra-bands of alternating matte and glossy layers, or layers just not lining up at all. However, the cause may not be just the print head acceleration.
When printing too fast, you might exceed the maximum volumetric flow rate possible with the installed hotend. Here, the plastic won't have enough time to melt for proper layer adhesion, causing under-extrusion or layer separation. Even within the flow limits of the nozzle, drastic changes in layer time when the hotend slows for complex geometry and traverses quickly for straight lines, can change polymer crystallization. The slicer usually adjusts this parameter automatically, but layers printed slower tend to crystallize glossy, while the faster ones might end up looking more matte in comparison, especially with PLA or Silk PLA filament.
Meanwhile, drastic layer shifting points to poor inertia handling because the acceleration exceeds the stepper motor's torque to restrain overshooting. This is easily remedied by reverting to a safe speed of 120mm/sec.
Prints toppling over
Clean the bed for clean prints
This error hurts the most because it's so easily preventable. When you're printing a bed full of parts overnight and wake up to a crime scene where one of the tall parts has fallen over and affected several others, the regret is immeasurable. The issue seldom starts with the print head running into the tall part, even if it might've worsened matters later. The root cause that ruins your entire batch isn't Z hop, but simple build plate hygiene.
Minor contamination, like that from finger oils, can also mess up bed adhesion for prints, more so for tall parts on a bed-slinger where the inertia is magnified as the print grows taller. If bed adhesion is inadequate, even a wobbly tall print could hit the traversing print head, get knocked over, and damage other items on the build plate. To ensure the plate is clean, IPA wipes may not cut it because they merely spread the oils. Instead, clean the plate with hot water using dish soap as a surfactant, with IPA for final pre-print prep.
Prevention saves you hours, and then some
Sure, most of these print failure scenarios might seem like edge cases, given how often you'd print a TV mount or use shiny silk filament that causes calibration system interference. Nonetheless, they represent the variable nature of this hobby, and you could waste kilograms of filament and days of print time in a year, just from ignoring the physics. Ten minutes spent triple-checking slicer settings and build plate cleanliness could ensure you're not cleaning up plastic spaghetti after a few hours.
5 game-changing 3D printing tips you’ll wish you knew sooner
Whether you're new to 3D printing or a seasoned pro, these tips can help you make the most of the craft