
A PC build is seldom a one-and-done proposition. Technically inclined tinkerers tend to pop the side panel off frequently to add storage, PCIe accessories like sound cards and networking adapters, or just perform routine cleaning. Keeping a rig pristine, especially an all-white one, and upgraded requires a solid, reliable set of tools.
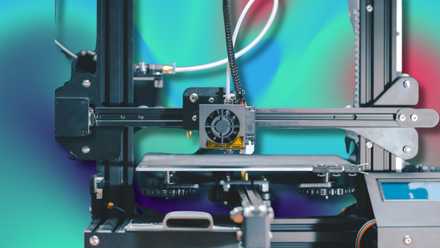
Meanwhile, my 3D printer has transitioned from a prototyping machine to an indispensable part of my workbench over the last few years. It has enabled the creation of otherwise gatekept utilities in a matter of minutes. Here are the four functional, everyday 3D prints I reach for every single time my PC's side panel comes off.
7 practical problems I solved with a 3D printer
My 3D printer has proven itself not just fun, but also a household problem-solver. Here's how
Pocket-size ratcheting bit driver
Because big screwdrivers are a pain
I'd agree that a screwdriver with a long shaft is indispensable for tightening screws in tight spots, like the upper left corner motherboard mounting screw, after you've installed a top-mount radiator and rear-facing case fan. You don't even need anything besides a PH2 bit for assembling the average PC today, all thanks to part standardization. However, carrying a foot-long screwdriver isn't convenient, and it proves impractical when assembling dense builds in an ITX case.
I printed out a reversible ratcheting screwdriver for 4mm hex bits with integrated storage and eventually stumbled across improved versions with more secure bit storage and larger versions for the standard 6.35mm hex drivers. All these models are best printed in PETG for durability since the internal ratcheting mechanism handles moderate torque. It's also easier than ABS to work with, since there's no heated printer enclosure needed. A tiny dab of lithium grease on the printed gear teeth, and the mechanism feels almost as smooth as a commercial tool.
In practice, the convenience of the size, bit storage, and fast one-handed operation make this my top recommendation for PC builders. You grab the printed ratchet; the bits are already integrated into the grip, and you get straight to work.
TPU plugs
Save your I/O from the dust and debris
If running a standard dual-monitor setup, there's a good chance two or three empty DisplayPort or HDMI slots are exposed on the GPU. The same goes for unused USB ports on the motherboard, and with time, they accumulate dust, pet hair, and other particulate gunk that can hamper functionality. Cleaning them out is a nightmare because tools might bend pins, and vacuums generate static. Most new GPUs ship with dust covers for unused ports, and they're a nifty solution.
If you misplaced or disposed of yours, new friction-fit ones are a 10-minute print away. Just ensure you're using a pliant material like TPU. Hard filaments run the risk of scratching the internal contacts or loosening ports. Using dust caps is especially beneficial on upward-facing front I/O, and I just blast the ports with a little compressed air before sticking in a 3D printed dust plug for easier cleaning later.
Cable combs
Some features shouldn't remain exclusive to premium hardware
Cable management is the visual signature of a good PC build, but it is also an expensive addition after the fact. Store-bought acrylic cable combs found on custom sleeved cables are irritatingly expensive for their function, just because they're less of a visual crime than zipties. Access to desktop 3D printing means you can print your own out using the last 10g of any filament you have, ideally PETG for the slight elasticity and durability that trumps PLA's brittleness.
Unlike prefabricated cable combs you'd add to custom sleeved runs before adding the connector at either end, these 3D printed ones go on like clothespins, because they're open from one side. This model includes combs for four-pin, eight-pin, and 24-pin connectors, and there's nothing stopping you from creating as many as you need.
A robust pry tool
Only if printed in the correct orientation
This is an accessory you'd find for $10 on Amazon, or you could spend two hours printing to justify your printer purchase. Either way, a pry tool is great for undoing a tightly fastened chassis panel held in with push-pins, or even your car's dashboard trim pieces. Cheaper commercial plastic spudgers—the kind bundled with budget phone repair kits—seem designed for single-use, but a 3D-printed replacement can serve you much longer.
The only cautionary note for this print would be to use a non-brittle, rigid material like PETG or ABS, and print the parts in the correct orientation. Layer lines should flow along the length of the tool for maximum strength. Also, remember to bump infill up to 20% or more and add four walls so when the edge wears out, you're not rushing to reprint. I love having one of these around, both for prying prints off my printer bed and to open budget front panels with minimal effort and tugging.
A 3D printer might be the ultimate peripheral
3D printing in the PC space is frequently viewed by outsiders as a completely separate, niche hobby. However, I've found it a utilitarian extension of the PC builder's toolkit. It cuts down waiting time for niche maintenance gear and rids you of subpar tooling. You just manufacture exactly what you need, and more when needs change.
9 reasons every PC enthusiast needs a 3D printer
If you love modding your PC, you should seriously consider investing in a 3D printer