
If you're looking for a Photoshop alternative, then GIMP is probably one of the best out there. It's free, it's fast, and it's open source. One of its most powerful features is its scripting and Python support, which gives you complete control over the application to automate processes that you would normally do by hand. We'll show you how you can make your own Python-based plugins for GIMP, with a sample program that can batch-resize images and imprint a basic watermark on them.
6 reasons I'm excited for GIMP 3
GIMP 3 promises a giant leap forward in creative freedom
GIMP has everything you need
You don't need to install Python manually
If you only plan on using Python with GIMP, you don't need to worry about installing Python separately. The right version with everything you need comes preinstalled so that you can immediately start making your scripts without needing to worry about the setup. All you need to be aware of is the plug-ins folder, which you can find under Settings, Preferences, and Folders. You can create a folder for GIMP to check, or just use one of the existing ones.
Once you've identified where your plugin folder is, you're ready to begin. Load up your favorite IDE (I use VS Code) and you can get going. You'll need to import the gimpfu module in your Python script but keep in mind that you won't be able to test your scripts outside of GIMP. You'll have to ignore most syntax errors as they'll complain about functions that you call that don't exist outside of GIMP, but keep an eye out for basic issues like type errors, whitespace, and more.
If you're not comfortable with scripting in GIMP or using Python, there are countless plugins out there that can make it even better than Photoshop.
8 best plugins for GIMP to make it even better than Photoshop
Level up your GIMP game with these must-have plugins
How to make your Python plugin in GIMP
We made a basic batch photo editor
To demonstrate making our own plugin in Python for GIMP, we created a basic batch photo editor that will take all of the photos in a folder, resize them to a specified width, and add a text watermark in the bottom right. It's a very basic program there are countless alternatives out there for, but the point is that you can manipulate images automatically with Python thanks to this.
What you know from normal Python applies here, but you'll also need to learn specific functions that GIMP uses in gimpfu to edit images. A significant amount of functions in GIMP use the PDB, or Procedural Database to interact with images. Functions like pdb.gimp_file_load and pdb.gimp_image_add_layer are functions you need to use to interact with your files, and you'll need to learn how to use them.
However, you'll also need to register your plugin with GIMP. Registering it basically means passing it all of the parameters saying what it's called, who made it, where you can access it, and defining any parameters that need to be filled in from a UI element. This is what creates the pop-up where we can select the input and output folders, set the width, and set the watermark text. There's even a slider for opacity.
You can make your own programs, too
Once you get the hang of it, it's pretty easy
In the above images, under the XDA watermark, you can see the text that we automatically added using the script. All of these images have also been resized to fit a width of 1920, which in a 16:9 aspect ratio, is 1080p. This is great for consistency but is still modifiable enough that you can make change the resize width, the type of watermark, and more. With some work, you could even have the watermark it adds be an image that gets added as a layer and flattened, and that image could be one you select by adding another UI element.
While there are countless plugins and programs out there that will do exactly this for you, it's just a demonstration of how you can make your own plugins for GIMP and get them to do exactly what you want and need. You could take this idea and make your own plugin for GIMP that does something no other program out there does, or you could even just take it as a learning experience.
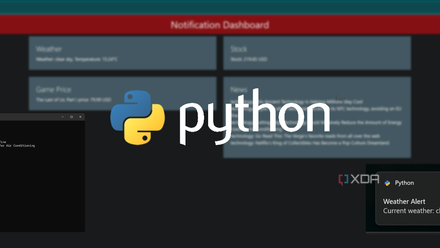
How I made my own notification system with Python to track stocks, the weather, and more
You can build your own tracking systems with Python, and it's surprisingly easy.