
We're big proponents of self-hosting services you can't live without because you never know when a company will disappear, and keeping your data on a device you control is a huge privacy boost. Whether that's saving backups of your devices, running a media server, or a mesh VPN service, keeping it in-house on your own network-attached storage (NAS) means you're in control.
One account that should be firmly under your control is your email. Self-hosting an email server is great for privacy and stops the hosting provider from scanning your inbox for advertising reasons. It puts you in charge of spam filters, encryption settings, and forwarding rules and enables the use of custom domains for your email, but that's also a double-edged sword, because when you're in charge, everything is your fault if things go wrong. Still, if you want to try running your own email server, you can do so fairly easily once you've rounded up a few prerequisites.
What you need to get started
Time to go domain name hunting for a suitable address
Self-hosting your email server is fairly simple to set up. You'll need a NAS to host it on, some knowledge of Docker, including how to edit compose files and environment files, and a domain name that you own. The trickier part is keeping your email server working after that, as your ISP and the spam filters of major email hosting providers are going to actively work against you. But to get things running, here's what you need:
- A domain name: Make this easy to remember, as it's going to be your personal branding.
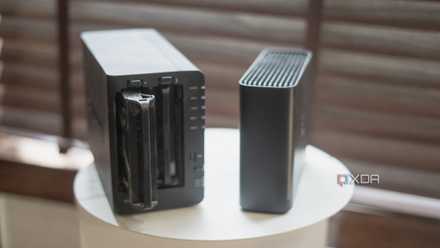
- NAS: You can use any NAS you like or build your own with the OS of your choice. While most have their own email server software, we're going to use a Docker container, so make sure the NAS can host those.
- Static IP: While you can use DDNS to start with, it's better to get a fixed, public IP address from your ISP, or...
- VPS (recommended): Email providers work on a trusted IP system, and it's often a better idea to get a Virtual Private Server with a dedicated IP address to either host your email server or to use as a forwarder to bypass any restrictions your ISP has placed on your residential IP.
You'll want to buy and register your domain name from either your ISP or a third-party domain provider. Your NAS might offer Dynamic DNS to provide a domain name, but this isn't the best practice, as you might end up with unreceived mail if your IP address changes and someone has the old IP cached when sending you email.
You'll also want to be familiar with the DNS records app in your NAS, so you can set A records, MX records, and PTR (Reverse DNS) records to get your email working in both directions.
6 things you'll need to set up your dream self-hosted email server
Get your own email server up and running.
Setting up your DNS manager
Let's get your email linked to your server IP address in both directions
If you're using a Synology NAS, you can use the DNS Manager app. However, it's recommended that you modify the DNS records directly in your provider. We're using Cloudflare DNS here, which is free to use and can be enabled simply by using the nameservers Cloudflare provides when you set up your account, but your own domain provider may suffice if it allows you to create PTR records.
In your DNS records, you want to create a DNS A record that points to your external IP address. Use a name like mail for easier management later on, but it could be anything as long as you make a note of it for later. It's worth knowing that if your NAS is using DDNS, your mail server will work, but you might miss important emails sometimes because your external IP might change, and people might be sending emails to the cached IP that you used to have, not the new one. Synology has native support for DDNS, but there are also many Docker containers out there to choose from that support a variety of services. Some routers may even support DDNS.
It's also worth remembering that your IP address will be viewable in these records, and you can't use a Cloudflare proxy or other methods of obfuscation. Renting your own Virtual Private Server (VPS) to use for these IP details is a worthy investment for your privacy, and can be inexpensive.
Now, you set up an MX record that points to your domain name. In our examples, it's mail.adamconway.ie, but it will be mail.yourdomainname.com for your own setup.
Before leaving your DNS configuration pages, setting up PTR records is highly recommended. These are used for reverse DNS lookups and are the opposite of the A record you set up a minute ago. Email DNS now uses SPF, DKIM, and DMARC to verify domain ownership, but PTR records are incredibly important to ensure that your emails don't immediately go to a recipient's spam folder. If you've already set up a DNS server on your NAS or domain, you might already have PTR set up as a Reverse Zone.
And to ensure your network isn't blocking your emails, you need to set a few port forwards up. Log in to your router's management pages and port forward the following ports to your NAS before continuing:
- 25: Simple Mail Transfer Protocol (SMTP) relaying port, used for communication between email servers
- 143: Internet Message Access Protocol (IMAP), no encryption, used for retrieving messages
- 465: SMTPS, used for outgoing messages using SSL
- 587: SMTP, now the standard for sending mail, typically uses encryption protocols like STARTTLS and TLS
- 993: IMAP, with encryption
Email has a complicated history when it comes to the history of the ports used, but things were more or less standardized by the late 1990s. It's good to ensure that all of these ports are forwarded to ensure maximum compatibility.
I hosted my own DNS server using my NAS, and you can too
Self-hosting a DNS server makes your searches faster and more secure.
Deploying your email server
Time for some Docker magic
We're going to use Docker Mailserver here because it comes loaded with all the parts you'll need for sending and receiving email, security packages, spam and antivirus packages, and a lot more.
-
Get the required files:
DMS_GITHUB_URL="https://raw.githubusercontent.com/docker-mailserver/docker-mailserver/master"
wget "${DMS_GITHUB_URL}/compose.yaml"
wget "${DMS_GITHUB_URL}/mailserver.env"- Note: If you want to deploy this container in a container manager (such as Dockge), you can simply use the compose file and the environment file from the linked GitHub repository.
- Configure the compose.yaml. You can use the default compose.yaml file in the container folder. Set up the variable for mailserver, and change the hostname to your domain, eg, mail.yourhostname.com.
- Edit the mailserver.env file to match your configuration.
-
Start the container once done with:
docker compose up
Once the container has been started, you need to run the "setup email add [email address]" command inside the container within two minutes, otherwise, the container will shut down.
The last step is to set up email accounts (and aliases if desired):
setup email add admin@example.com passwd123
setup email add info@example.com passwd123
setup alias add admin@example.com external-account@gmail.com
setup alias add info@example.com external-account@gmail.com
setup email list
setup alias list
Now, it's time to do some testing.
Test emails and client login
You'll now be able to add your email server to your email client of choice. We used Thunderbird here for the demonstration, but you can use any client you like. You'll need to enter the following info from your mail server settings. We recommend just trying the username and password first, as most clients will then automatically detect the rest of the details required. However, they are shown below in case it fails to connect.
# IMAP username:
If you're going to use Gmail on mobile, you should know it won't let you use your email server without it having SSL enabled, so follow the instructions for adding SSL to your new Docker mail server to finish up. It's a good idea for anyone to set up SSL for encryption in transit from your email server to your client, especially if you're going to use it while you're not on your home network. You'll also want to set up DKIM keys and add them to your DNS records.
Once you have everything working as intended, stop the container with CTRL+C, then you can start it in detached mode:
docker compose up -d
7 Docker containers you should run on your Synology NAS
Turn your Synology NAS into a Docker hub.
Why you might and might not want to do this
Self-hosting your email server is more private, but also a lot more work
Having complete control over your email data is a good thing, keeping your private emails safe from scanning by the provider or other entities. But you can only be sure of your end of the email chain being secure, and the other person on any other email exchange could be on an insecure system. You can't treat email as secure, not in any way, shape, or form, but at least you know your emails aren't being skimmed by advertisers... at least on your end. It's also free, without having to give up your personal data, and gives you a lot of power when it comes to customization and security.
But on the flip side, there's a lot of extra work, opens your home network to the internet in an always-on manner (because your IP address will always show in your domain's A records), and things like spam filtering and antivirus protection will now be your responsibility, whereas the email provider was in charge of that before.
You can mitigate some of these issues by using a VPS, either as a relay or as the self-hosting server for your email. Either way, the setup is similar: make sure the DNS records point to the correct IPs, that you've enabled SSL, and that reverse DNS is enabled to reduce the likelihood that Gmail, Yahoo, or other email providers will incorrectly flag your domain as spam.
6 reasons you should (and shouldn't) run your own email server
If you've been considering running your email server, here are the big things you should consider before doing it.