
We all need more and more storage space for our digital files, but you don't always have to dive straight in to a consumer NAS with expensive hard drives. You can take an old SSD or even a flash drive and turn it into a small network drive to get you on your self-storage journey. That's possible because the best Wi-Fi routers have a USB port on them which can be used as a host device for things like USB modems, but also for storage drives. It's also fairly straightforward to enable in your router settings, so let's dive in.
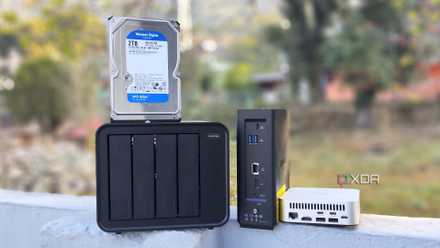
3 overkill network storage solutions that are faster than a typical NAS
Got a lot of data and a massive budget? Here are some of the crazier storage solutions you can upgrade to when your NAS is feeling cramped
What you'll need
Setting up centralized storage on your router is fairly straightforward
Adding an old SSD to a router to create a network drive that all your devices can connect to is a quick way to reduce your reliance on cloud services. Many consumer routers have a USB port for connecting certain devices, including USB drives.
Here's what you'll need to turn an old SSD into a network drive connected to your router:
- An old SSD, either SATA or NVMe is fine
- A USB enclosure for the SSD
- OR an external SSD
- A USB cable with the right ends for your SSD enclosure and router (usually USB-A to USB-C)
- A router with a USB port
If you're using an old internal SSD, once your enclosure arrives, mount the SSD inside according to the manual and connect it to your computer once so that you can format it. You'll want to check the file format compatibility for your particular router model, but most will support FAT32 or NTFS.
-
Netgear Nighthawk RS300
$290 $330 Save $408/10- Wi-Fi Bands
- 2.4 GHz, 5 GHz, 6 GHz
- Ethernet Ports
- 3x 2.5Gb, 2x 1Gb
- USB Ports
- 1x USB-A 3.0
- MU-MIMO
- Yes
- Mesh Network Compatible
- No
-
Ugreen M.2 NVMe SATA SSD Enclosure
$22 $30 Save $88/10- Storage capacity
- Up to 8TB
- Hardware Interface
- USB 3.2 Gen 2
- Compatible Devices
- M.2 2230, 2242. 2260, 2280 SSD sizes above 8TB
-
Crucial P3 Plus Gen4 NVMe M.2 SSD
$125 $170 Save $45
How to set up a USB-attached SSD on your router
Plug in the drive, and it's time to head into the admin pages
Now, it's time to get that SSD mounted on the network. Plug your enclosed SSD into the USB port on the back of your router. Open a web browser, go to your router's IP address, and log in. You're looking for the settings for the USB port, which might be called different things depending on your router firmware.
On Asus, there will be a section on the main page with the USB logo that will show the USB drive and also a USB Application button on the sidebar. Either can get you to where you need to be. D-Link has a section for the USB port on the main page, and TP-Link will show the USB drive at Advanced > USB > USB Storage Device.
This page will have various options, but the most important things are to set a login name and password so that only authorized users can see your files, and to enable SMB and FTP access. Make a note of the \\Drive-Address for the SMB settings and the IP Address and port for the FTP details. You'll need these to mount that drive on your computer's file explorer later on.
4 reasons you may want to use a DAS instead of buying a NAS
Why you should consider using a DAS
How to mount the new drive on your computer
Adding the network drive to your file manager of choice makes it easier to use
Whether you're on macOS or Windows 11, it's time to mount that USB SSD as a network drive so you can easily access it.
Mount on Windows
For Windows users, open File Explorer and navigate to This PC. Open the Map network drive applet from the ellipsis (...) icon at the top and put in the SMB details, the drive letter you want it mounted as, and select the checkbox next to Connect using different credentials so you can enter the login details you set up in the router.
How to map a network drive on Windows 11
If you want to access a folder on another PC on your network, you can map a network drive on Windows 11. Here's how to do it.
Mount on macOS
On macOS, the process is the same as connecting to a server or NAS. Open Finder, select Connect to Server, and enter smb://url-of-your-drive. That should pop the drive into the side Finder pane, and you can access it as if it were an internal drive. It's worth adding the mount to your login items as well so that you don't have to mount it every time you reboot your computer.
How to access NAS on Mac
Need to access storage attached to your home network on Mac? Here's how.
Adding an old SSD to your router for centralized storage is a good first step to reducing dependency on the cloud
We like reusing old hardware whenever possible, so turning an unused SSD into a network drive on your router is a great way to give it new life. It doesn't come with the fault tolerance and other useful features of a fully-featured NAS, so be warned that it isn't a long-term storage solution and you won't want to store things that aren't backed up elsewhere. But for a quick way to access the same files between two computers, it'll do the job admirably.
4 reasons to host your own cloud storage instead of trusting Google or Microsoft
I don't trust anyone buy myself to host my data.