
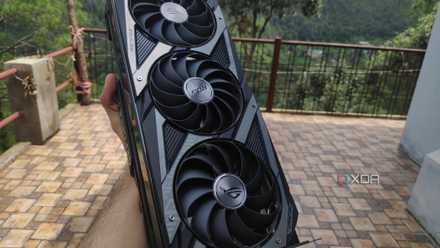
Unlike typical lightweight FOSS tools, you’ll need the right set of hardware to get a media server up and running. The storage front is especially important, as you’ll need TBs of space to accommodate your collection of ripped TV shows and movies. And if you ask any veteran tinkerer, they’d also advise picking up a spare GPU for hardware-aided transcoding tasks.
But with the prices of PC hardware hitting the red zone, dedicated graphics cards that don’t sell for scalped prices are starting to seem like a myth. In fact, that’s a problem I ran into a few weeks ago, when I wanted a replacement for my transcoding task on a Jellyfin instance. After hearing good things about the Intel N100, I tried turning a sub-$200 system into a Jellyfin server, and while it has one minor catch, it can handle concurrent 4K streams without breaking a sweat.
Intel Quick Sync is the reason I will never buy another Nvidia card for my Jellyfin server
Quick Sync is just that effective for self-hosted media server setups
Hardware transcoding is a must-have for my setup
But I don’t want to use my old GPU exclusively for transcoding operations
If you’re anything like me, you’ve probably got ripped movies and TV shows in all sorts of codecs. Unfortunately, not all devices in my arsenal can support every media format, and that’s where transcoding comes into the equation. As you may have guessed by now, transcoding translates an incompatible video format into one that a device can play. But relying entirely on the CPU to transcode videos isn’t ideal, as it can introduce frame drops and cause the video stream to stutter under the extra transcoding tasks.
Rather than taxing the CPU, only to get subpar performance, graphics cards tackle the extra processing load required to convert the video codecs to the right format for the client device. But here’s the thing: I’m already using my old graphics card for my virtual machine-heavy experiments. So, unless I started running Jellyfin on my dev VM (which I have no intention of doing), I had to look into alternatives – like relying on an integrated GPU. You see, several (but not all) modern Intel processors bear an extra processing core called Quick Sync alongside the iGPU, which is designed to handle moderate transcoding tasks. That makes it the perfect alternative to a dedicated GPU, especially since my household doesn’t typically stream more than 3 4K videos concurrently.
I went with a Jellyfin LXC hosted on Proxmox
One that supports GPU passthrough and connects to my SMB shares
Switching gears to the practical side of things, I decided to use the LattePanda Mu as the host system for my Jellyfin server. It’s a compute module with an N100 CPU and 8GB of RAM, and having run Proxmox on a similarly specc’d SBC in the past, I’ve learned not to underestimate Intel’s budget-friendly processor.
Anyway, I’d already armed the board with Proxmox and a few LXCs, and configuring Jellyfin was as simple as executing bash -c "$(curl -fsSL https://raw.githubusercontent.com/community-scripts/ProxmoxVE/main/ct/jellyfin.sh)" within my PVE node’s Shell section. Since I plan to pair this LXC with the SMB shares housing all the archived media files on my NAS, I went with the default settings and didn’t bother allocating extra storage provisions. Better yet, the PVE Helper Script immediately detected the Intel iGPU and began installing the drivers alongside the other Jellyfin packages. Once the container was up and running, I signed in to its web UI and enabled the Intel Quick Sync functionality within the Transcoding tab of its Dashboard section.
Unfortunately, Proxmox’s UID/GID mapping tendencies make things somewhat complicated when pairing network shares with unprivileged LXCs, meaning I had to look into workarounds when adding archived movies and TV shows to my Jellyfin instance. The bind mount workaround involves connecting the underlying Proxmox host with the SMB share on my NAS, and doing so is fairly easy via the Storage section on PVE’s Datacenter tab. I also created a new folder to serve as the mount point for the network share within my LXC. Then, I ran the pct set 102 -mp0 /mnt/pve/jellyfin-smb,mp=/mnt/media command to let the Jellyfin server access the share. Finally, I switched to the Jellyfin web UI and used the Library option to add the folders housing my painstakingly collected media library. Sure enough, they appeared inside the directory, and Jellyfin began scanning the files and their metadata.
6 Jellyfin plugins that add free features Plex charges you for
Jellyfin's plugin ecosystem does what Plex charges for, and it's free
My budget-friendly setup is enough to drive several 4K streams
AV1 decoding is the only missing component here
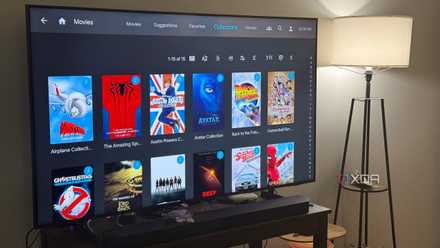
Since I wanted to confirm whether the iGPU was working for my transcoding tasks, I quickly tried playing some videos from my collection on my web browser. Sure enough, modifying some playback settings resulted in the Play method switching to Transcoding, without causing any stuttering or dropped frames. I was able to run three 4K streams simultaneously, even a fourth one with a couple of frame drops around the beginning. Switching to 1080p videos made things a lot easier on the system, and my N100 was able to run 8 streams without any noticeable problems.
That said, there’s one Achilles’ Heel in this pint-sized setup – despite the N100’s iGPU working fine with hardware-accelerated AV1 decoding, it has to rely on the CPU to encode this codec. That’s kind of a bummer, but considering that most of my files are in H.264 and HEVC, it’s not a deal-breaker by any means. To be honest, the fact that I can play entire 4K videos from a low-power device with a tiny footprint like the LattePanda Mu speaks volumes about Intel Quick Sync’s capabilities, and I doubt I’d be missing my GPU for media streaming tasks anytime soon.
LattePanda Mu
- Storage
- 64GB eMMC, M.2 M-key slot
- CPU
- Intel N100 (upgradable to Intel i3-N305)
- Memory
- 8GB LPDDR5 (upgradable to 16GB)
- Operating System
- Windows 11, Linux
- Ports
- 4x USB Type-A, 1x HDMI 2.0, 1x 1GbE RJ45, 1x PCIe 3.0 x4
- GPU
- Intel UHD Graphics